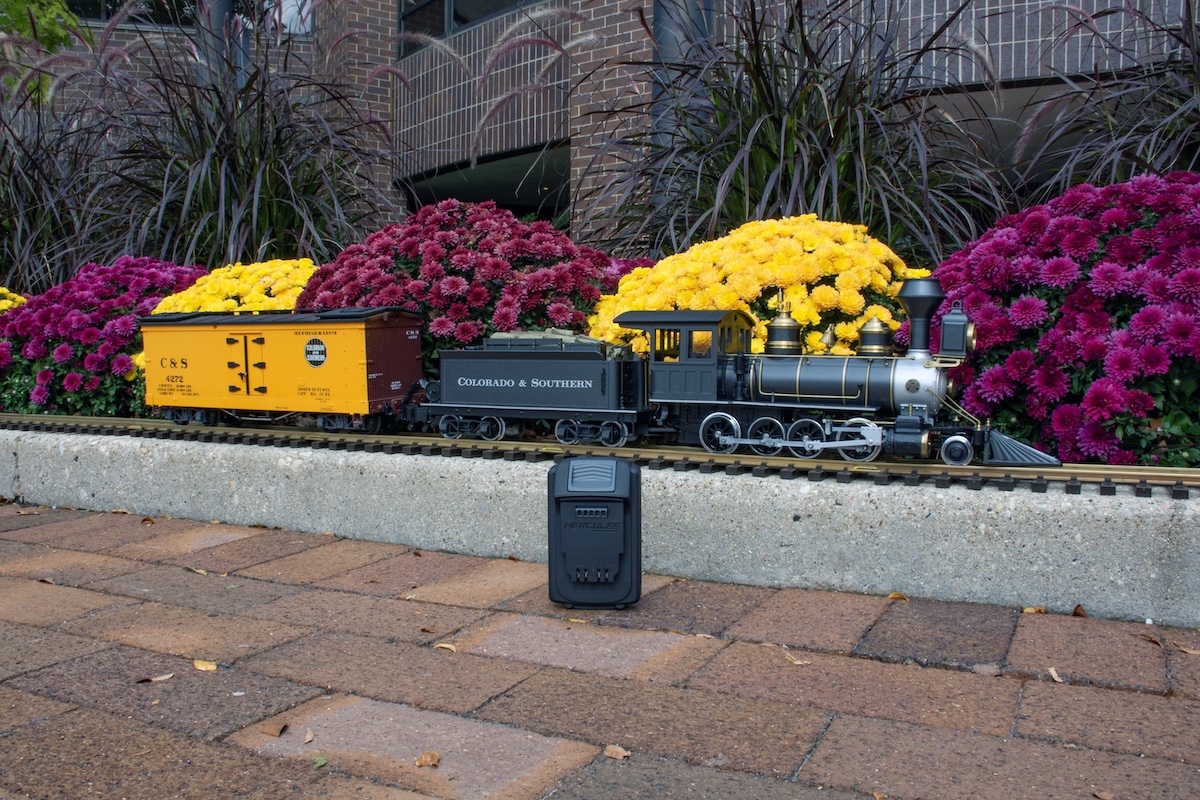
I never thought I’d get serious about Large scale (G gauge) model railroading, but here I am. This past summer, I successfully bid on a 1:22.5-scaled C-16 2-8-0 in Colorado & Southern livery at an online auction.
This model, from the 1989 product line of the former Delton Locomotive Works (before its tooling went to Aristo-Craft), was known for its “lemon” reputation due to a weak, sometimes faulty single gearbox. Thankfully, a test with track power showed no immediate issues, though I’ll be mindful of its pulling load.
While the model ran, I wasn’t satisfied. I wanted a true plug-and-play locomotive for any large-scale layout and was eager to explore “dead-rail” operation. So, I decided to convert it to battery power with Blunami control. The results?
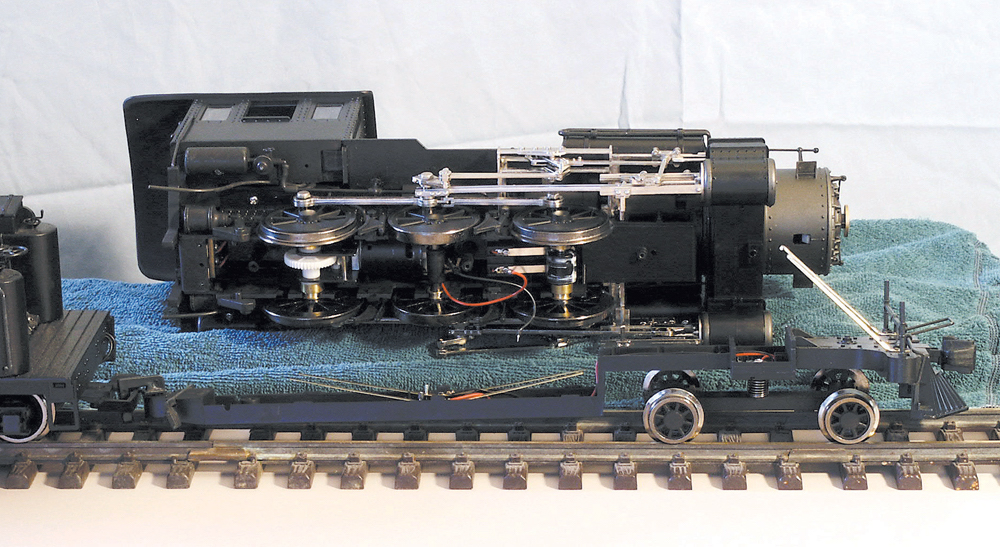
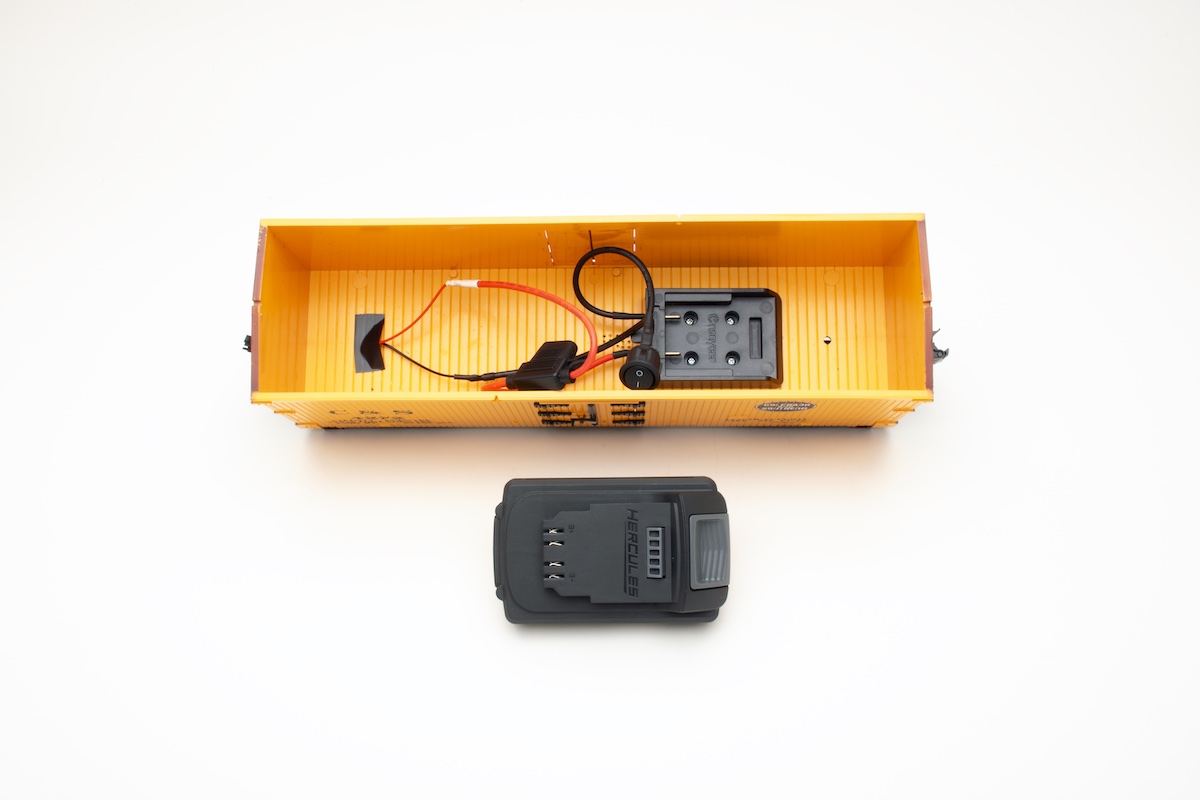
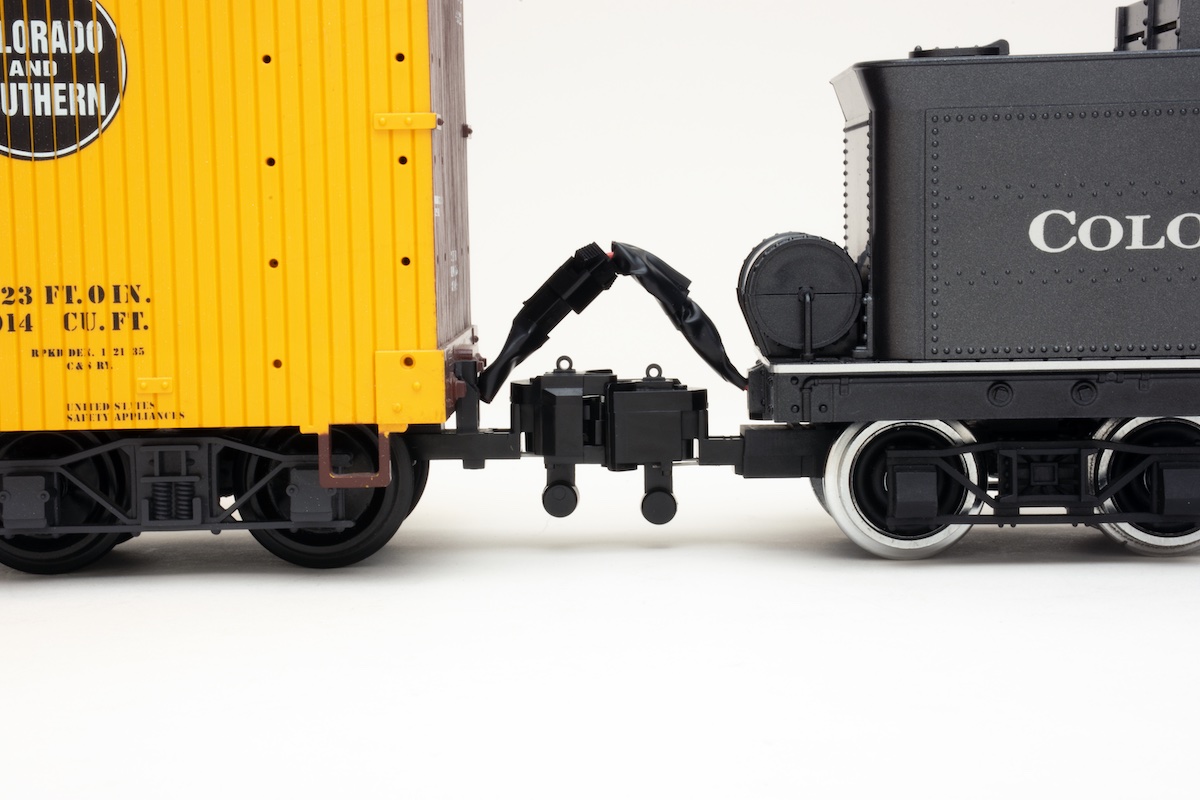
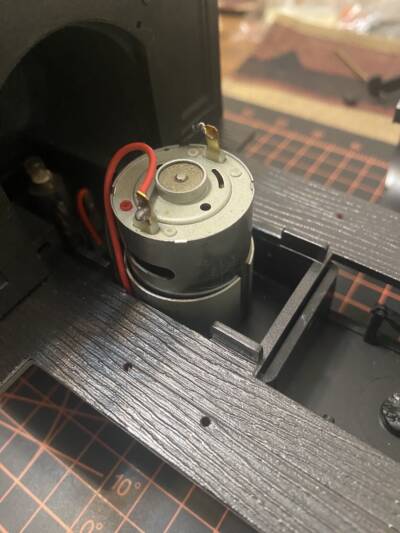
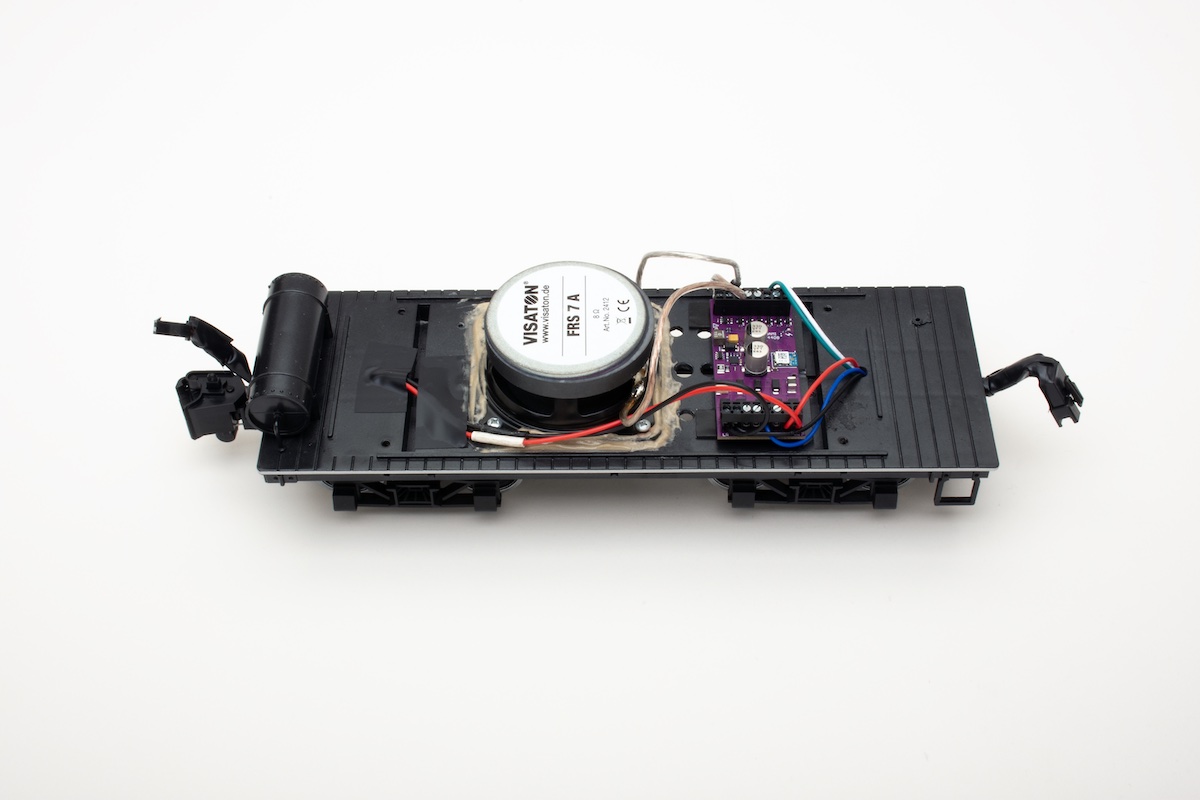
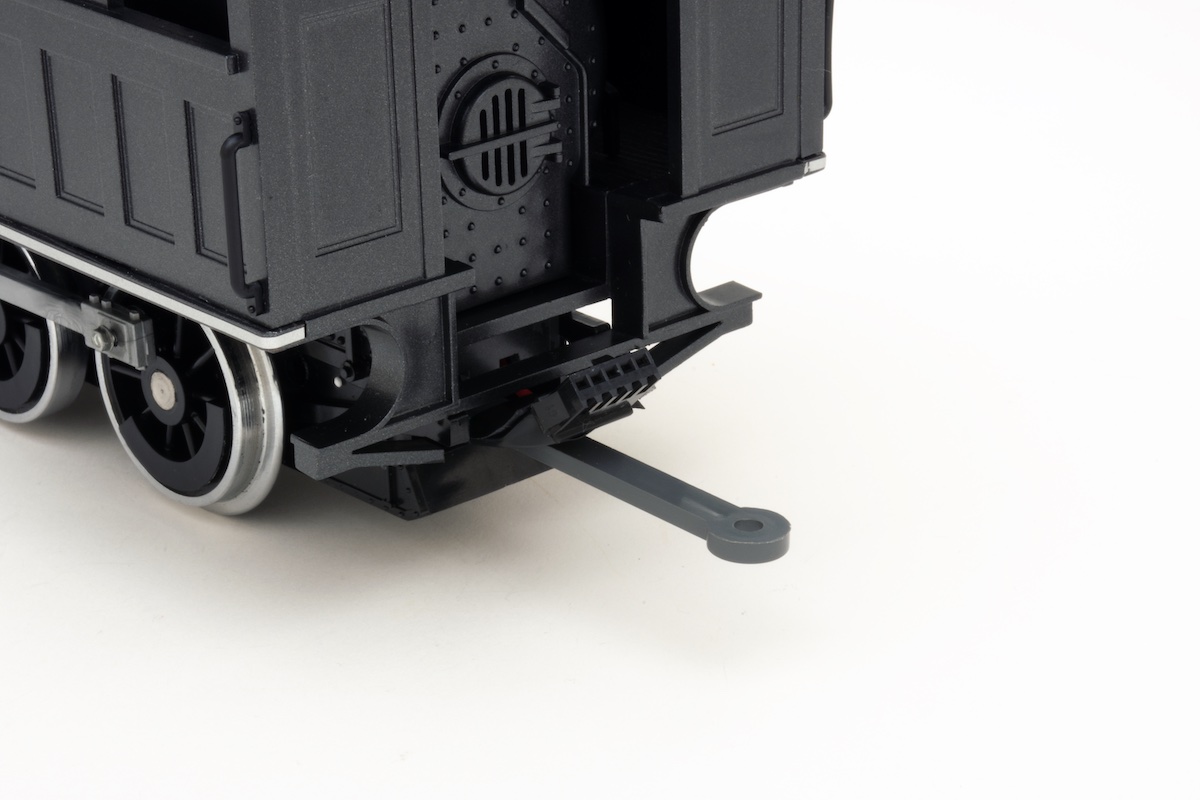
An LGB Colorado & Southern reefer boxcar (No. 42720) serves as the battery car. It houses a battery adapter and a 5 amp fuse, allowing my Hercules power tool, 20V Lithium-Ion battery to slide right in. A two-pin wire connector (22 AWG) links the boxcar to the locomotive tender, supplying power to the SoundTraxx Blunami 4408 sound decoder. The decoder shares space in the tender with a Visaton GmbH & Co. KG FRS 7 A – 8 OHM speaker. Wires from the decoder that aren’t connected to the battery and speaker are then run through a five-pin connector (22 AWG) from the tender into the engine, connecting the motor, headlight, and flickering firebox (FX3) — both the headlight and flickering firebox were updated to LEDs.
I know converting large scale locomotives to battery and Blunami control isn’t new. However, as this was my first attempt and I’m not electrically inclined, I’m incredibly satisfied with the results and the knowledge gained. While not an exhaustive how-to guide, as the internals of a Delton C-16 2-8-0 will differ from an MTH ES44AC diesel, this article highlights key lessons learned from this project, hoping to benefit other beginners attempting a large scale battery conversion themselves.
Choosing your setup
My decision to use a power tool battery and the Blunami 4408 was about keeping the project manageable and not biting off more than I could chew. While dedicated model railroading batteries and radio control systems exist, this path offered a safe and successful learning experience.
The Blunami 4408, designed for large, O and S scale locomotives, is a convenient all-in-one sound decoder and radio receiver. No extra components are needed, leaving valuable space in the tender. Wiring the decoder is straightforward: insert the tinned wire end into the terminal and tighten the clamp to prevent loose strands.
With Blunami’s Bluetooth capability, my iPhone serves as the controller. While I usually prefer a physical remote, I made an exception to keep costs down (easier said than done!). I’m impressed with the app’s functionality, including operations and CV adjustments.
Using a power tool battery and a battery car might not appeal to everyone, and that’s understandable. But for a beginner like me, it was a good and safe stepping stone to understanding battery power, which can be dangerous if you’re not careful and don’t do your homework (more on that coming up). Even if I don’t pursue more advanced Lithium-Ion battery setups that fit inside the locomotive or tender, I’m content with this arrangement.
Your battery conversion and control system decisions may take another route, and that’s fine. But as a beginner, choose wisely.
Doing your homework
A project like this requires preparation and knowledge. You’ll need to know what you’re doing: Would this power adapter be the right fit for my battery? Are the wires properly connected from the decoder? Do these LED lights have the correct resistors?
After disassembling the engine and tender for the first time and accessing the insides, I formulated a plan to remove all the old wiring, electrical pickups, circuit board, and speaker for a clean slate. How the replacement parts and components would fit together when installed was then determined. I would have slight revisions to the plan as the project went along, but not without a gain in confidence that the changes were sound.
Gaining confidence involved extensive research through online videos, articles, and books. If these resources didn’t provide answers, networking became an invaluable alternative.
Help is always available
Networking offers fantastic opportunities to connect with fellow modelers, share the hobby, build friendships, and lend each other a helping hand. I must acknowledge the multiple people who assisted me throughout this project.
Matt Troester, chief repair officer at Sommerfeld’s Trains & Hobbies, was my primary consultant from the start. I called or visited the store almost weekly with questions for him about components and installation best practices. His advice and insights were crucial for a successful conversion and my increased knowledge in electronics.
Help isn’t limited to face-to-face interactions. Digital resources like forums, chat groups, and social media pages can be obliging. While not entirely related to the battery and Blunami conversion, when the locomotive’s cylinder assembly part cracked, I needed either a repair or a replacement. Believing a replacement was the best option, though potentially difficult to find (Delton is long gone, and Aristo-Craft closed in 2013), I reached out to a few large scale-dedicated Facebook groups. Colorado modeler Kevin Strong, who, like many, cannot throw parts from old scrapped projects away, immediately responded with a replacement ready to ship.
Slow and steady wins the race
From start to finish, converting this 2-8-0 to battery power and Blunami took roughly two months. This extended timeline was partly due to working on it during my free time. Ultimately, it came down to taking things one step at a time and being patient.
One afternoon was spent drilling holes in the tender frame for the speaker; the next was soldering, cutting, and re-soldering wires for the motor and lights. Even after completing one step, I’d wait to take the next to ensure the acquired components would function correctly upon installation. I admit I was eager to complete the project in haste. However, the “slow and steady” approach prevailed because the goal was to do it right.
Perhaps that’s why everything worked as it should during the first test. With the Hercules battery supplying power, the decoder roared to life along with the sounds and lights, it responded well to the app, and the model ran smoothly. More tests and adjustments are expected, but after two months of research, inquiries and hands-on work, this large scale battery and Blunami conversion truly paid off.
Share this article