


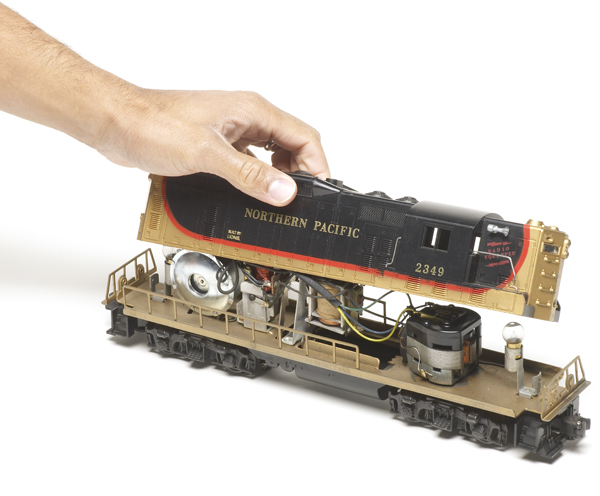
It happens to all of us sooner or later. You place your favorite vintage locomotive on the track, power up the transformer, and the darn thing just sits there, or at best, it reluctantly creeps forward. Rather than abandoning hope and returning the locomotive to the shelf, you can always try to get to the root of the problem. In my experience, performing needed repairs isn’t difficult. More often the biggest issue is determining where to start looking for the problem.
After many years of repairing Lionel and other makes of classic toy trains, I’ve found that most locomotive failures are electrical in nature. Surprisingly few are the result of mechanical shortcomings.
For electricity from the transformer to do its work, it must be properly directed to the two major components – the motor and the reversing mechanism (commonly called an E-unit). The thousands of Lionel trains made during the 20th century are relatively simple machines, and the problems they develop usually aren’t difficult to ascertain and successfully repair.
In this article, I’ll address postwar and early modern-era Lionel locomotives powered by open frame (“Pullmor”) motors. Modern locomotives with sealed can-type motors and complex circuit boards usually require the services of a qualified technician. However, some of the following suggestions, such as tracing loose wires and adding proper lubrication, apply to these units as well. Let’s get started!
Open circuits
We’ll look at the most obvious difficulty first. If there is power to the track (use a test light to be sure) and your engine is stone cold dead – no lights, no hum from the E-unit, and not a spark of life from the motor – the problem is almost certainly an open circuit. This means electricity isn’t going where it should. Look for the following conditions.
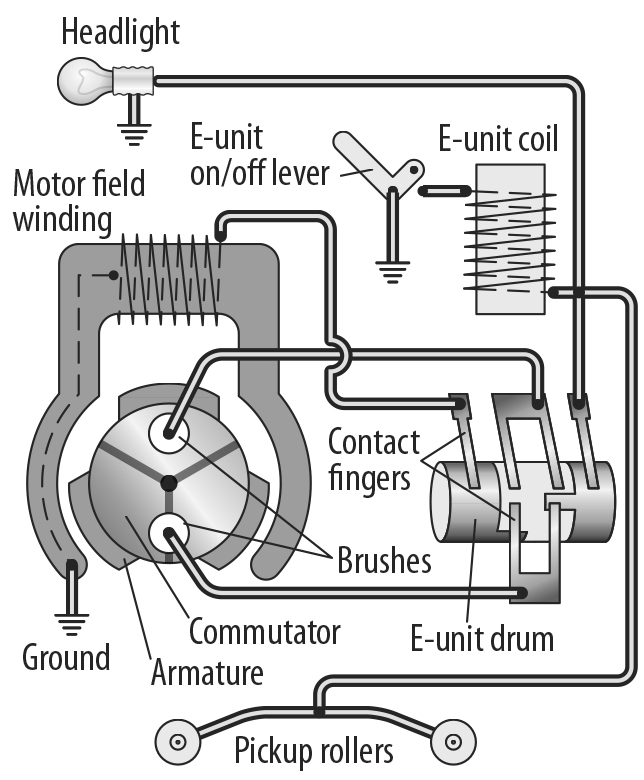
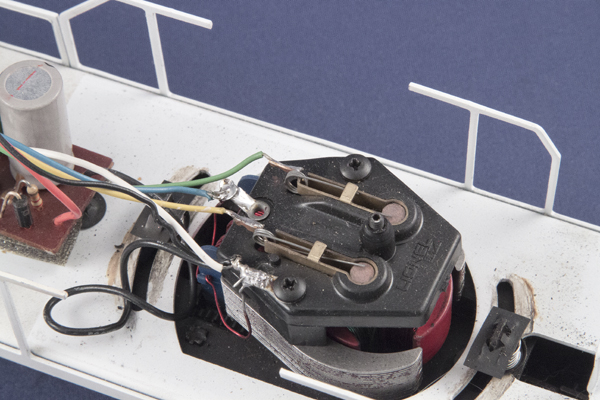
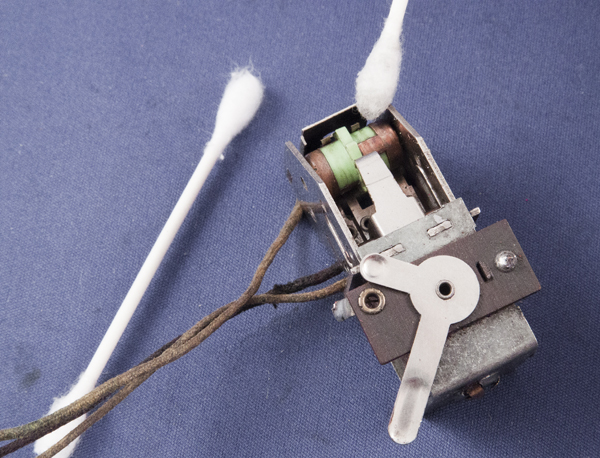
Broken or loose wire. At right is a diagram of the wiring for a typical locomotive. Two wires from the reverse unit connect to the brushes. One is attached to the field of the motor, and the other connects to the pickup roller assembly. Examine each wire to determine if there is a loose connection. Most locomotives have an additional wire or wires for the headlight and/or cab light, and many diesels have a built-in horn circuit, but these wires are not involved in making the motor run. If the headlight doesn’t work, and you know the bulb is not burned out, look for a loose or broken wire to the pickup roller assembly. Also check the ground connection from the field.
Short circuits
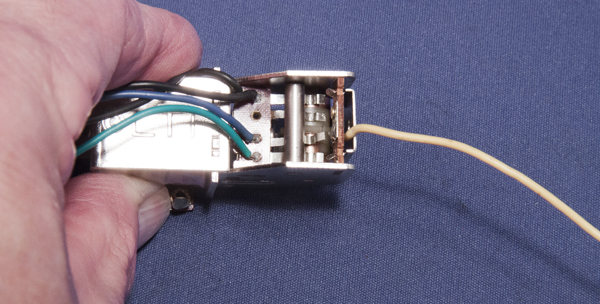
If the transformer overload light comes on after you’ve advanced the throttle or the circuit breaker trips and cuts off power, there is a short circuit. What’s a short circuit, you ask? Any circuit in which the electricity can return to the opposite pole of the power source without passing through the device it is meant to activate. Electricity will always follow the path of least resistance, bypassing a lamp or motor when another route exists. Some of the most common causes for a short circuit are as follows.
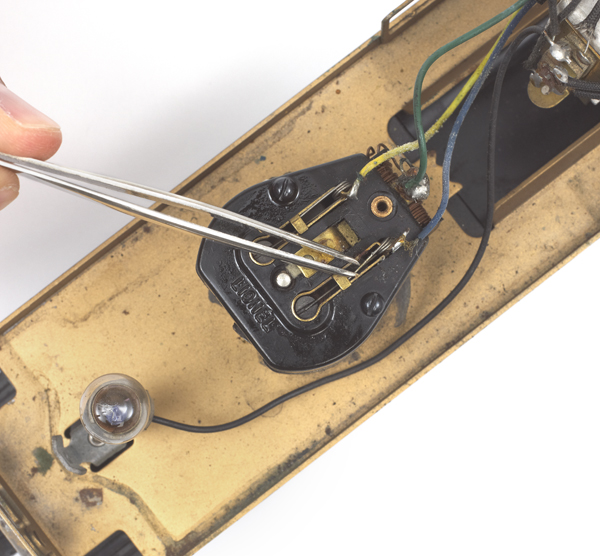
Loose wire contacting frame. Be it the result of a failed solder joint or an excessive tug when removing a part, a loose wire touching the frame or another wire connection point will cause a short circuit. Determine where it belongs (refer to the wiring schematic on the previous page) and reattach it. This probably is the most common short circuit and the easiest to remedy.
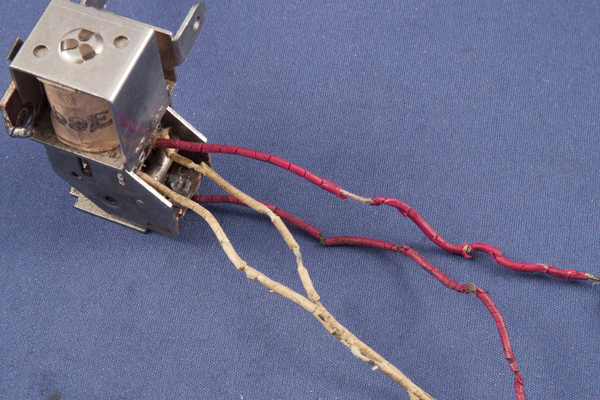
Exposed headlight wire. While this problem isn’t as easy to detect, it is common on older locomotives with cloth insulation around the wires. A short circuit can occur when an exposed wire touches a metal part of the socket or other components along the wire’s path between headlight and the pickup roller. It’s best to replace any wire with worn or frayed cloth insulation.
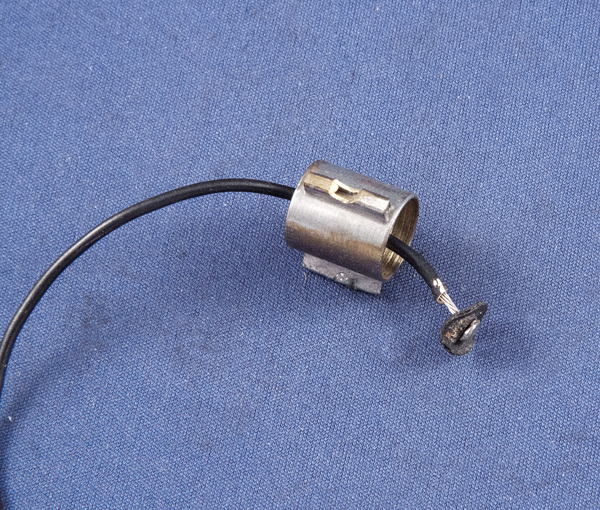
Also, sometimes the washer inside the socket becomes bent or otherwise distorted, causing a short circuit. It should be replaced if you can’t bend it back into shape without breaking it.
Loss of power
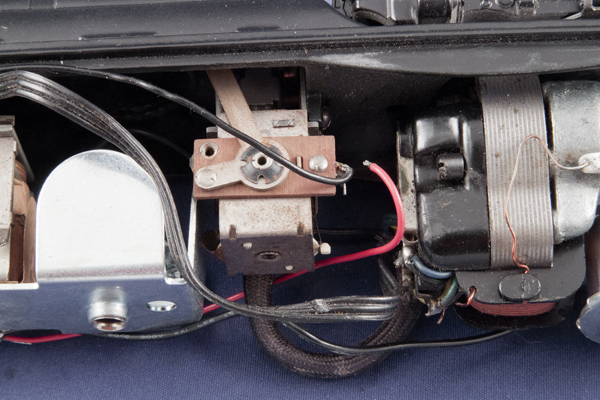
Your locomotive may light up and move forward sluggishly, yet it seems to lack power. It may run with a jerky motion, stall completely at low voltage, or be unable to attain normal speeds. To operate properly, the motor must receive an unimpeded amount of electricity, and there must be nothing that causes the mechanism to bind or to develop unnecessary friction. Let’s first examine the electrical causes for this type of failure before we explore other possible mechanical issues.
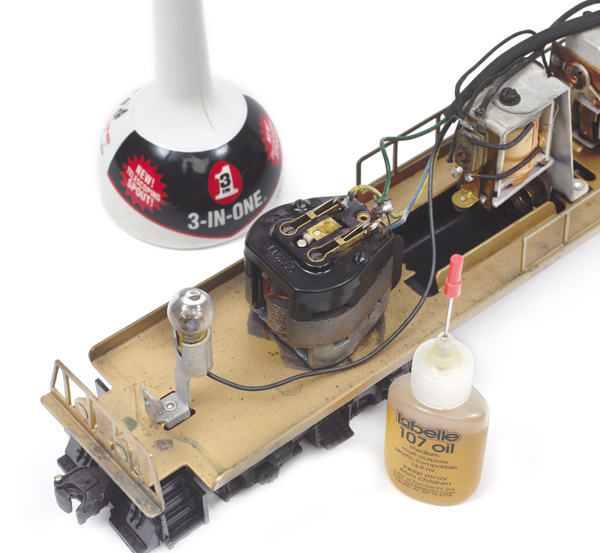
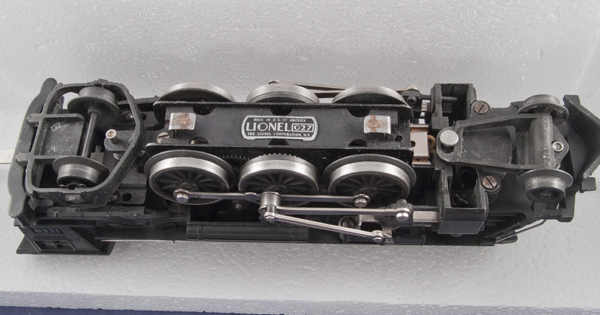
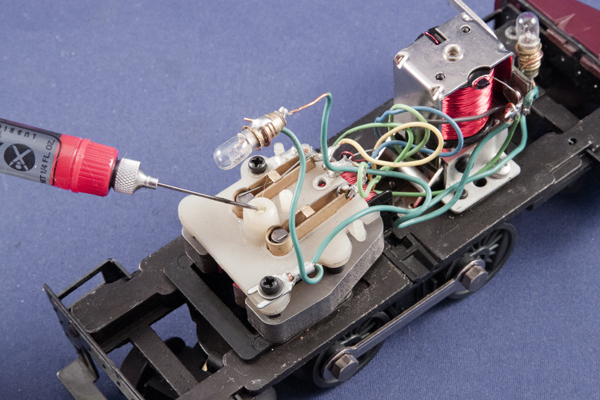
Improper lubrication. Using the incorrect type or an excessive amount of lubrication can interfere with electrical transmission. When applying lightweight oil or grease, be sure none of it comes in contact with the brushes or commutator. Also be sure the wheels are clean and free from oil or grease. A little bit of lube goes a long way.

Weak brush holder tension. Check the spring tension in the brush holders. After years of use, the spring tension that keeps the brushes in contact with the commutator can weaken. Insufficient pressure may cause sparking and uneven current flow. Quite often, when a locomotive performs better or runs faster in one direction than it does in the other, uneven brush spring tension is likely the reason.
Although you can attempt to adjust the tension of these springs, it’s probably best to replace this key component.
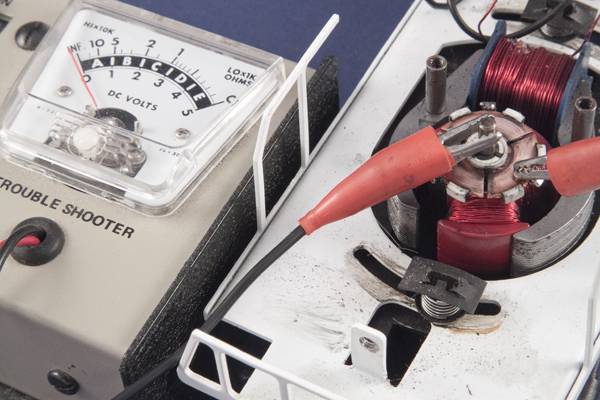
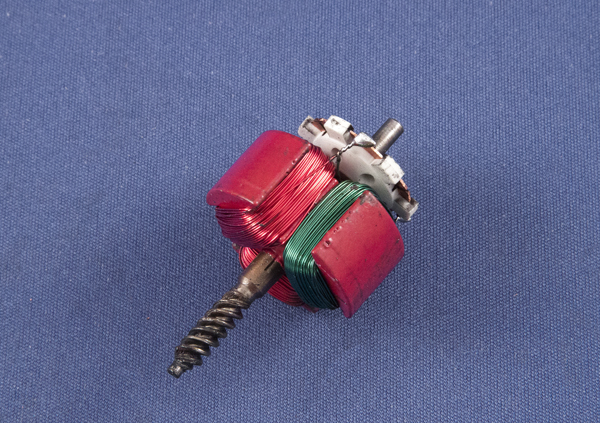
Short circuit at commutator. Set a test meter to the ohms position, clamp one lead on the armature shaft, and touch the other lead to each of the three commutator segments, one at a time. The meter should indicate “INF” (infinity)—in other words, it should not move, indicating that there is no electrical connection (a short circuit) between the commutator and the shaft.
If you don’t have a meter, use the two wires from a transformer to test for this condition, with the throttle set at about 12 volts. There should be no sign of sparking. If there is, you can obtain replacement armatures from parts suppliers.
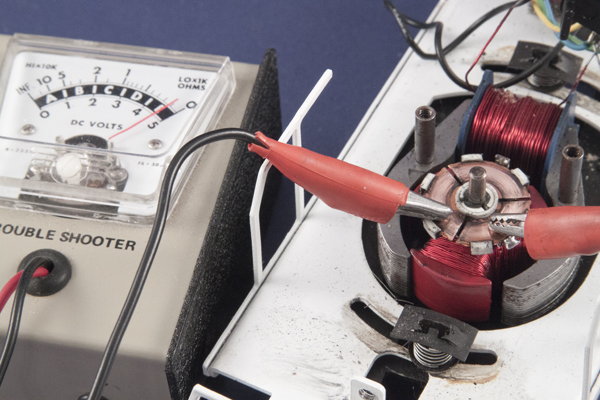
Open circuit at commutator. Touch one lead from the test meter to one of the segments of the commutator, and the other lead to an adjacent segment. The meter should register little or no resistance (zero or close to it). Repeat the test for the third segment.
In the absence of a meter, use two wires from a transformer with the throttle set at about 12 volts. There should be a strong spark at all three segments. If there isn’t and you can’t find any broken wires, contact a qualified repair shop or obtain a replacement armature from a parts supplier.
Friction and binding
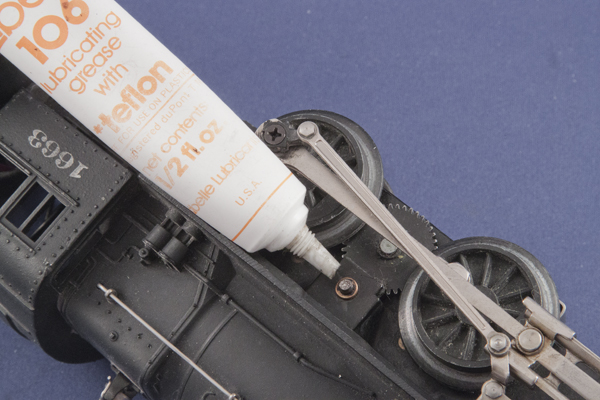
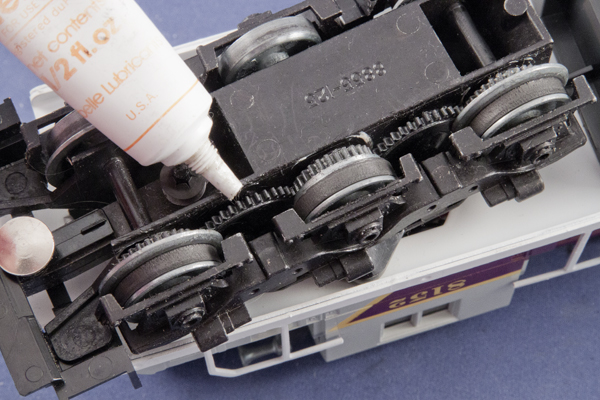
Following are the most common mechanical problems that interfere with smooth operation. The foremost cause of poor performance is friction from lack of lubrication. Consult the instruction sheet that comes with each locomotive for the proper application of oil and grease, and lubricate very sparingly. Too much oil or grease attracts dirt and hastens the reoccurrence of these problems.
If you don’t have an instruction sheet, the following general guidelines apply.
Dry rods. Place a drop of oil on all moving parts of a steam locomotive valve gear and side rods. Make sure no oil migrates to the wheel treads. Wipe everything with a soft absorbent cloth, such as an old t-shirt, when you finish.
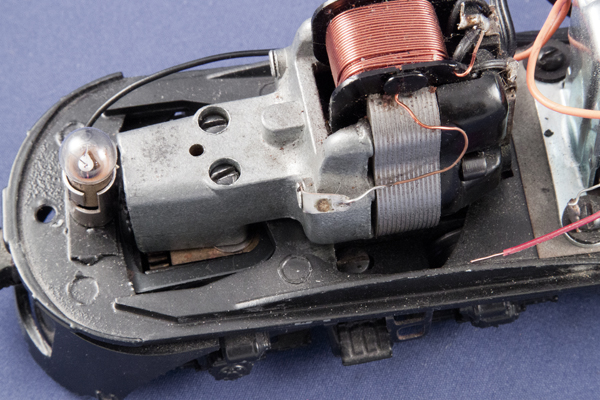
Dry shaft. On vertical motors with a small hole between the brushes, add a drop of oil. These motors have a ball bearing at the top of the armature shaft that should be lubricated very sparingly. Excess oil here will travel to the commutator and brushes.
Binding side rods or valve gear. If a steam locomotive seems to hesitate slightly with each revolution of the wheels, the most common cause is a bent rod or incorrectly installed rod screw. Remove the rods and valve gear, and test the locomotive on the track. If the problem has disappeared, reinstall the rods one piece at a time and test after each one is attached. When the problem reappears, the last piece you installed is the source of the binding.
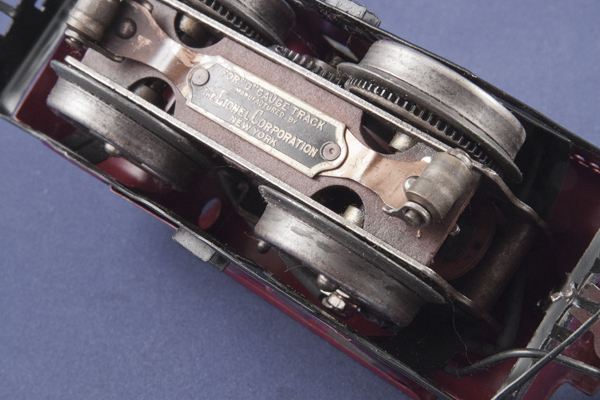
Mystery metal parts. Examine the gears and wheels for foreign objects. This problem most often occurs with Lionel locomotives equipped with Magne-Traction.
Worn or wobbly gears. Finally, inspect the mechanism for gears that are worn or loose on their shafts. This problem is especially prevalent on Lionel’s postwar Alco diesel locomotives. Gear replacement requires specialized tools and is best left to a repair shop


Daha Fazla Bilgi AL Cami Halısı Özellikleri İnsanları bir araya getiren ve Müslümanların ibadet etmek için bir arada bulundukları camilerin dış yapısı kadar iç yapısı da oldukça önemlidir. İbadet eden kişilerin huzurlu bir biçimde ibadetlerini gerçekleştirebilmeleri için cami içerisinde kullanılan motif, desen, halı gibi detaylar önemlidir. Camilerden içeri girildiği zaman ilk dikkat çeken ve iç yapıyı tamamlayan bir detay olan cami halıları da bu açıdan önemle seçilmesi gereken bir unsurdur. Cami halısı kullanımında dikkat edilmesi gereken birçok önemli detay bulunur. Bunlardan ilki halının desen yapısıdır. Ülkemizde bulunan camilerde en çok tercih edilen desen türü ise saflı desen ve göbek desen halı seçenekleridir. Dikkat edilmesi gereken diğer bir detay ise halının rengidir. Cami halısının rengi iç mimariye uygun, kolay kirlenmeyecek ve leke göstermeyecek ve ibadet sırasında kişilerin dikkatini dağıtmayacak, zihin karışıklığına sebep vermeyecek bir renkte olmalıdır.. Cami halısı kullanımında dikkat edilmesi gereken diğer de aylardan bir tanesi de üretimde kullanılan hammaddedir. İnsan derisinin halı ile temas etmesi göz önüne alındığında hammaddenin sağlığa zararlı olmaması gerekir. Ayrıca kullanılan halının kir ve toz tutmaması da önemlidir, bu nedenle çoğunlukla yün halılar tercih edilir. Hem sağlık açısından hem de uzun süreli kullanım imkanı sunması nedeniyle en ideal hammadde tercihi yündür. Plastik ve türevi malzemeler ibadet sırasında yaşanabilecek elektriklenme ve dikkat dağıtma gibi etkenler yüzünden tercih edilmemektedir.
Looks like Lionel wins this article! How about doing the same for Marx?
iam reading the article it is helpfull
hi iam knew so bare with me i have americanfyer trains i have a 293 engine would not run on track if i lift off track put power to engine it will run when on track no power no lights
Great article. Postwar Lionel trains are very simple and reliable. A few additional suggestions- if all else fails- have a similar operating engine or motorized unit for comparison of wiring and proper connection locations. It’s not unusual for a well intentioned prior repair to be the fault.
I use a typing eraser pencil to clean armature contact plates and the E-unit drums after cleaning off excess oil. A small spritz of Radio Shack contact cleaner/lubricant helps improve drum contact. Lastly, if the pick up rollers are arcing- the contact cleaner/lubricant can help restore continuity.