


Classic Toy Trains recommends these six tried-and-true tips for simple scenery that goes beyond sparse displays of “trees” or a random tunnel and will improve nearly any toy train layout.

1. Start with foam framework
A 4 x 8-foot sheet of 2- or 3-inch-thick pink or blue extruded foam insulation board is much lighter than a comparable sheet of ½-inch plywood. It can easily support the weight of a toy train layout if the foam is resting on wood-frame benchwork. If you’re going to rest the layout on sawhorses, it’s best to double the thickness of the foam.
Extruded insulation board is available at home improvement stores like Menards, Home Depot, or Lowe’s.
For quick-assembly foam framework, check out the Woodland Scenics (woodlandscenics.com) Mod-U-Rail system. Also consider foam panels coated with stone aggregate (styro.net) that give an instant scenery base.
There are adhesives made specifically for use with insulation board like Liquid Nails for Projects and PL300, but full-strength white glue also bonds foam.
2. Use foam-compatible paint
A quick way to make your foam base look like earth is to paint it. Use one that’s specifically compatible with the material. If you don’t, the paint may react with the foam, dissolving and pitting the surface.
Using a low-odor latex house paint is great. There’s even less mess and clean-up if you find the right color in a spray can. Most major manufacturers offer water-based spray paints.
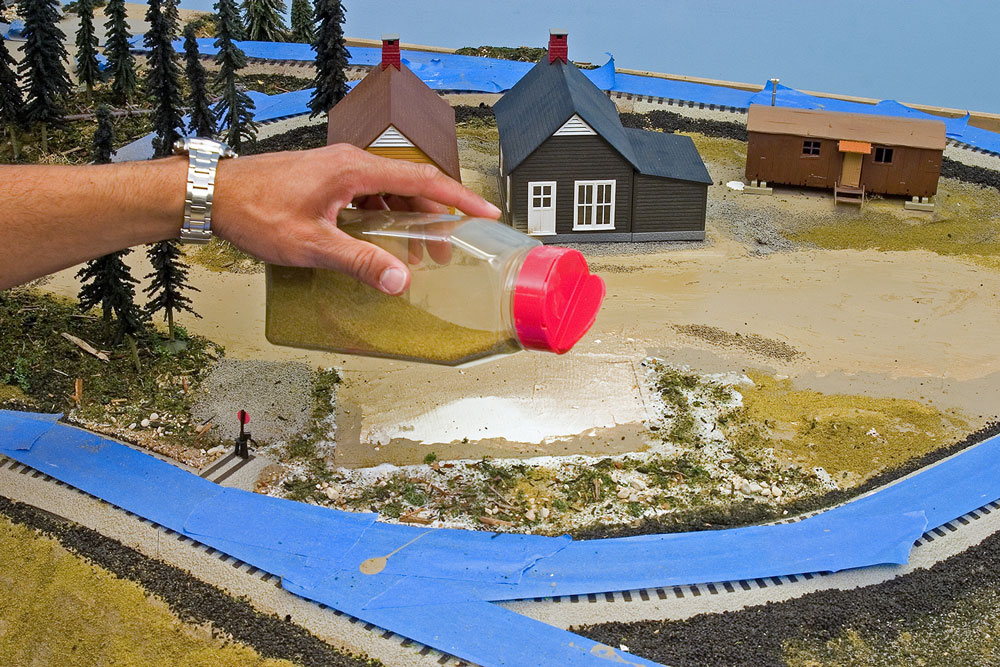
3. Ground foam for texture
Tiny colored bits of ground-up closed-cell foam material can help you create scenery with great color and texture. Manufacturers such as Scenic Express (scenicexpress.com) and Woodland Scenics offer comprehensive collections of foam-based ground covering ranging from extra fine to clumpy.
There are as many ways to apply ground foam as there are colors. For easy application, spread a thin layer of white glue over a layout surface and use a jar with a shaker lid to shower on the foam.
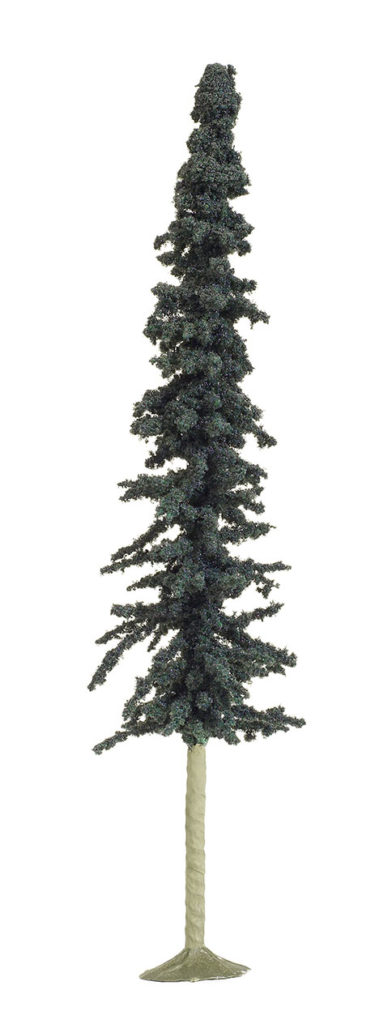
4. Foam for foliage, too
Trees for your layout don’t need water, but they can use a thin covering of fine foam to enhance their appearance. Some commercial trees, such as Bachmann SceneScapes (bachmanntrains.com) no. 32203 conifer trees, come out of the box like this.
Otherwise, you can douse your trees with hairspray then shower a green shade of ground foam over the branches. The cheapest, stickiest kind works best – many hobbyists like Aqua Net. Then shake off any excess ground foam and plant the tree on your foam base.
5. Rock on!
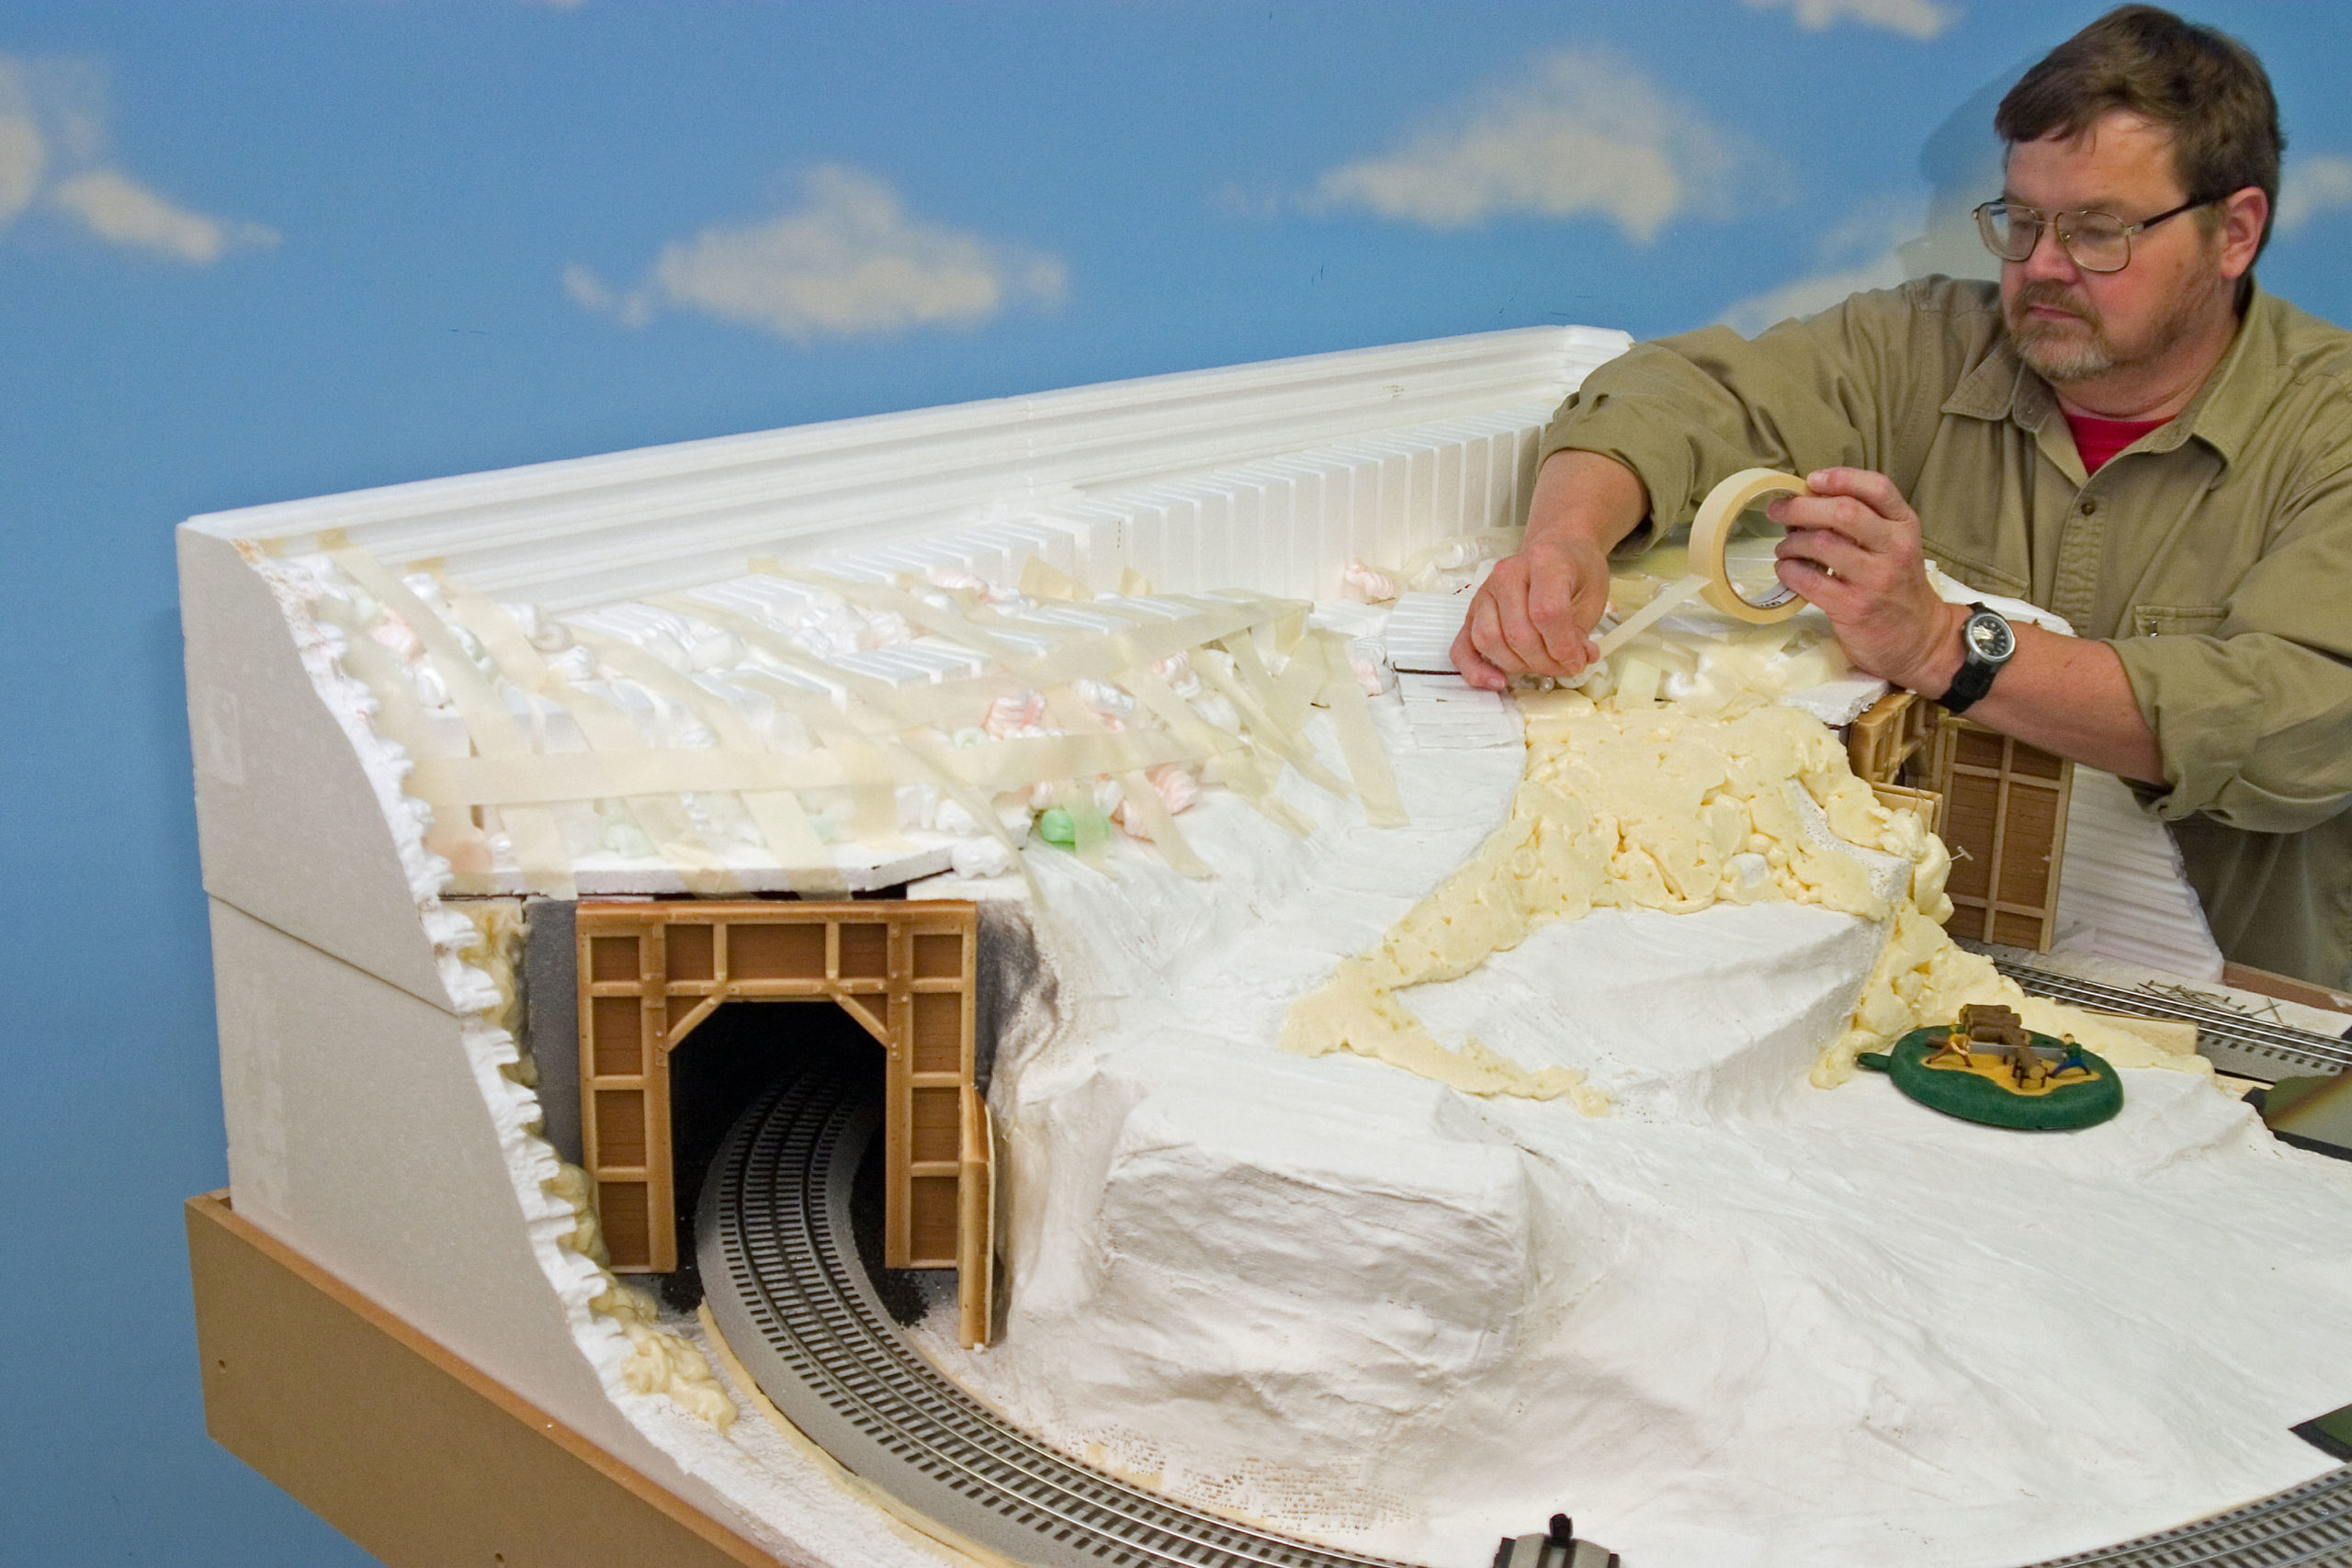
Make a big impression on your layout with a mountain. Start by stacking Woodland Scenics no. ST1419 profile boards into towering peaks. After interlocking and gluing the sections, use an electric knife, hot knife, or hot wire cutter to carve a realistic slope.
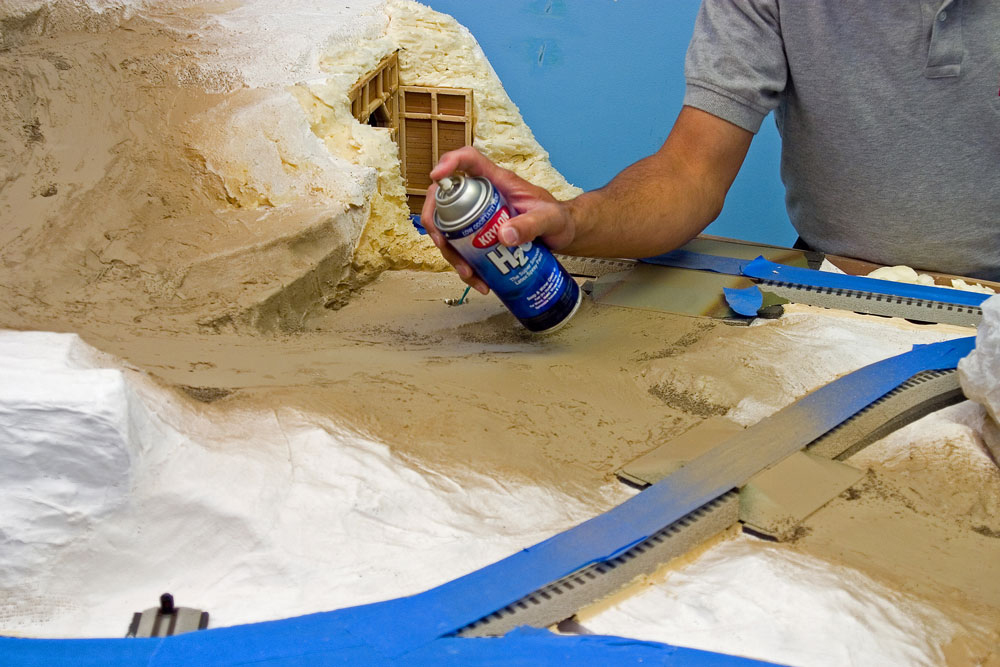
Then you can use a combination of piled foam peanuts and expanding foam sealant to create rugged terrain.
These products are far easier to shape and carve than plaster and create less fine dust. To give foam rocks a realistic texture and strata, you can use a hand saw, steak knife, or Surform rasp.
It’s hard to avoid creating lots of foam debris as you work with these tools, so keep a shop vacuum at the ready.
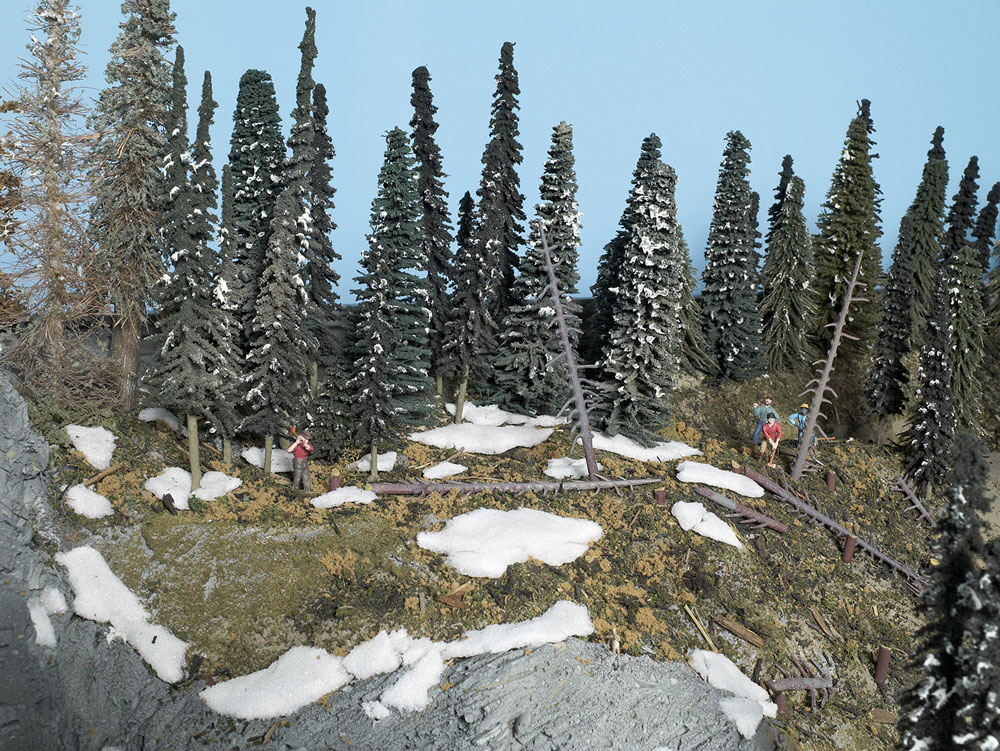
6. Let it snow
While some builders opt for a full dose of artificial snow on their holiday layouts, others want only a subtle suggestion of winter.
If you’re part of the latter group, you’ll be pleased to learn that Dow Styrofoam (stryrofoamcrafts.com) craft foam sheets can be easily torn into shapes that resemble large patches of melting or drifted snow. Look for this type of foam (not insulation or bead) at craft supply outlets.


The link under section 6, (stryrofoamcrafts.com), does not seem to work. Can someone point me to an example of what you mean?
Thanks,
Steve
How about a discussion of using natural material instead of Ground foam for texture and other things??