Canadian Canyons Series: Part 19 – Adding the upper deck 1
| Last updated on November 20, 2020
Trains.com is undergoing website maintenance that is expected to last approximately two weeks. Click here to learn more.
| Last updated on November 20, 2020
Members enjoy 15% off any purchase in our store. Join Today!
Model Railroader 2026 Calendar
Don't miss Model Railroader’s all-new 2026 calendar, featuring Rod Stewart's spectacular layout!
Sorry its so late getting back to you on this, Ivan.
White glue is water soluble. Yellow carpenters glue is not. I’ve used both for woodworking projects for years, and you can use either one equally well. The caveat is this, if you’re working on an area of the layout that could be exposed to water, such as an area that will have scenery, the white glue can soften back up and let go. The yellow glue will not.
Hope that answers your question.
David
What is the difference between carpenters glue (the yellow stuff) that you use and white glue? Amazing series and I see why you built a mock up before hand.
This has been an excellent series! One question…. How on earth are you going to do this in 4-6 magazine articles?! There’s going to be some sleepless nights ! bet!!
As with any complex civil engineering design requiring cuts and fills through mountains, valleys, and rugged terrain, bridges over roaring rivers, and large flat areas for sidings and industry change orders are an inevitable reality once the construction crews (Eric, Ben, etc.) get out into the field and have to make it all work and fit!! LOL
Great series with so many good tips and techniques. I particularly like some of your wood working techniques, David, using the clamps and squares for cuts, etc.
If I can only remember them when I need them.
Another great installment … When you factor in this layout will be portable it has to be over built. Your showing how to make notches was very nice high light.
David, I am enjoying the videos on Canadian Canyons. I thought the whole concept of two layouts layered on one another is unique. Will you be doing a video on the concept design and how you laid out the thing? I would like to have seen how you built the little physical prototype model as well.
Jeff smith
Another fine episode. I get almost as much enjoyment watching David do the carpentry as watching the running trains. David, I find that I am trying to do better carpentry and to have a more finished look to my layout and you are a primary motivator in that regard.
You never cease to amaze me David as I’ve been enthralled with this layout from Day One. Can’t been to tell you how much I’ve learned from this whole series. Keep ’em coming!
I have to show this to my wife. She’s always teasing me about how many clamps I have. Lol. Just a thought, David, you “eye-balled” the cross members to lines intersecting the long joists. Why not use your triangle square to create a 90 degree vertical reference point?
This layout never ceases to amaze me! Looked like you were building a giant acoustic guitar lol!
Ya know, David, this is almost as much engineering as was done on the original. I doubt, however, that they used a lot of cross members, and probably didn’t have quick clamps. Boy, are those things handy to have.
It was good to see how some miscalculations were corrected. It also helpful to have other sets of eyes looking at the project to see if improvements can be made like the view block behind the staging tracks.
hay david just likes to cut wood. enjoy the show.
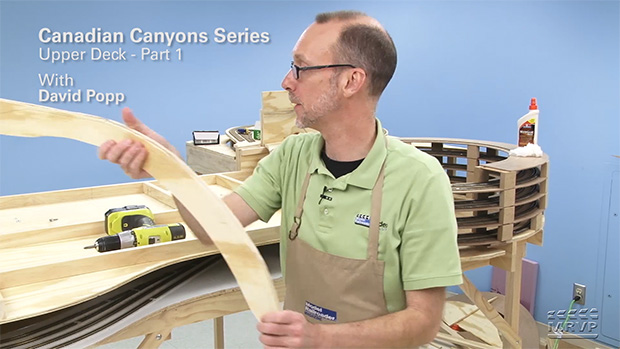
I am still very confused as to what is being built. You ran through it early in the video but you were just gesturing at plywood without visible lines,. I hope it will all become clear to n the next installment.
This has to be by far the most complicated project railroad to date. It is an amazing design. There seems to be an enormous amount of engineering and thought put into this one. As a suggestion, I would have painted the “view block” hardboard and also installed some LED adhesive strip lights on a switch. You can operate with the LED strip off, but turn it on if you have to for derailment and visual inspections.
I’m curious – why such an extravagant platform for the upper deck? Seems like a small forest of risers, plus a few cross joists for risers that would otherwise get in the way of the staging tracks, would have sufficed…