Videos & Photos Videos How To Benchwork Canadian Canyons Series: Part 18 – Building the helix connection

Canadian Canyons Series: Part 18 – Building the helix connection

By Angela Cotey | August 20, 2017

| Last updated on February 3, 2021


Email Newsletter

Get the newest photos, videos, stories, and more from Trains.com brands. Sign-up for email today!

Having trouble viewing this video?   Please visit our Video FAQ page
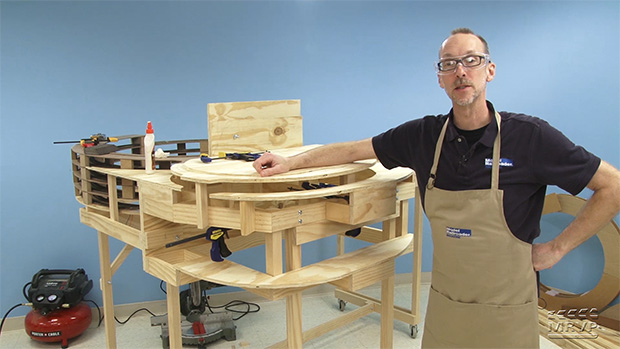
The track, wiring, and electronics are finally in place for the lower (hidden) level of our Canadian Canyons N scale layout! In this video, David raises his game to build the benchwork for the upper (visible) level of the layout. The first order of business is to frame out the layout lobe that connects directly to the helix.

23 thoughts on “Canadian Canyons Series: Part 18 – Building the helix connection

  1. Yup, it’s a Porter Cable brad nailer. While you won’t use it to frame a house, It shoots up to 3″ finish nails, which is more than adequate for benchwork applications using 1x dimensional lumber. It saves considerable time on benchwork construction.

    David

  2. Great series. What nail gun is David using, brad, finishing or frame? What brand does he use and/or recommend? Any other advise on nail guns for the novice? Thanks.

    -Ted Shoemaker

  3. Great video series. The lighting and the camera work is very good. This is going to be one of the best model railroads Model Railroader has built. Almost everything is shown as you build it. I liked the large bridge build videos. keep producing these professional videos. Thank you these videos.

  4. Dave and crew, loving this series, and stealing many ideas for my own layout of an area further west – the PGE from Lillooet to Squamish. However, there is one little nit that as a native of the area I feel obliged to point out. “Fraser” is not pronounced like the fictional barfly and resident of Seattle, with a “z”. The name of the river (and my alma mater, Simon Fraser University) rhymes with “laser,” with a harder “s”

    Thanks again for this really cool series!

  5. If you scroll down on comment page ther is normally a list of past videos related. You will have to open an older one and scroll down to prior version and repeat till you get to first in series

  6. This continues to be a fascinating series David, and an inspiration at least for me as I plan my “retirement” layout over the next couple of years. Certainly staging yards and a helix will play a key role. I joined MR Video Plus about half-way into the series, is there a way to access it from the beginning? Thanks!

  7. I’m building a N scale layout with a sector plate. What should I start with first. The layout or the sector plate? Thanks.! Charles Crandall, Cadillac Michigan

  8. Excellent video series, i have learned a lot about helixes, DCC block detection wiring. Looking forward to seeing more

  9. I second the motion for a book on this layout and would also like to see a DVD of all of the MRVP segments made during the construction. The longer I watch this series, the more I enjoy it. Kudos to the entire MRVP staff. Keep up the great work.

  10. David, has anyone ever told you that you have a baseball announcer’s voice. 🙂 You are definitely an expert when it comes to bench work. I would love to see MRVP do a series on a modern day HO scale switching layout with a minimum 24″ radius curves and #6 turnouts using Micro Engineering track built on sectional modules around the walls.

  11. I am really enjoying this project layout series. MRVP is worth every penny of the subscription. The project layout is very well presented and the quality of the videos is outstanding on my new imac ! Thanks MRVP !

  12. As always, fascinating to watch. David you plan amazing layouts, and I love the fact you have to adjust as you go along, like the rest of us! Once you finish this layout I have a 8′ by 16′ room which will make a great place for your next project railroad, an around the walls two deck layout. Plenty of possibility for you. I have a spare bedroom now as the kids are all grown and on their own, so you can work ’round the clock until it’s time to sleep. Meanwhile, a book about this layout, like the Clinchfield layout, would be great when you are all done.

  13. David mentions adding another rotation of the helix. Can not find where that was explained or the reason for it. Please further explain why the change.

  14. Geez, you must own your own lumber company by now, David! There are tons of wood in this one! Gonna be a bitch to carry!! Looks great. I think this is one of the best parts of making a layout. Once the track goes on and wired then it becomes just detail, detail, detail. The creation from design to first train I really find the most satisfying. Well done.

  15. Excellent work David. I enjoy your meticulous work as it helps me to be more precise and neat. To see where the layout is in this stage and where it is now on ‘today’s web cam’ is truly a work of art. Glad to hear that block signaling will be installed on parts of this layout as I was afraid I had misunderstood that part of Ben’s project with detection systems. No doubt, this will be the most advanced layout MRVP has tackled to date. I join all the others as we wait for the next segment… well done!

  16. Thanks for another interesting video. I’ve found it easier to work with Luan plywood over tempered hardboard. What do you see as the pros and cons?

  17. I am really enjoying the planning and carpentry lessons but I am a little lost on the track and scenery plan at this point. Just looking at the benchwork it is hard to tell what is track, land, or water. For the next installment, can you go back to the track plan a minute and show us what it is you are building?

  18. Great benchwork segment, shows how complex this layout truly is. Your forstner bit works more like a tunneling machine through the mountain in this demonstration. Nice work David. Thanks.

  19. Ah, back to engineering 101. Took you a while, which is not to take anything away from Ben’s work. I think I would have labeled the various pieces of sub-roadbed/river/lake bottom so when I come back later, I wouldn’t forget what was what.

You must login to submit a comment