


Seven ways to uncouple model railroad train cars on tracks: Automatic knuckle couplers look great, and they make coupling cars extremely easy – you simply push them together. However, when it comes to uncoupling, far too many of us rely on the hand from the sky method (also known as the 0-5-0 switcher), reaching in to lift up the end of the car. This isn’t ideal in terms of realism, and you risk damaging rolling stock and surrounding scenery. In addition, this kind of uncoupling leads to derailments since wheels often don’t go back on the rails when you set the car back in place.
Fortunately, there are many uncoupling tools out there that make it easy to separate cars without manhandling your rolling stock.

Magnet magic
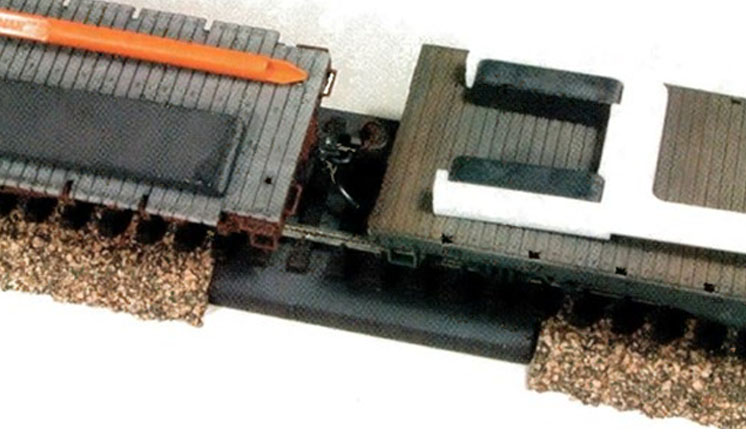
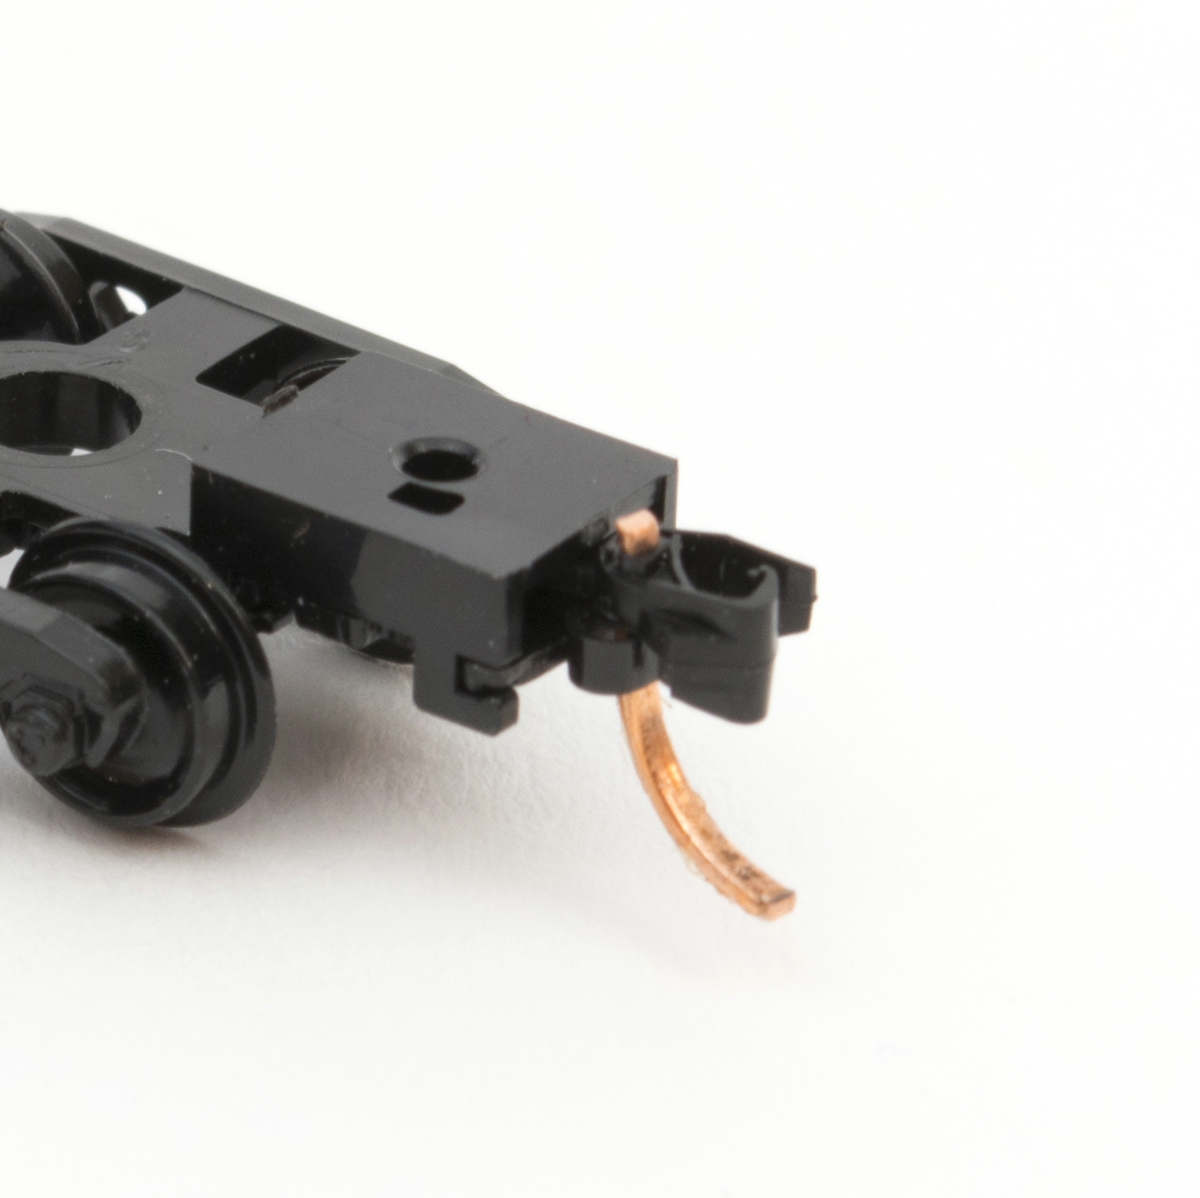
Uncoupling magnets work by pulling aside steel pins under the couplers. To use, spot the couplers directly above the magnet. The Couplers must be slack, so you might have to back up slightly to ease the tension.
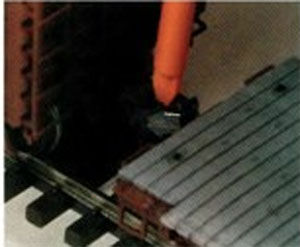
The couplers will begin to separate as Fig 1 shows. If you want t oleave the car at that location, simply pull the rest of the train away and the car will remain at that spot.
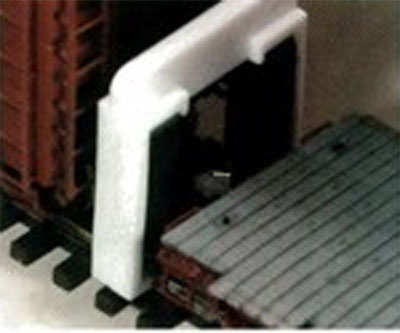
Magnetic couplers can also be used with what is known as delayed action, which allows a car or cars to be positioned at any location beyond a magnet. To do this, position the couplers above the magnet, as in fig. 1. Then, instead of pulling completely away, pull away just enough to allow the coupler to separate wide as fig 2 shows above.
Magnetic uncouplers are either permanent magnets, which are always “on,” or electromagnetic, which are activated by applying electricity to the magnet’s coil.
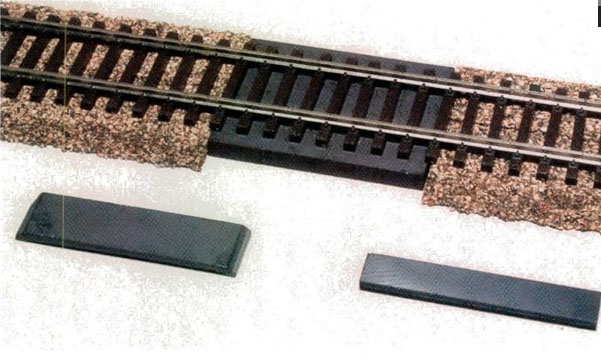
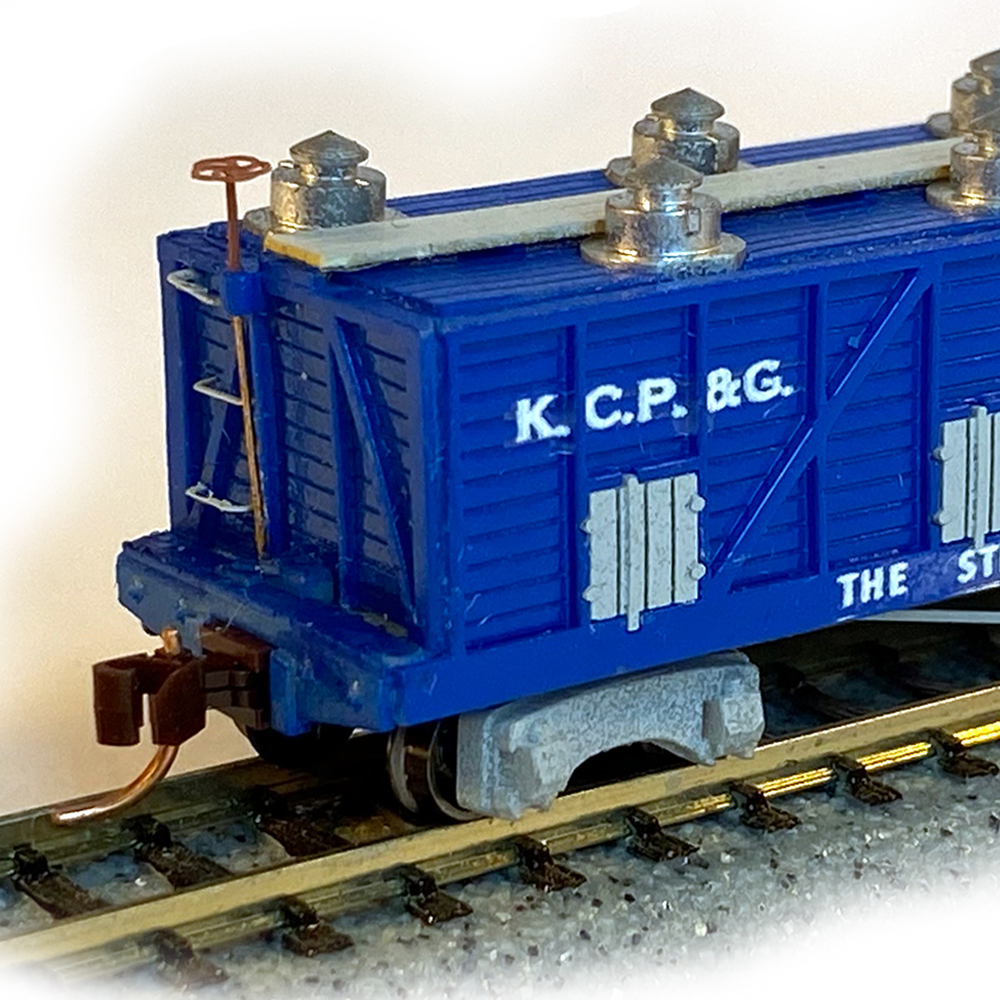
Permanent magnets (fig. 3) work very well. As long as the slack is stretched (such as when a train is being pulled) cars will pass over the ramp without uncoupling. However, if the slack gets bunched, as cars are being pushed or when a train slows down, the magnet can accidentially uncouple cars. For this reason, it’s best to use permanent magnets on sidings and spur tracks.
Large magnets, like the HO scale Kadee no. 308 in fig. 3, are powerful enough to be located under the ties. They’re the ideal choice when first building a layout, as they can be installed before laying track. They can then be completely hidden by ballast.
Figure 3 shows two Kadee between-the-rails magnets. The larger no.321 uncoupler allows delayed uncoupling; the narrower no. 312 coupler can uncouple cars only at the magnet. In N scale, Micro-Trains offers the no. 1310 between the rails uncoupler, the no. 1311 uncoupler (which comes mounted to a piece of Atlas code 83 track) and the under track no. 308 uncoupler.
Ease the cars back together (the magnet will keep them from coupling), then continue pushing to the spot where you want to leave the car. When you top and pull away, the couplers will return to their normal positions without recoupling.
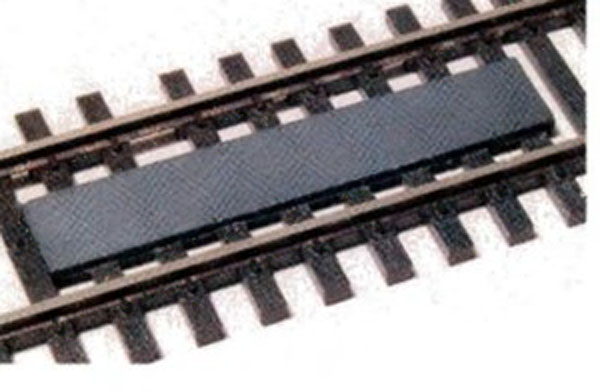
Kadee’s no. 321 can sometimes be placed atop the ties with code 100 track, but uncoupling pins won’t clear the magnet on code 83 and smaller track. For these, the ties between the rails must be cut away and the magnet glued in the gap, as fig. 4 shows. The magnet can then be hidden by ballast.
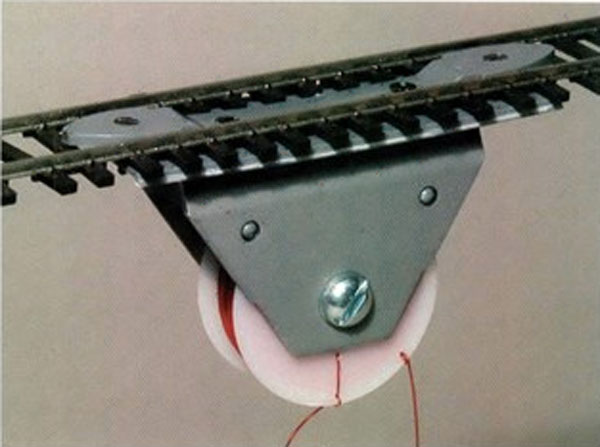
Electromagnets (fig. 5) are ideal for main lines, where they can be activated only when needed. These uncouplers are more work to install, as a holemust be made in the roadbed and subroadbed, to clear the assembly. You’ll also need a power supply controlled by a momentary contact ush button which can be located on a control panel or on the fascia at the edge of the model train layout.
Hand tools
Hand uncoupling devices have the advantage of being able to uncouple cars at any location. A disadvantage is that you must reach over part of the model railroad to uncouple cars, so there’s the chance of bumping scenery. Hand tools are a good choice when the track is within easy reach of the front of the layout. A simple wooden skewer works fine, but there are also specialized tools on the market.
The Accumate Switchman (no. 1001) from Accurail (fig. 6) is designed for the Accumate coupler, but with a bit of practice will work well for other knuckle couplers. To use the Switchman, slip the tip between the coupler knuckles and twist gently.
The Rix no. 14 uncoupling tool (fig. 7) uses a pair of small magnets on a bracket to pull the uncoupling pins apart. Place it between cars, then move the cars apart.
Seven ways to uncouple model railroad train cars: Regardless of the uncouplers you use, it’s vital that your couplers are installed properly – at the correct height per National Model Railroad Association Standards and moving smoothly or they won’t work well.
Some modelers use hand tools for all uncoupling; others use hand tools on main lines and magnetic ramps on spurs, sidings, and yards. Choose the method and tool that works best for each location, and you’’ll find yourself using the 0-5-0 switcher less and less.


In Fig. 3 you mention the 308, 312 and 321 uncoupling ramps. Also, already sized for HO Code 83 track is the Kadee # 322. No gaps are required to be cut in the ties (re: Fig 4).
And pardon my disblief at having to say this ….. Does anyone from your Magazine pay attention to this product? This is the second time I have made this comment to MR based articles – once here and previously to one of Cody’s videos.
I have tried the Accumate Switchman on Kadee couplers. From my experience, It borderline worthless for anything but Accumate couplers; ALL my cars have been switched to Kadees for simplicity and confidence of how they operate. I primarily use the skewer for uncoupling, though I have Kadee # 322s in the yard and on a couple of industrial spurs at the back of the layout.
Last regarding your comment — “Regardless of the uncouplers you use, it’s vital that your couplers are installed properly – at the correct height per National Model Railroad Association Standards and moving smoothly or they won’t work well.”
If you are using the Kadee uncoupling gauge to set coupler heights, etc., be SURE to use the same gauge ALL the time. I have several of the gauges acquired over the years, both the metal and Delrin gauges – and they are not all the same height (I had as much as 1/16” difference between the several gauges, and yes, even that little can cause derailments, particularly on club trackage where the track work of others was to different “capabilities” than I was used to having on my home layout ¯\_(ツ)_/¯ ). I had to choose one and use it exclusive to assure all the cars were set the same.