Set in Southern California, my HO scale layout includes a Southern Pacific train order office surrounded by a desert scene. Although this arid landscape has sparse vegetation, my scene needed two prominent desert plants – palm trees and cacti – to look complete. I found good artificial palm trees, but commercially available artificial cacti didn’t look very realistic. Scratchbuilding the plants would involve more time than I wanted to spend, so I abandoned the project and waited for a manufacturer to make an acceptable cactus.
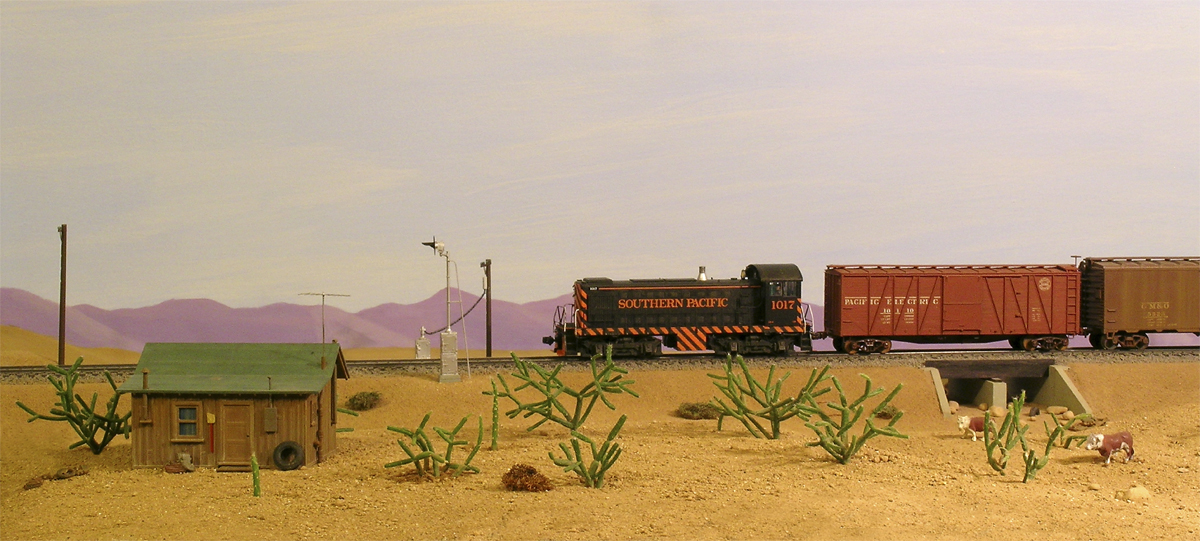
Inspiration struck in spring of 2002 when I noticed that the sprouts of our cactus houseplants looked to be HO scale. With help from my wife Cheryl, an expert gardener, I came up with a technique for layout landscaping with live cactus plants.
Finding the right plant
The larger your modeling scale, the more varieties of cacti will be available to you. I needed sprouts that would live a long time without growing quickly out of HO scale. For my scene, I found two suitable plants, each with its own unique look: Christmas tree opuntia with very small needles and rhipsalis capilliformis with no needles.
Transplanting the cacti
Since cacti can live in the harshest climates, the plants are forgiving subjects to take cuttings from and transplant. For HO scale, I chose sprouts from ½” to 1″ long. Using tweezers to hold the sprout, I cut it from the larger plant with a hobby knife.
A plastic 35mm film canister is the perfect-sized pot for a cactus sprout and will help keep the plant dwarf-sized. After all these years, I’ve found a use for my film canister collection!
First, I drill an .081″ hole in the bottom of the canister. Next, I fill this miniature plant pot to 1 ⁄8″ from its top with half plant mix and half sandy soil. I add water to saturate the contents. Using the point of a pencil, I make a ¼” hole in the soil for the sprout. With my new cactus in place, I pack in the soil around the sprout and fill the canister to the edge with scenery dirt.
The new cactus needs to stay out of direct sunlight for 10 days. The plant doesn’t need any more water at this stage. The initial water, noted above, is enough and serves to pack the soil into a steady base for the plant. The cactus sprout will need no more water until roots begin to develop. By then, it will be installed on the layout.
The right tool for the job
After the cacti’s 10-day rest, I was ready to set the scene. First, I needed to cut out a smooth-sided 1¼”-diameter hole in the Styrofoam base. As with my initial cactus problem, I couldn’t find a ready-made solution. Looking around the house, I found an old metal flashlight housing that was the right diameter. (A 1¼”-diameter metal sink drain extension, available at most local hardware stores, will also work well.) Using a flat file, I sharpened one end of the tube, and my new hole-cutter was ready. Using a twisting motion, I made a sharp cut with my hole-cutter through the Styrofoam.
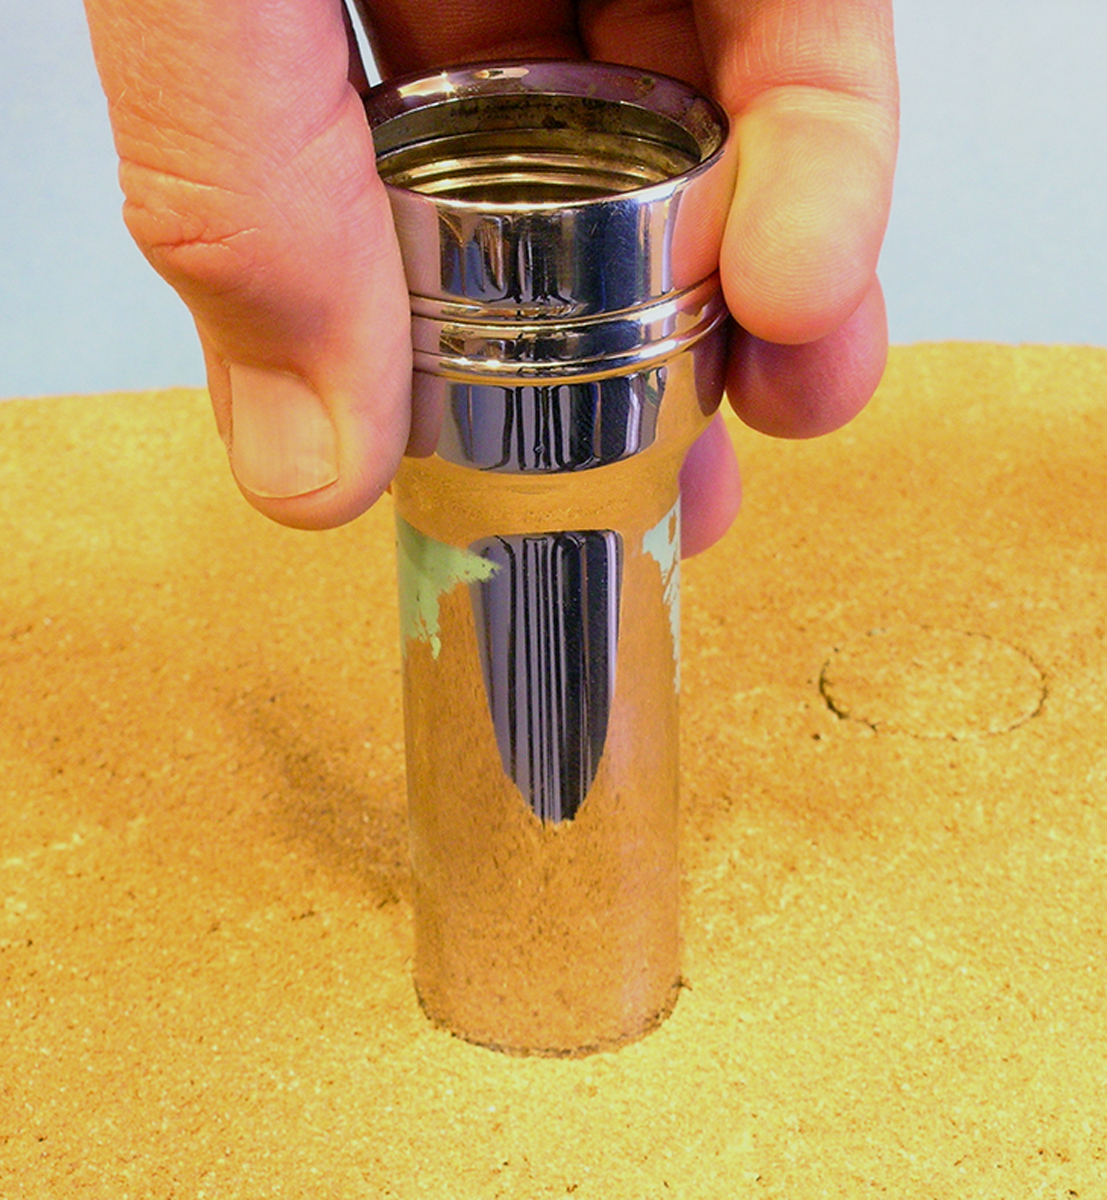
I then removed the plug of foam from inside the tube and saved it for future use. With the hole made, I set my miniature plant pot into the opening until the rim was slightly below the hole’s edge.
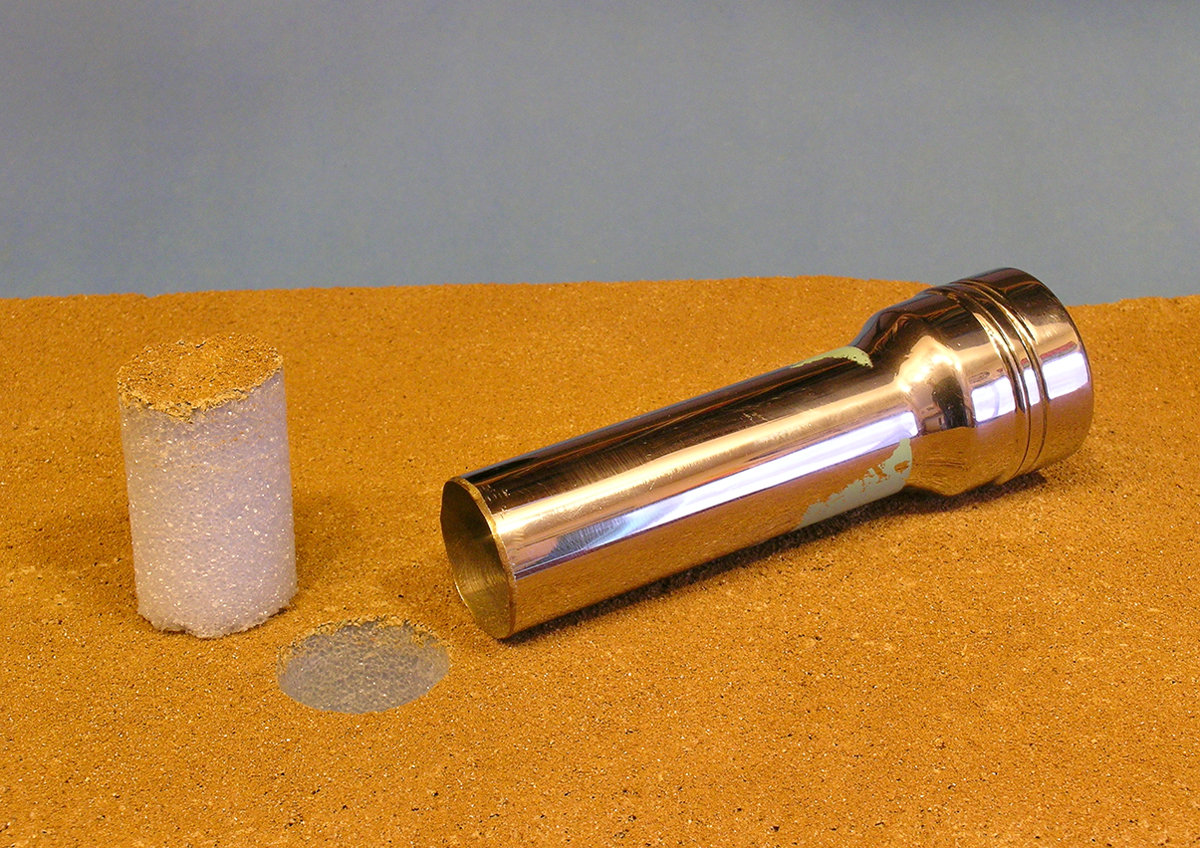
I filled the remaining depth with scenery dirt to blend the cactus into the layout. If a plant ever needs to be relocated, I can refill the empty hole with the leftover foam plug and a little white glue.
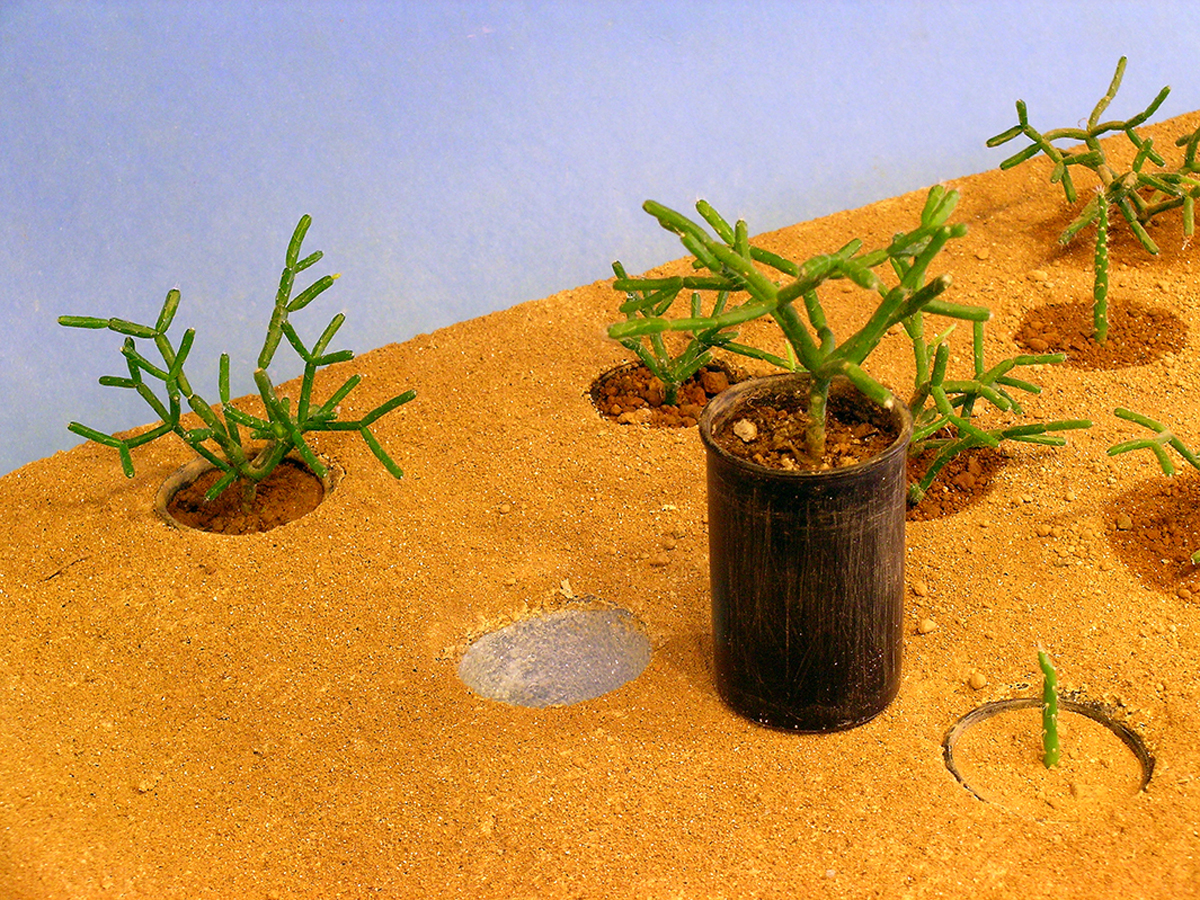
A living landscape
Cactus plants grow slowly and are easy to maintain. With an eyedropper, I water the living parts of the layout several times a month. It helps if your layout room has a window for natural light, but that’s not a necessity for the cacti to thrive. I keep some extra mini plants on a windowsill so that I can occasionally rotate these with my layout cacti. The direct sunlight helps the plants live longer. Many of my film canister cacti are now three years old. When the plants outgrow HO scale, I’ll give them to Cheryl. After all, it was her gardening that inspired me to bring my layout to life.
This article originally appeared in the April 2006 issue of Model Railroader. – Ed.