


OK, time for a show of hands. How many of you enjoy ballasting? That’s what I expected. Ballasting isn’t an aspect of the hobby most modelers enjoy. However, I’ve ballasted parts or all of several Model Railroader project layouts over the years, and I’ve come to enjoy adding those tiny granules to layouts.
When I joined the MR staff in the early 2000s, former Ad Sales employees Mike Brickl and Erik Bergstrom were dubbed the “Ballast Brothers” for the work they did on our HO scale Milwaukee, Racine & Troy staff layout. When they left the company, I was handed the ballasting duties (most likely because I was the new guy). Instead of running out of the layout room screaming, I decided to take the opportunity and run with it.
Admittedly, some of my early efforts were a bit rough. You can ask David Popp about a few of the turnouts I glued shut along the way. But over the years I developed my skills, using previously published methods as a starting point and adding my own twists. I took it as a high compliment when Andy Sperandeo referred to me as “MR’s own ballasting ace” in our special issue How to Build Realistic Layouts: Freight Yards in 2007.
If you have ballasting work in your future, give these tips for successful ballasting a try. Before long, ballasting will become something you look forward to doing.
Types of ballast
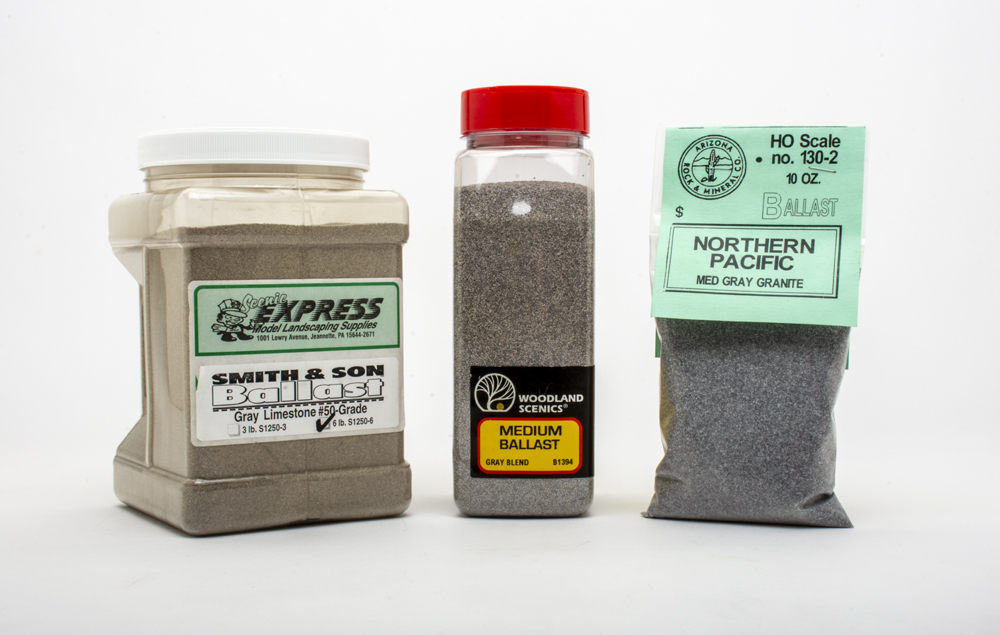
When you head to the scenery aisle of your local hobby shop, you’re going to see different brands of ballast. What are the differences? Mainly size, color, and material. If you’re layout re-creates a specific prototype, you’ll want to check out offerings from Arizona Rock & Mineral. The company produces scale ballast made from real rocks that’s designed to match specific prototypes.
If you’re looking for general purpose ballast colors, you have plenty of options. Woodland Scenics offers fine, medium, and coarse ballast in eight colors. The ballast, which contains tree nut byproducts, is a bit lighter than that made from real rocks. It tends to float away if you’re heavy-handed with wetting agents or scenery glue.
Scenic Express produces natural stone ballast in an assortment of colors. European manufacturers Busch, Faller, and Noch also offer ballast in their respective product lines, which are available from Wm. K. Walthers Inc.
Tools for ballasting
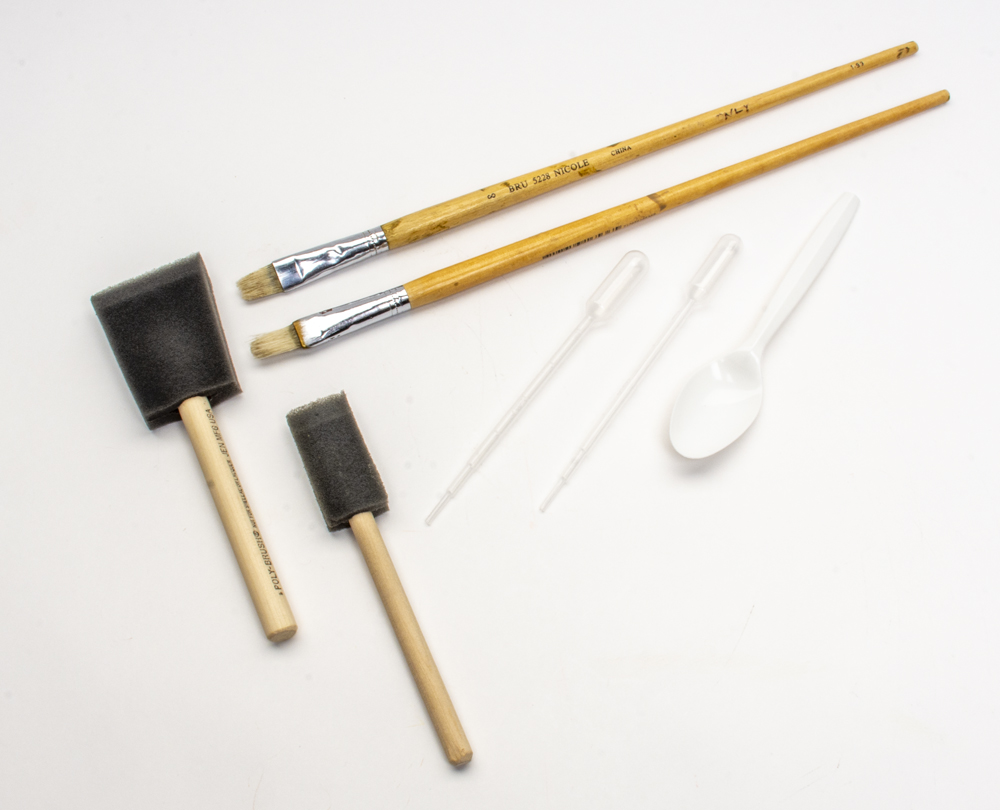
You need tools for ballasting? Yes, but not that many: Two paintbrushes, two foam paintbrushes, a spoon, and pipettes.
I use the two paintbrushes to spread ballast in the gauge and apply glue to the shoulders. I’ve been using the pair of No. 8 flat brushes shown above for years. Find brushes with stiff bristles (soft bristles don’t hold up well, especially if they’re used for ballasting). You may need smaller or larger brushes depending on the scale you’re modeling in. Though you could get away with one brush, I prefer having separate brushes for dry and wet work.
I turn to foam paintbrushes for shaping the ballast on the shoulders. The bevel on the foam brushes is similar to the profile on most commercial roadbed, making it easy to get crisp, angled edges. The 2” brush works well for most applications. The 1” brush is handy for tight spaces.
I use a spoon to apply ballast. Though you can use cups, container lids, and sieves, among other items, I find a spoon easier to control. The pipettes work well for applying wetting agents and scenery glue in a controlled manner.
Wetting agents and glue
Securing ballast to the layout requires a two-step process. First, I apply a wetting agent to break the surface tension of the ballast. My go-to product is 70 percent isopropyl alcohol, which you can find at drug stores and big-box retail stores. Make sure you work in a well-ventilated area when using isopropyl alcohol and follow all printed safety instructions.
Another option is to use wet water. That’s water with a few drops of liquid dish soap added. Though some modelers have successfully used wet water for years, I’ve never had much luck with it. I find the alcohol does a better job of penetrating the ballast.
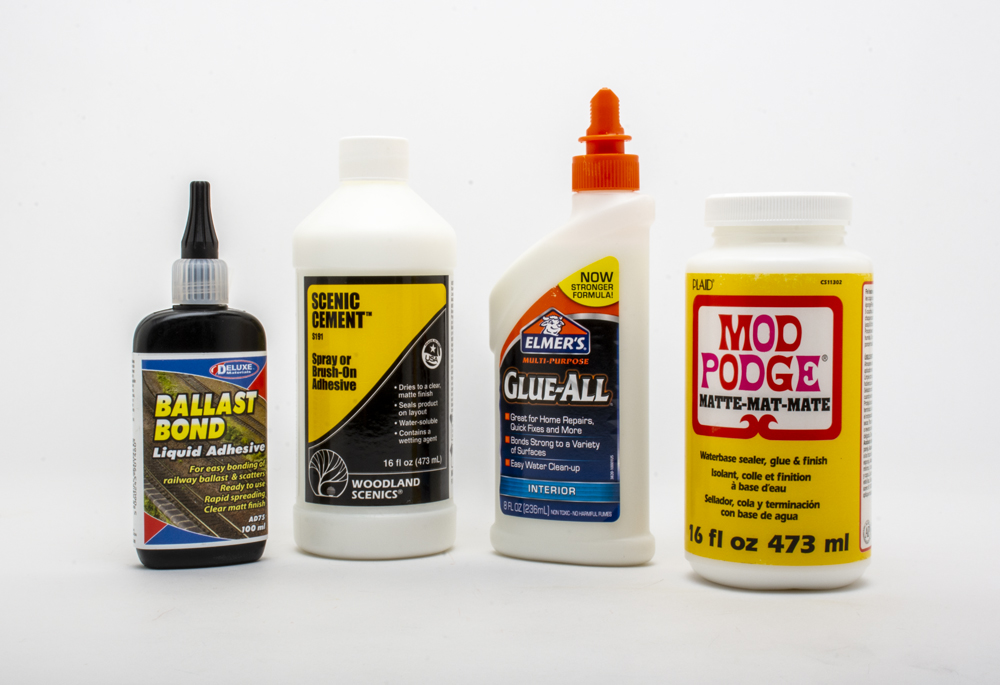
Similar to wetting agents, there are off-the-shelf and home-brewed options for scenery glue. Since many of my projects are deadline driven, I use Woodland Scenics Scenic Cement. The water-based, ready-to-use adhesive is non-toxic and dries to a matte finish. Deluxe Materials Ballast Bond and Micro-Mark Scenery and Ballast Cement are two other ready-to-use options.
White glue and matte medium can also be thinned with water for use as scenery glue. Suggested mixing ratios vary. For white glue, published ratios I’ve read include equal parts glue and water, 2 parts water to 1 part white glue, and 4 parts water to 1 part white glue.
Some of the ratios I’ve read for matte medium are 2 parts water to 1 part matte medium, 1 part water to 2 parts matte medium, and 1 part water to 4 parts matte medium. In both cases you’ll want to test ratios to find which one works best for you. Some modelers will also add a drop or two of liquid dish soap to each batch of homemade scenery glue as a wetting agent.
Ballasting the gauge
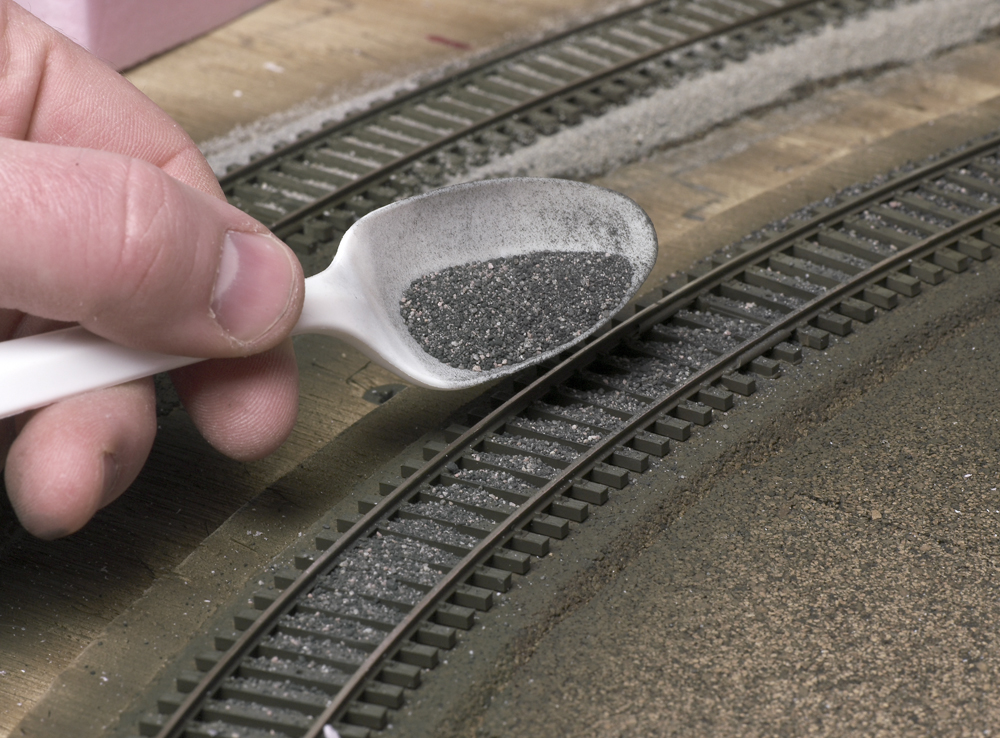
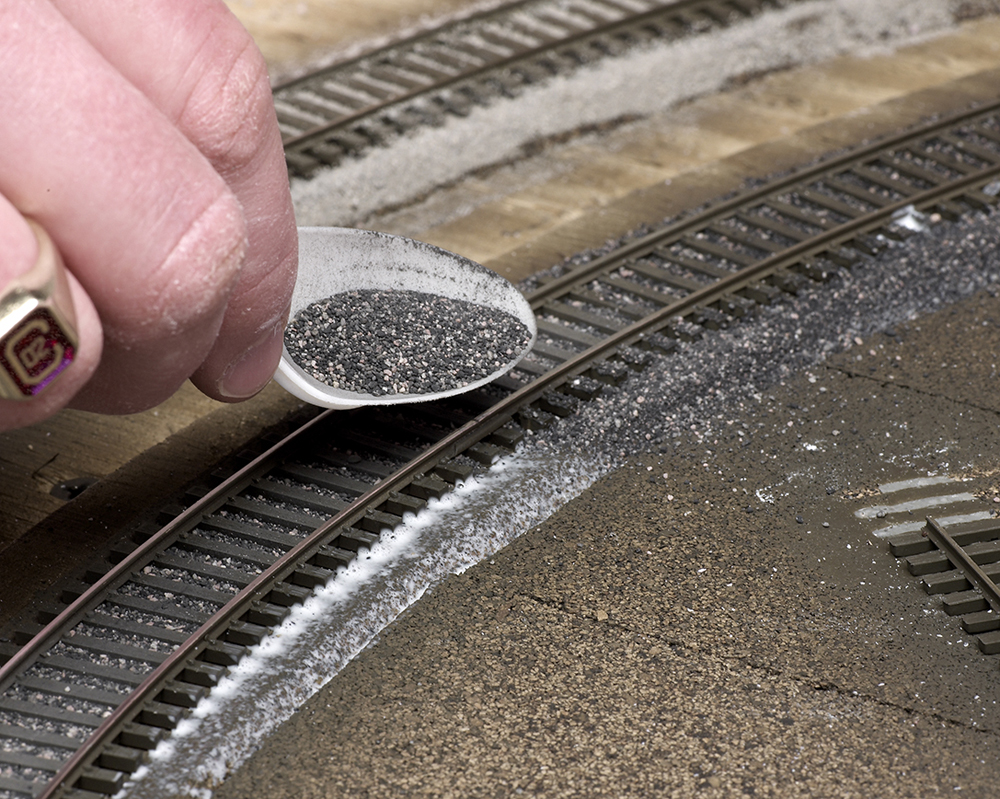
I almost always start by ballasting the gauge, the name for the area between the rails. First, I use a spoon to apply the ballast. I sprinkle in enough granules to get the ballast to roughly the tops of the ties.

Next, I use a No. 8 flat paintbrush to distribute the granules. On mainline track, my goal is to get the granules off the tie tops and out of the web of the rail. On sidings and in yards it’s OK if you leave some ballast on the ties. Notice in the photo above there are a few low spots between the ties. I just pinch a few granules between my fingers to fill in those spots. I pass over the ballast a second time with a paintbrush to clean stray granules off the ties.
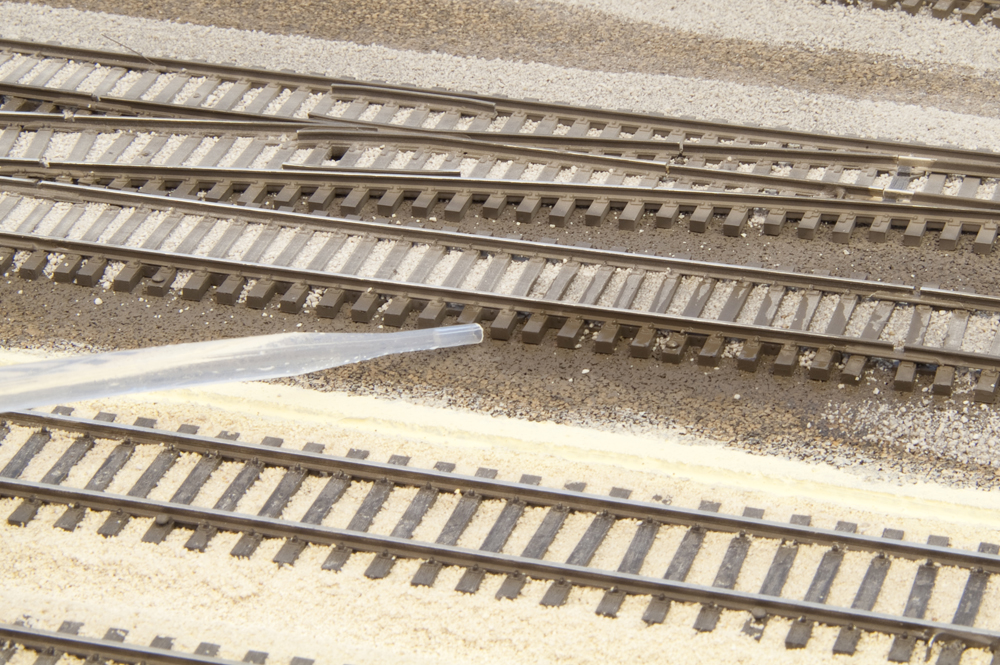
Once I finish ballasting the gauge, I use a pipette to wet the granules with isopropyl alcohol. I apply the wetting agent from the sides. This allows it to soak in from the edges, reducing the chances the alcohol will leave craters in the ballast or wash the granules out from between the ties. I use the same technique when applying the Woodland Scenics Scenic Cement.
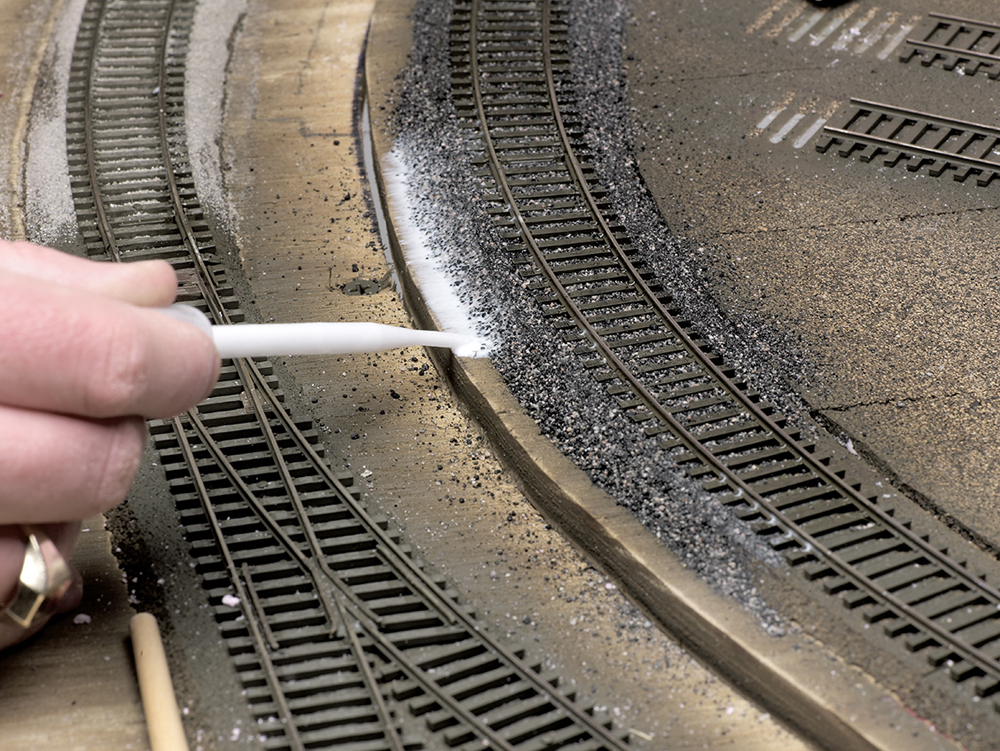
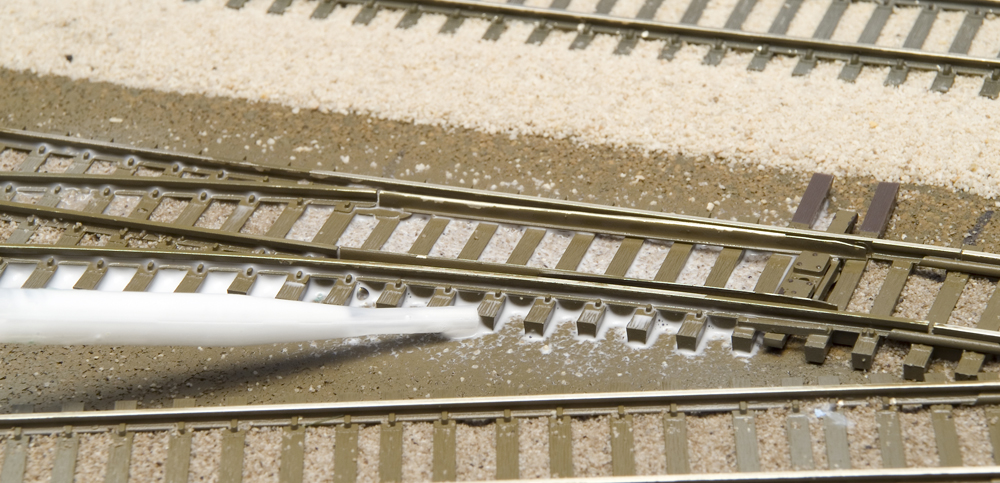
Working on the shoulders
I use a different technique for the shoulders. First, I spread diluted white glue from the tie ends to the base of the roadbed with a paintbrush. While the glue is still wet, I sprinkle on a light layer of ballast with a spoon. Work in manageable areas so the glue doesn’t dry before you can apply the ballast. I use a shop vacuum to clean up any loose granules.

After the glue dries on the first layer, I apply a second layer of ballast to the shoulders. Then, using the beveled edge of the foam paintbrush, I shape the ballast to the contour of the roadbed. As before, I remove the granules from the tie tops and the web of the rail. The flat edge of the foam brush works well for shaping the ballast, too.
As before I use isopropyl alcohol and Scenic Cement to secure the ballast on the shoulders. First, I seat the pipette against the web of the rail and apply the wetting agent from the top, letting it wick down.
As the alcohol soaks in from above, I apply more isopropyl alcohol along the base of the ballast, letting it wick up. I use the same process when applying the Scenic Cement.
Specialty work
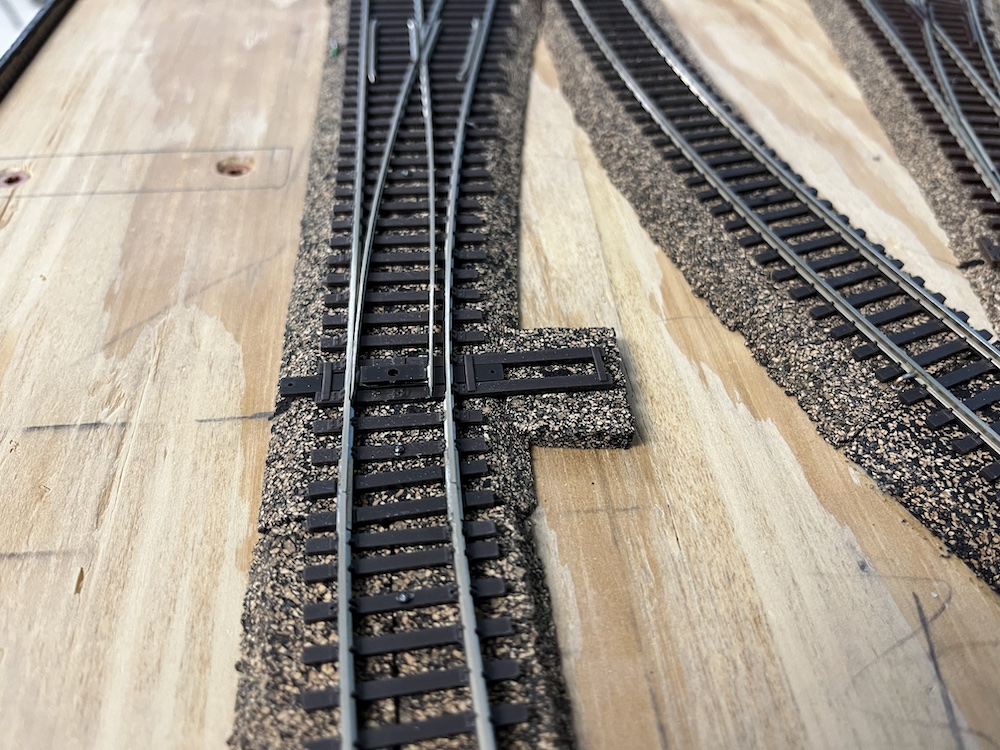
Ballasting turnouts can be tricky, but it’s achievable. Since there are moving parts, I apply the ballast a bit below the tops of the ties. I distribute the granules with a paintbrush and move the points to make sure there are no bare spots.
As with the gauge, I apply the wetting agent and glue from the edges. I keep a paper towel handy to wick up any glue that gets between the switch rod and headblocks, in the heels, and between the points and stock rails.
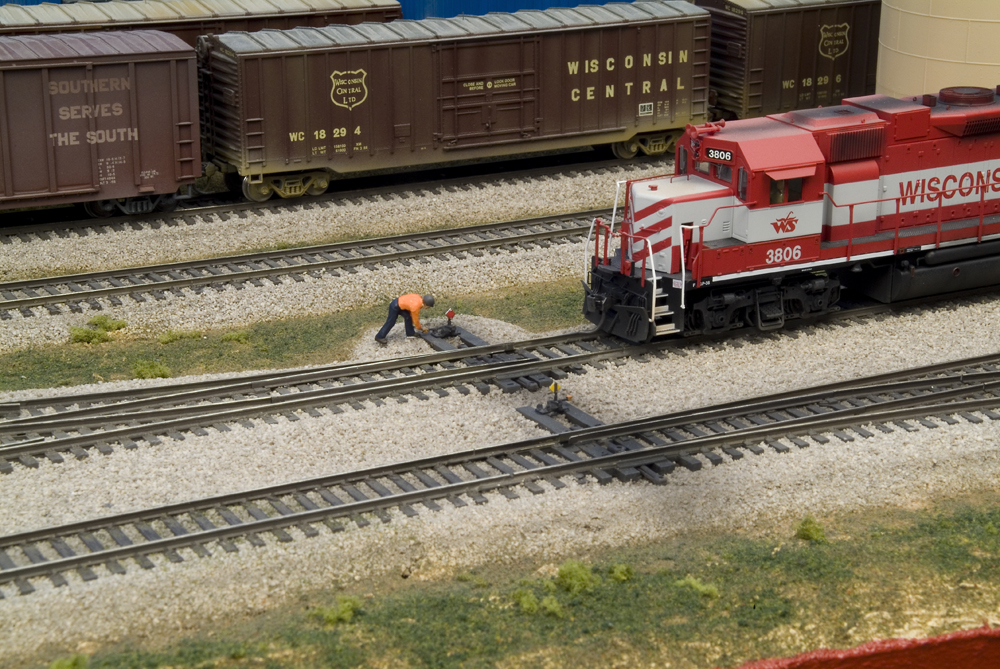
Ballasting doesn’t have to be complete once the glue is dry. Airbrush weathering and other scenery materials can be used to further enhance the realism of your track. The photo above shows an HO scale yard diorama I built several years ago. Notice how I used an airbrush with thinned black paint to simulate oil and grease drippings in the gauge.
On yard and industrial tracks you often see evidence of spilled loads. I used a slightly larger ballast to simulate spilled aggregates. The static grass and ground foam capture the look of spilled grains that are starting to sprout.


Thanks Cody this will come in handy I’m starting to ballast my layout I will use these tips very well.
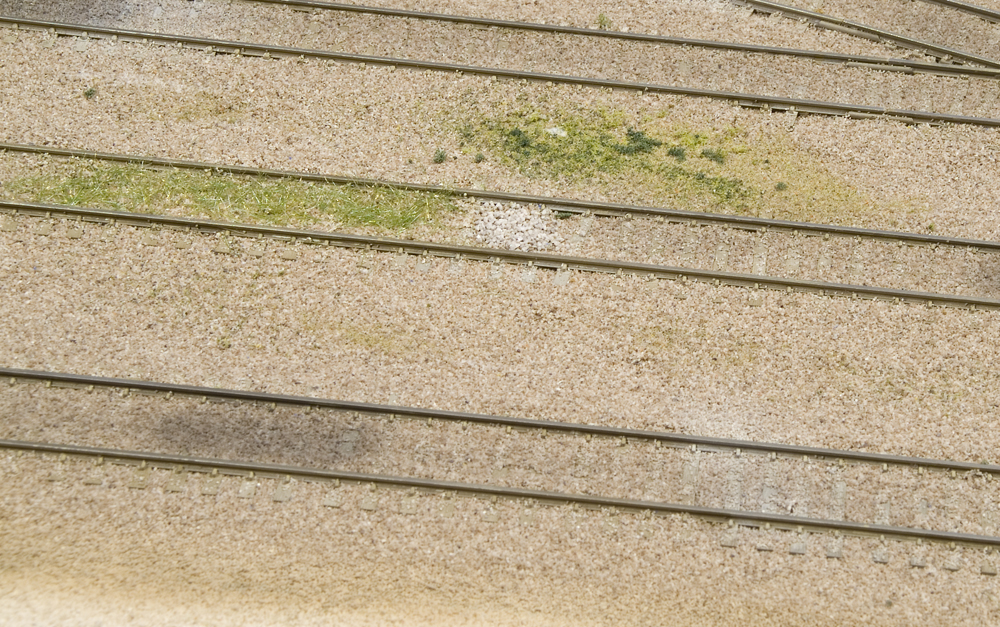
I prefer to do ballasting after any other scenery treatment in the area is done. That way there is no plaster ridge buildup along the track and the ballast is on top of the surrounding ground. On the prototype the ballast is the last thing added to the scene, at least until the weeds start encroaching.