


Six model railroad photography tips. Whether it’s a feature for the pages of Model Railroader or an article for the Trains.com website, photography can make or break a story. Readers and website viewers expect quality images that are sharp, well composed, and free of distractions. There have been more than a few times in my 20 years with the magazine that we’ve had to reject an otherwise solid how-to story or layout visit article because the photography fell short.
Knowing how to use a camera is part of the equation. For more information on that subject, read “How to photograph a model train layout” by Brooks Stover and watch the five-part video series “Easy model railroad photography” with Gerry Leone.
However, there’s more to good images than just focus and composition. Though we live in an age where photo-editing software can fix some things, it can’t correct everything. The six model railroad photography tips presented here cover simple, but important, things you can do before putting the camera on the tripod and snapping images of your layout.
Clean your layout
Dust is something almost every layout owner has to deal with. Finishing your layout room, using plastic tarps, and air cleaners are a few methods for combating dust. However, before photographing your model railroad, it’s important to give it a thorough cleaning.
A handheld vacuum is a handy tool for removing dust from ground foam, ballast, and other scenery materials. A soft paintbrush and a can of compressed air make short work of dust that’s accumulated on locomotives and rolling stock.
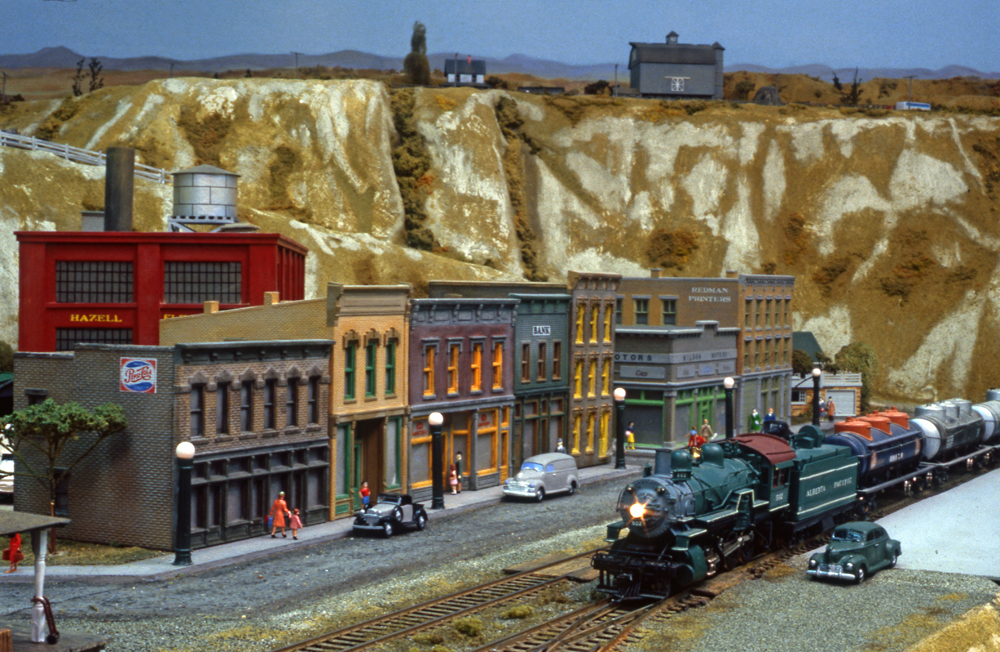
Another product we’ve put to good use on our layouts here at Kalmbach Media is the Dust Dabber from Woodland Scenics. The product, shown in this video demonstration, is designed to remove dust, dirt, and debris from water features. It can also be used on other smooth surfaces, such as the painted and weathered plastic streets shown in the photo above.
Check the details
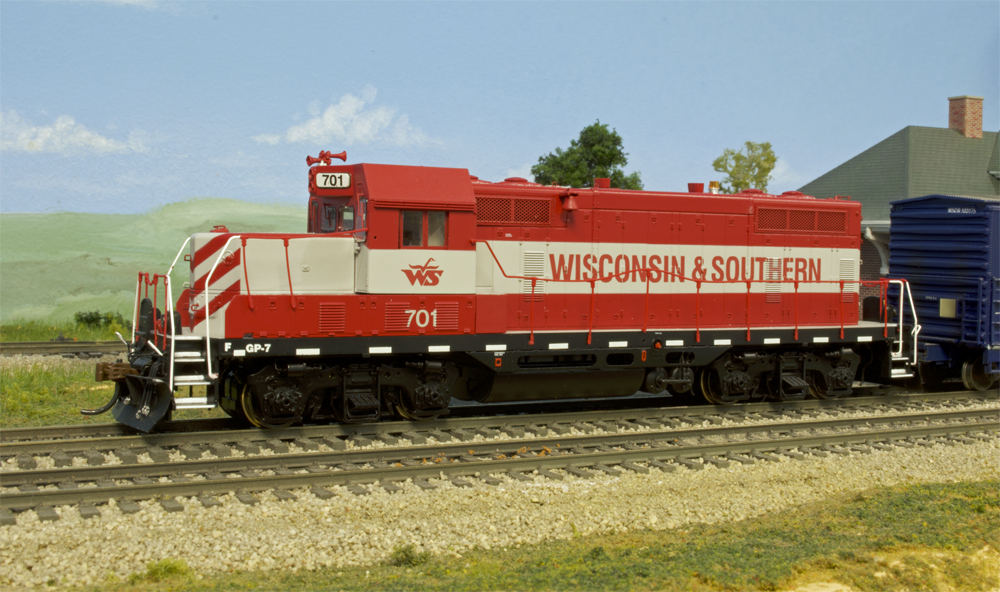
Since I photograph models for News & Products and Product Reviews, I’ve learned to closely examine handrail and stanchion castings on locomotives and etched-metal running boards on freight cars. Why? Sometimes the pins on the handrails and stanchions pop out of their sockets and the glue joints between the metal running boards and plastic support brackets fail. Bent handrails, dislodged stanchions, and warped running boards draw attention to images for the wrong reasons.
Thankfully, there’s a fix for these issues. I use a piece of .015” phosphor bronze wire to apply canopy or tacky glue inside the sockets on locomotives. With the glue still wet, I press the pins into the sockets. A piece of painter’s tape may be necessary to hold the parts while the glue dries.
I use a E6000 clear adhesive to reattach etched-metal running boards. Use the adhesive sparingly so it doesn’t ooze through the holes in the running boards.
Scrutinize the scenery
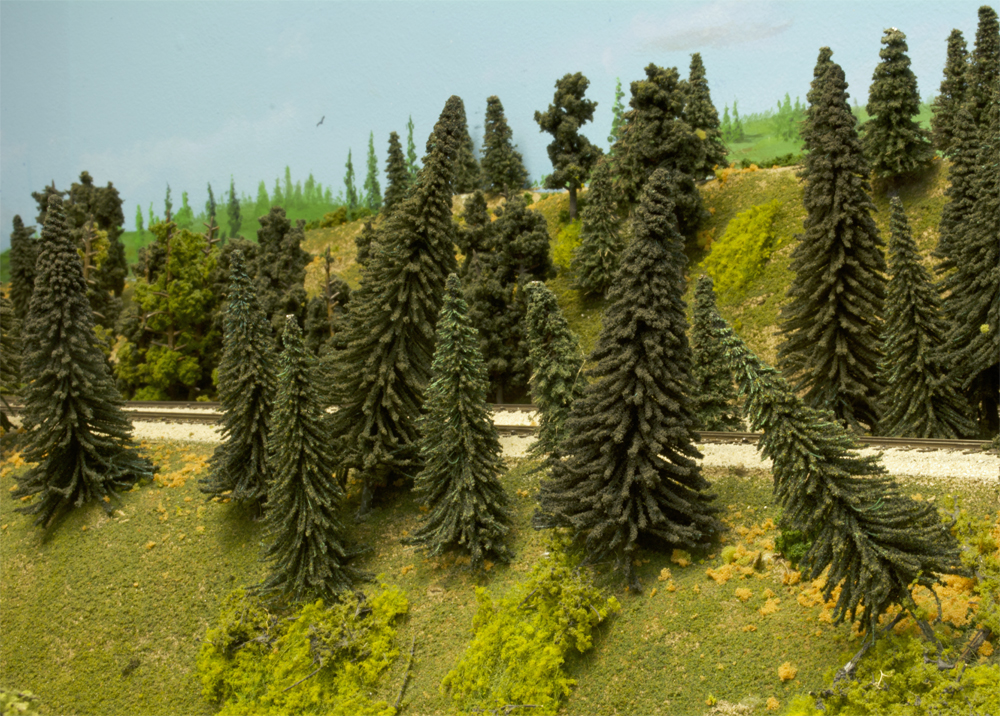
Though I exaggerated them a bit in the photo above on our HO scale Milwaukee, Racine & Troy (MR&T) staff layout, bent trees can ruin an image. Even though most of the trees are vertical, the few that aren’t draw unwanted attention to this scene. The purpose of the trees here is to help mask the opening in the backdrop leading to the upper staging yard.
Fortunately, these trees have wire trunks and can easily be straightened. If your trees have trunks made of plastic or natural material, remove them and put glue in the holes. Then use clothespins, pushpins, or other items to hold the trees upright while the glue dries.
Buildings shouldn’t float
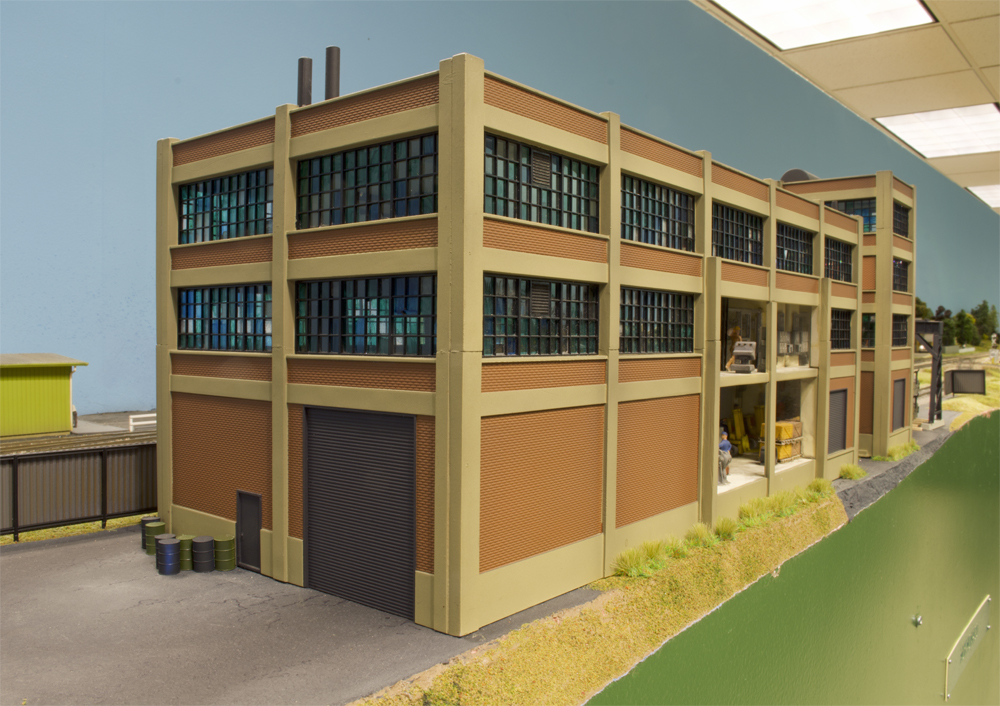
“Floating building syndrome” is a problem that plagues structures on many model railroads. You know what I’m talking about. That unsightly and unrealistic gap between the structure’s foundation and the scenery below it.
We ran into that problem when we added a second building to the Empire Level complex at Mukwonago, Wis., on the MR&T. The plastic building didn’t seat tightly against the painted cork base. Though photo-editing software could have fixed the issue, there are ways to address the problem that also further enhance the scene.
Notice how we placed barrels next to the building and added weeds along the foundation. Strategically placed figures and vehicles will conceal the gaps by the personnel and roll-up doors. A few pallets would also be appropriate for the industrial setting.
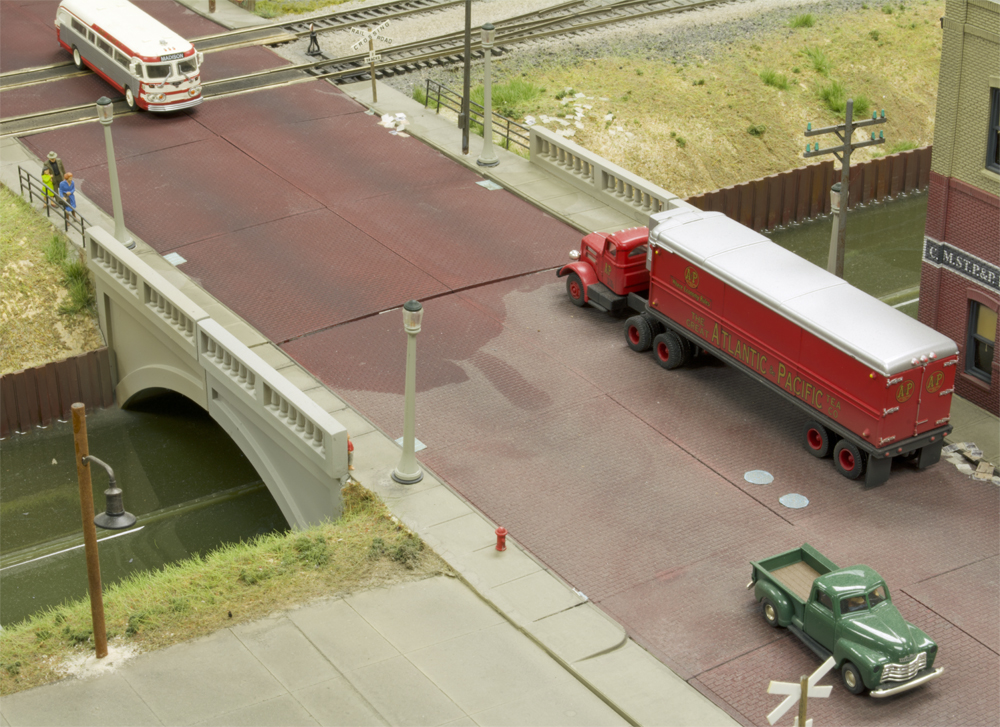
Look for derailments
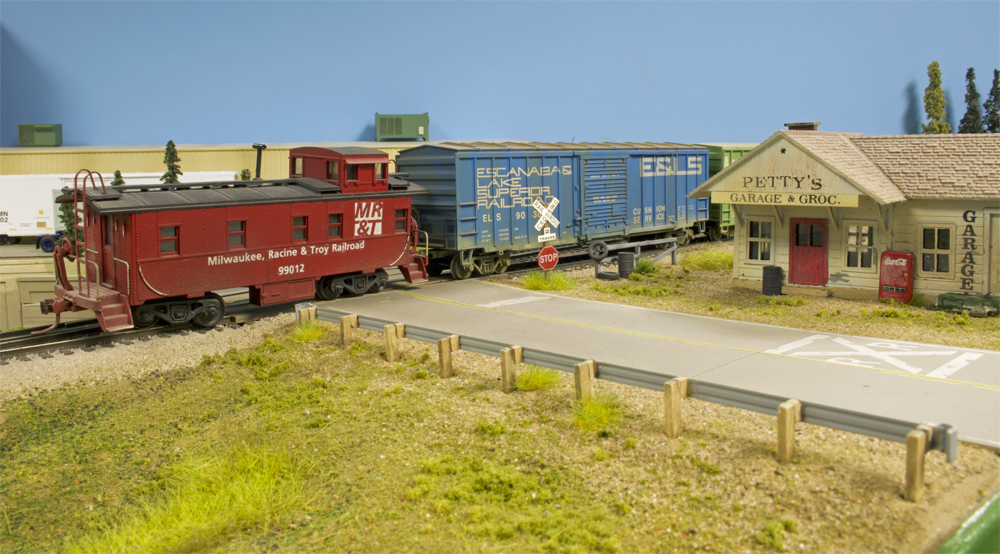
What do you notice about the picture above? Is it the guardrail with wood posts? Perhaps the weathered road with pavement markings? Or is it the abandoned service station in the background? The first thing that jumps out to me is the derailed truck on the caboose.
When composing a photo, study everything that’s in the viewfinder. If possible, bring a laptop and an SD card reader to the photo shoot so you can look at each image in a larger format. If that’s not an option, study the images in the display on the back of the camera. Zoom in and scroll around the photos as necessary.
Shoot a gray card
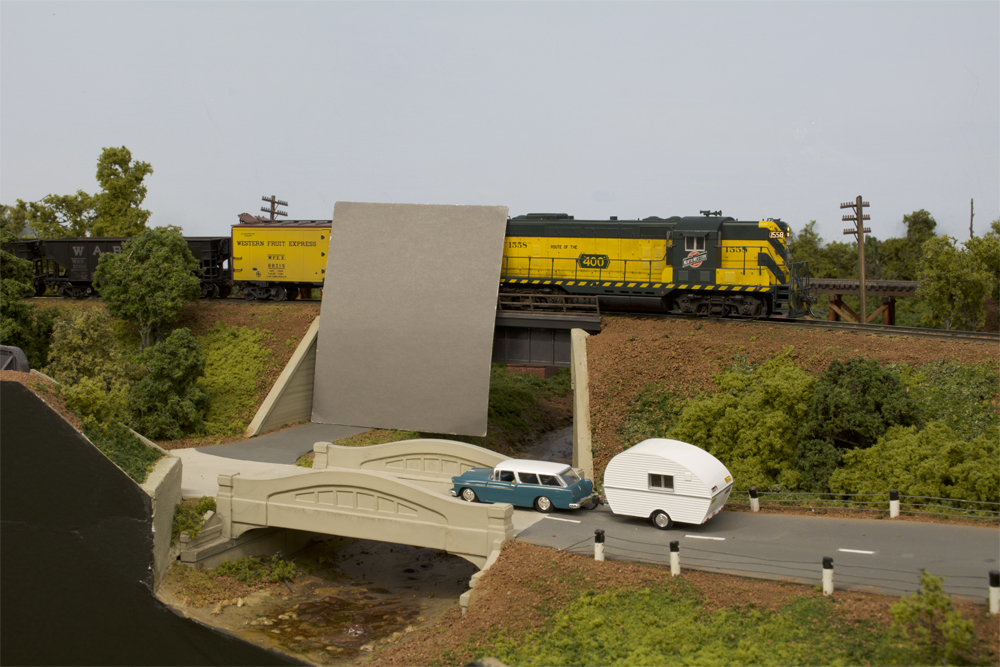
I’ve taken layout and product photos under a variety of lighting conditions, including tungsten floodlights, fluorescent lights, and light-emitting diodes. To help ensure the white balance is consistent across all of the images during post processing, I put a gray card in one of the photos. If lighting conditions change, I shoot a gray card for each situation.
Gray cards come in a variety of sizes and price points from retailers like B&H Photo Video. My 4 x 5-inch card fits neatly in my camera bag. To prevent it from getting dirty, I keep it in a plastic bag with the supplied instruction sheet.
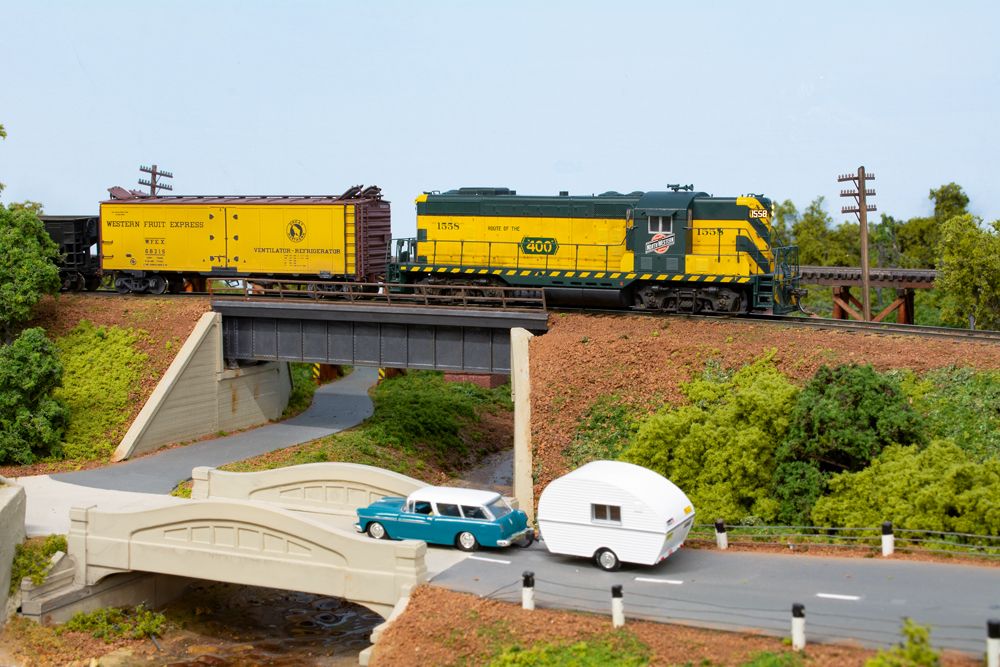
I took a second photo of the same scene, this time without a gray card. The image above shows how the photo turned out after it was processed and cropped. Notice how the yellow on the locomotive and refrigerator car pop, the backdrop is sky blue, and the scenery colors are more vibrant.


So what is the purpose of the gray card? It really wasn’t explained in the article exactly why the gray card is used, just that it should be used.