Renewable resource
After running out of rocks to retain a narrow slope near a railyard, I remembered tossing some 20-year old deck boards into a pile in my backyard. The redwood boards had already been repurposed to hold in the border pavers on a patio (to replace the deck) and were now veneered in cement. Yet life remained in the old boards. Sure, they were decomposed to 1¼” thick instead of 1½” in a few places, but the wood was strong enough, when placed on edge, to walk on the structure if mostly buried in decomposed granite (DG, or crusher fines).
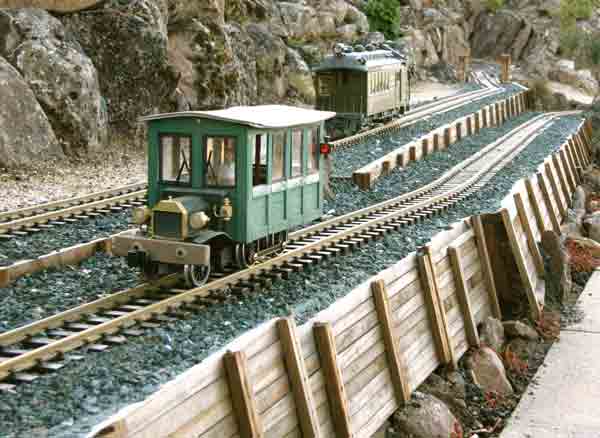
The great advantage of using the tensile strength of 2 x 6s in this particular location enabled the placement of two retaining walls, arranged side by side, in an 18-foot-long stretch (photo 1). The two parallel tracks needed to be close together because of the pinched piece of land in the dogbone trackplan and to leave room for a necessary road above the top line for human foot traffic. The retaining walls are supported and anchored deep into the ground, in case a heavy foot should step on the track or wall.
How to hide the big, ugly boards? I chose to glue and nail horizontal wooden strips to them. If a wall were to show 5″ above the track, it would rise 10′ high in 1:24 scale. In that scale, the redwood strips would need to be ripped to 1/2″ thick to represent 12″-wide lumber, which was not uncommon in old-growth lumberyards of yesteryear.
Ramp up the rise
Another consideration for using this method was the need for a constant 2% grade on the lower track to meet the upper one before the return loop in photo 1. To pull heavy loads, trains like to run on a shallow grade, which could be easily maintained by the ramp-like straight edge of the long boards.
The identified grade was marked on the top-face edge of the board using a smart level; smart folks without that level can make two marks 25″ apart, both on the top edge, then one mark on the face of the board, 1/2″ below one of the edge marks, depending on which direction the grade rises. With a straightedge between the lower dot and the one 25″ away, draw the 2% grade line. The grade is “rise over run,” found by dividing 1/2″ by 25″, which equals 2%.
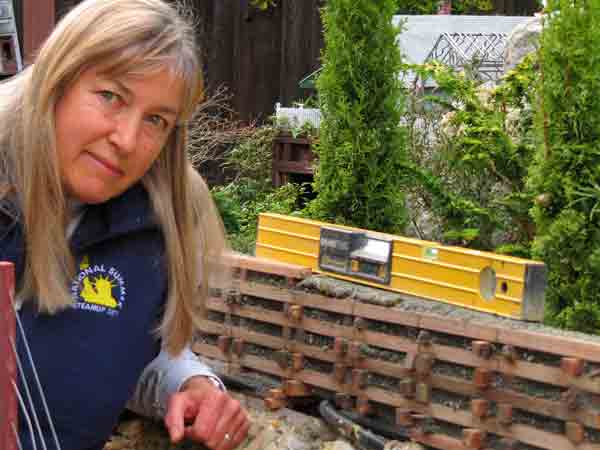
All horizontal, 1/2″-square stock will be attached to the board parallel to this 2%-grade line. The vertical posts will be perpendicular to this line. In photo 4, the “smart” level resting on the 2 x 6 reads “2%” but the horizontal 1/2″ boards are level!
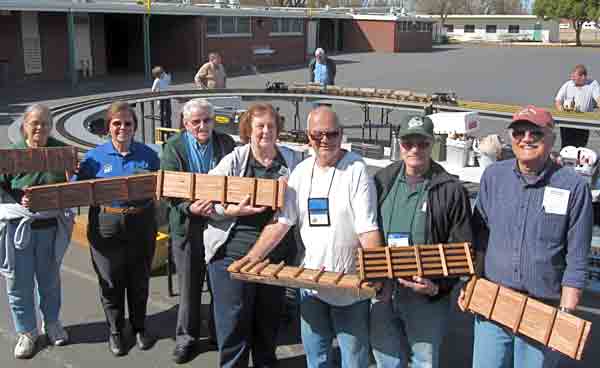
A good group project
Rather than throwing the rest of the deck boards into a landfill, I decided to make kits for a clinic session for my club, the Sacramento Valley Garden Railway Society. I cut up nine 2 x 6s into two different lengths (20″ and 29″) to save time when cutting the horizontals. The lengths were somewhat arbitrary because they best used up the remaining ½” x ½” stock I had ripped. In photo 1, I had lamented that the bottom end of the vertical posts were dangling in air instead of being firmly rooted in the ground “doing their job,” so I made these verticals longer. Even so, the bottom of the retaining wall will get hidden in gravel and plants. I cut the horizontal stock 1″ longer than the sub-board so they overhung the 2 x 6 about ½” on either side. Under the ends I glued and nailed a vertical to hide the side edge of the 2 x 6.
To set up for the clinic I put nine plastic bags over some packing paper (all repurposed, of course) on two long tables. One station was for me, the teacher.
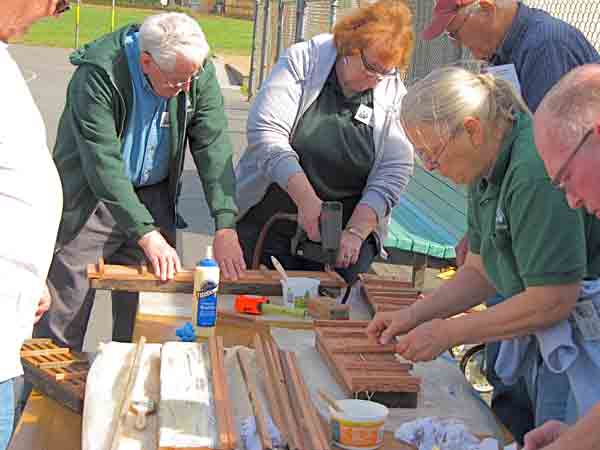
I started the 45-minute clinic showing set up, variations, and demonstrations of the safe use of the brad gun. It happens that photo 2 shows the sequential steps, due to the natural pace each person chose to work. Here’s the general layout, open to variation:
1. Find the best face of the board and orient it so the best long edge is on top. Clean it with a wet rag to help the glue to penetrate the wood.
2. Brush Titebond II, III, or other weatherproof glue on thickly. (Be careful of Gorilla glue, the expanding monster.)
3. Bunch up several horizontals and brush on a thin coat of glue . Center all glued ½” horizontals tightly on the board, starting with the top edge. You can raise the top board above the 2 x 6 edge to hold the ballast but, when the wall is slanted back, the top edge will slope down to easily hold ballast, glued or not.
4. Glue the back of the verticals (6″+ for a 2 x 6) and space them out perpendicular to the horizontals. Some people liked having each post rise ½” above the wall, which looks outstanding, but I’d probably catch my toe on one.
5. Now you nail the verticals down in one of many ways. I chose to start at the top and bottom of one vertical, angling the brad toward the center of the board. Once another vertical is fastened on, it’s easier to do the others because the horizontals aren’t floating, looking for a home.
The brads must penetrate each horizontal board, preferably near its center. On the verticals, you can shoot the brads in a left-of-center/right-of-center pattern to avoid many dead-center holes, which could split the board (at which point you’d need to replace it). Because we used aged wood with 18-gauge brads, we didn’t have that problem, except for one board that was accidentally nailed too close to the edge. Also the speed at which the pneumatic brad-nailer works, causes little splitting. In the olden days, I used a tack hammer, green garden stakes, and wire nails (and band-aids for my left thumb).
6. Preserve the whole structure or line it with plastic on the earth side, if using wood without the natural tannins in cedar and redwood. Pressure-treated wood is good, too.
7. Install the wall in the railway by fastening stakes on the reverse side. If you screw a post on either end with one screw, you can rock it into place by pounding on the stakes, alternating left and right. Be sure to angle it back at a 5º to 10º slant. Backfill with clean gravel and tamp firmly.
Materials list
Exterior-grade wood or plastic wood: 2 x 6, 2 x 8, scabbed 2 x 4s, etc.
Exterior aliphatic-resin glue, like Titebond II or Titebond III
Paint brush to spread glue and rag to wipe board
Level/ruler to mark grade on board (if necessary)
Brads (18 ga.) hammered or shot from a brad nailer
Clean gravel fines or sieved crushed gravel
Posts or drilled framing bars to screw to the reverse side of the board