


Five track and roadbed tips
Smoother soldered rail joints
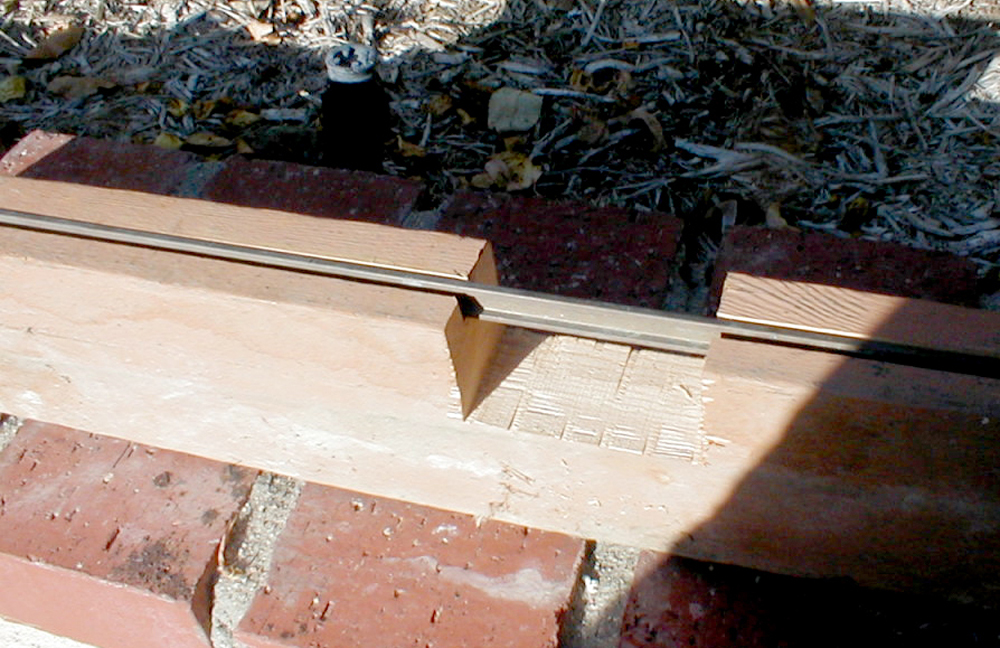
I had a problem getting smooth solder joints when soldering together 5′ rails. I took an 8′ 2 x 4 and cut a groove down the middle of one side, just wide enough to hold the rail. Then I cut a wide notch in the 2 x 4 to give clear access to the rail joint. (see photo above). Now my rail joints are perfectly straight. —Tom Trigg, Oceanside, California
Losing track screws
Tired of losing your track screws? Put a little dab of lubrication grease on the end of the hex-head driver and the screw will stay put. Place a paper plate under the track while screwing the joiners together and you’ll have no more lost screws in the ballast. —Michael Smith, Dania Beach, Florida
Revitalized Scotch-Brite
I was running trains recently and had some dirty track sections. I hit them with my well worn Scotch-Brite pad, which didn’t clean very well. I dipped it in a bucket of warm water mixed with dish soap and went to work. I am always surprised how clean the rails get with a minimum of scrubbing, even when pollen and tree sap gets thick. —Todd Haskins, Brewster, Massachusetts
Securing track to supporting bed
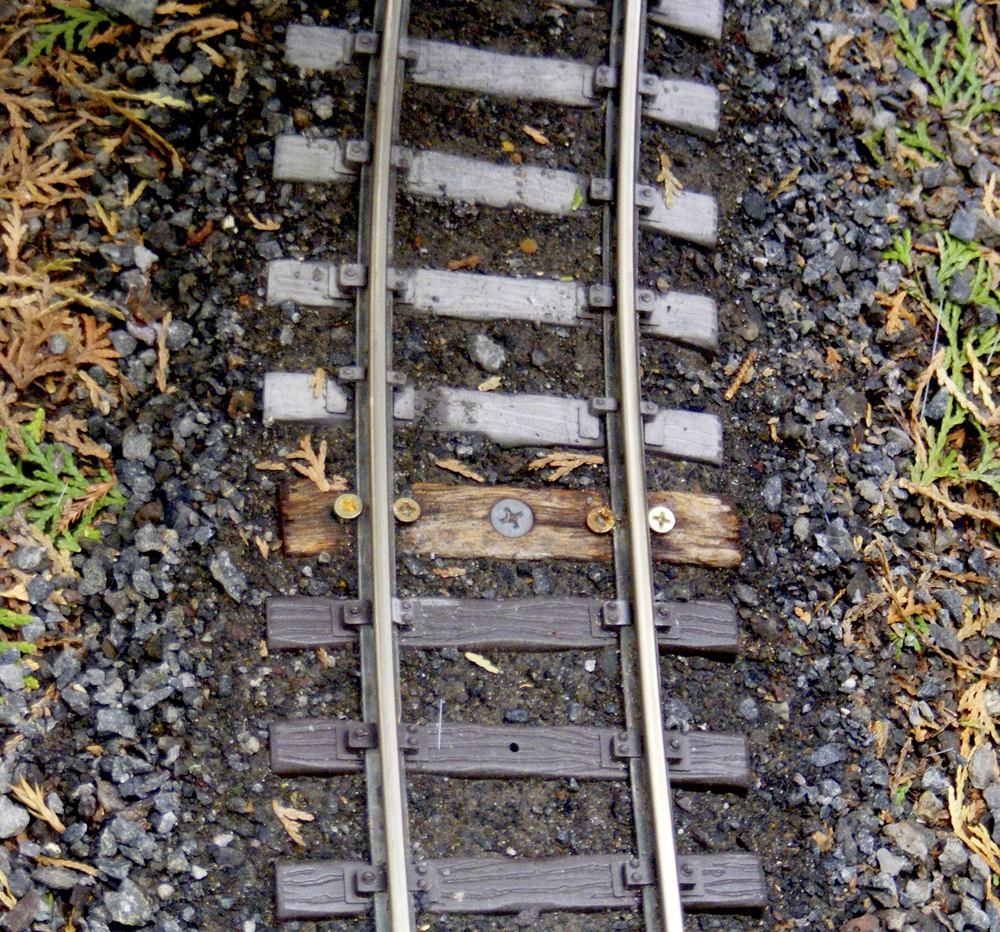
I originally screwed my track down to a rigid substructure using the holes in the center of the plastic ties. However, the rails shifted in the heat, shearing off the plastic “spikes.”
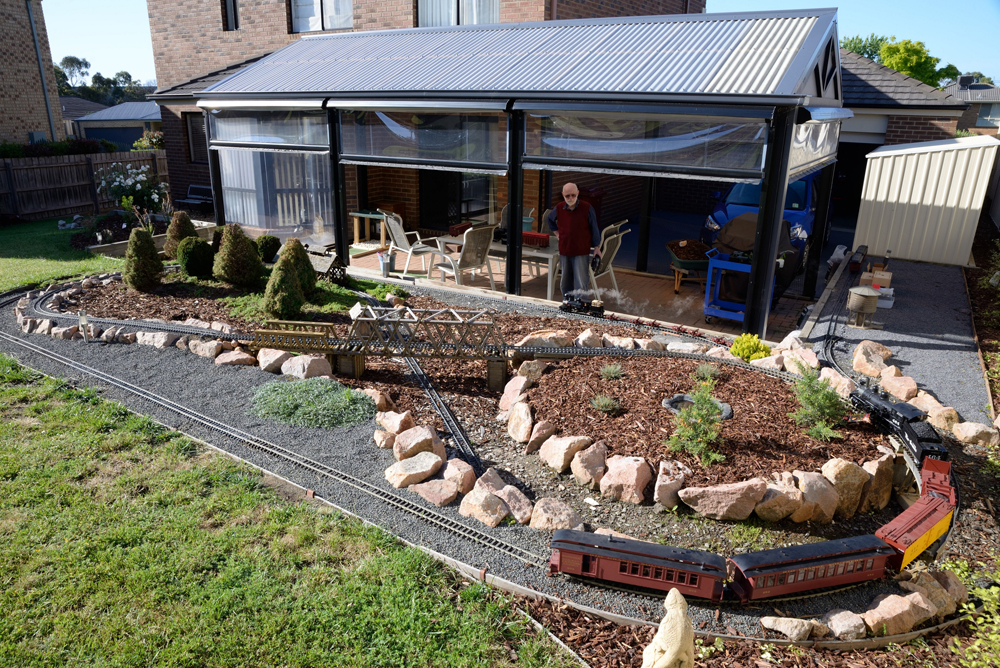
To solve the problem, I cut some solid-timber ties from garden edging made of a local hardwood. I ripped it into pieces about 12mm (1/2″) wide, then cut them the same length as gauge-1 ties. I drilled a hole in the center to screw through. I then put the tie under a piece of track and drilled a 1.5mm (1⁄16″) hole either side of each rail. This sets the gauge. The tie is then screwed into place on the substructure and the rails are held securely in place using 12mm, brass, countersink screws. —Mick Bennie, Epping, Victoria, Austraia
Track magnet source
Next time you are ready to throw away your worn out electric toothbrush, check the bottom: it contains a small but powerful magnet. Remove it, glue it to a strip of styrene, and you have an excellent track magnet for blowing the whistle and ringing the bell of your favorite locomotive. —Bob Huddleston, Northglenn, Colorado
Get track cleaning tips for your railway here.

The only parallel rail joints I made were at switches. All othe joints were staggered 6” or more. This prevented horizontal and vertical track kinks for twenty years. I used Aristocraft stainless steel rail placed in LGB and or Aristocraft plastic tie strips and curved track using TrainLi track bender. Aristocraft and another brand rail (not track) benders spiraled rail causing rail head to tip inside or outside of verticals widening or narrowing track gauge. TrainLi track bender is awesome permitting curves to start shallow and gradually sharpen instead of sectional curved track slamming trains into abrupt curves, which is ok for slow yards, but not mainlines.