Trevor Park
Santa Cruz, California
Wooden kit
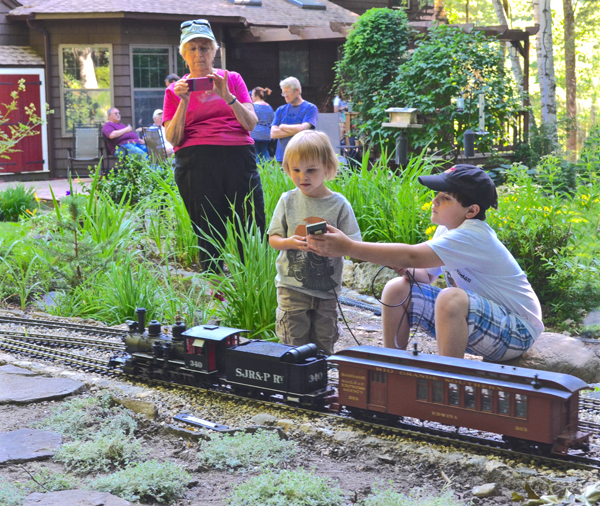
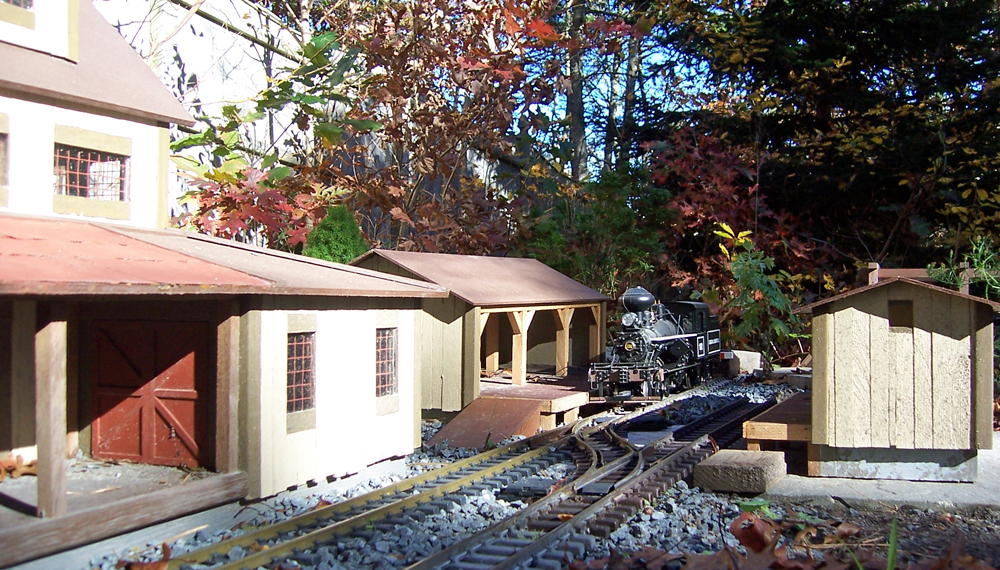
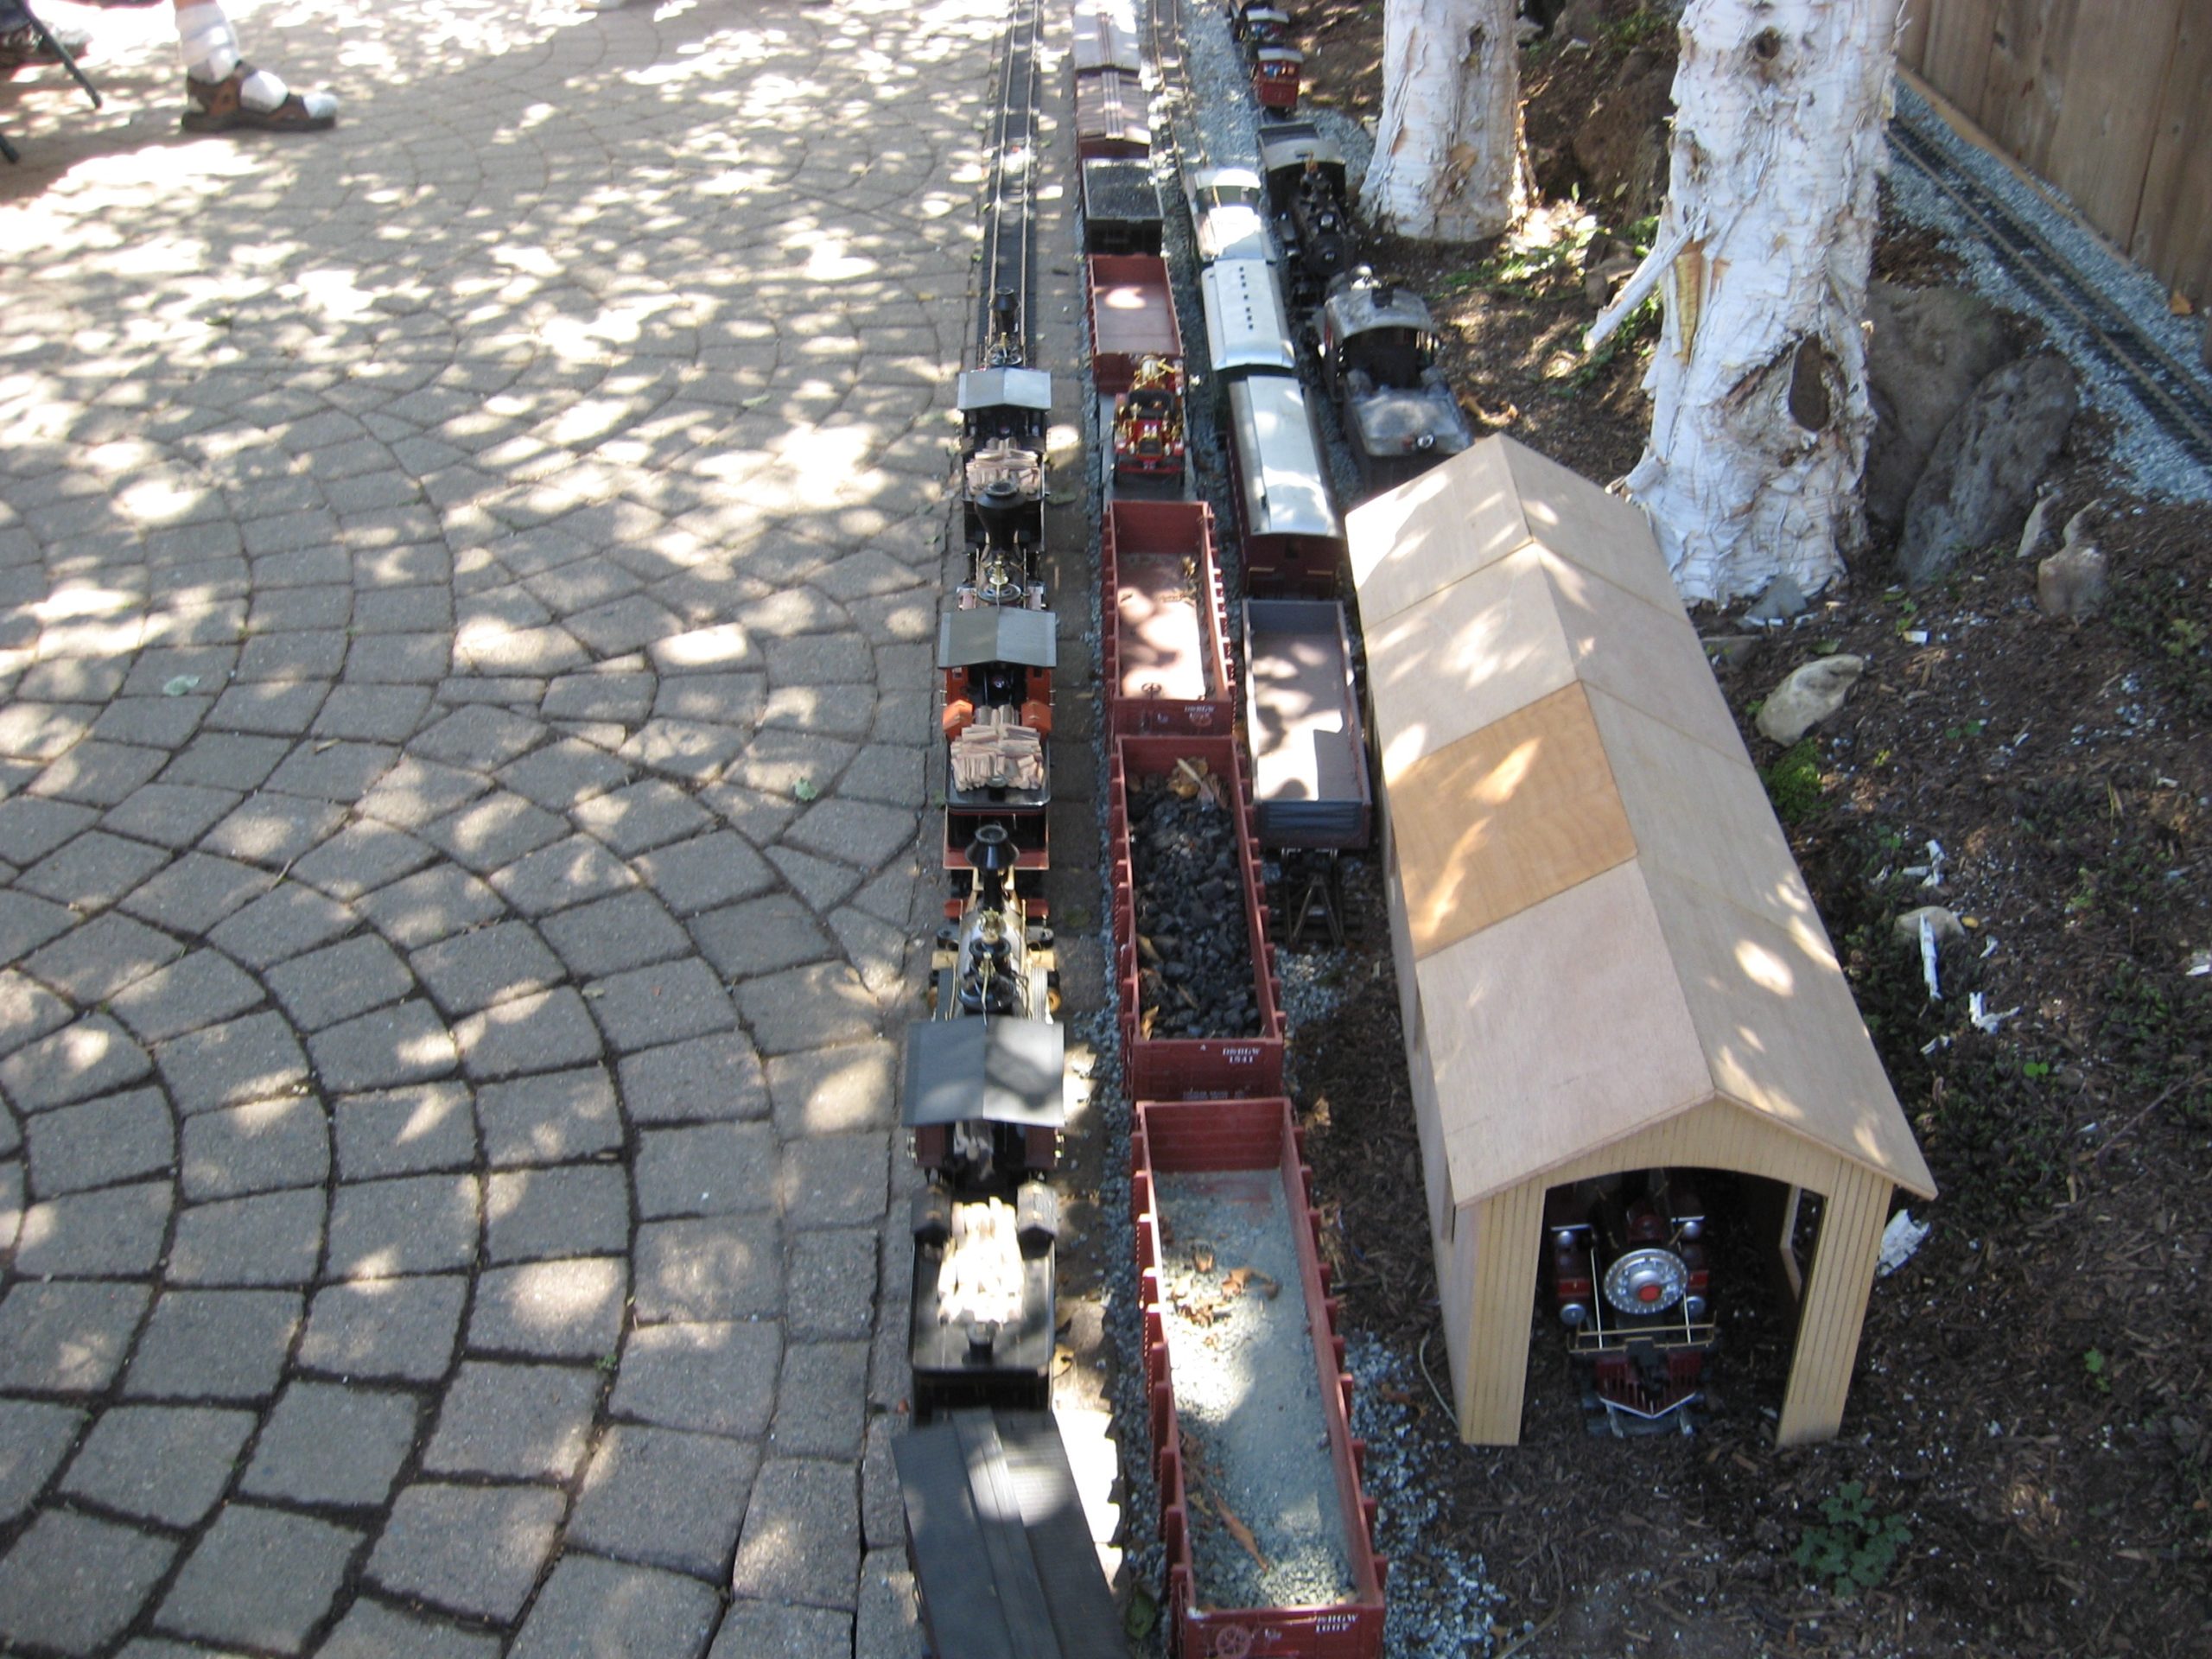
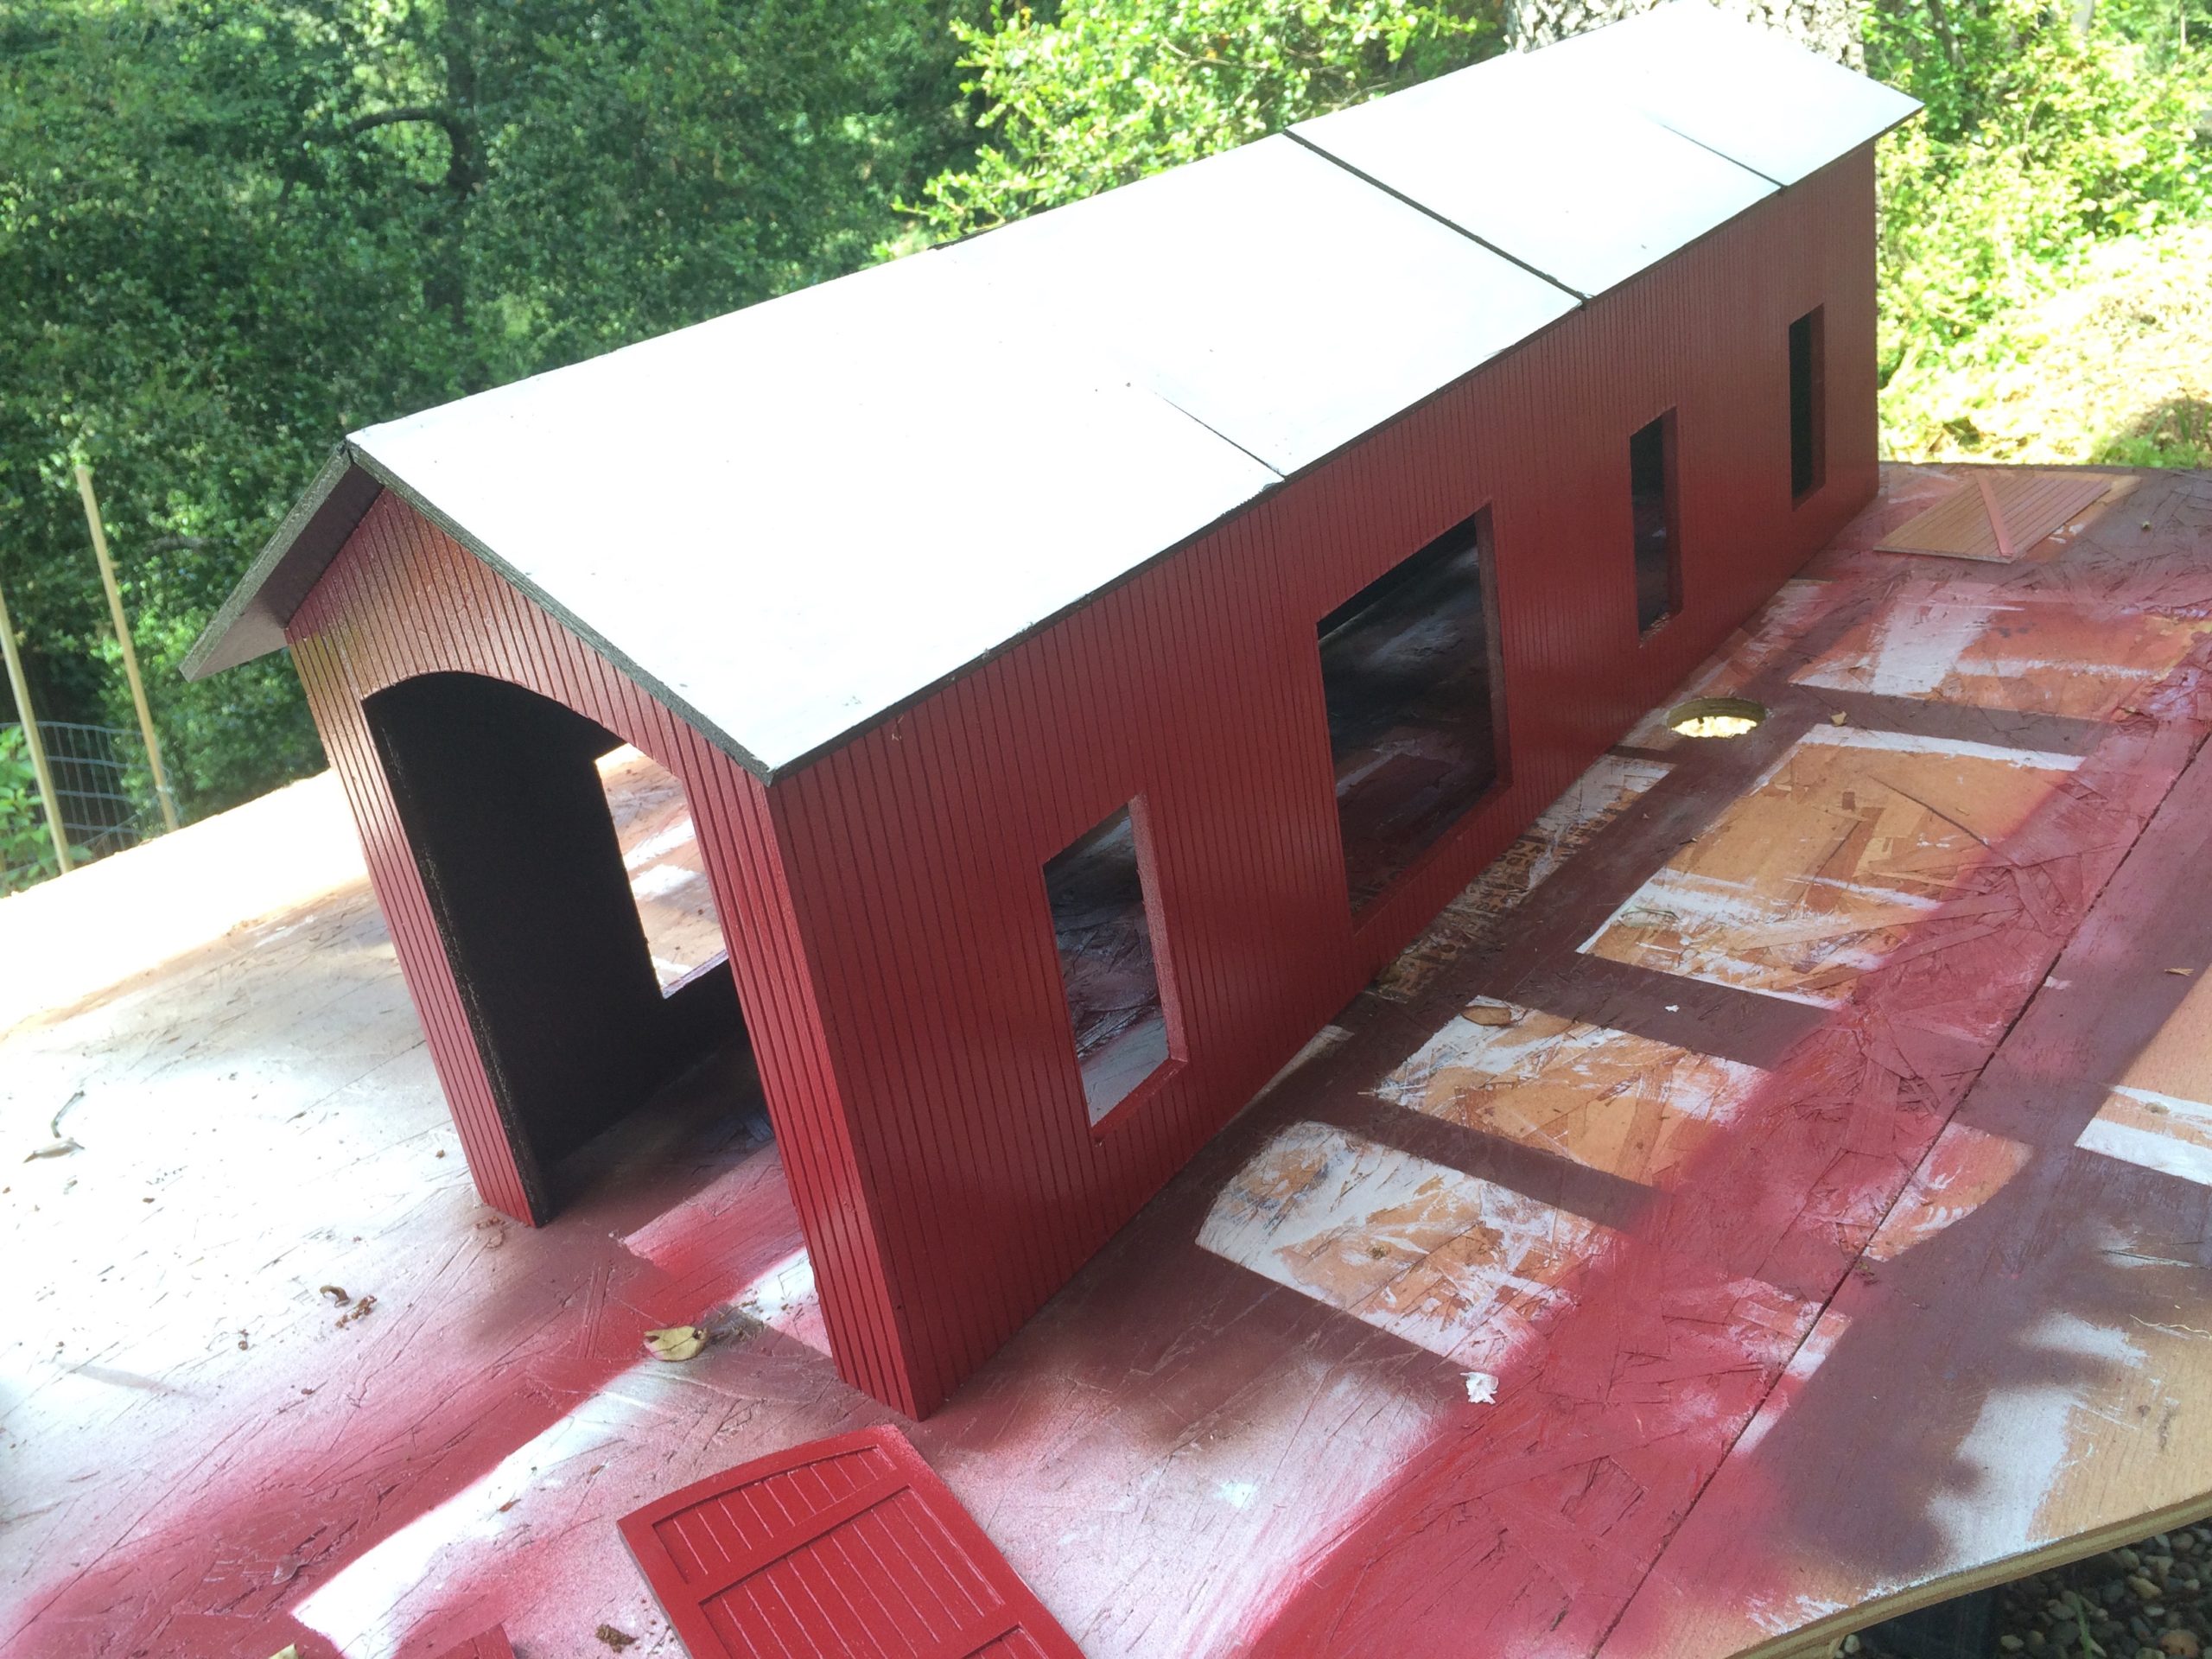
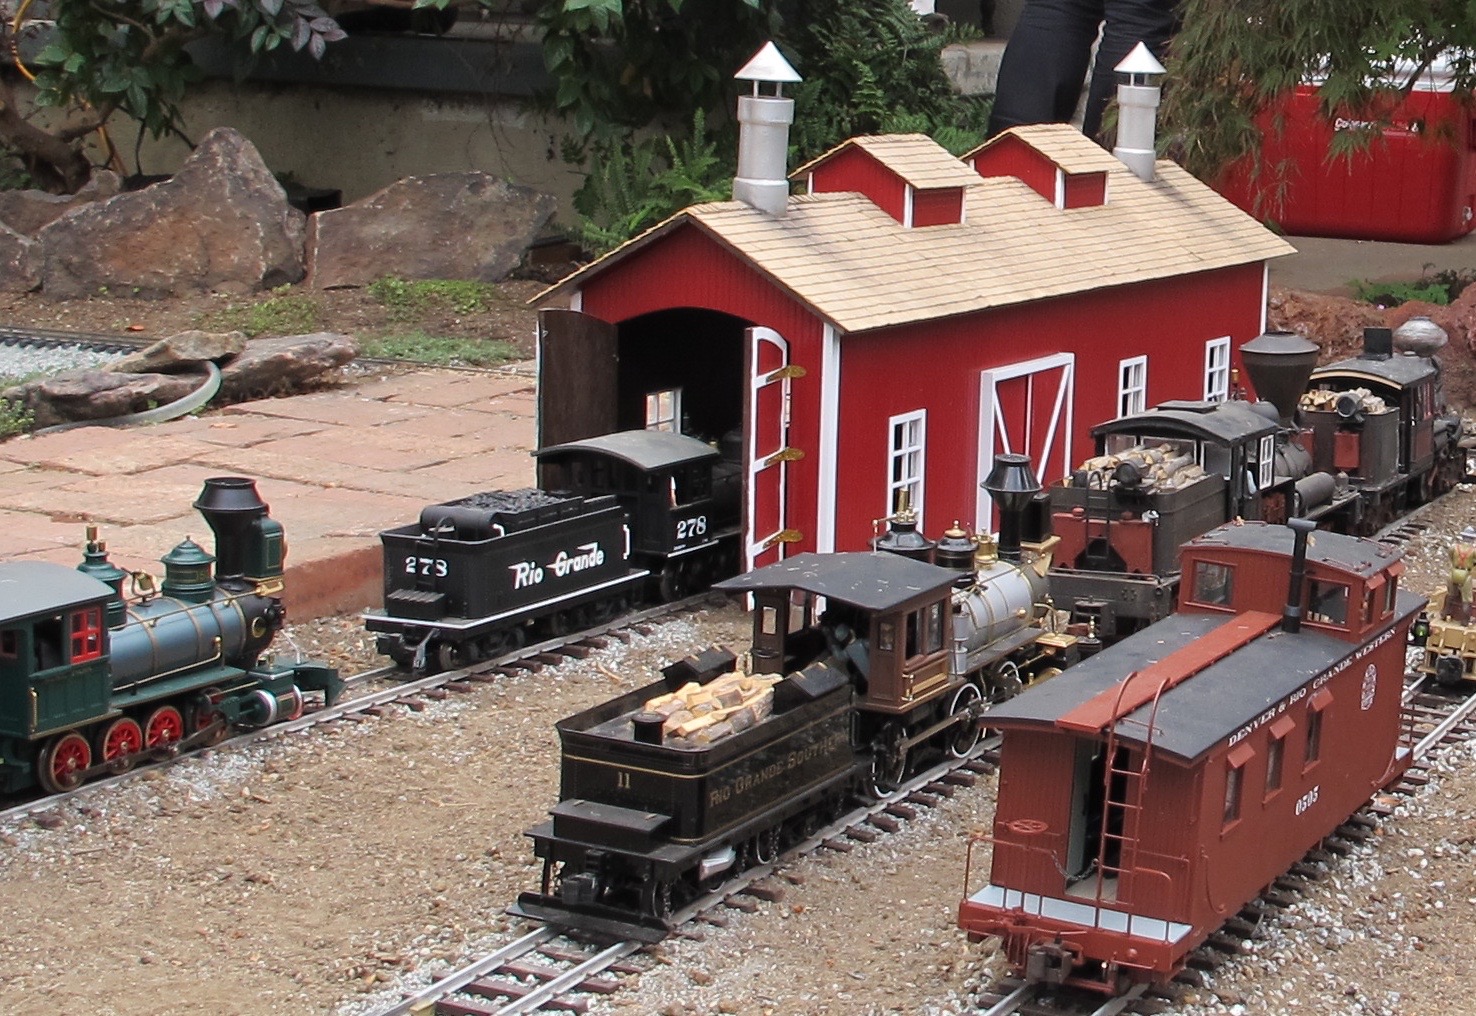
When designing the train yard for the front yard portion of my Fern Creek and Western garden railroad, I realized that I needed an engine repair shop to create a focal point at that location. Since space is limited on our railroad, I knew that a one-stall engine house was what we needed to make a believable engine repair facility that was suited for a small narrow gauge railroad. On a day that we were touring other railroads in our area, my partner and I, who built the FC&W, came across an open house that had a for-sale table. As many fellow garden railroaders know, these tables can be a great place to find really good deals. While looking through what was for sale, I saw a box that contained pieces to build an engine house. This kit was a Lionel #8-82105 Wooden Engine House kit, produced somewhere in the late 80s and early 90s. It was a deal, at only $20! Now came the more involved part—building it.
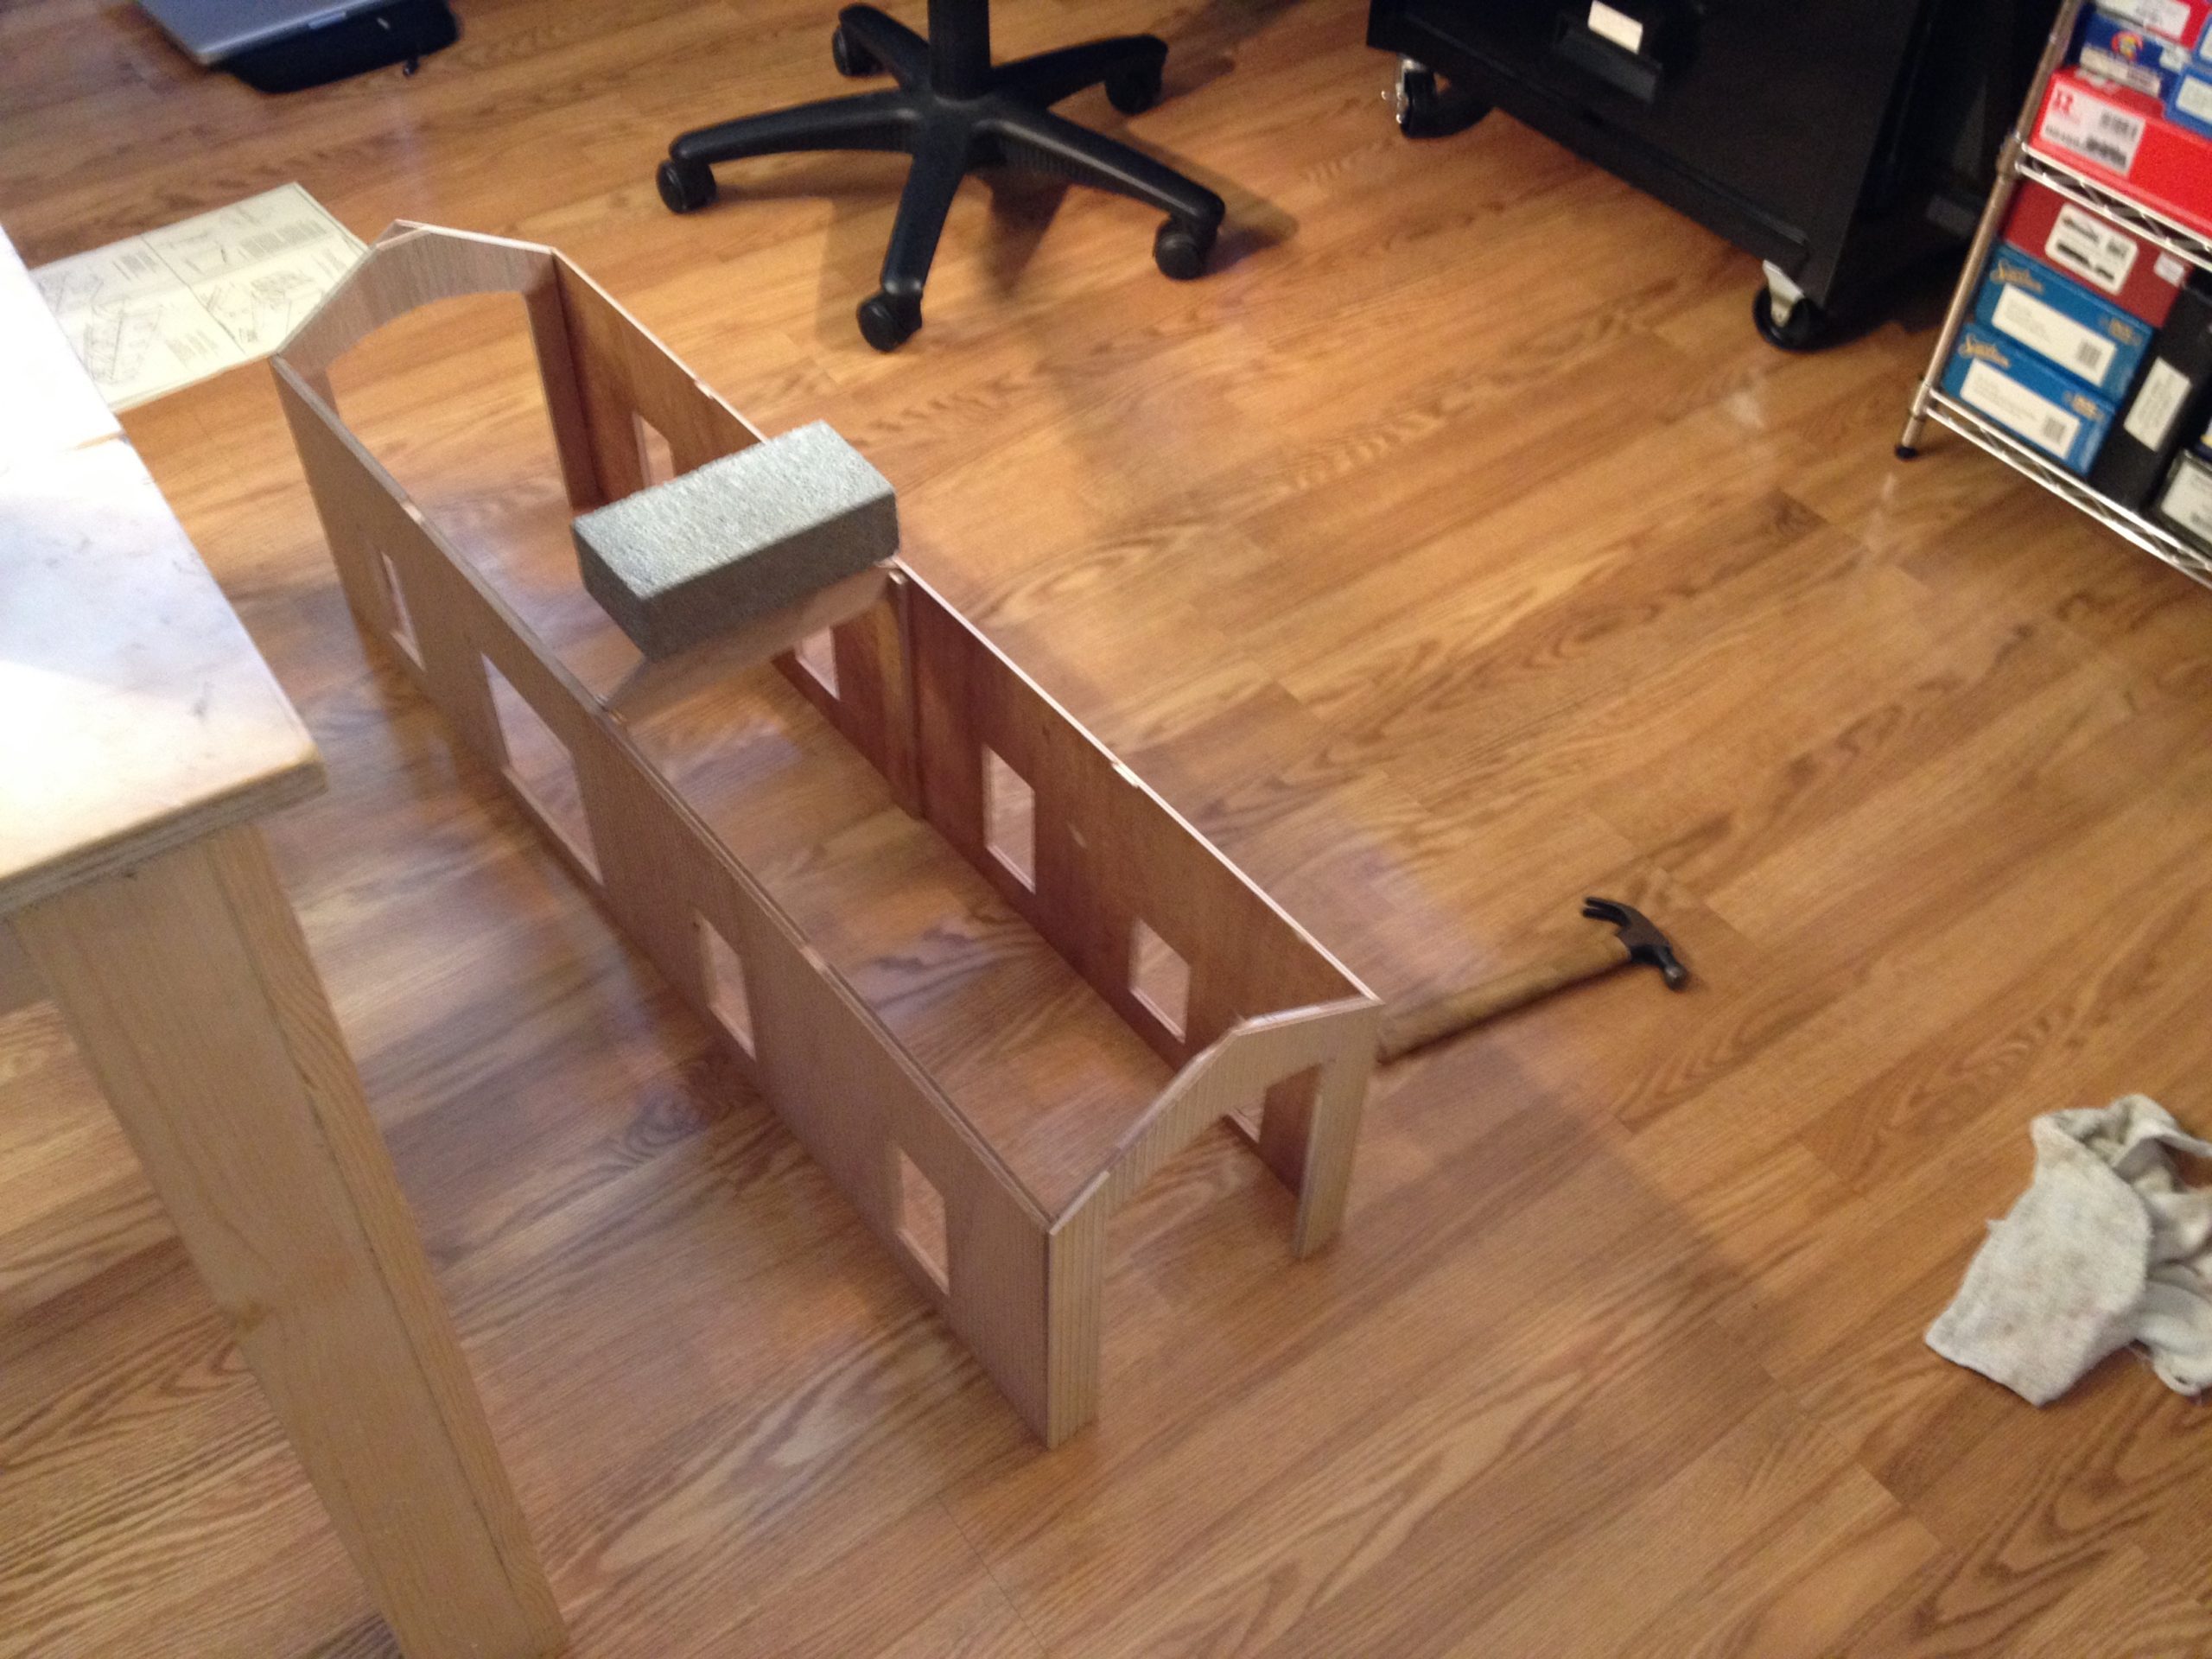
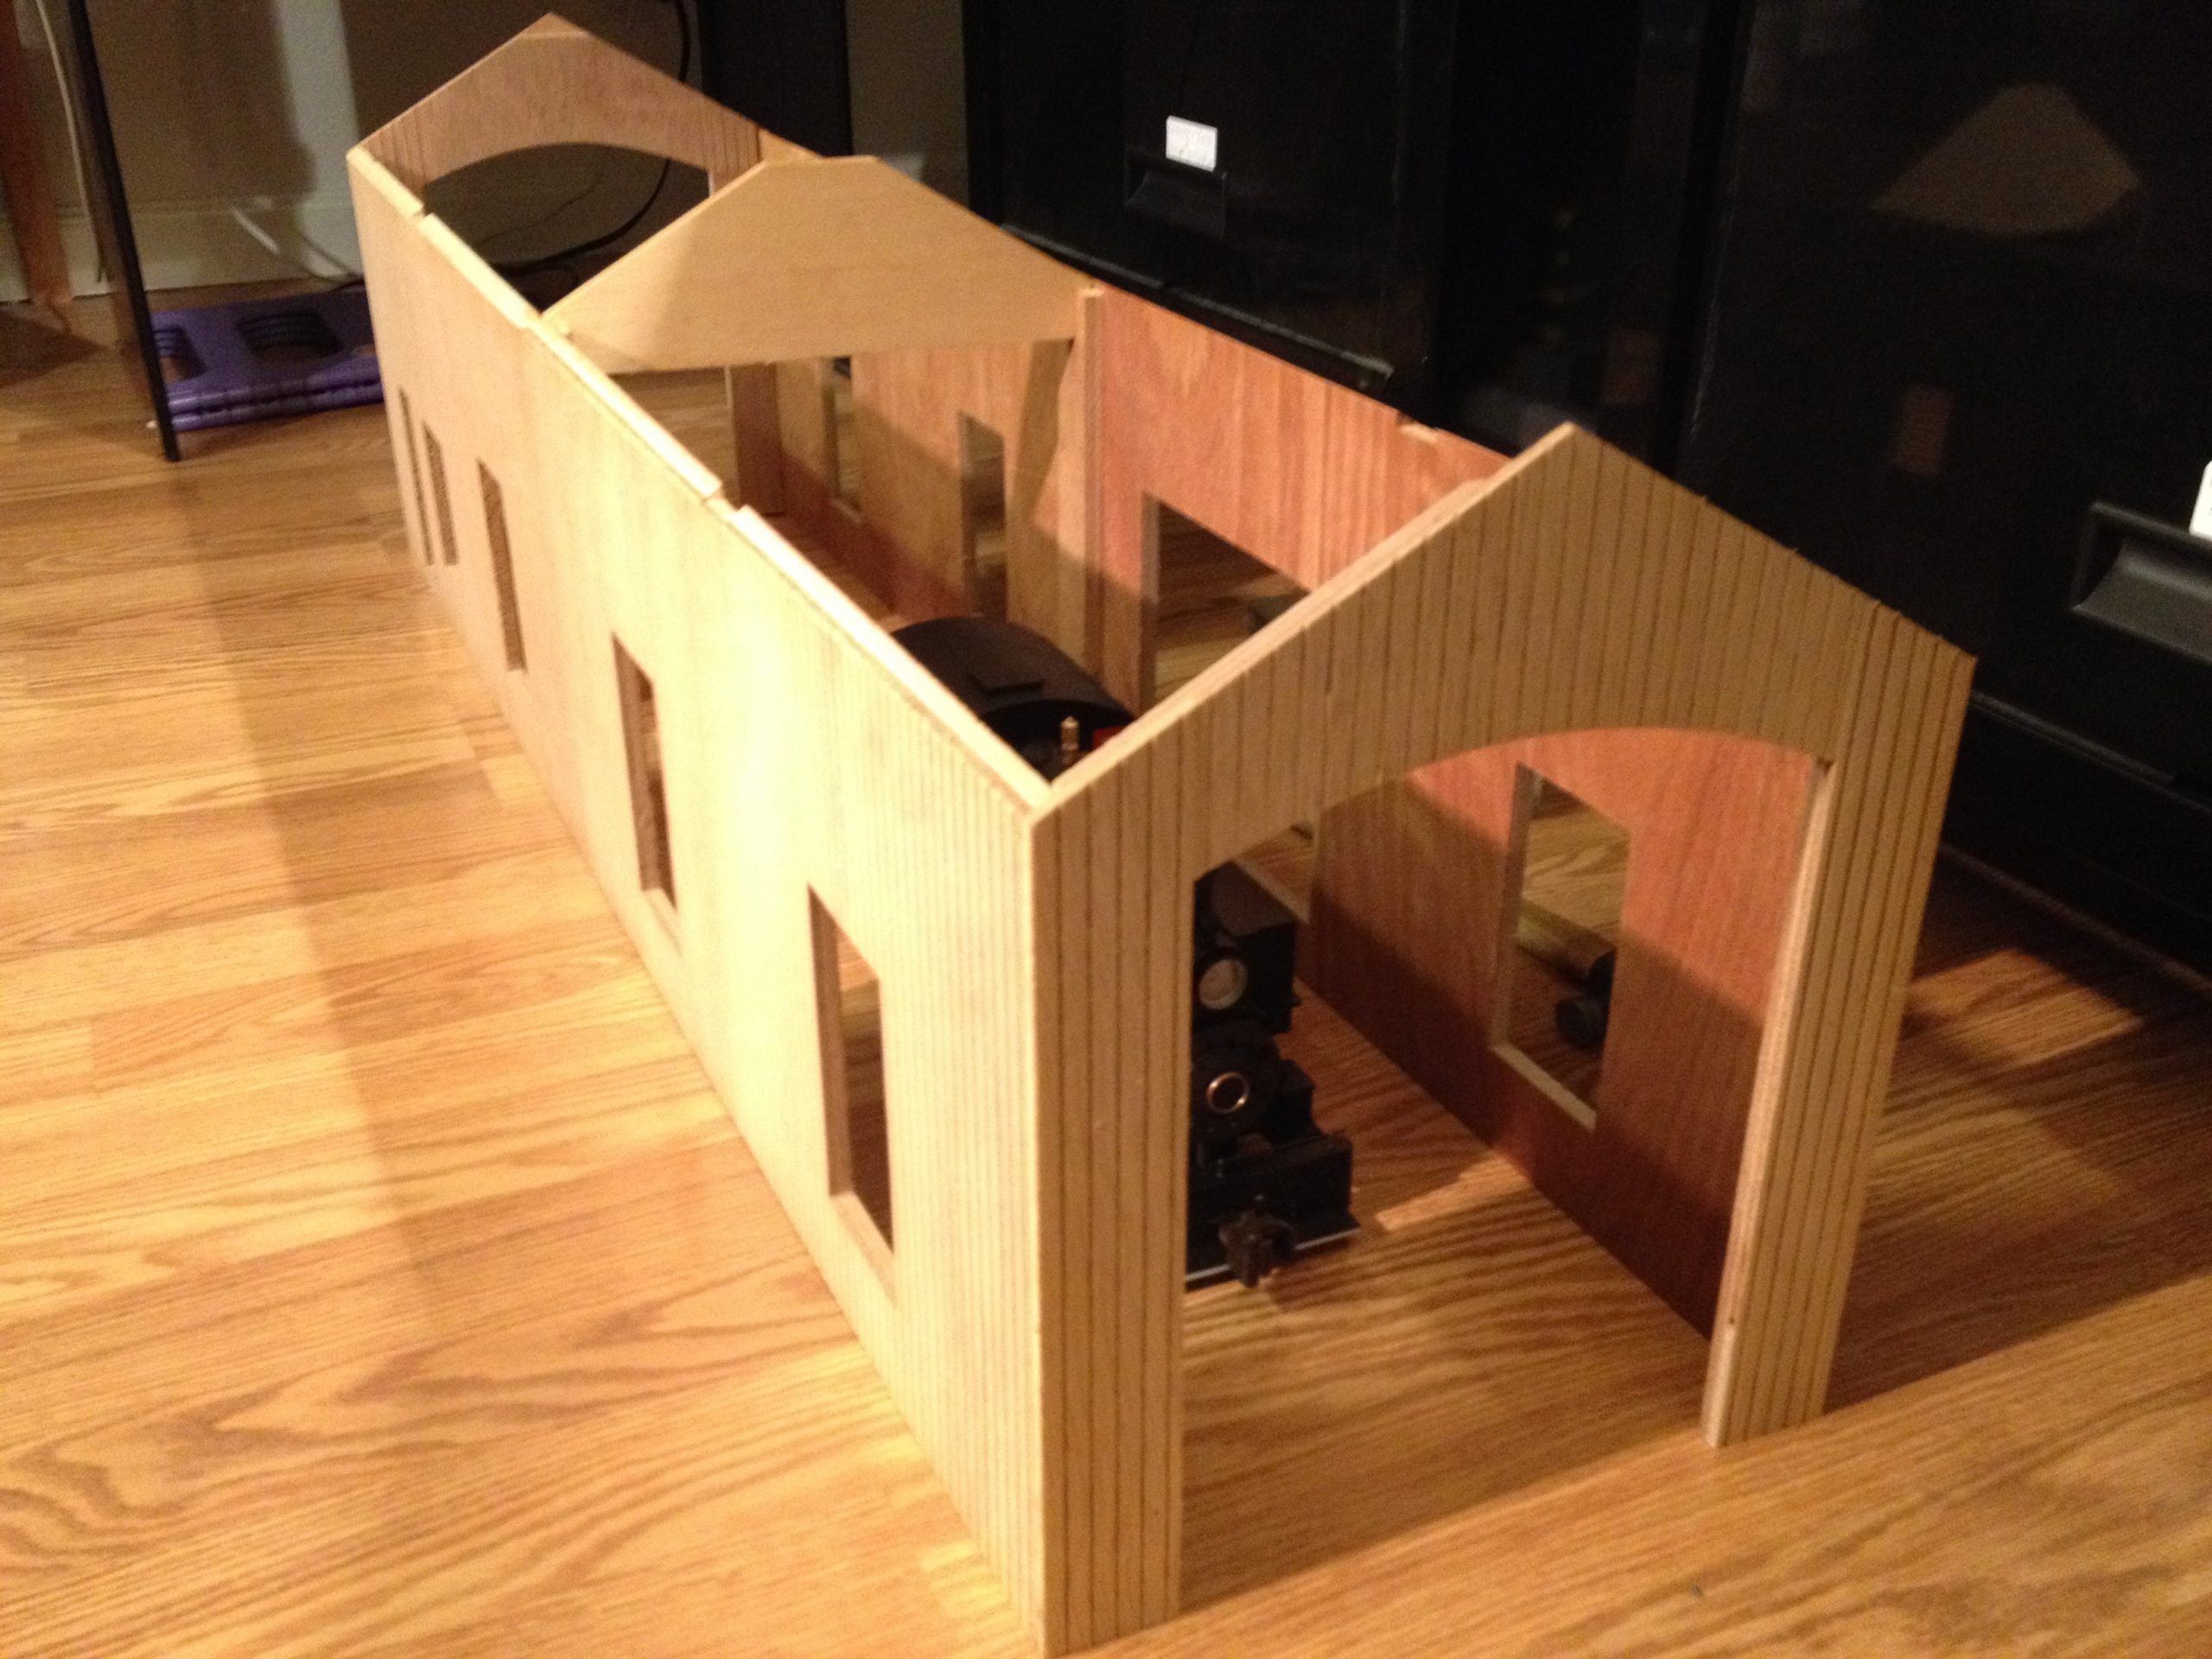
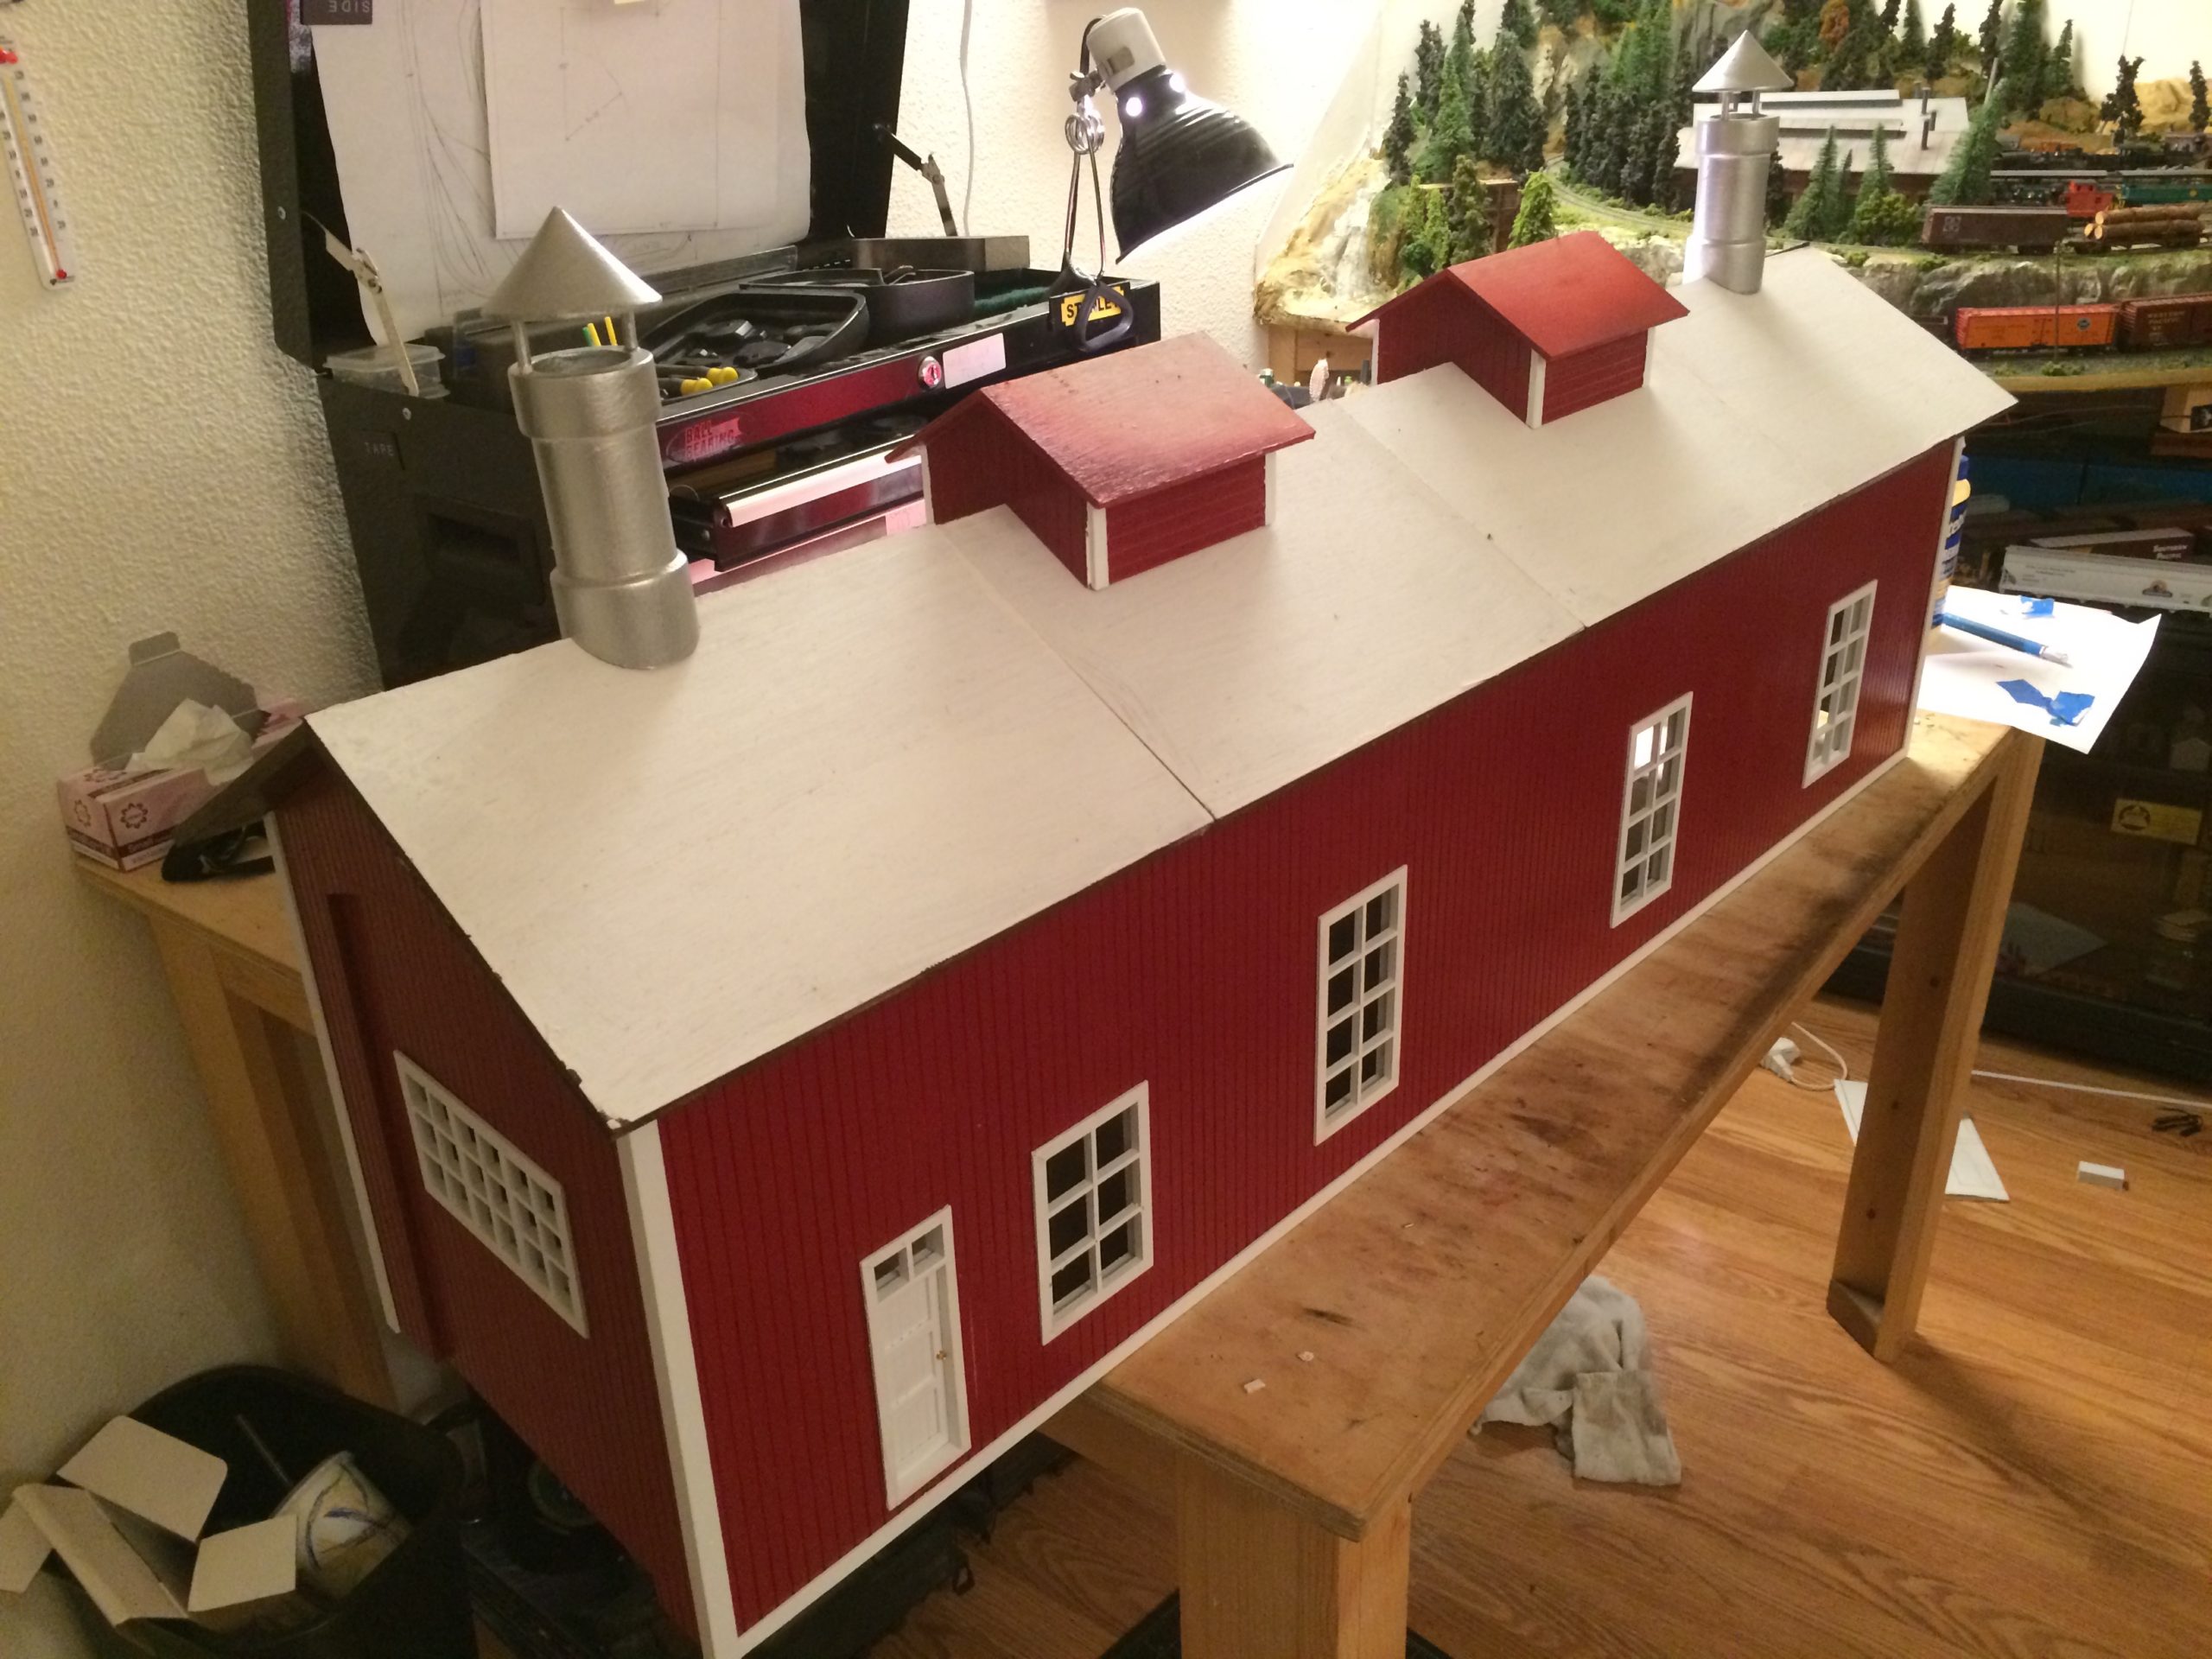
I started by putting the main walls together. The walls are just plywood, with simulated clapboard siding. I put bracing on the inside of all the corners to ensure it was stable when being moved around and when in place on the railway. The bracing was glued to the walls with wood glue and held temporarily with nails while the glue dried. After doing this, I put on the roof substructure so I could set the roof sections on for looks, since we had our first open house coming up at the time. Once this was done, I began painting the building and all of its trim pieces. Everything was painted on all sides with regular house primer to ensure that it would be resistant to termites and rot. Once everything was primed, I sprayed the building and all the trim and window components in their proper colors. I chose Rust-Oleum Colonial Red spray paint for the paneling on the building and the doors and Rust-Oleum White for the trim and the windows. The inside of the building was painted with Rust-Oleum Espresso Brown. I gave them time to dry, then began assembly.
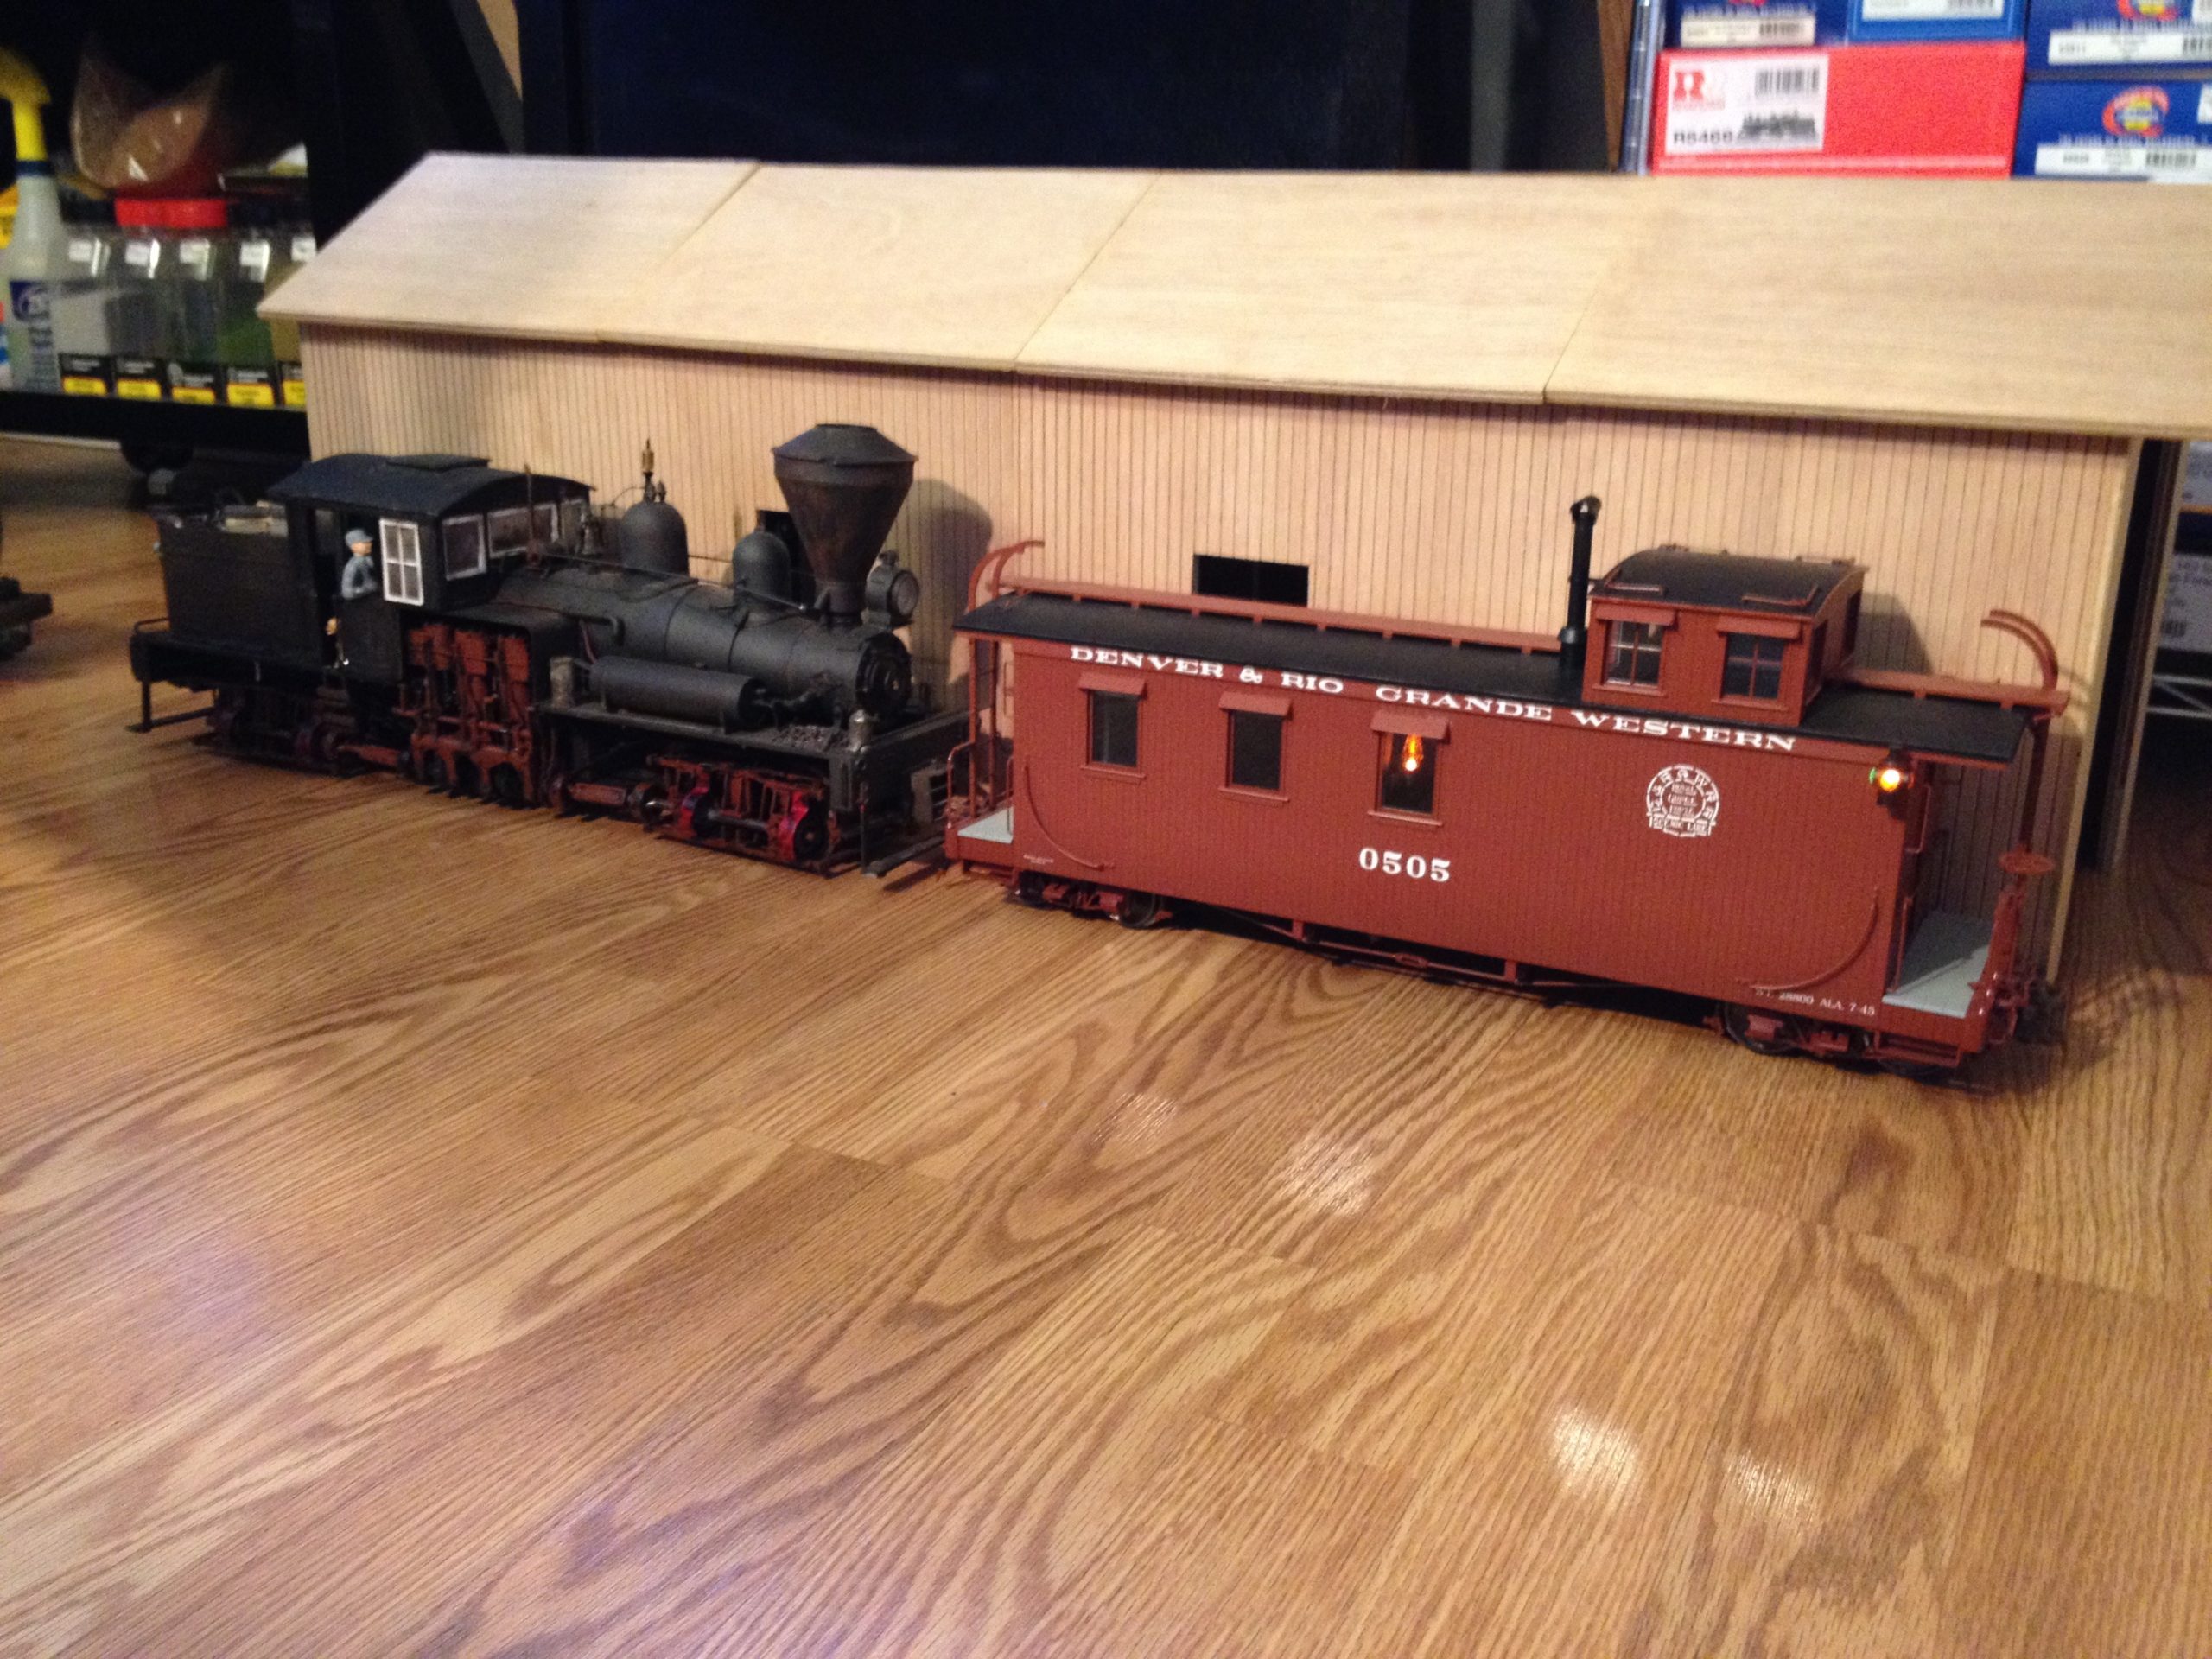
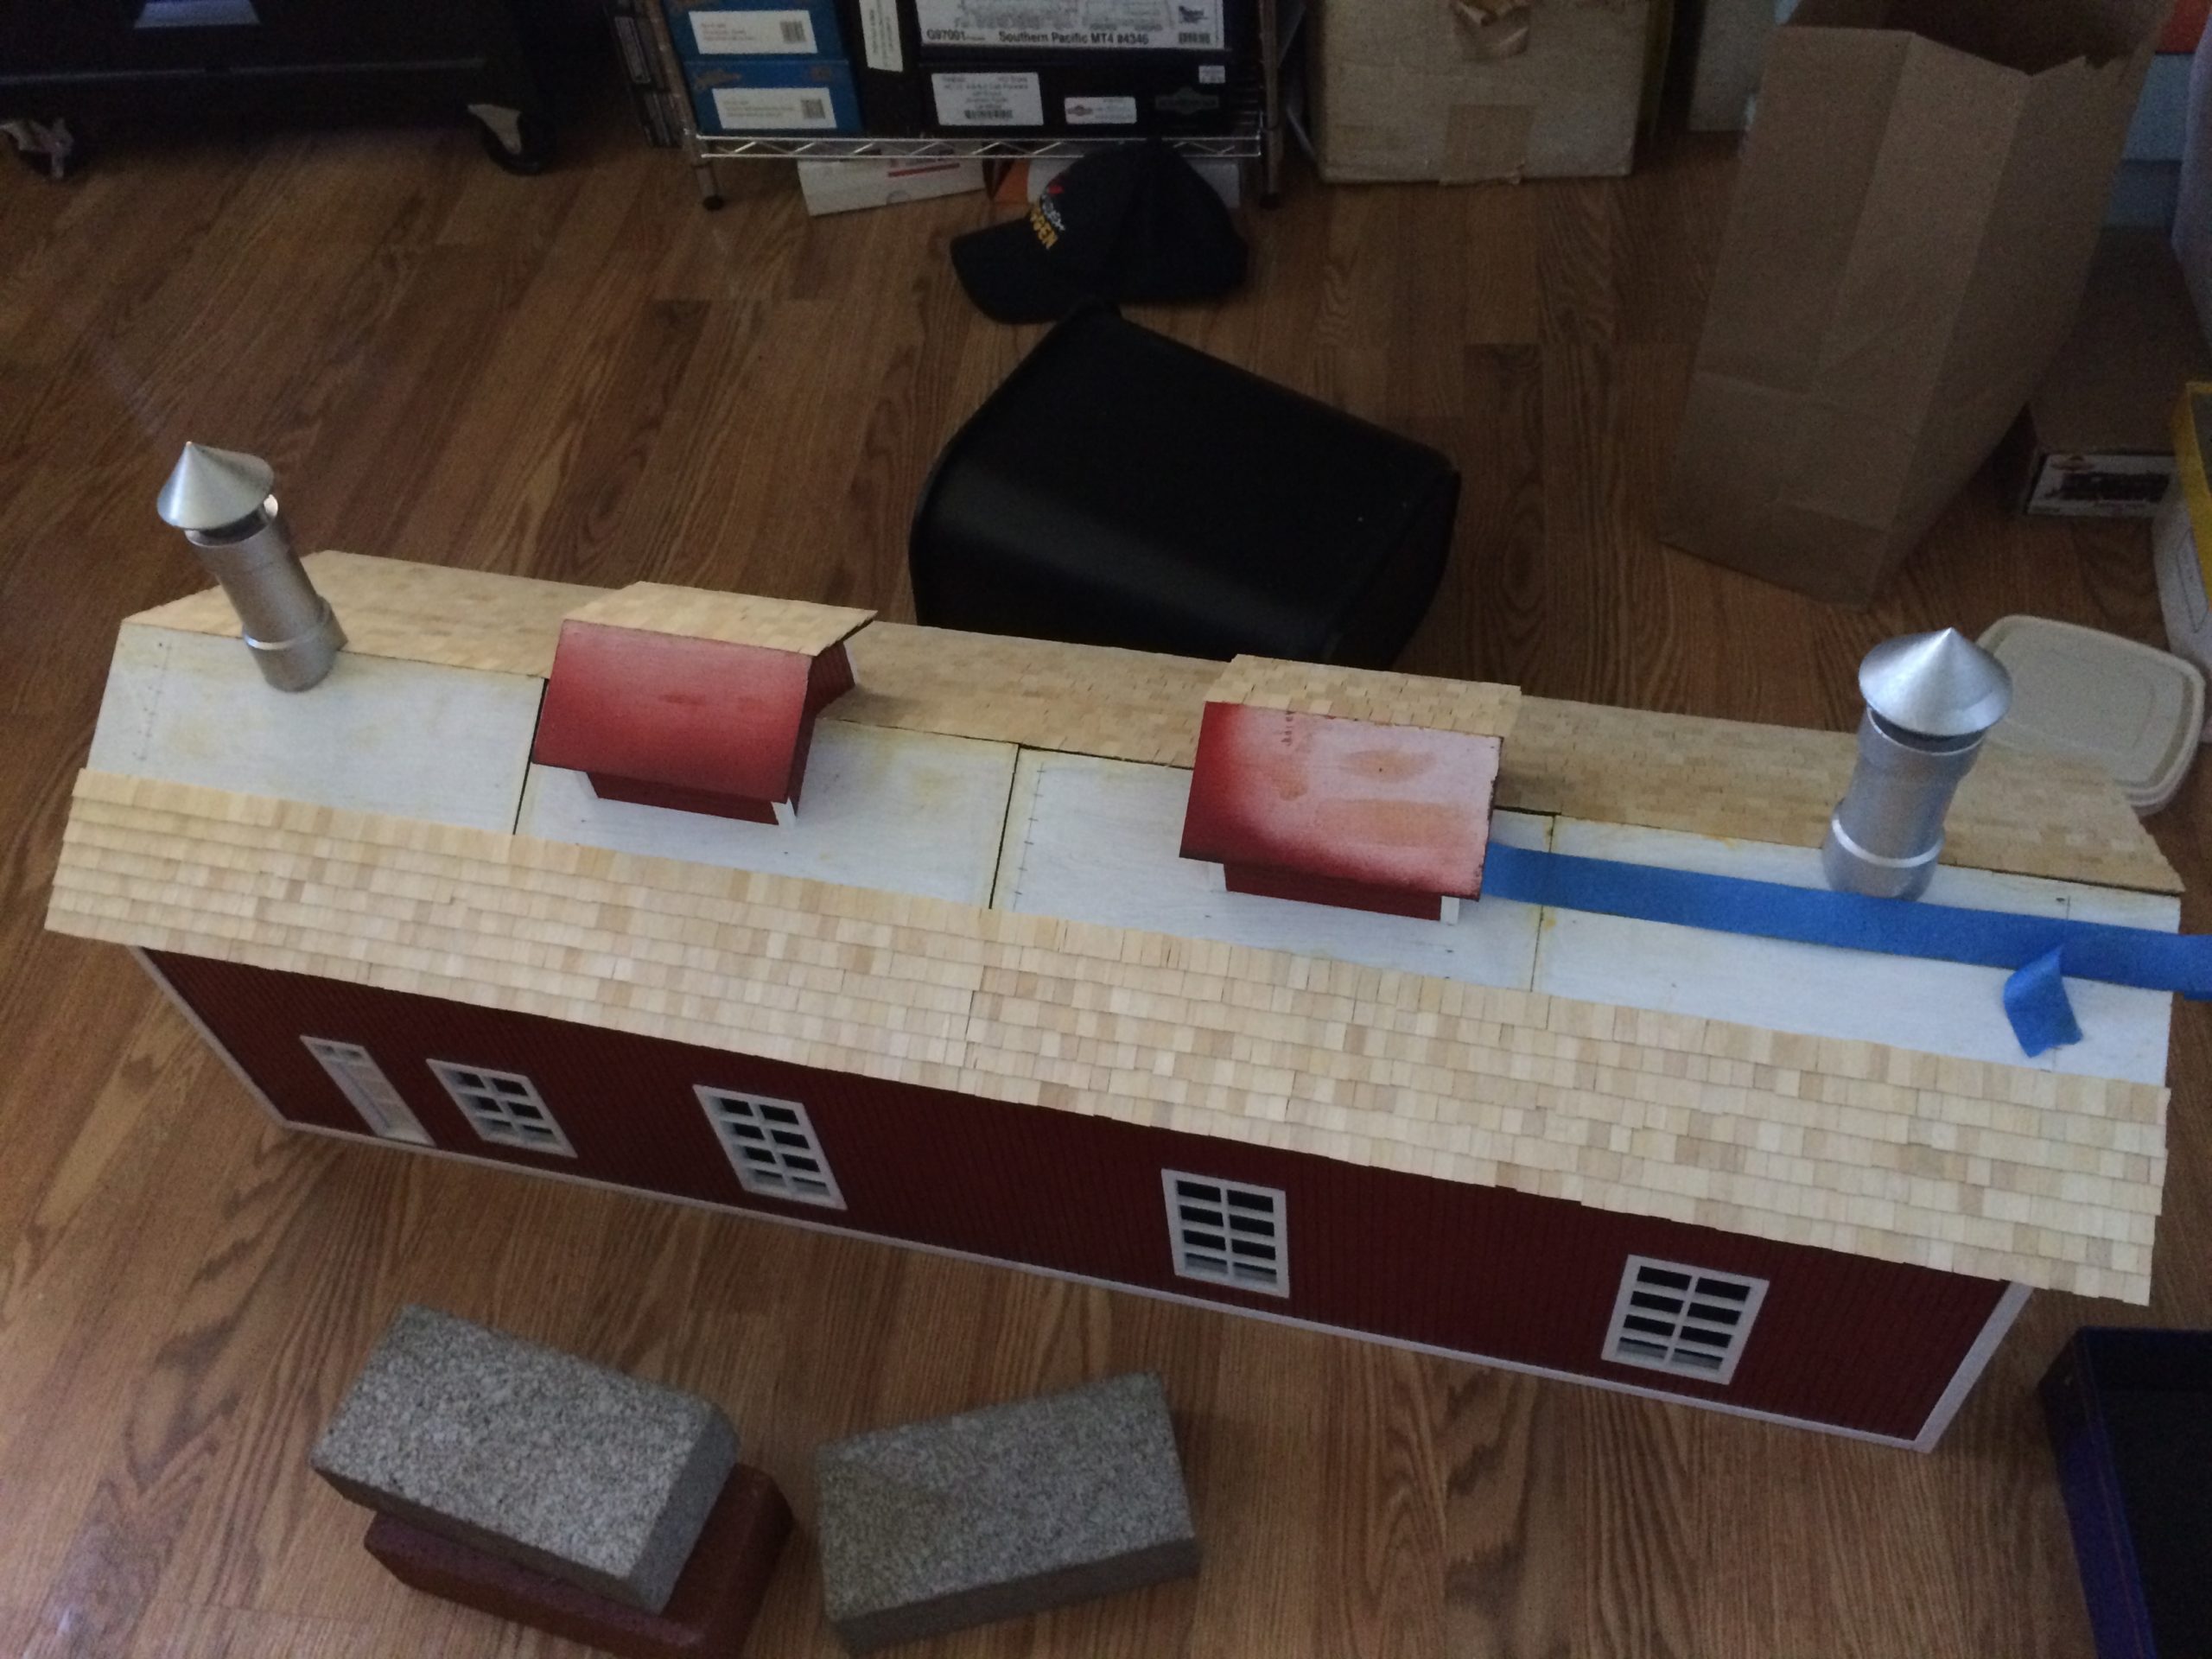
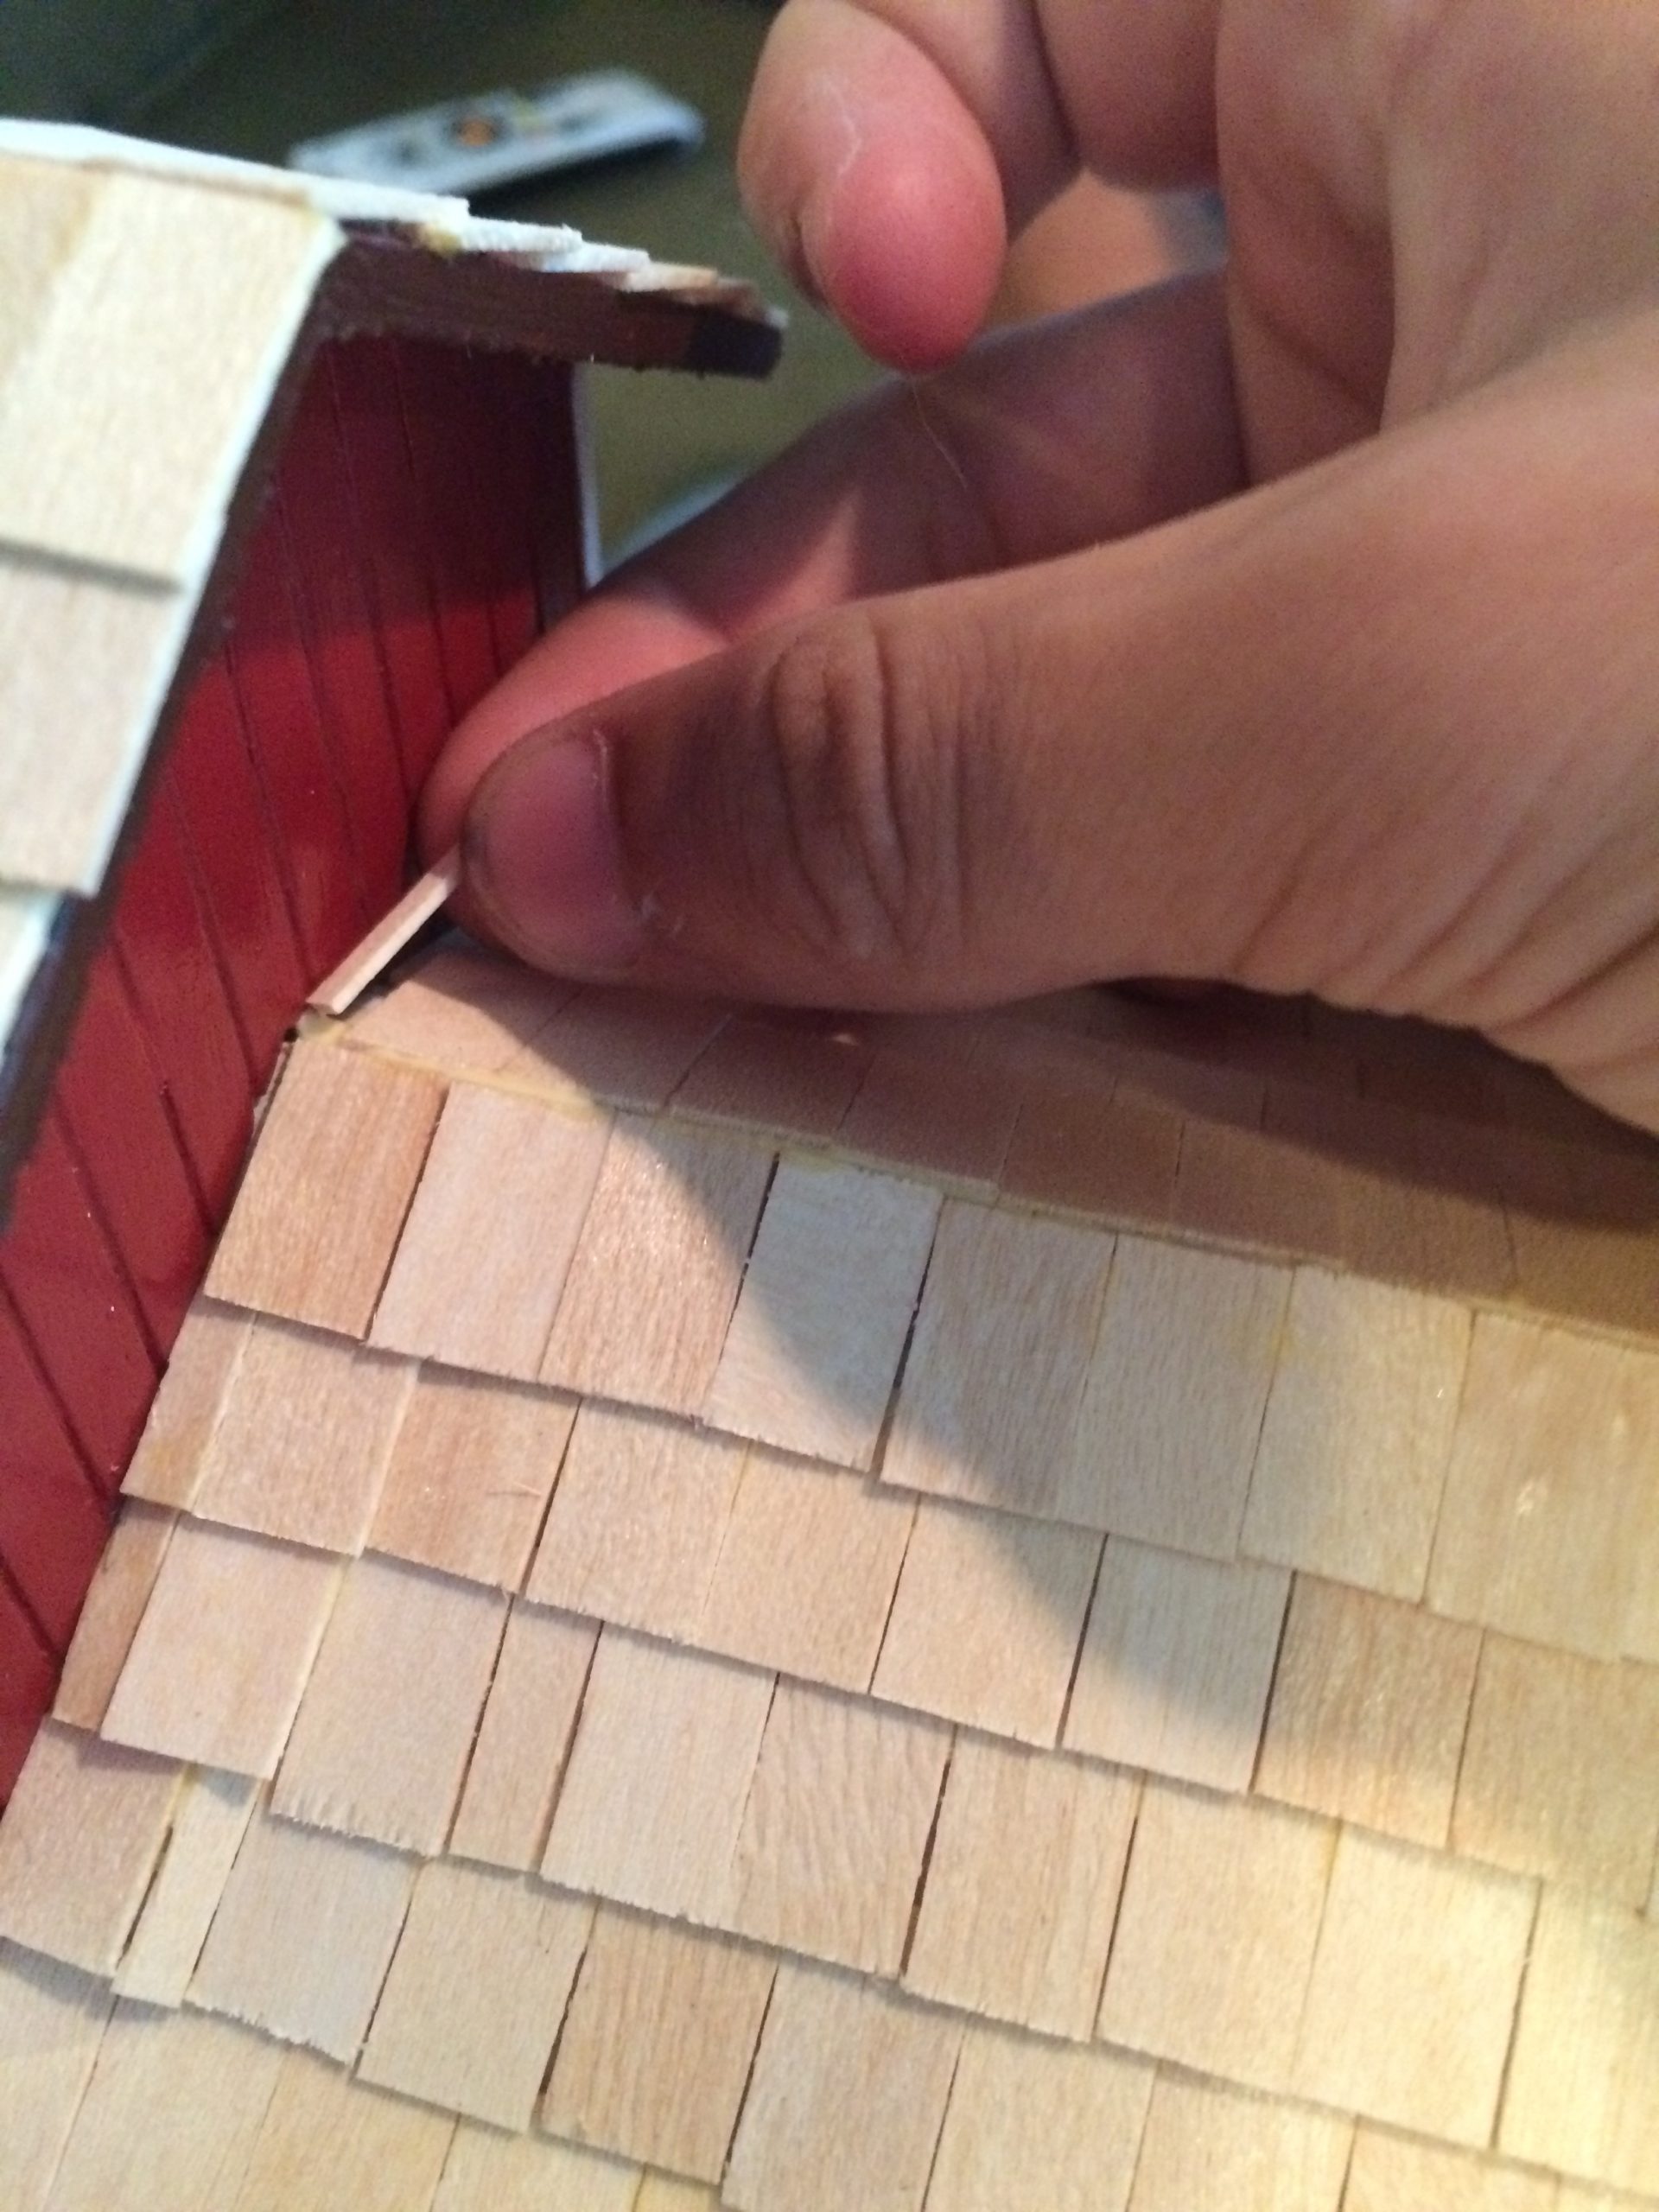
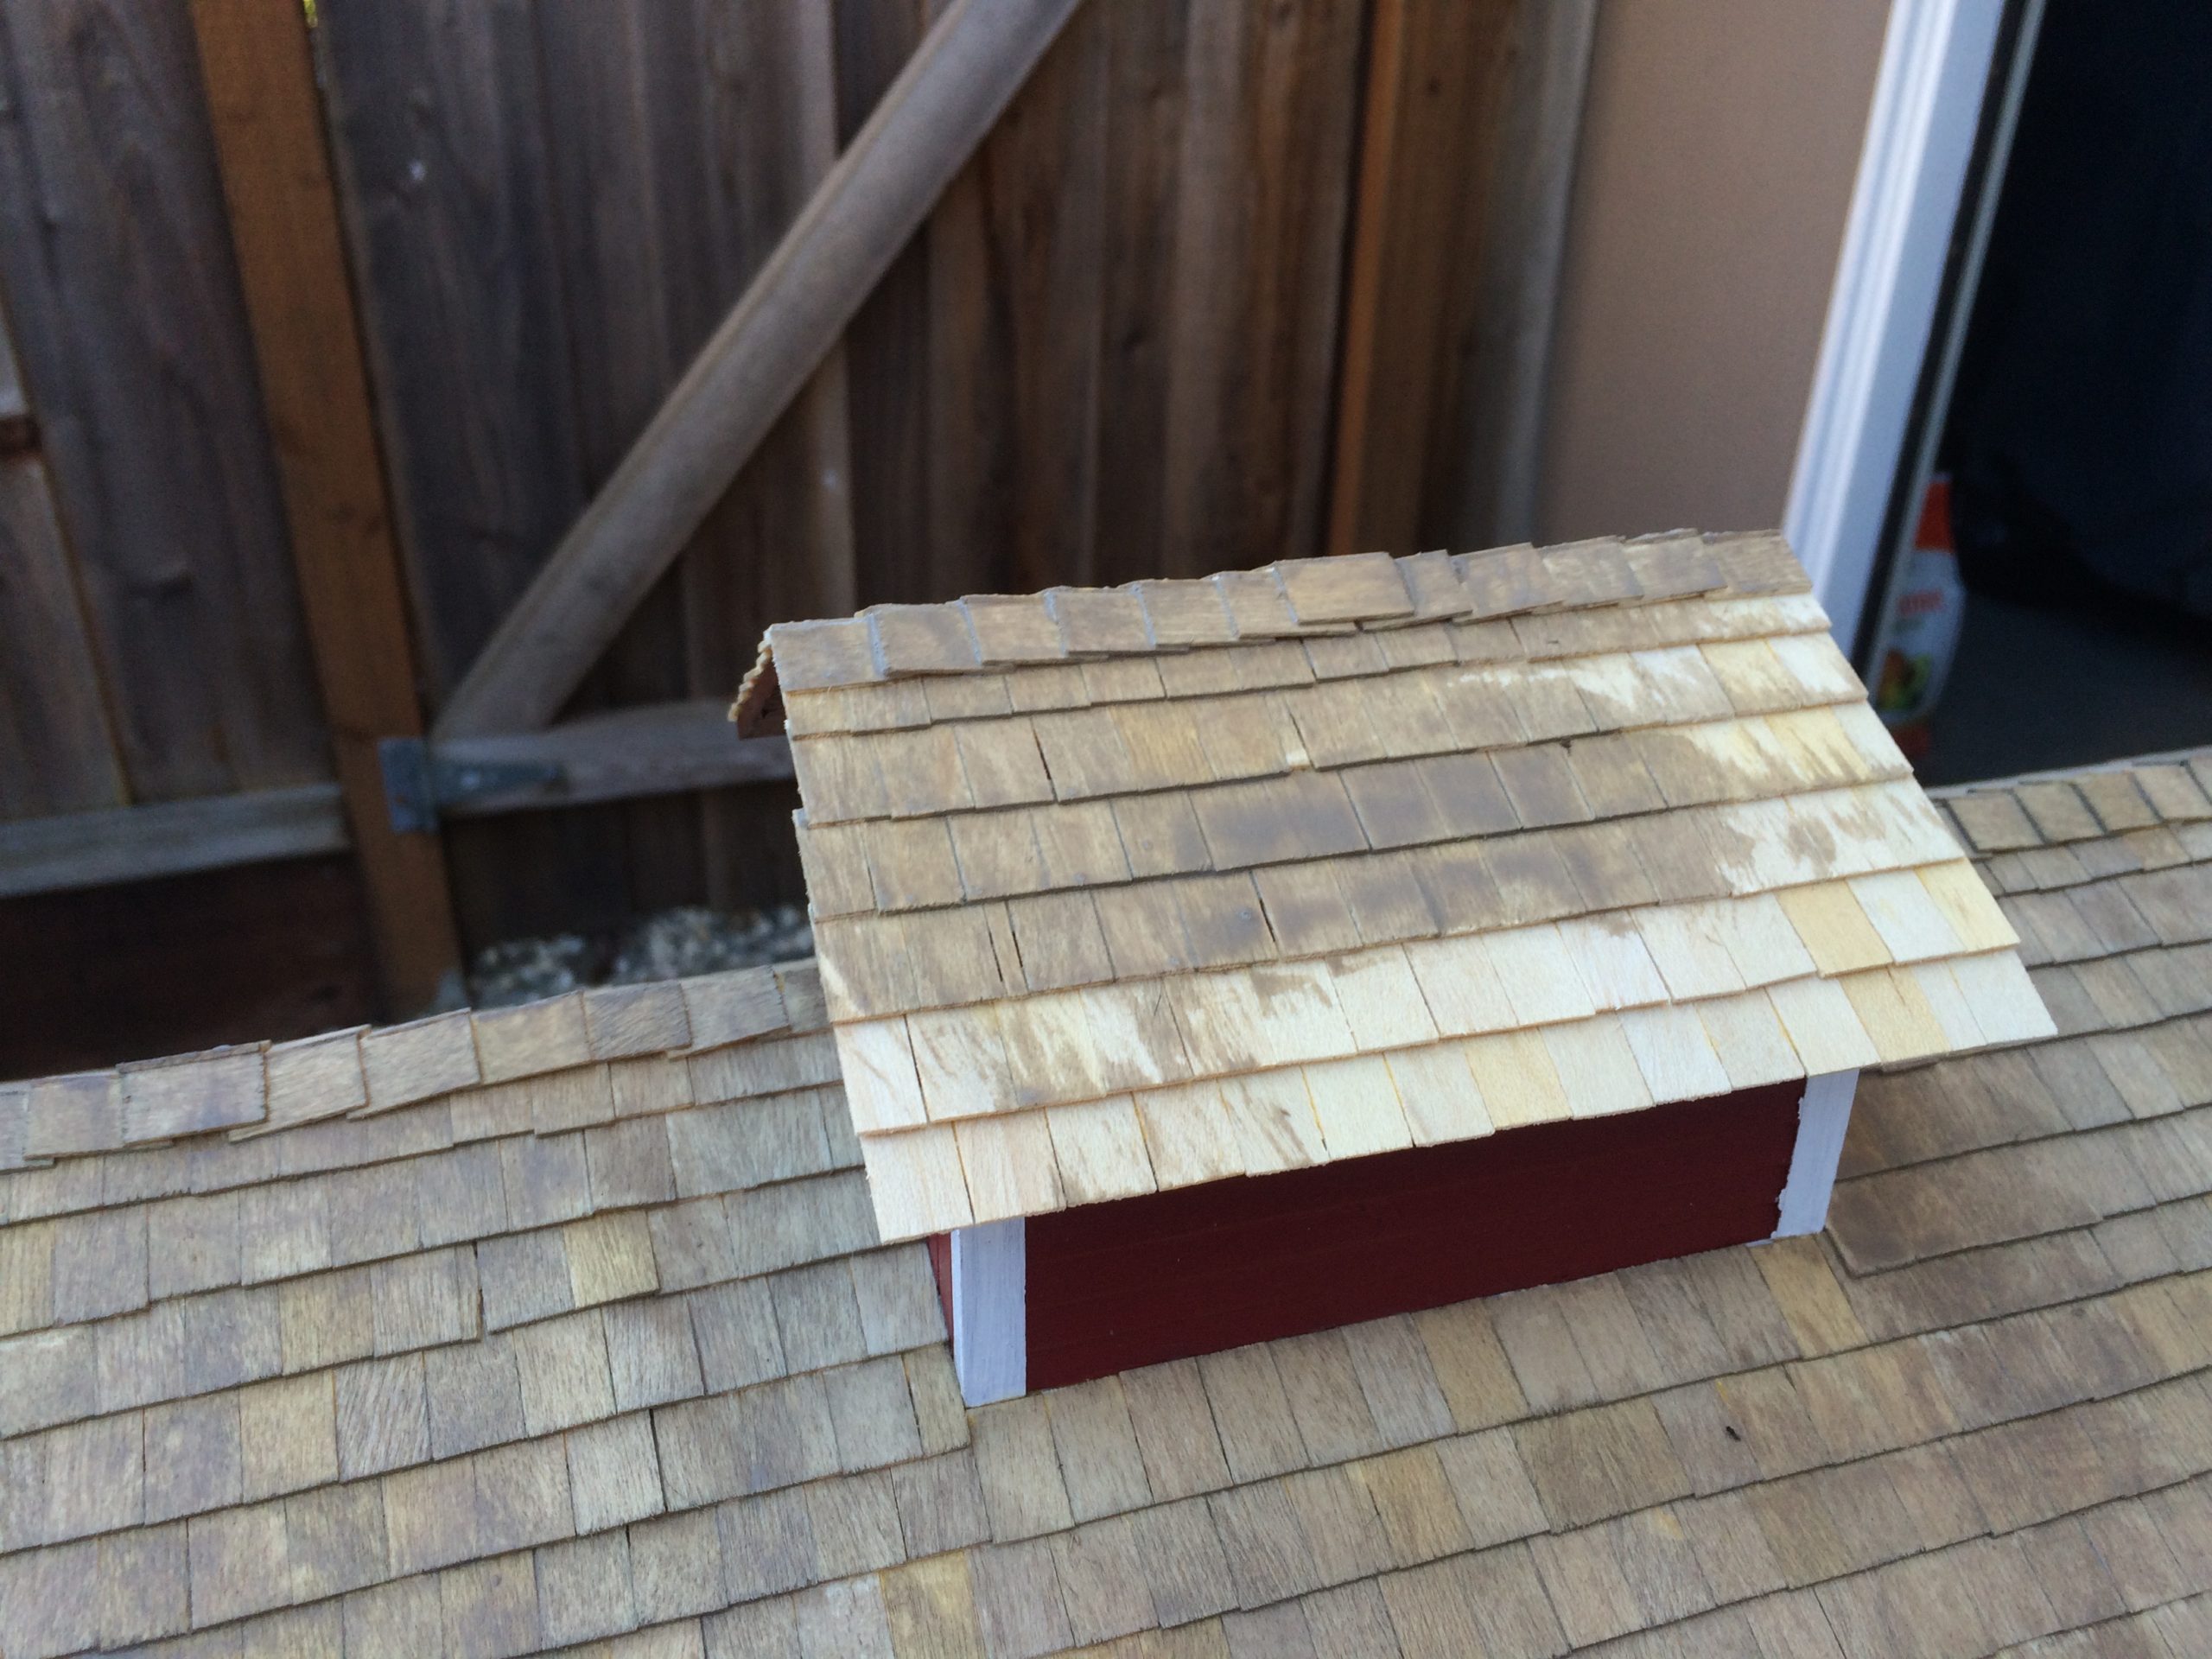
Assembling the rest of the kit was relatively easy. Windows and trim went on nicely. Once they were all glued on it was time for the most tedious part of the project—putting the shingles on the roof. Each shingle on the entire roof was individually applied. Thanks to help from a friend, a week of nights did the trick. It was the most arduous part of this project in my opinion but it also gave it a very detailed look. The roof was stained with a deck stain, which gave it an aged-wood look as well as a protective coat to preserve the shingles. Beware not to put the stain on too thick. If you do, it will become oily so that leaves and debris will stick to it, which will ruin your hard work. After a little bit of weathering, the structure was railroad worthy. This structure has become the centerpiece of the front yard of our railway and it has been one of my favorite projects to have worked on.