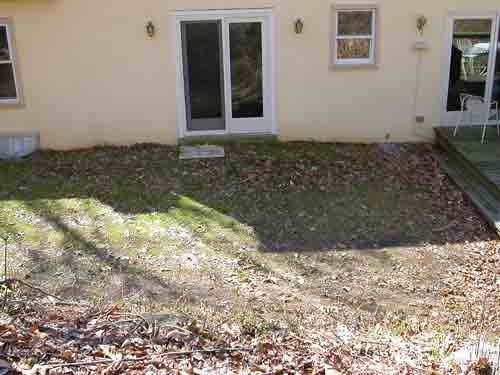
Hardscaping, the subset of landscaping that includes outdoor paths, walls, and other things not made from plant or soil matter, can enhance the setting of many garden railways. Railway sites are also easier to maintain if they are elevated. I recently built a retaining wall for my railroad, the JS&A. The wall defines the railway area and protects the site from foot traffic.

Two of the most popular solutions for retaining-walls are railroad ties or concrete blocks. I believe that blocks are a better choice. Although heavier, they look nicer, can be used to construct taller walls, last longer, and are strong, while still being easy to work with. They come in a variety of colors, styles, sizes, and brands. I used EP Henry brand. Retaining walls should be built before the railroad, if possible, then backfilled with local soil or topsoil.
Getting started
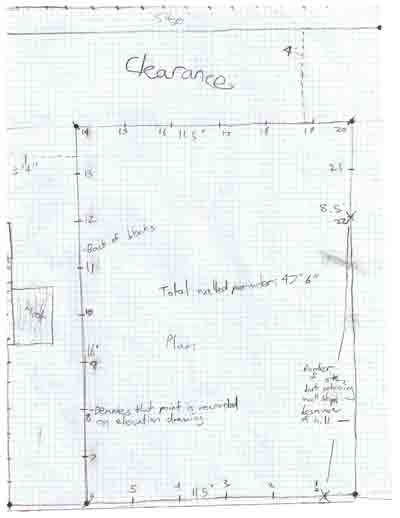
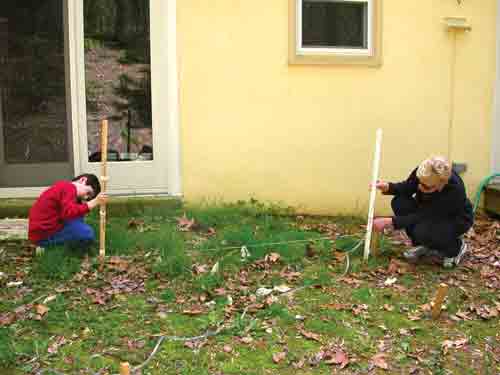
The first step in building a retaining wall is to mark out the proposed area with stakes and string. Place the stakes at the back edge of the space you want enclosed, as the blocks will be placed in front of them. Keep in mind that the retaining wall blocks should be stepped back about a half inch per course (row). Sketch this informaton on a piece of graph paper (see illustration above). Then, using a water level (see August 2003 GR, pg. 85), record the elevations of points on the string line, measured every three feet or so. Mark these elevations on the graph paper, then “connect the dots.”
Now it is time to choose your style of block. EP Henry makes several varieties, as follows.
• Nursery stone, English garden wall, and Coventry garden wall are good for small to medium applications (up to 3-4′ high, depending on how you construct the footing of the wall). All come in the basic red, purple, and tan colors.
• Coventry wall (not to be confused with Coventry garden wall) can be used for taller walls (to 20′ high). It comes in many different-sized blocks, allowing you to create patterns within the wall surface. It also comes in a “double sided” variety.
• Stone wall and terrace wall are useful for larger applications. The blocks are bigger and heavier, so they may not look good in smaller applications.
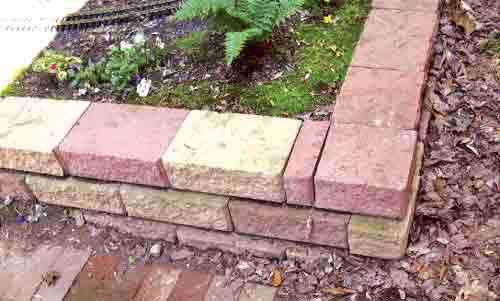
I chose English garden wall for my small retaining wall. It looks more formal than other types, as its edges are straighter and less artfully chipped.
Once you have selected a block, find out how many you will need by drawing a line on your elevation drawing to match the height of the desired wall. Scale down the dimensions of your chosen blocks until they match the scale of the drawing. Draw in courses of blocks under the desired wall height until they reach below ground level. (The first course should be buried 2-4″ for small blocks, and 4-7″ for the larger types.) Count the blocks, adding several extra for good measure. If this is too confusing, EP Henry has installation guides on its web site, several of which include a “wall calculator” for estimating quantities.
You can arrange for your hardscaping center to deliver the blocks, unless you are willing to make several trips in a pickup truck.
Constructing the wall
Here is a summary of how to build a retaining wall. Consult the manufacturer’s literature for more detailed guidelines.
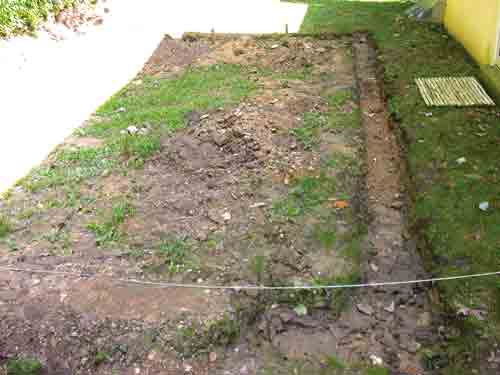
First, dig the trench. A rule of thumb is that in addition to the minimum depth that needs to be buried, dig down one extra inch for every eight inches of exposed wall height. For example, if you want the wall to be 25 inches high at a given point, you should dig the trench three inches deeper than the minimum. If the soil at your site is muddy or soggy, or if the wall is high or located at the bottom of a hill, you will need to dig the trench even deeper to allow for extra bedding material. Make the trench slightly wider than the block, with sides as vertical as possible. Keep the bottom level, and thoroughly tamp it with a hand tamper.
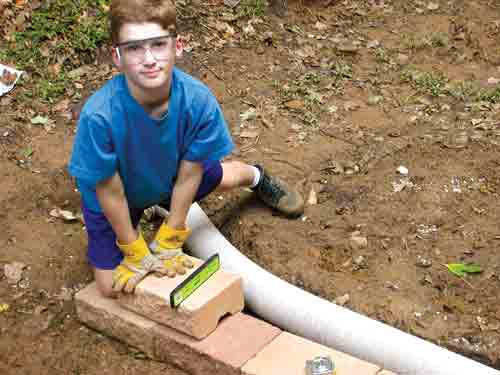
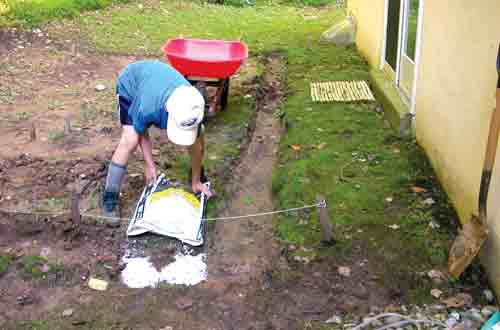
Next, line the trench with EP Henry’s “2A modified” or a similar base stone. Tamp it down and try to keep it as flat as possible. Add a thin layer of bedding sand and tamp well. Put a block on the sand, making sure its back is lined up with the string you strung up earlier. (A word of caution: the smallest blocks weigh about 30 lbs., and go up to over 70 lbs. each. Be careful when lifting!) Check it with a level. The base course is never perfect at first, so if the level is a little off, hit the block with a rubber mallet to correct it. If it’s really off, lift the block and take some sand out from under the high side. Do this for the entire base course. Be sure that the tops of adjacent blocks are level with each other and fit snugly together.
Adding subsequent courses is much easier. Remember to step each course back by a half inch. Some blocks have lips on the back that ensure the proper setback for each course. Other blocks may need to be secured with a few dabs of high-strength flexible concrete adhesive. Still others have special pins to lock one course to another. When the wall is at its final height, some blocks may need cap units to cover holes or spaces.
It is possible to make corners and curves with these blocks. Some styles have special tapered units, used for creating curved sections. Some have corner units, which have the rough rockface on two sides. Those that don’t, however, will need to be cut for sharp curves and corners. You can do this yourself with a hammer and brick chisel (although I’ve been unsuccessful at my attempts to do so) or use a miter saw. I took my blocks to a tool-rental store, which cut them for a small fee.
When the wall is done, use native soil or topsoil to backfill it. Don’t fill it up right to the top of the wall; leave at least a half inch of space. The backfill will need to be tamped before you put any track down, to help keep the track stable later. If you desire, EP Henry also makes lighting units for their walls, which can add a lot of drama to a night scene. However, make sure your wiring is rated for outdoor use.
Drainage, corners, curves and more
If your retaining wall is at the bottom of a large hill, or is above three or four feet tall, it may be necessary to use a soil-stabilizing fabric called Geogrid. This is held between two courses of blocks, and then spread out behind the wall, to be eventually covered with backfill.
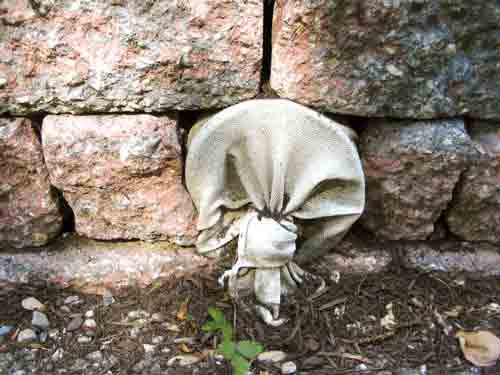
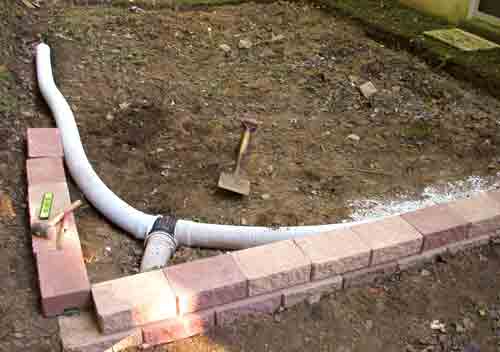
Unless you build your wall with mortar or tons of adhesive, water will naturally seep through the wall face to relieve hydrostatic pressure. Even so, you may want to bury a corrugated drain pipe immediately behind the wall. Cover the pipe in a drain sock-a fabric that prevents dirt from getting in through the drain holes. The end of the pipe either goes under the wall to lower ground, or simply pokes out into the wall face. Tie the end of the sock in a knot to discourage furry guests. When you bury the pipe, make sure it’s angled to promote water flow.
In addition to building raised railway area, these blocks can be used for other landscaping projects. I built a larger curved wall along the side of my driveway, and another to define a flower bed. The possibilities are only limited by your imagination.
I hope you decide to use these blocks to enrich your railroad or garden. Happy hardscaping!