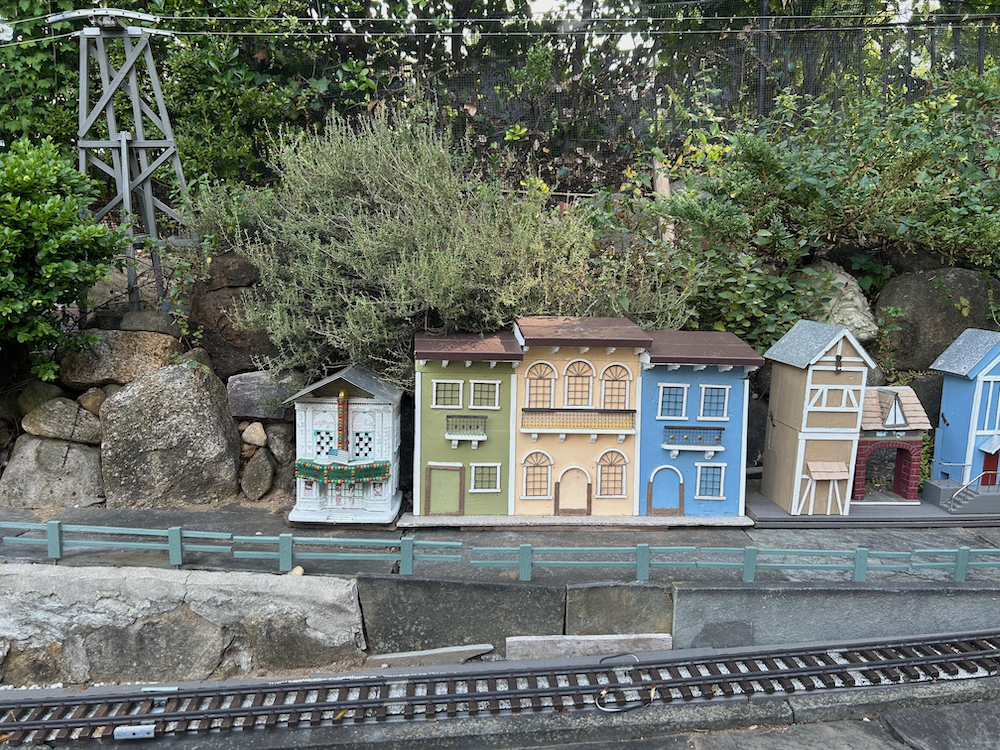
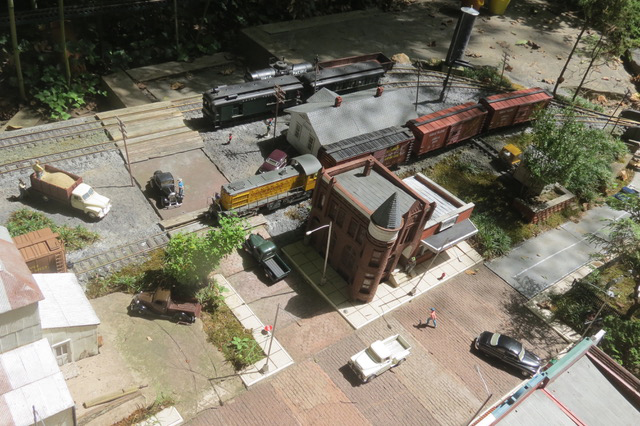
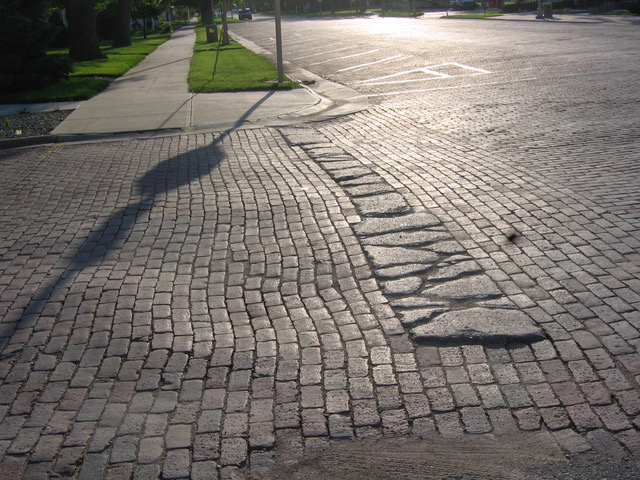
Model paved brick streets: As on most of our garden railways, trains run by a model town. Mine is based on a small midwestern town I visited every summer as a boy. I hung out on Main Street lined with shops in an array of Victorian buildings with a brick paved street. In those days, when farmers came to town to shop, the sound of their tires on the brick and the rattle of fenders and bumpers became part of my memory. I couldn’t model the sound they made but I wanted to pay homage to the brick paving.
I wanted a 12” wide brick street. I suspected somebody might make miniature brick but I wasn’t sure it would be accurate in scale so I decided to make my own.
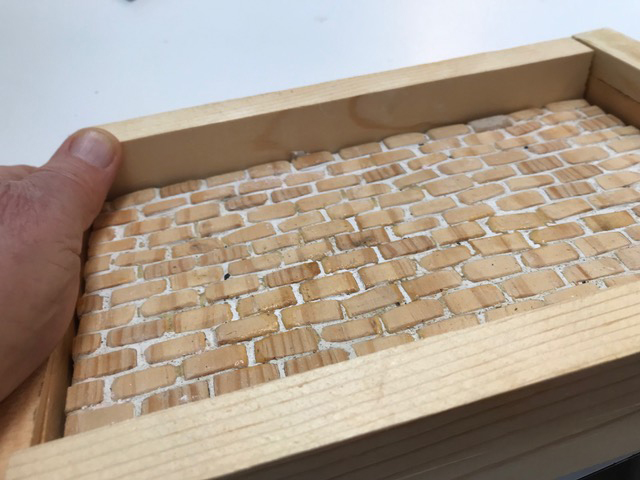
First, I made a 6” by 12” model of a segment of the street. I made the mold out of hundreds of uniform pieces of bass wood that I cut into brick shapes roughly ½” by ¼” and ¼.” I varied the shapes of the bricks a little, and rounded off the edges on my table saw to resemble smoothed and worn brick. I glued each piece down in rows on a piece of pressure treated plywood, then pressed plaster inbetween each piece. I wiped away the surplus to give each brick a separation from its neighbor. This became my master model that could replicate in concrete. Several of these castings could be set together to create my brick street.
I built a frame that fit around tightly around the mold, about an inch taller so any cast segments would be strong. I rubbed the brick surface with a light coating of petroleum jelly, so the mold and castings would not stick together and this prevent leaks when casting. I mixed plaster of Paris and poured it into the mold which became the reverse mold, for the concrete segments.
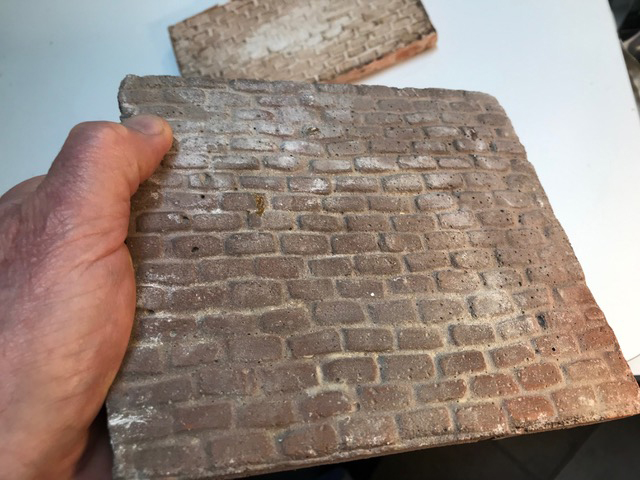
The brick segments were made using a few cups of quick-setting concrete, mixed with a uniform amount a terra cotta coloring and enough water to allow the mix to fill in the mold nicely. After spreading more petroleum jelly on the plaster cast, I poured the concrete mixture into the mold. I let this set for an hour or so and then unmolded it, letting the brick casting firm up in the sun. I sprinkled the piece with water now and then as it hardened. I repeated this process and finally got a dozen fairly accurate renditions of the street texture. Each segment abutted closely to its neighbor on a compacted blue stone base. It looked like a brick street!
Visitors to my layout never think about how I made Main Street. It is too tedious an exercise to explain or for them to understand. But I’m happy with the results, and may be I’m the only one who can hear those rattling fenders on my model cars.
Learn more about John Vorhes!
See more of his railroad in a past issue of Garden Railways.