


Do you need to camouflage full-size items near your railway? Even though the 12 x 43 feet space in my yard is designated for my garden railway, I must share it with a couple of essential items that are full size, namely the composting bin and a storage bin.
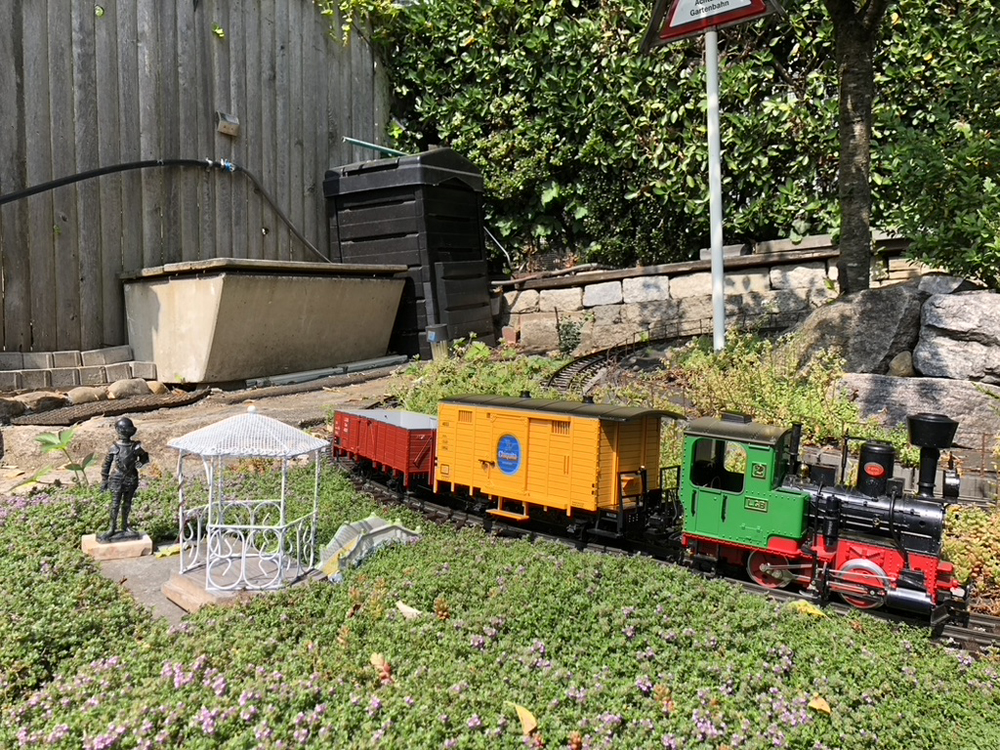
Every time I run my trains I cringe when the trains pass by these two bins, since my imaginary view of my perfect large scale world comes tumbling down by the presence of these two behemoths. I’ve long questioned of what to do with them.
Then, while I was reading something about camouflaging, the proverbial light bulb went on in my head. That’s it; I’ll camouflage them! Suddenly, I saw those two intruding structures
as two industrial buildings.
In old war movies, I remembered seeing a camouflage method that uses netting. I went looking for netting or mesh that would be both lightweight and durable against the elements.
Of course, just covering the bins was not going to do the trick, so I thought I’d paint the netting to look like the exterior of industrial buildings.
I’m not the best of artists, so I struggled to come up with the best way to paint the mesh to look like an acceptable facsimile of industrial building exteriors. I thought I would first try using some of the cans of spray paint already in my workshop. Since these structures only need to give the appearance of industrial buildings, it was not essential to focus on too much detail.
I happened to have a remnant of a mesh used to make shade sails for patios. You can buy this material online by the yard or as finished shade sails. I’d guess a fiberglass mesh for door and window screens could also work.
Dimensions and building process:
Large building: 24” W, 24” D, 32” H
Small building: 36” W, 22” D, 16” H
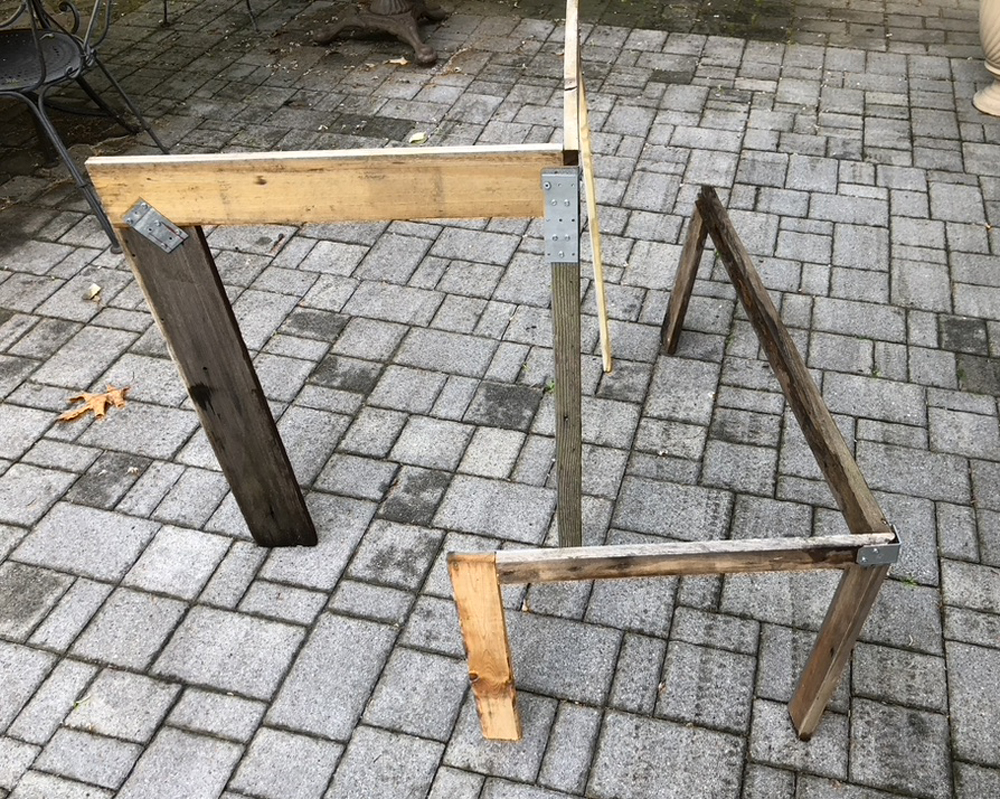
Using leftover pieces of pine (some 1” x 1“, some 3” x 1”), I put together two simple frames to fit around the bins. I used glue, deck screws, and galvanized brackets to create two light and sturdy structures.
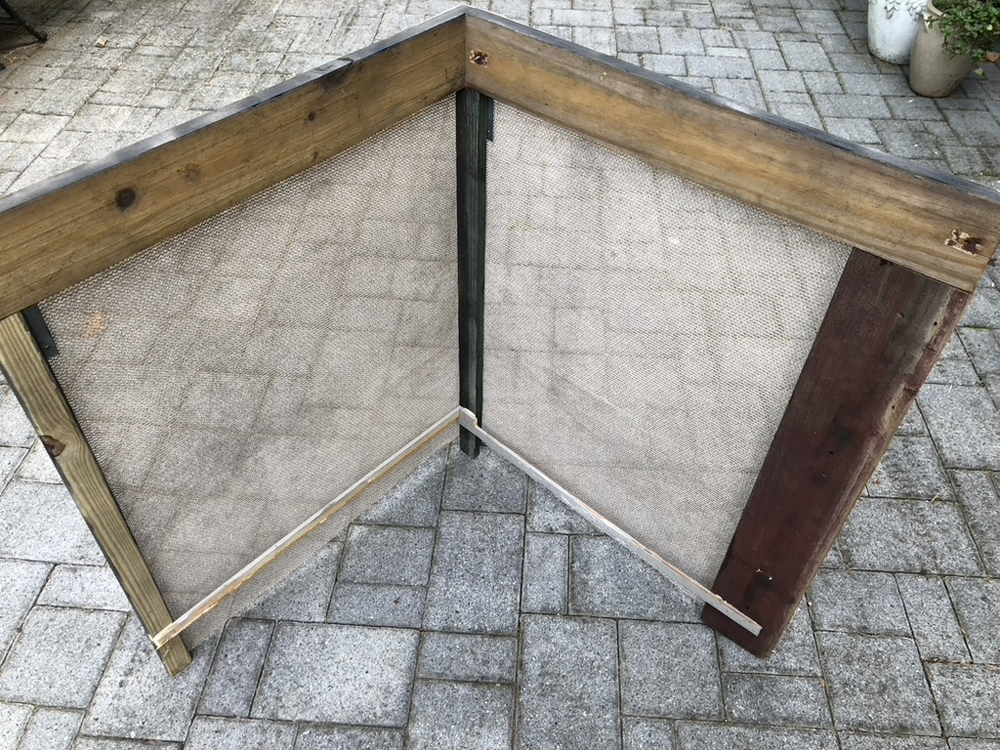
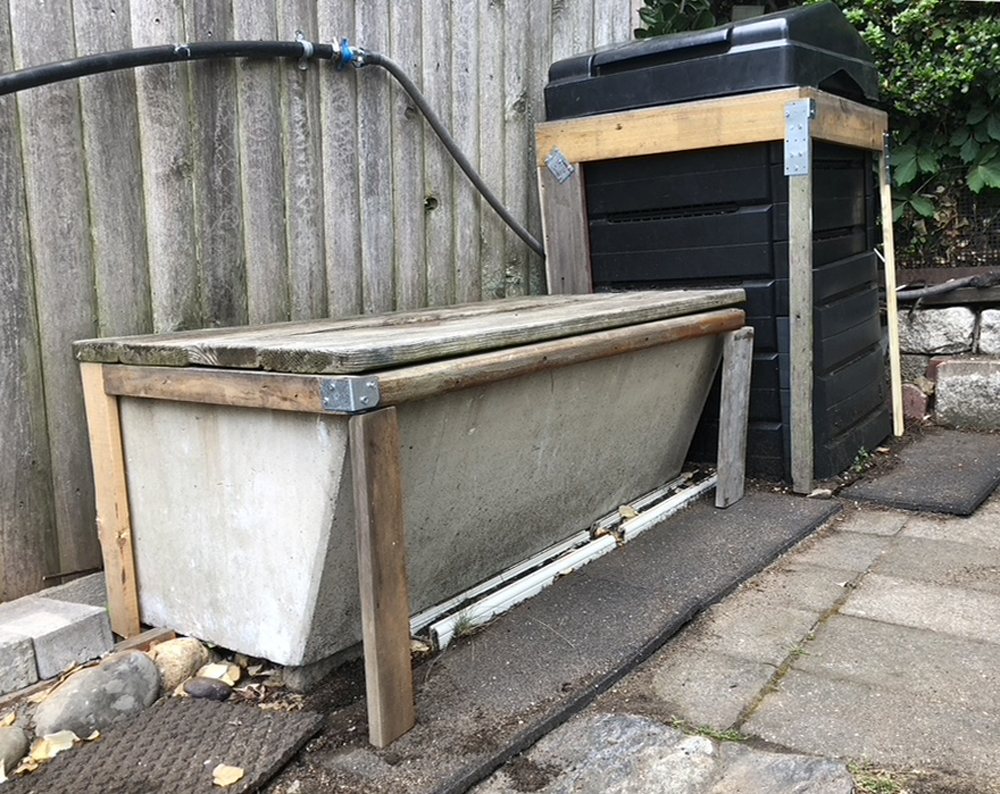
I sprayed these wood frames with black matte paint to “camouflage” them, and to provide a level of protection against the elements. Once the paint was dry, I stapled the mesh to the frames, in a similar way as stretching canvas on a frame for oil paintings.
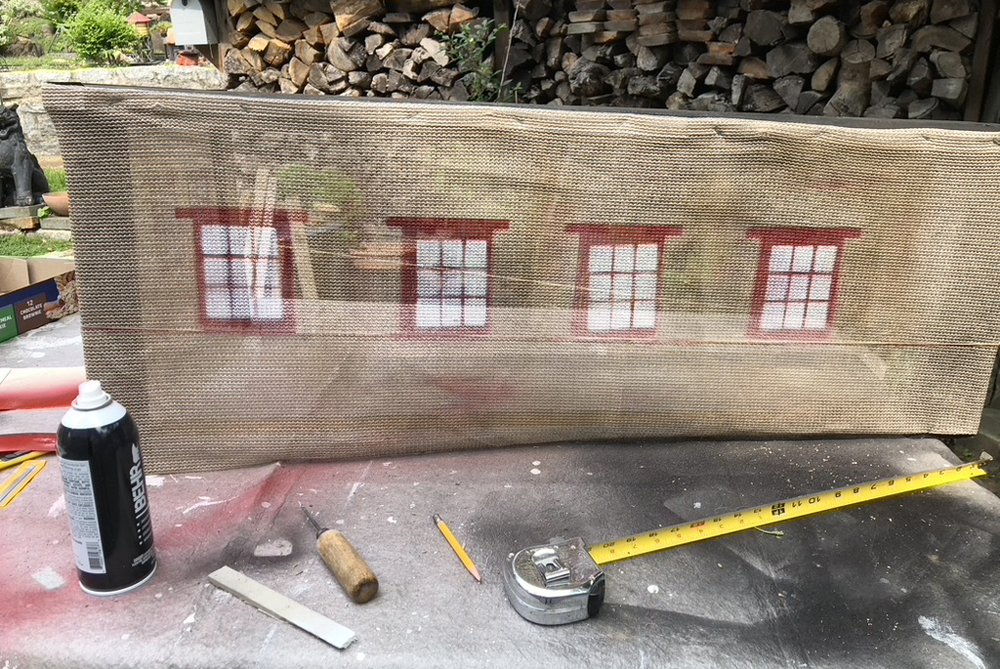
I decided that the small building would remain tan, the color of the mesh, to represent stucco. I sprayed the large building red/rust to represent bricks.
Painting the windows
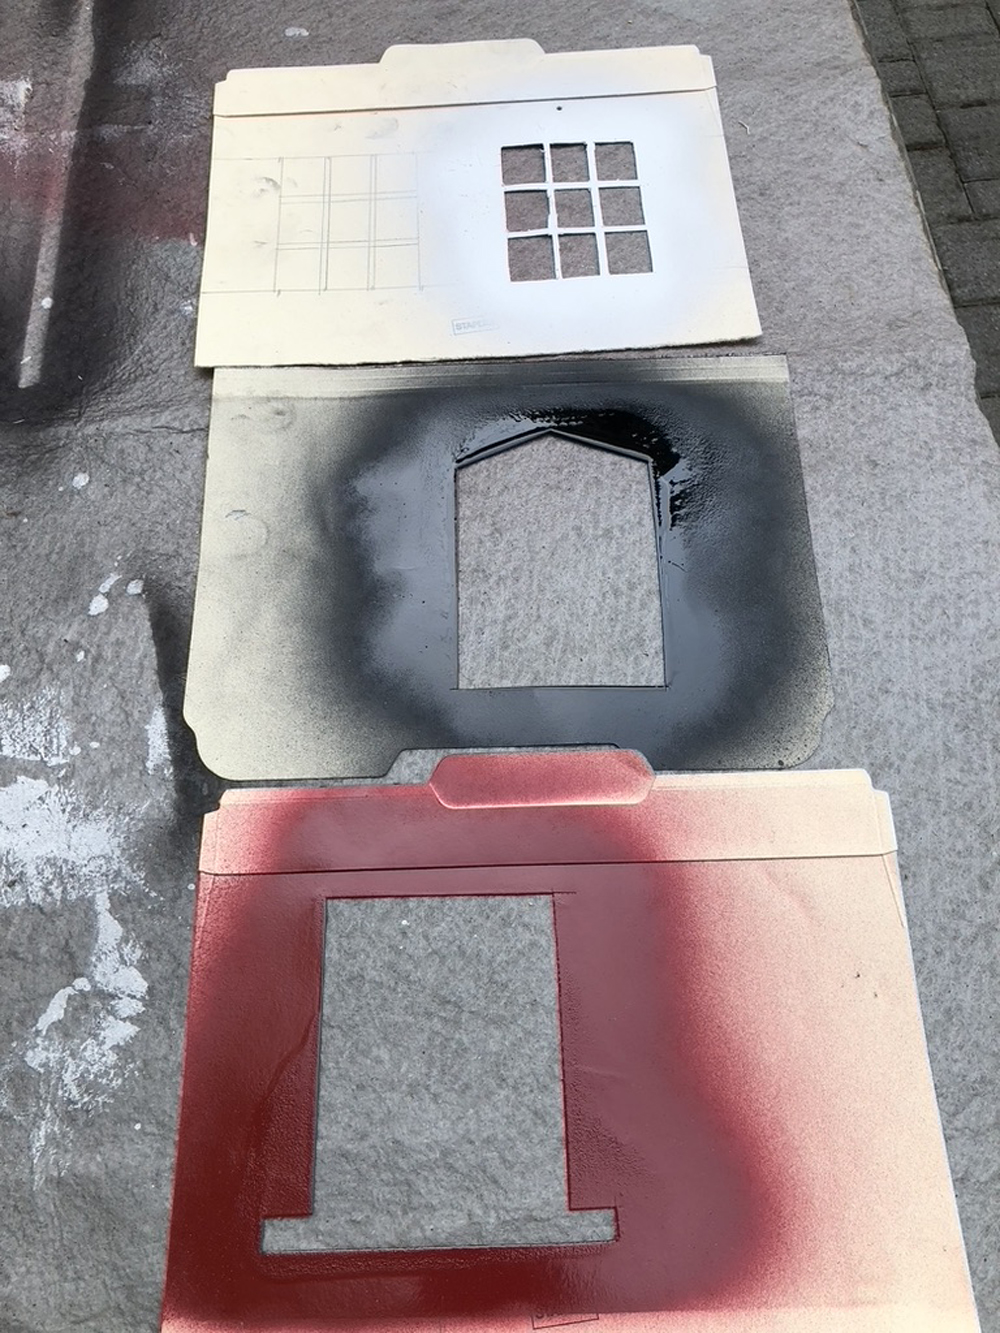
Each building has its own window style, with the windows of the red building sporting a peaked top, and the windows in the tan building having a transom beam at top. Cutting stencils for these two window openings out of light cardstock is quick and straightforward.
The outer dimensions of the black windows are 4”x 5”, while the size of the white windowpanes is 3” x 4”.
The windowpane stencil was used for both buildings. You are limited to the style of windowpanes only by your ability (and patience) to create as many styles as you would like.
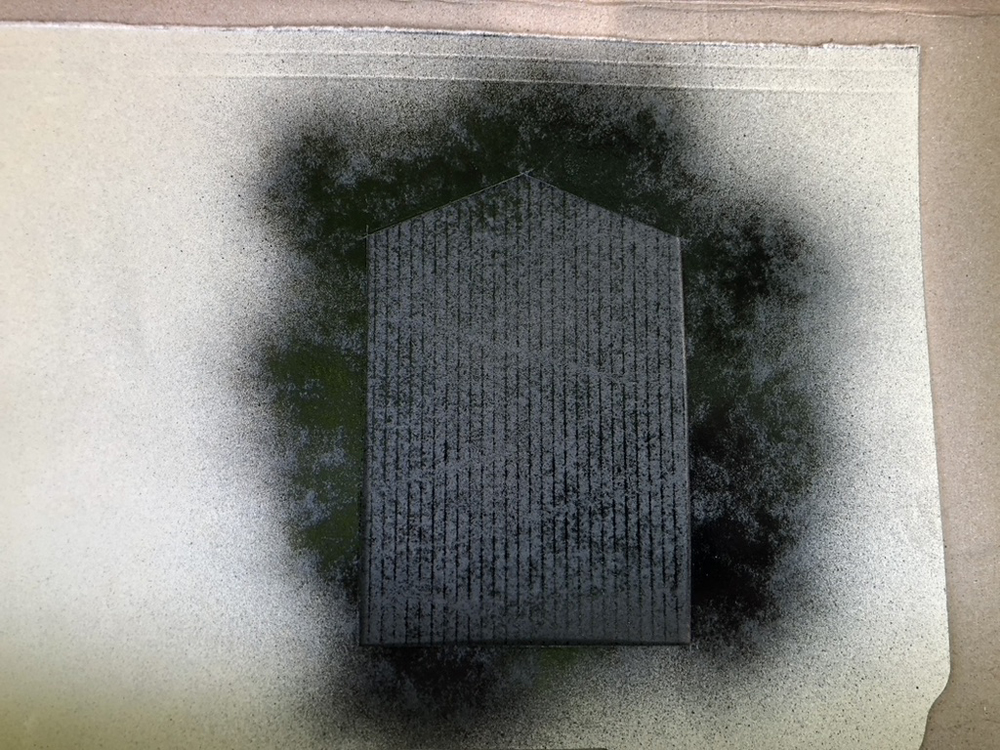
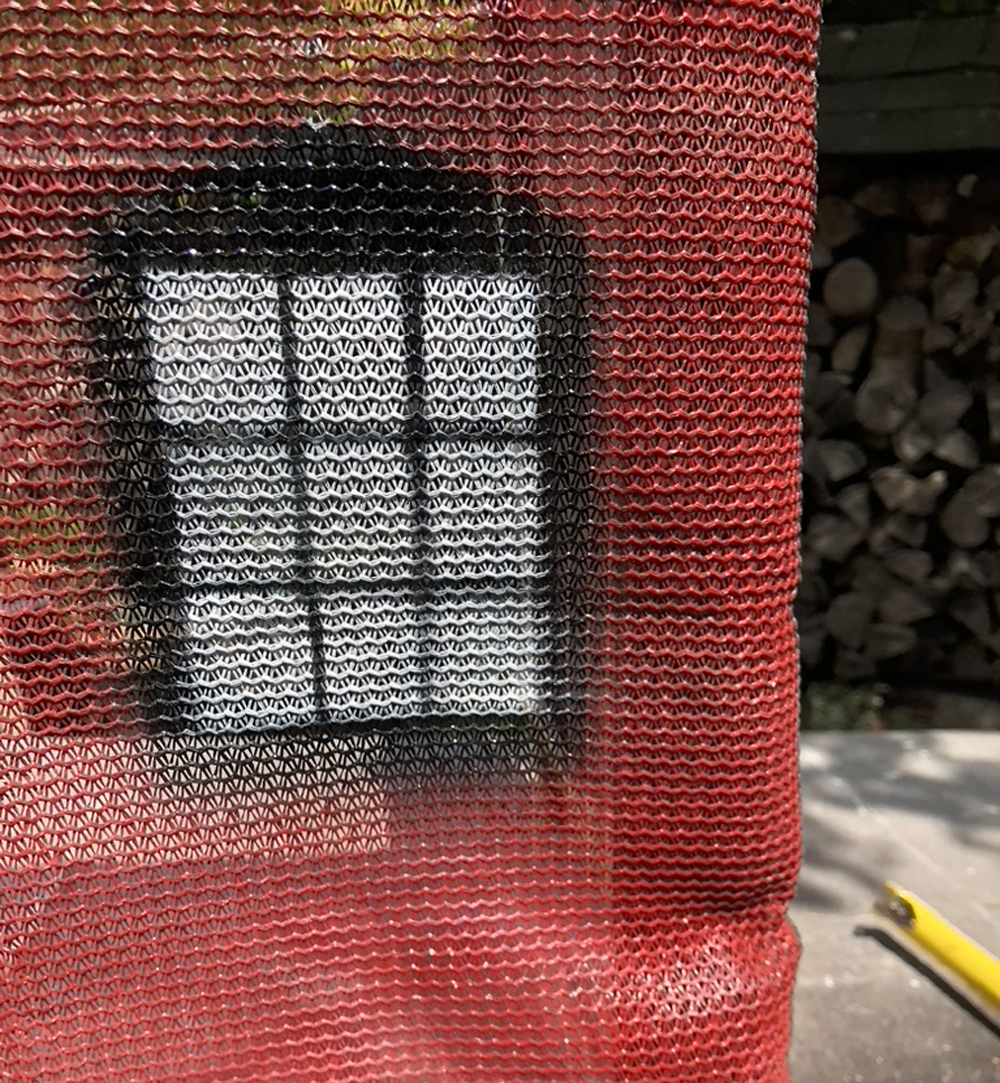
First, using the window stencil, I sprayed the window openings black. Second, using the windowpane stencil, I sprayed white to create the windowpanes.
The position of the windows is in relation to the size of each building. For the red building, I placed three windows across the first and second floors, with two windows across for the top floor. For the tan building, I placed three windows on the side, and four on the front. This building has only one floor.
Painting the windows turned out to be a lot easier than I thought. If you have a way to align the black windows and the white windowpanes, you will be ok.

I used an auger to make a hole 1” above the windowpane stencil, centered in relation to the window. Then, with the auger in the hole, I used it as a guide to help me place the stencil aligned with the center of the black window. Then I held the stencil in place with one hand, while I sprayed it white (use rubber gloves to protect your hands from the spray).
I goofed on a couple of windows when I misaligned the windowpanes on the black window. But I just sprayed the window black again, realigned the windowpane stencil, and sprayed white again, and voila! The error was fixed.
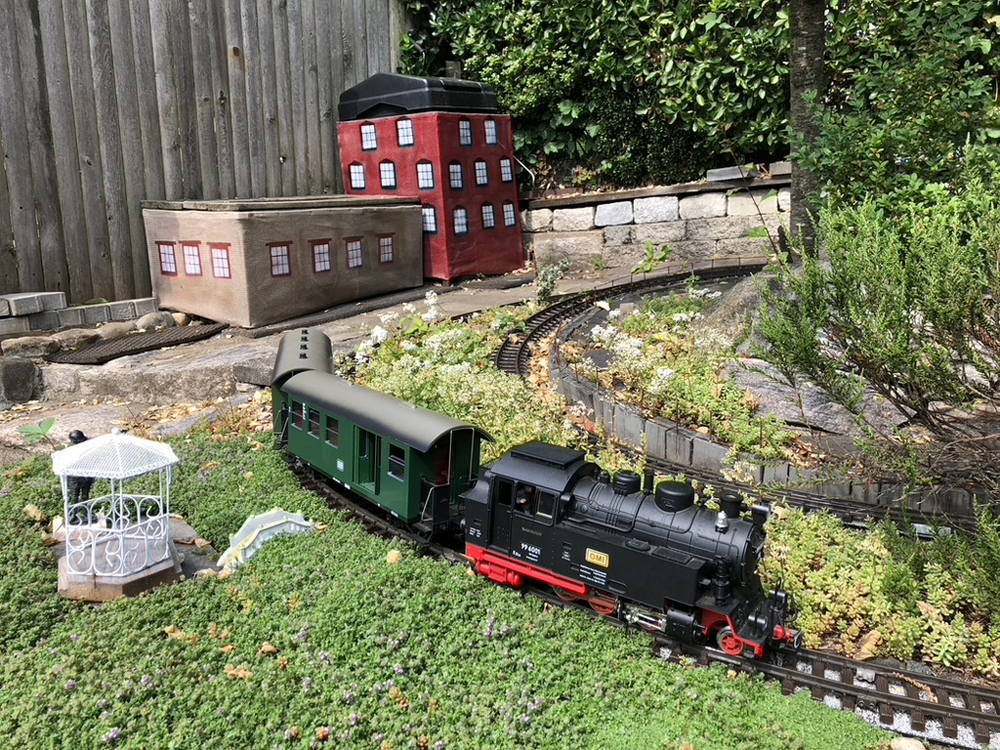
As the “after” picture shows above, that area of the railway not only got two new buildings, but I did a bit of tidying up as well, so now it looks nice, clean, and to scale.


This is brilliant!