


I model the Western Maryland Ry. (WM) from the 1920s to before the start of World War II. Appropriate commercial models of coal hoppers for my modeling era are limited in large scale. I was using LGB two-bay and Bachmann three-bay hoppers as stand-ins, but I wanted accurate, period-specific coal hoppers for my rolling stock fleet.
I turned to 3-D printing to create models that are otherwise not available. Over the last few months I created files, printed, and built different versions of the Vanderbilt, GLa, U-channel, and fishbelly hoppers that were operated by the WM and its predecessors during the era I model.
I also created some wood-chip variations of the U-channel, Vanderbilt cars, and fishbelly cars. These cars represent the evolution of the hopper car from the turn of the last century into the 1930s. During this time the railroad was shifting from wood hoppers and gondolas to all-steel cars with greater capacity.
This series will take a look at the different cars I built. If you have access to a 3-D printer, the files are available on Cults3D.
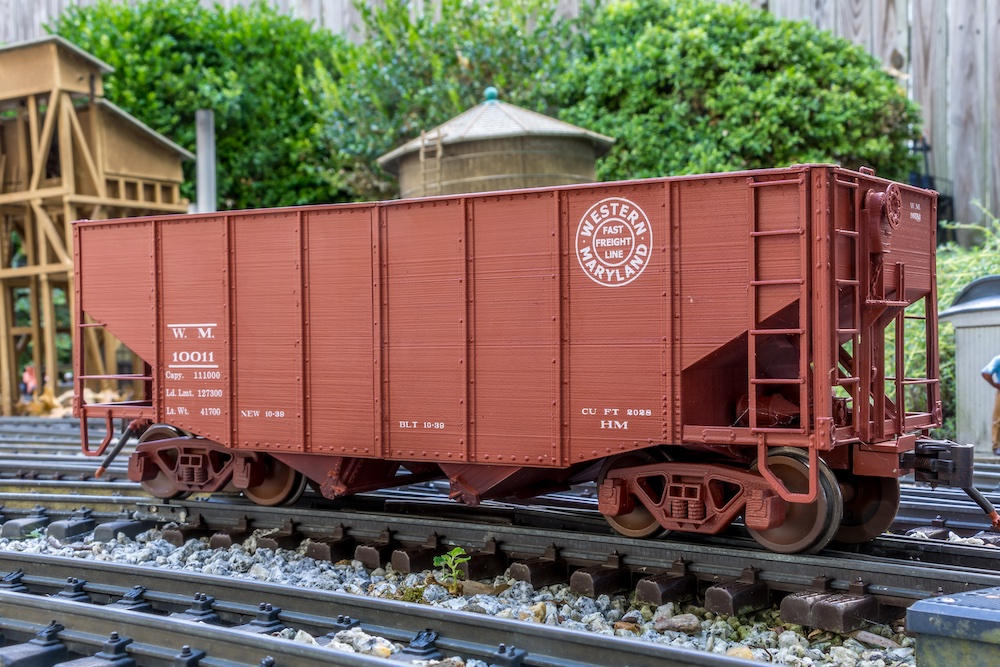
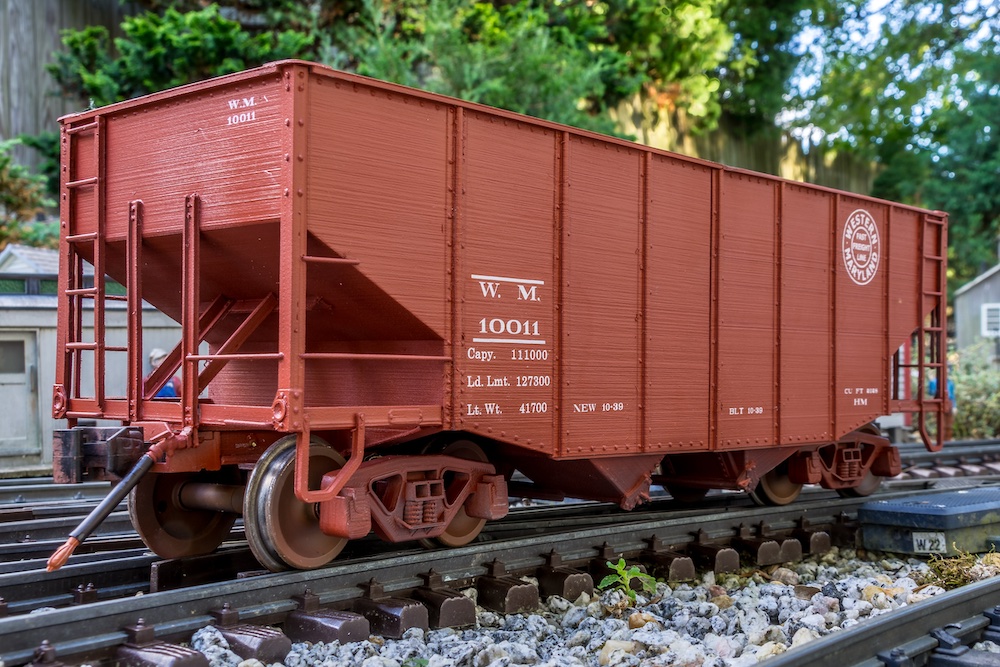
Arguably the best-known hopper associated with Western Maryland railway was the fishbelly hoppers. These 55-ton cars were introduced in 1937 and designed to increase capacity by lowering the floor of a basic 50-ton outside braced car so it sat lower between the trucks, giving them their distinctive appearance. These cars were in use through MW’s end. There were numerous rebuilding programs where the cars were lengthened and increased to 70-ton capacity.
I decided to make the early H-4/5 version of these cars in their original, as built, configuration.
When designing the 3-D printed model, I made the sides, slope sheets and underframe each as two pieces to fit the limits of a standard filament printer. I use Tinkercad to create my files, and typically use a scale of 1mm = 1” to make it easier to design things. This works out to 1:25.4 scale, so I re-scale my files in the slicer as needed. I built these cars in 1:29 scale, which worked out to a slicer rescale of 86%.
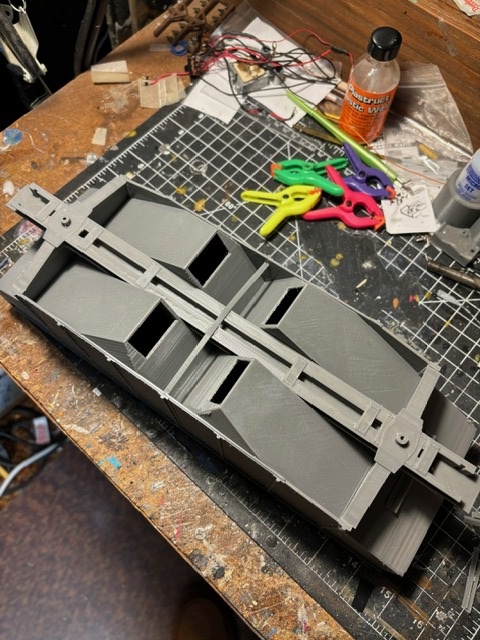
I first printed the six basic components, then I did a test assembly to check the fit before gluing everything together. I glued the two side wall sections together and used 1/8” styrene rod to join the two halves of the frame.
After the frame was set, I added the slope sheets to the frame assembly. I designed alignment pin holes in the frame and added slope sheet pieces, which use a short piece of 1/8” styrene rod to ensure the slope sheets are properly aligned on the frame. I added the frame/slope sheet assembly to the side wall assembly and glued everything after alignment. Then, I added the end frame/slope sheet pedestal components to each end.
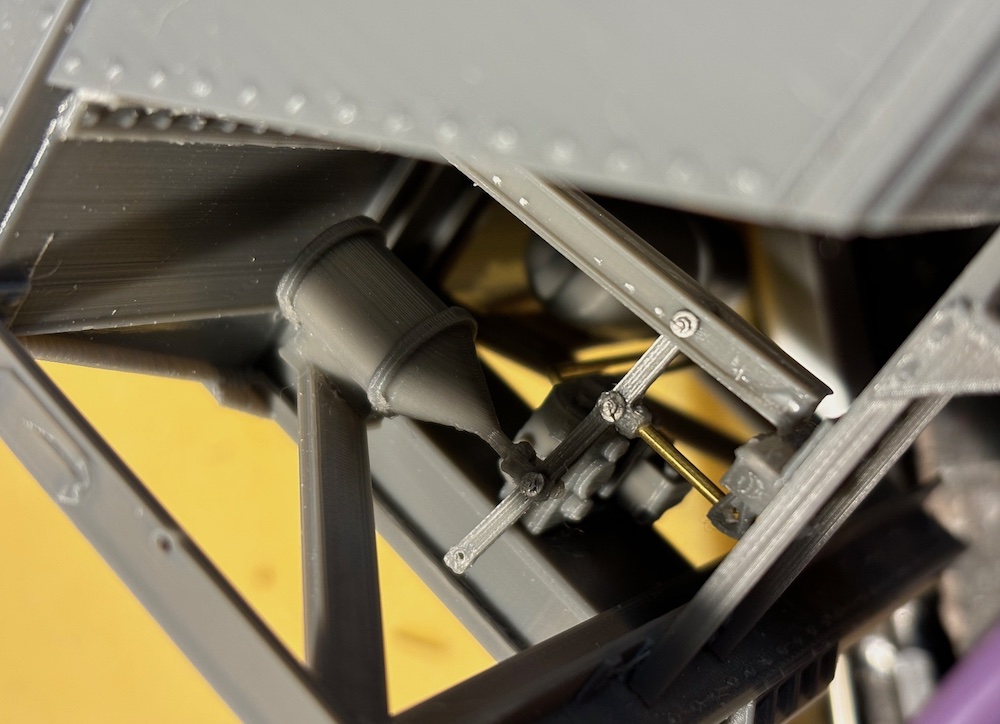
After assembling the basic car, I started adding the details like the corner posts, end supports and corner ladders. I added AB type air brake components used by these cars and added some Ozark Miniatures ½” bolt castings to detail the brake beam. A piece of brass rod runs from the bottom of the brake beam to the frame. I also added brass rod for air lines between the air tank and valve as an extra detail.
I designed the brake platform assembly with the brake fulcrum and incorporated mounting holes for rods to the brake beam and a connection for a chain to the Ajax brake assembly. I added the grab irons to the end sills as well as Ozark Miniatures air brake hoses and valve castings which I installed into a mount that under the edge of the sill at the bottom of one of the support channels. I installed Kadee center-set couplers using mounting cavities I designed into the ends of the frame. The Bettendorf trucks were 3-D printed and I used metal wheels.
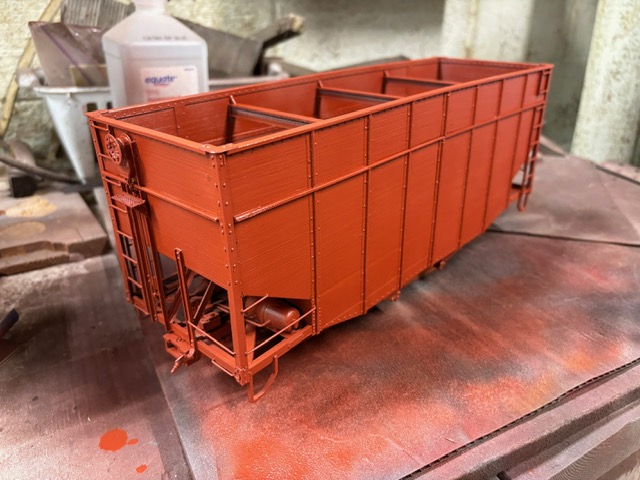
Once assembly was complete, I gave the car a coat of grey primer, and then applied Badger ModelFlex light red oxide paint with an airbrush. I used photos to recreate the “fast freight” lettering that was applied to these cars. I created the lettering sheet in Publisher and created a .PDF file which I sent to Shawmut Car Shops, who printed the custom decals.
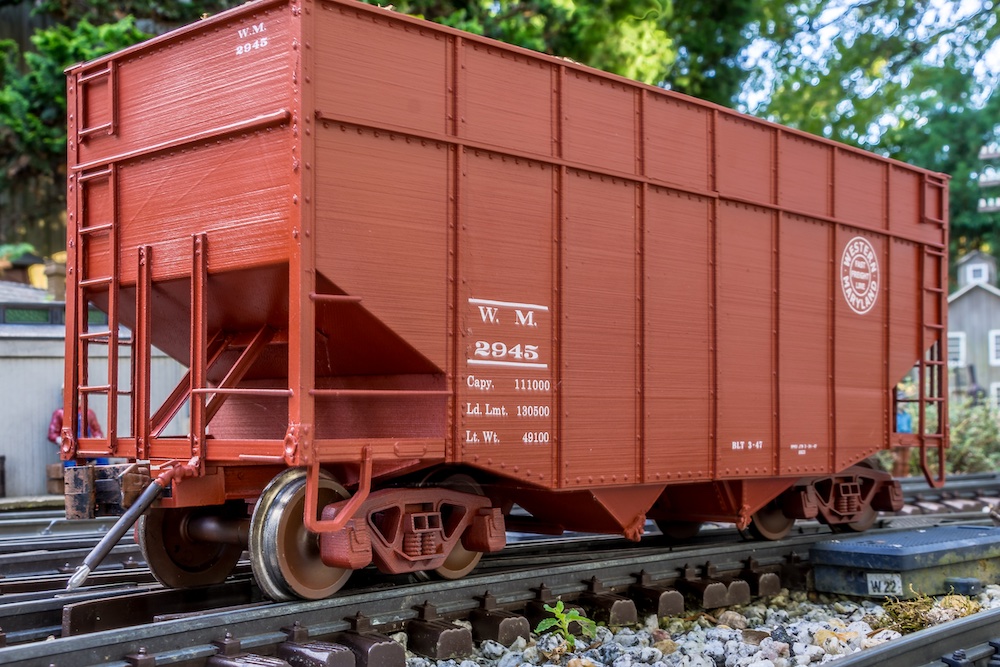
After building this car, I decided to make one of Western Maryland’s wood chip car conversions, since I already had the files made up for the basic car. The WM converted a group of these fishbelly hoppers to wood chip service in the 1960s by adding a three-foot extension at the top to increase cubic capacity. The extensions were made using the top sections of retired cars. The placement of the brake platform and brake wheel were modified to be higher on the car, but the rest of the car was essentially the same.
I made my 3-D printed version in the same way, and did a cut and paste of the top part of the car body files to make the extended version. I modified the brake placement and brake platform assembly to match the prototype. I added a coat of grey primer, and followed it up with a final coat of oxide red. These cars were lettered in the “speed lettering” scheme when they were rebuilt, but this is outside my modeled era, so I took a little bit of modeler’s license and lettered it with the “fast freight” herald so it would fit in with my other equipment. I made a base form out of a piece of foam insulation board and glued sawdust on it to make a load for the car.


