For the past several years I’ve enjoyed building a small toy train Christmas layout for the holiday season. I challenge myself to develop a new track plan every year. By using O-27 tubular track, I’ve been able to come up with a variety of interesting track plans that fit nicely under my Christmas tree.
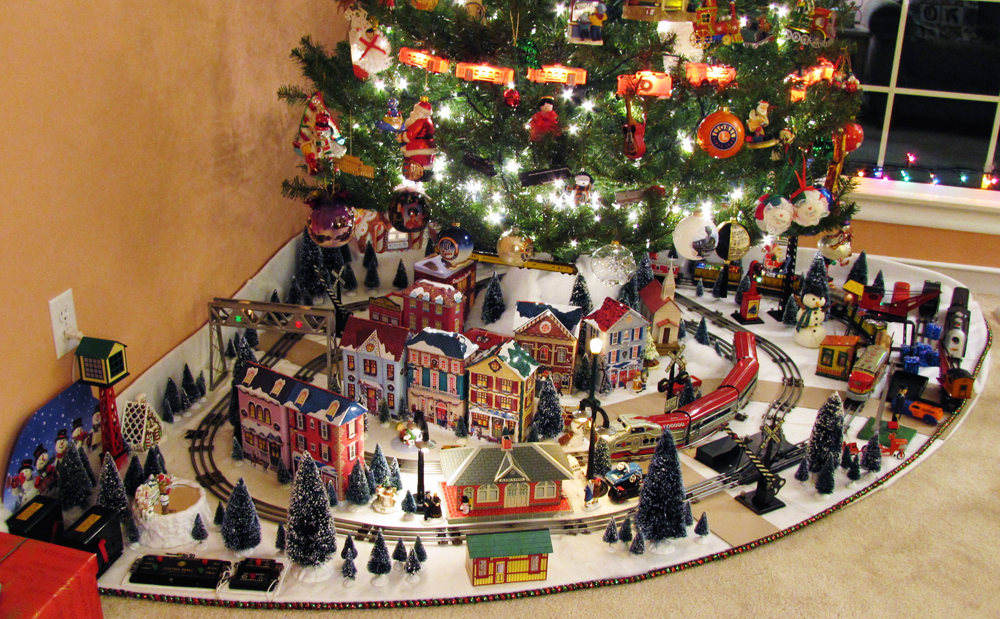
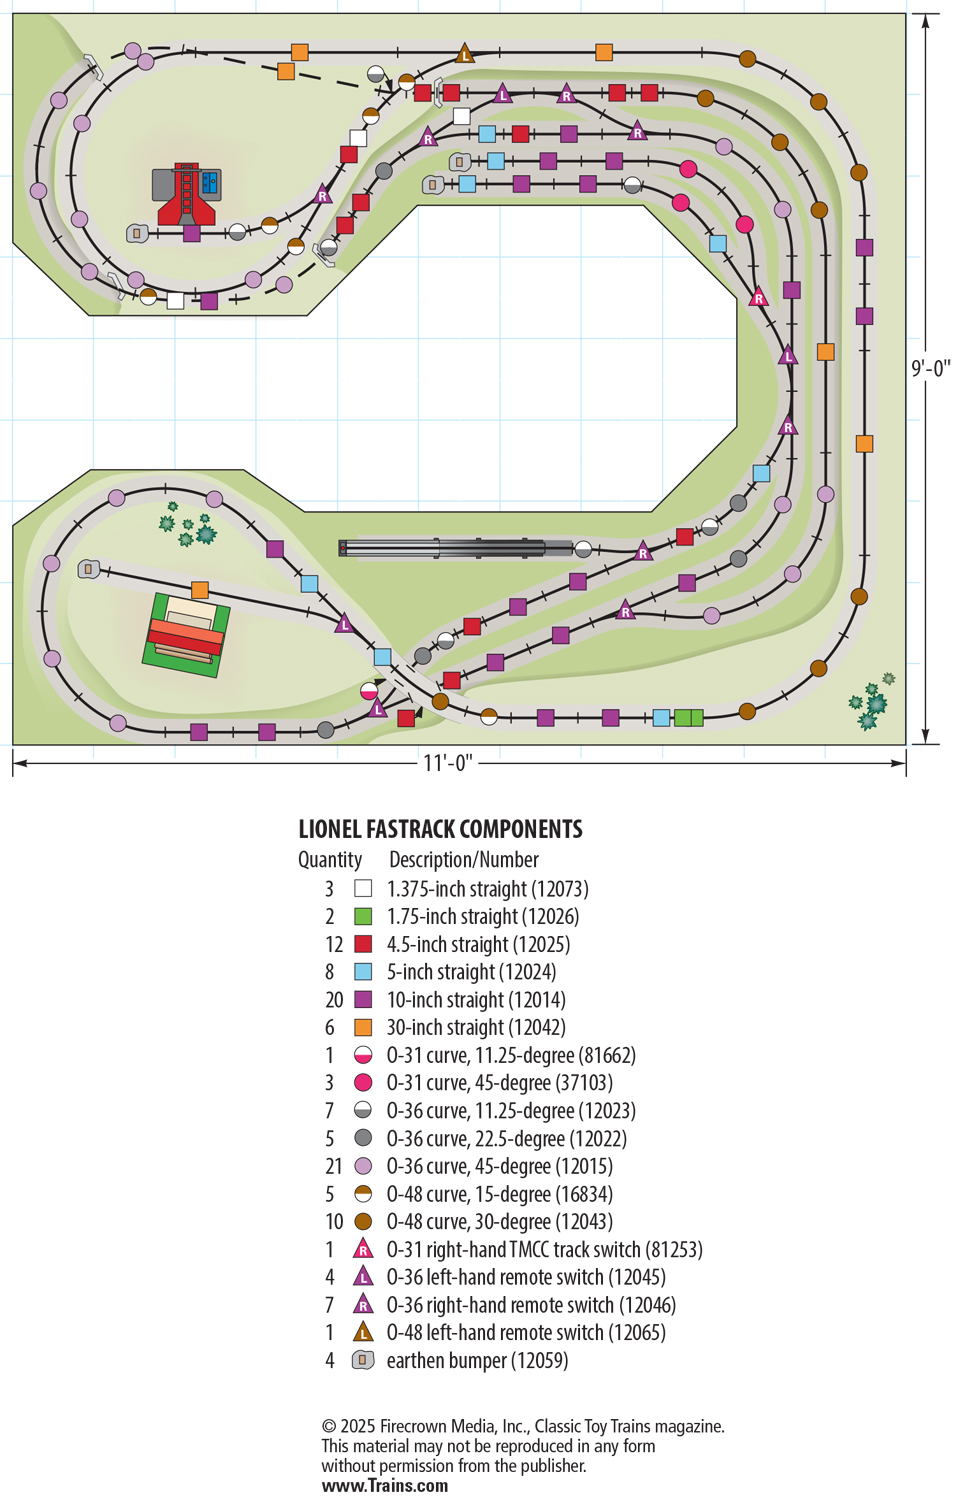
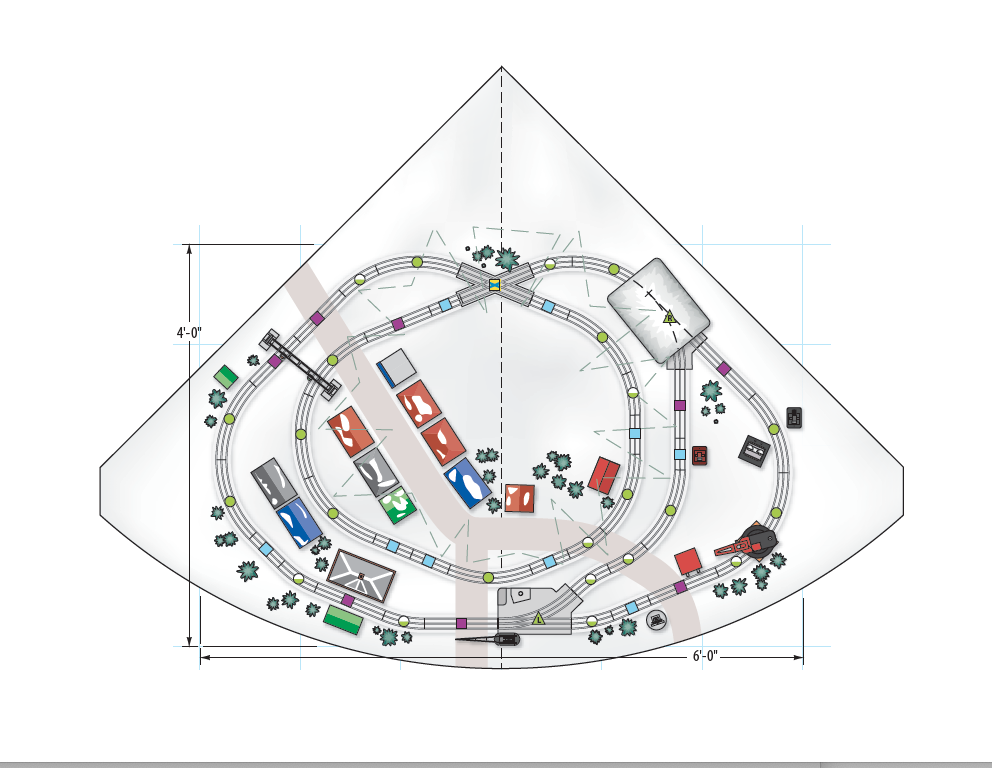
This design includes an asymmetrical twice-around loop, a passing siding, and plenty of space for a full-size Christmas tree – all within a 4 x 6-foot space!
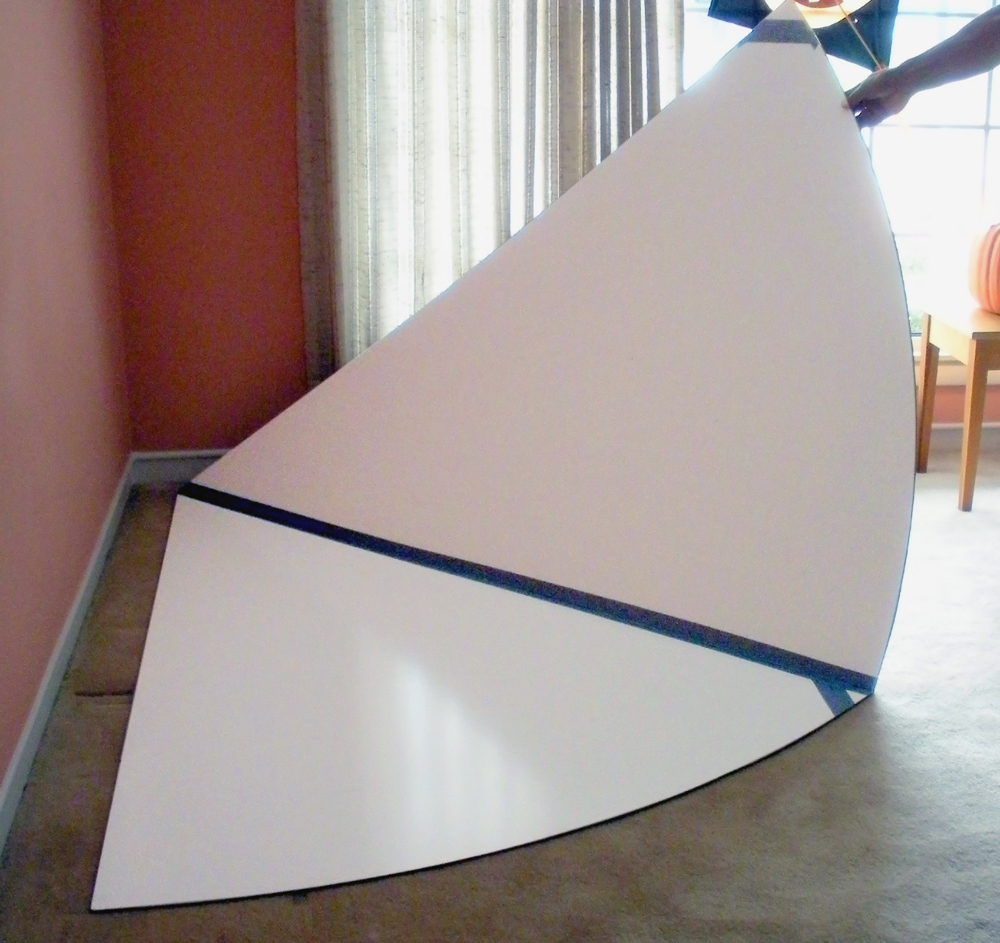
A folding foundation
I began construction by building a portable, folding foundation from a 4 x 8-foot sheet of 3/16-inch-thick hardboard that’s painted white on one side. Transporting the large board could pose a challenge, so you might consider borrowing a friend’s truck or paying for delivery.
After getting the board home in one piece, I cut it down in size. I had designed my plan to accommodate a Christmas tree in the corner of the room, so I decided a pie shape with a curved front edge would look attractive.
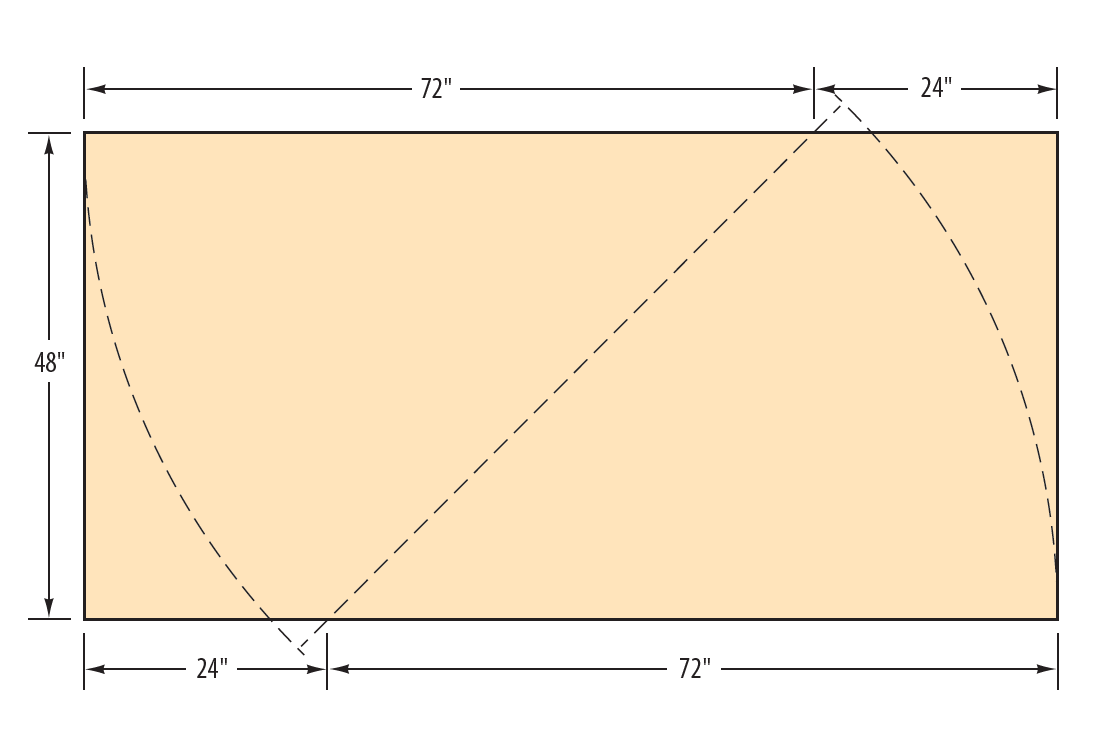
I used a saber saw to cut the hardboard into the pieces specified in the diagram shown above. I then used duct tape to join the two pie-shaped pieces along one edge. The tape acts as a “hinge” that allows the two sections to fold into a single pie-shaped piece. When folded, the layout foundation is easier to carry and more compact for storage.
Small toy train Christmas layout track plan
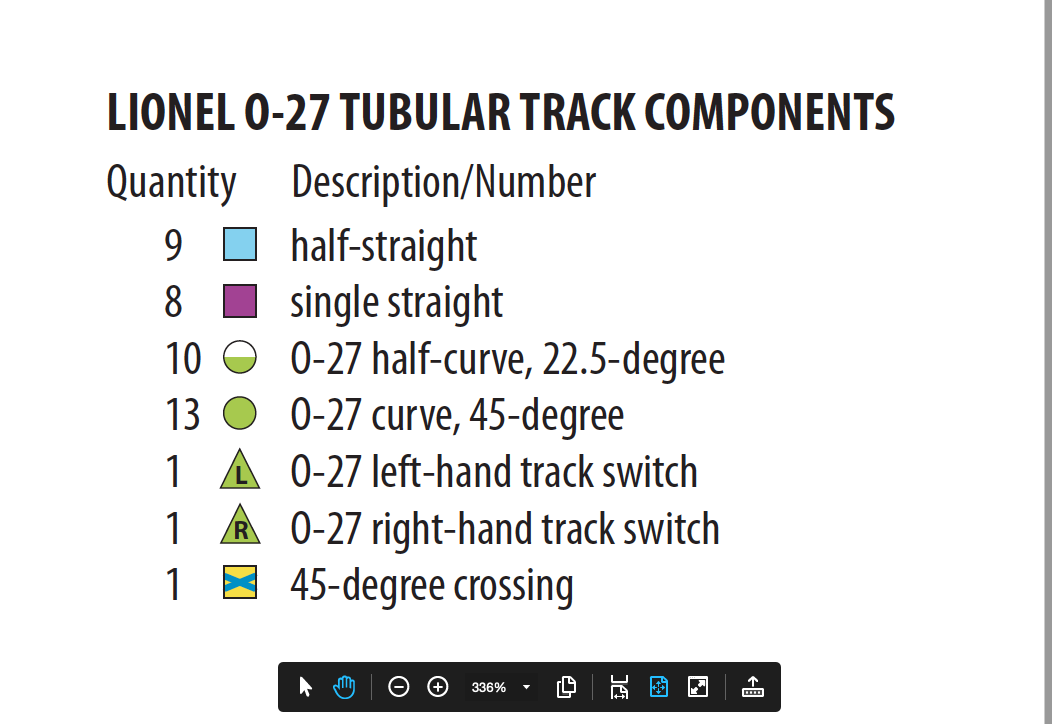
After establishing the footprint for my display, I developed the track plan to suit the size and shape of the space. By using tight O-27 curves (27-inch diameter), I was able to fit a fairly long mainline run and a passing siding into a space that’s often used for a basic oval configuration.
A Lionel 45-degree crossing is the key to making all of this fit.
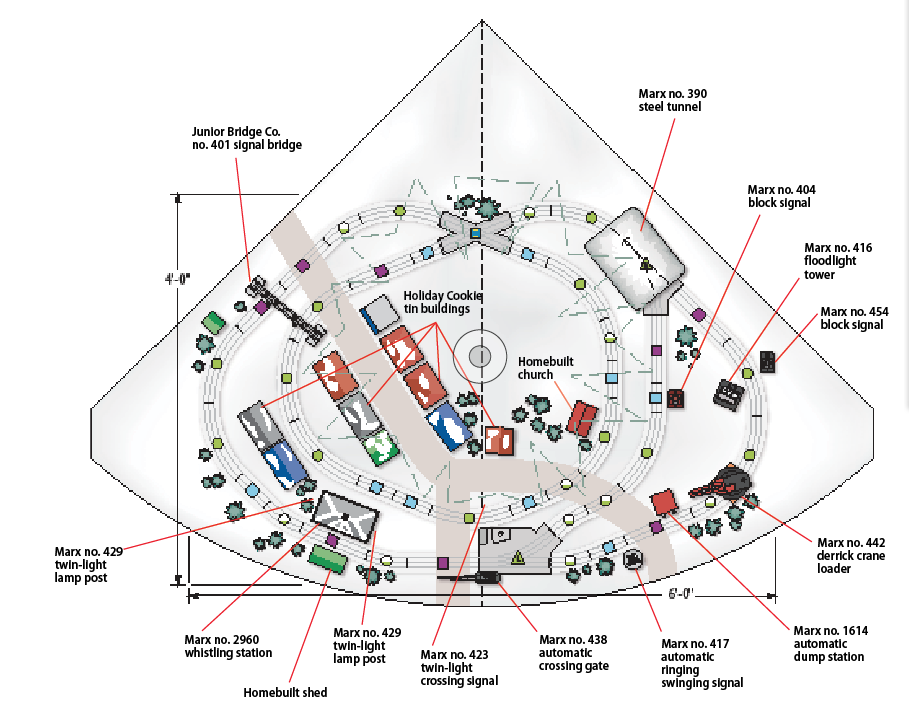
After installing the track pieces on the foundation, I tested a locomotive to confirm the layout functioned without issue. Next, I placed the Christmas tree stand in position and determined an approximate placement for my Christmas-themed structures and accessories.
Some assembly required
 After determining the ideal placement for the structures, I made note of each location and removed everything, including the track, from the board. Over the bare hardboard I added 60-inch-wide lengths of inexpensive fleece fabric to represent snow cover.
 Fleece, commonly found at fabric stores, is fluffy white and slightly stretchy (so it’s easy to get rid of wrinkles). It has tight fibers that won’t get caught in the wheels of a passing train.
To secure the fleece, I simply tucked the ends under the edges of the board. I used two pieces of fleece with a slight overlap.
Though it wasn’t essential, I used an additional sheet of fleece help disguise the tree stand. I recommend that you completely install and decorate your tree before working on the train display.
After installing the tree, I re-installed the track, returned the structures and accessories to their specified locations, and then wired everything for operation. I prefer to use white-colored wire for all the electrical connections. Wires in a more visible color can be hidden by tucking them under the edges of the hardboard or by laying fleece over them.
I also like to add a product called “buffalo snow” to highlight certain areas of the layout. This artificial snow is fluffy and has long loose fibers, so be sure to keep it at least 2 inches away from the tracks.
To make the roads, I cut pieces of mat board (heavy cardboard) 3½ inches wide. You can purchase mat board at artist supply stores, where it’s sold in a variety of colors and sizes. To join two road sections and keep them in place, I added strips of tape to the underside.
With everything in place, I can sit back and run my trains and enjoy the holiday season.
Once the holidays pass, I store the track and structures, stuff the fleece in large trash bags, fold up the hardboard, and start dreaming about how I can improve on next year’s display!
Watch a video of this layout.