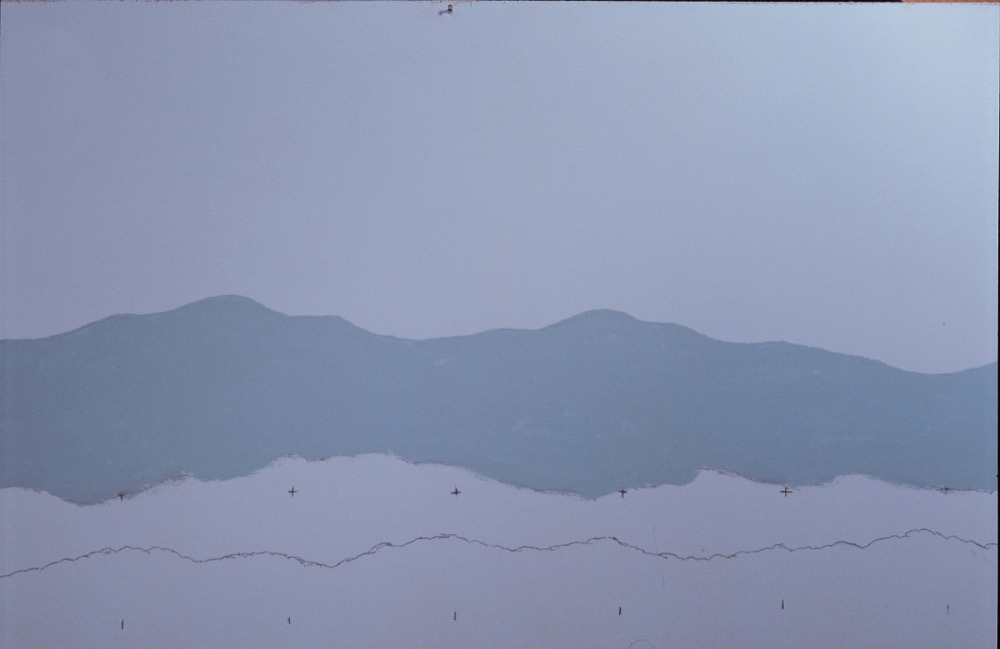
Figure 1
Ray used a grid reference on his pre-painting drawings. He painted the uppermost gray-green level showing the most distant mountains. Photo by Ray Stuber
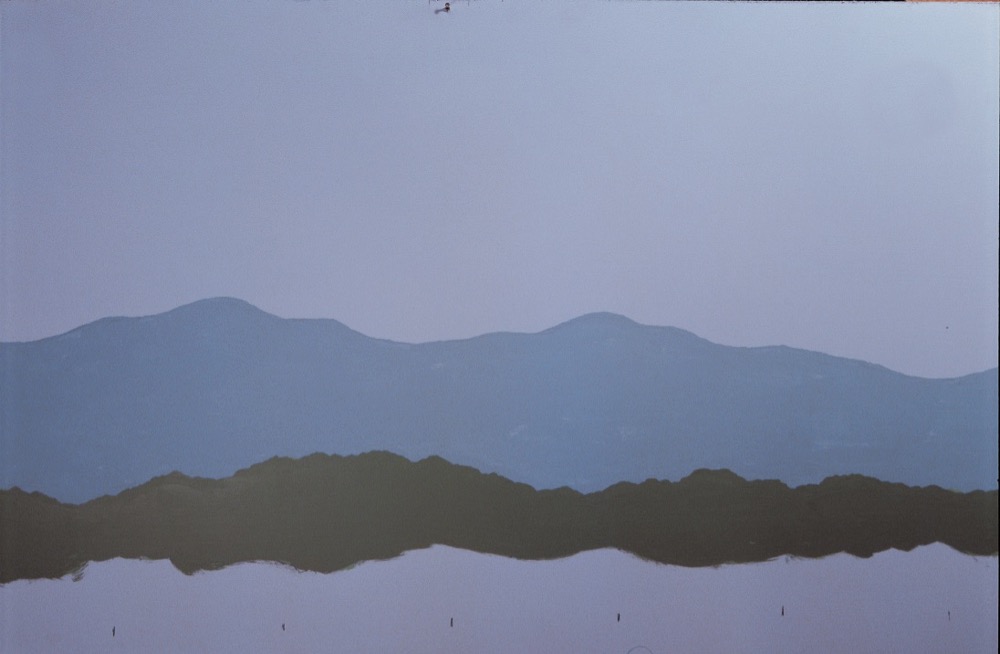
Figure 2
Ray next painted the intermediate hills. The paint from each lower level masked the messy spots near the bottom of the previous level. Photo by Ray Stuber
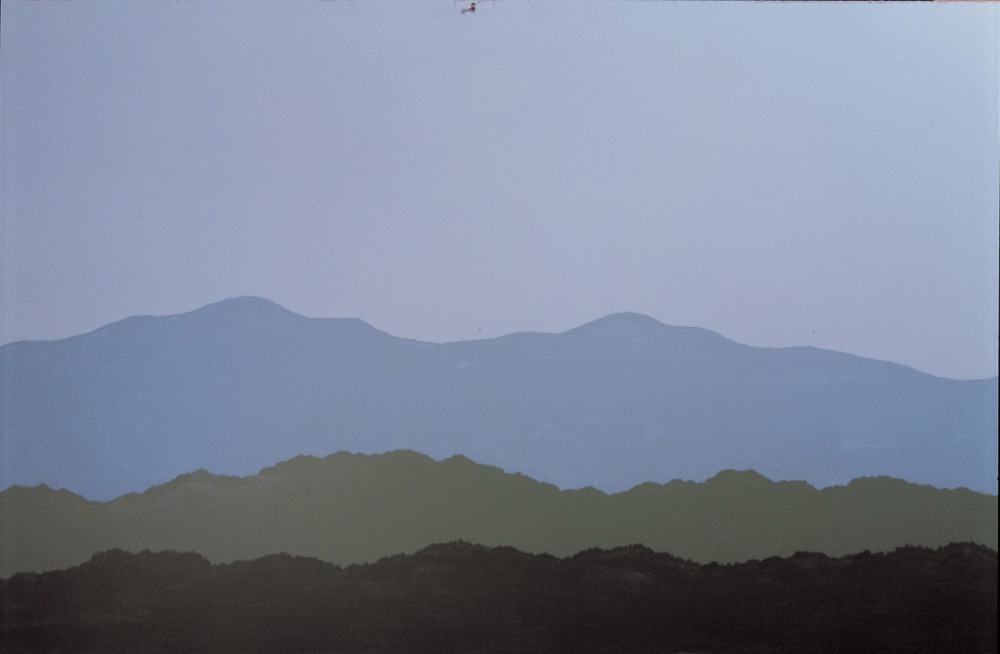
Figure 3
Ray made the lowest level the darkest green. This simulated the treetops that would be seen as a train sped by. Photo by Ray Stuber
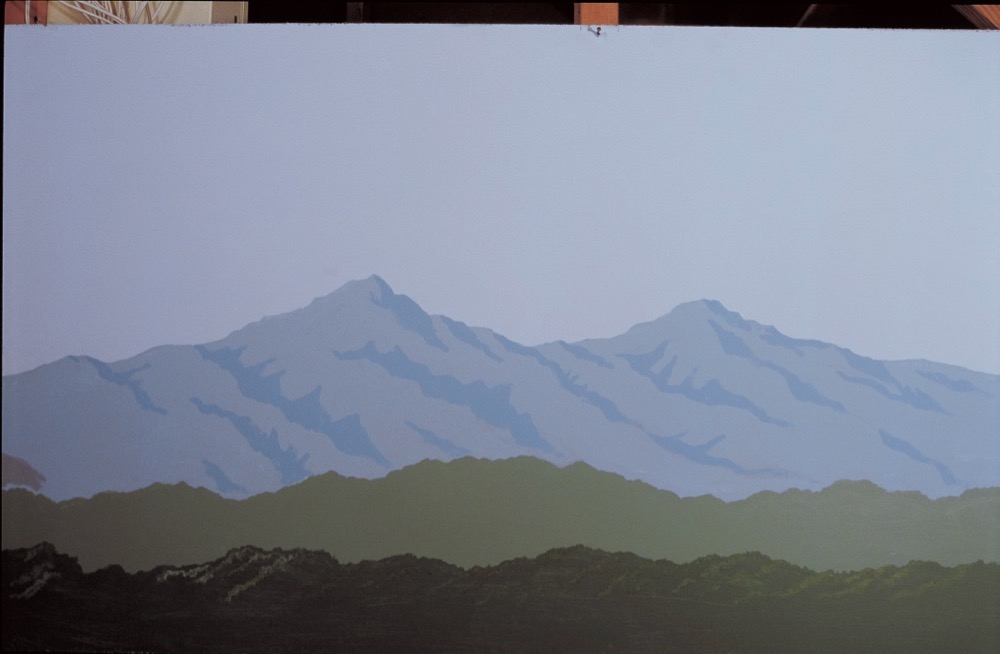
Figure 4
While many operators would be satisfied with the generic view, Ray Stuber took his scene a step or two further, adding shadows that created a more dynamic scene by suggesting ravines, peaks, and gullies. Photo by Ray Stuber
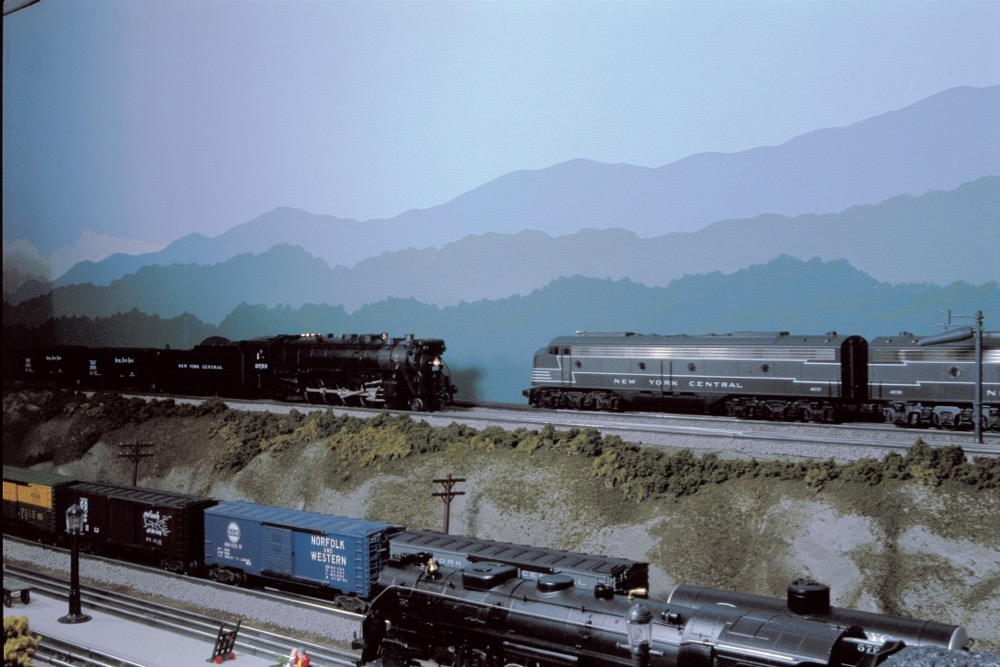
The finished product: A mountain backdrop installed on a layout. Photo by Ray Stuber
Creating the scene
The examples shown here are from the backdrops on my O gauge layout, which is set against distant hills. I broke each sketch down to three levels of scenery: the foreground (tree line), the intermediate level (nearby hills), and the background (mountains). I needed to use only three colors, one for each level, on my sketches.
Consider where you would like the horizon to be located. I like it at about eye level (5 or 6 feet above the floor) or a little above. Assuming the train table is 4 feet high, the horizon would be roughly halfway up a 4-foot-high backdrop panel. If you want the mountains more in the distance, place them lower on the horizon and make them drop occasionally behind the intermediate hills. Make the foreground trees about 6 to 8 inches high so the tops will be visible over the passing trains.
When sketching hills and mountains, avoid what I call the “wave effect,” where the peaks and valleys are too pronounced and close together.
Also, if you have a good idea where the mountains, buildings, and other objects are going to be located on your layout, sketch them on the grid drawing. Since I have an elevated section running around the backside of my layout, I moved everything up 6 inches when sketching the background.
Construction options
When constructing backdrops, decide whether to mount them to your walls or directly to your layout.
I built my layout in an unfinished basement, so the backdrop panels actually became the walls for the train room. I built the panels from 4 x 8-foot hardboard sheets, using 2 x 2 strips for support and filling the joints between each wall section with spackling compound. I began painting them before building the layout.
If your layout is already built and in place, paint 2 x 4-foot or larger panels on your workbench and attach them to your train table. With this technique, be sure to line up the mountains and hills from each panel as you proceed with painting them.
The height of your backdrop will probably be dictated by your construction method and room configuration. A train table containing a ceiling-height backdrop will create a more complete environment for your scenic vistas than, say, a two-foot high poster backdrop.
Painting the scene
At this stage, the paints you select may vary from my examples, particularly if you aren’t duplicating my mountain backdrops. Still, you can get a good idea on how to paint your own scene based on my approach.
I chose Olympic brand flat latex paint. Olympic’s color names are listed in parentheses below. A gallon will cover 400 to 450 square feet and a quart about 100 square feet. [Olympic brand paint is no longer available. The manufacturer suggests PPG as a substitute. -Ed.]
I use three ground colors in addition to the blue sky (“Ariel”) on my backdrops. The background mountains are a light hazy blue (“Crystal Lake”), the intermediate hills are light green (“Slate Green”), and the foreground trees are a somewhat darker green (“Painted Turtle”).
Begin by applying two coats of the sky color to the entire backdrop. For large backdrops, I recommend a paint roller for this step.
Once this paint has dried, correlate the grid drawing to the backdrop by making “+” marks at 12-inch intervals on the backdrop, using a charcoal pencil or a similar dark-leaded marker.
Each mark should correspond to the point where two lines intersect on your drawing. Obviously, you don’t need to worry about marking the areas that will contain only blue sky.
Using these marks as a guide, draw the topmost horizon lines onto the backdrop as indicated by your drawings. Proceed to draw lines indicating the mid-level and lower-level scenery.
Now you can begin painting each level. In figure 1 I’ve already transferred the lines for these three levels of scenery (mountain, hills, and trees) to a 4 x 8 center section and painted the background mountains.
I use a 1/8-inch brush to paint in the top line of each level and fill in the rest with a larger brush.
In figures 2 and 3, I’ve painted the lower levels. Note that I added a little more jagged definition to the top of each level, as compared to the smoother mountains on the horizon. I did this by turning my brush on its side and dabbing a little.
Don’t be afraid to experiment. If you aren’t happy with the result, paint over it and try again. If you are happy, either declare the job done or try your hand at some even finer detail work.
Finishing strokes
With a few more brush strokes you can add character to each of the three ground levels in your backdrop. As figure 4 shows, I’ve taken the process a step further by creating a rugged definition on the mountaintops and adding shadows in the ravines and valleys.
Use your reference photos as a guide. You may want to experiment on your sketches or grid drawings using colored pencils to create darker shadows. Just be sure to identify which direction the sunlight is coming from and keep it consistent.
Once you are happy with your sketches, experiment with your shadow technique on a piece of scrap wood before trying it on your backdrop.
For the mountain details, mix about 10 drops of a dark blue acrylic paint – I used “Cerulean Blue” in this sample – into a small cup filled with your mountain paint. You don’t want too much contrast. And remember, the paint tends to dry darker. Also, note the proportions of each color in case you want to duplicate the mixing process later.
To create highlights on the foreground trees, mix a green paint with some white acrylic paint.