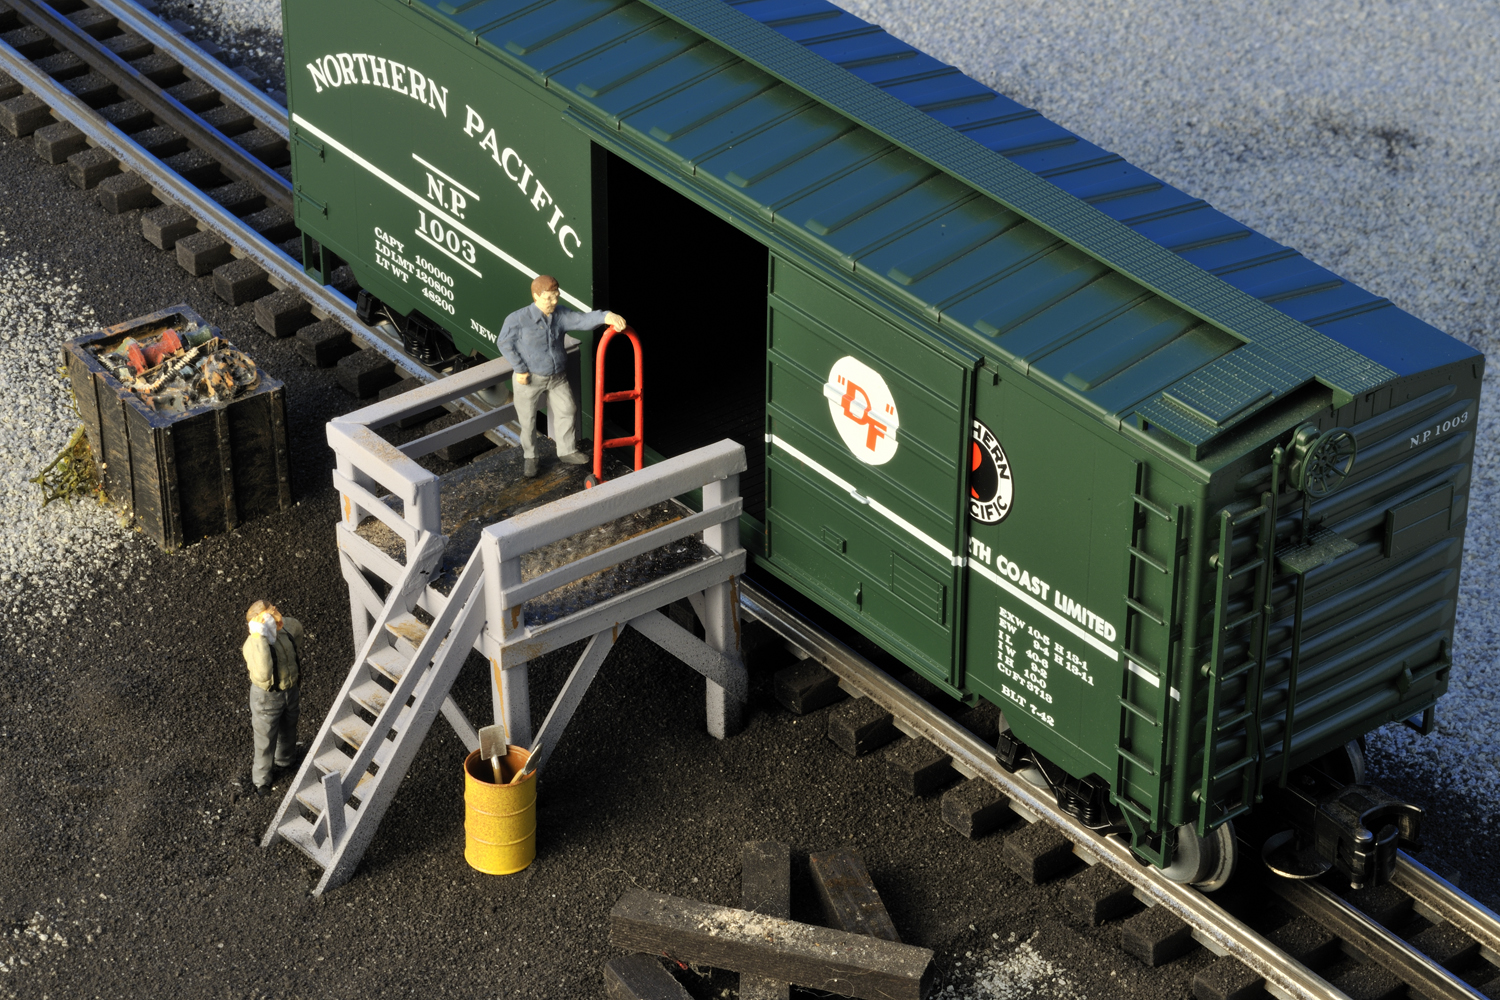
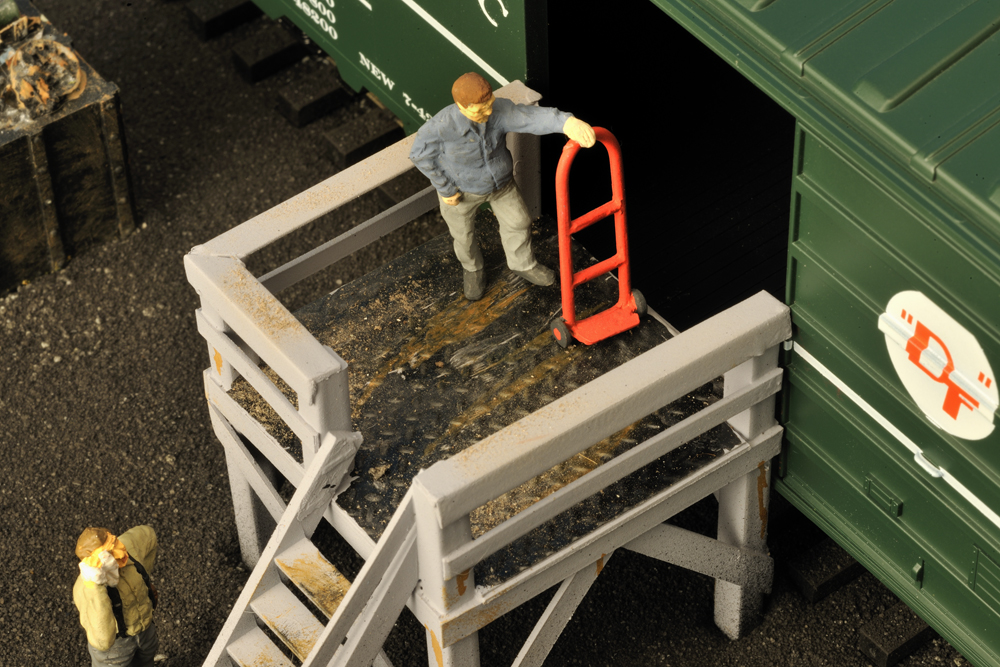
When you look at any model railroad, it’s the details that grab your attention—the people at the station, barrels by the wayside, or maybe a weathered locomotive or car. A recent trip to Sand Patch, Pa., inspired this small but important platform used by the maintenance-of-way department to unload materials for work along the line. It is simple to build, and the dimensions can be modified to fit a particular location or siding.
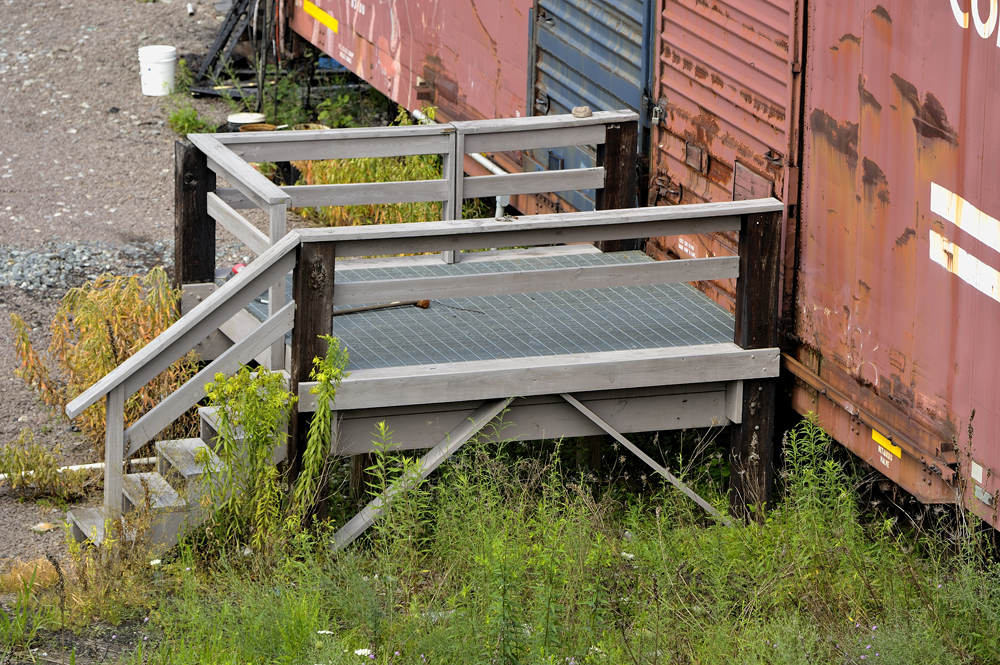
The deck of the prototype looks like a rectangle, but I made mine 8 feet square (2” in 1:48 scale) to fit into a particular location, as measured by the width of the boxcar door. Beginning with this part of the model, I cut a square from Plastruct diamond plate styrene sheet (PS-152) for the flooring. Next, I cut four uprights (90202) to a length of 9 scale feet (2¼”). Place all four pieces side by side to check for irregularities. Fine-tune the pieces so all are the exact same length.

Now on to the four uprights. Measure from the top down 3 feet (3/4”) and mark it with the edge of a sharp blade. This will give you a fine line to set the crossmembers of the platform accurately for a more exact fit. Cut four pieces of strip styrene (90738) to 8 feet long (2”) for the side members. It can be a little tricky to get everything square and in place, so I made a jig to hold the uprights at the edge of my bench. When the two ends are set, attach the other side, making sure everything is square.
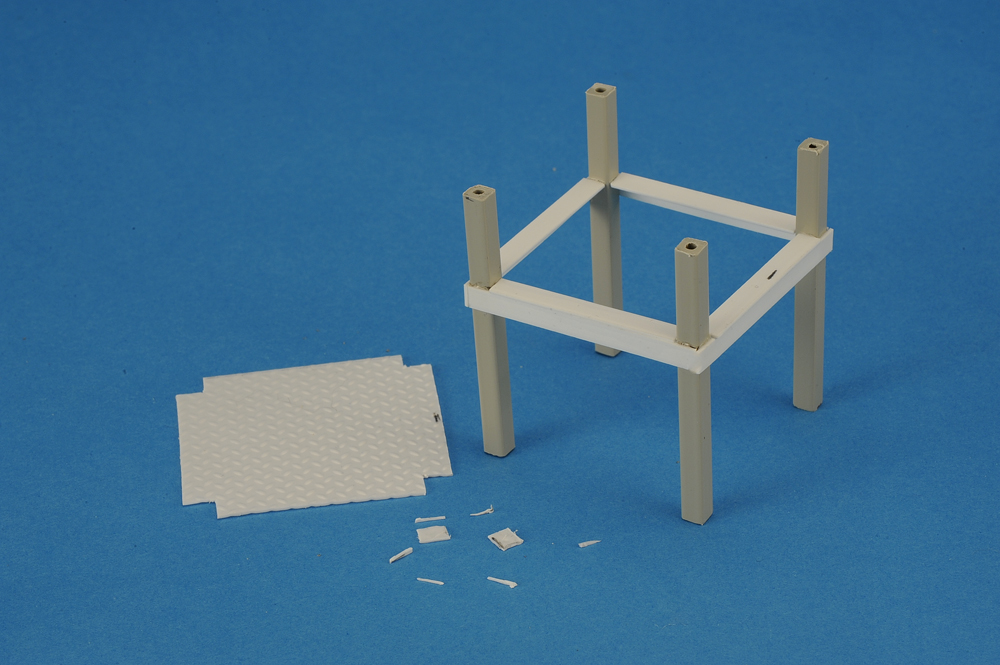
For supporting the floor, you need to cut another four pieces from the same stock (90738) at 6½ feet long (1.63”), cementing them in place on top of the side braces. On the diamond plate, I notched all four corners so the floor sits down and into this assembly. Make small cuts so it fits just right. To make sure everything goes together smoothly, I made a small mark on the floor and the end braces. Since the cement dries almost on contact, you want to make sure the floor is positioned right the first time! When you are satisfied, add more cement underneath at the floor joint for strength.
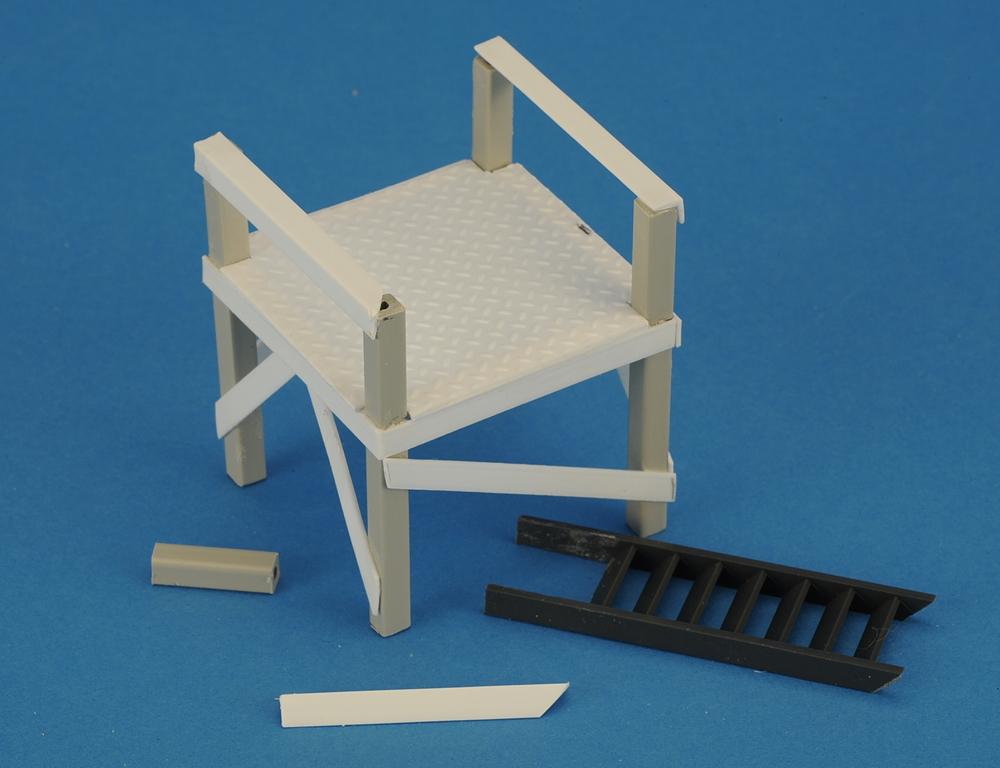
To finish the top rail and side braces, I used 4mm styrene angle (90505), cutting the left side (as you look at it) to 8 feet (2”) at its longest point on the angle cut. The right side is easier and is also cut to 8 feet (2”). For the stairs, I used Plastruct O scale stairs (90443) cut to 10 feet long (2.5”). I removed the top two steps, leaving seven steps with the last being the platform for support. On the left support, I cut another brace from (90202) at 3 feet (.75”), cementing it straight and square to this part of the stairs, as shown. Now add the top angle cut at 4 feet (1”); check the corner for appearance and cement in place.

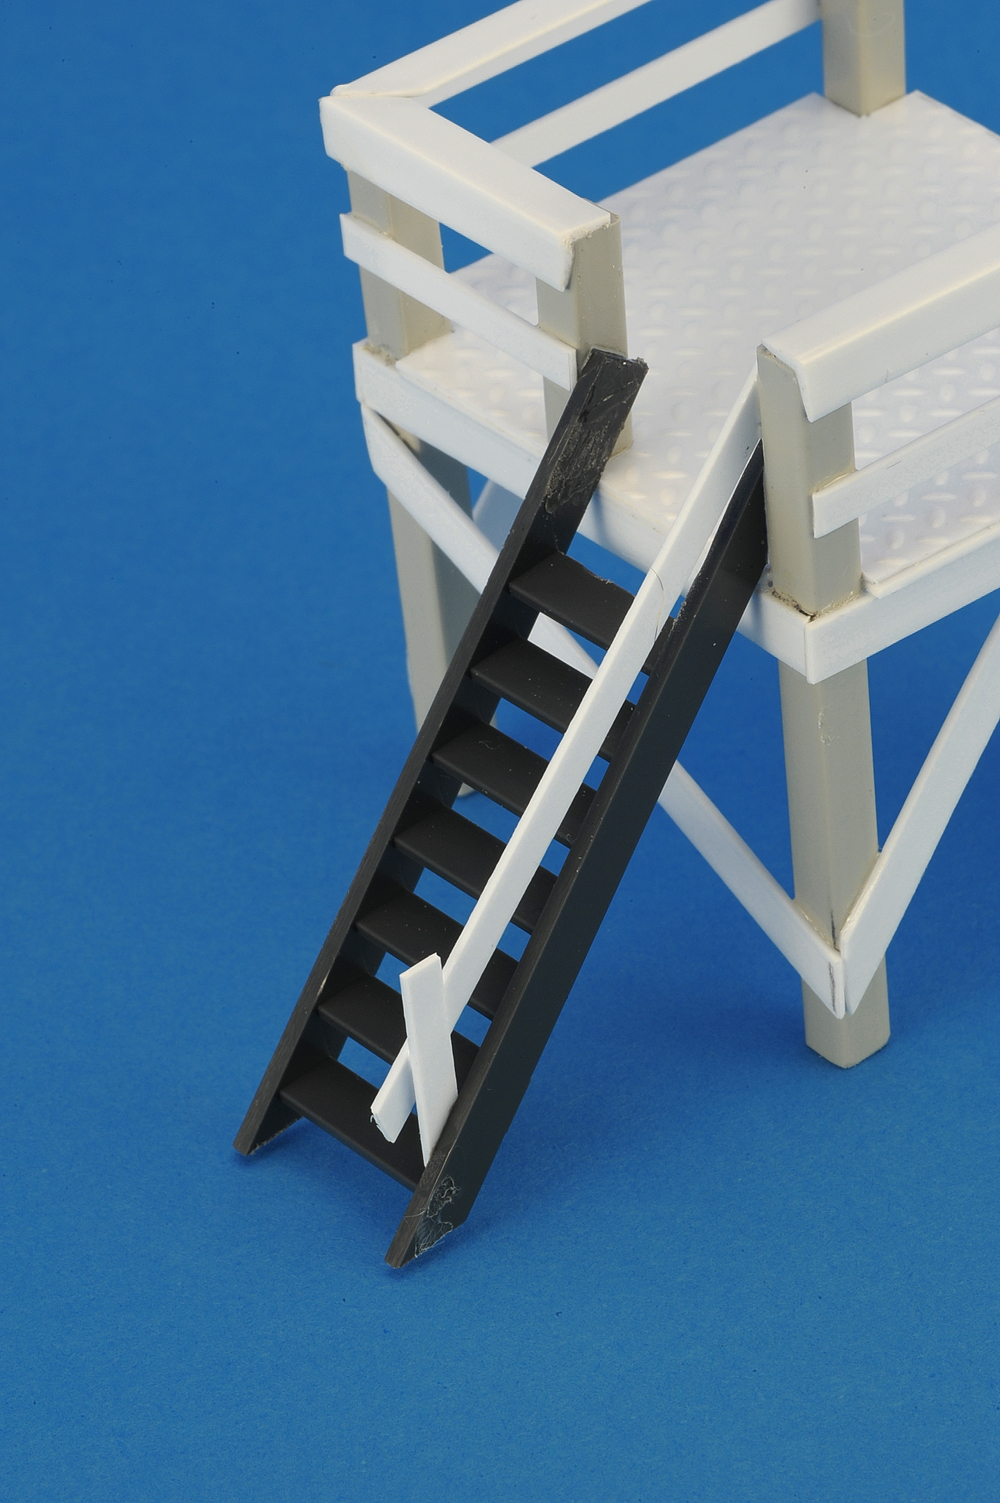
To add to the details, the center rail is cut from Plastruct (90736) styrene strip, measured and cut so it just meets the end of each upright support with the stair rail cut from the same material. Finally, the underside bracing is cut from the same stock, angled to fit neatly about a foot above ground level with a double bracing on three sides, a single brace on the front.
Finishing and weathering
I spraypainted the model with Rust-Oleum automotive gray primer, which is a good choice when you want to weather a model. When dry, it leaves a little bit of a “tooth” for weathering chalks to cling to. When all was dry, I hand-painted the deck in a flat black, then drybrushed Floquil rust [Floquil paints have been discontinued. –Ed.] from an old bottle on my shelf on the deck and along the sides where the braces and angles join.
Once the platform is complete, you may choose to add some details around the platform. Some buckets, ties, a few workers, and other small items can be added for that real-life look.
This is a great project for the first time scratchbuilder or even the veteran modeler, who might want to take a break from a larger undertaking or to complete a small spot on a seldom-used siding. If you’re looking for a small but noteworthy detail on your layout, give this project a try.
Materials
Plastruct PS-152 diamond plate sheet
Plastruct 90202 square tubing
Plastruct 90738 strip
Plastruct 90505 4mm styrene angle
Plastruct 90736 strip
Plastruct O scale stairs 90443
Plastruct Plastic Weld cement
Fine sandpaper or sanding stick
Rust-Oleum automotive gray primer
Acrylic black and rust colored paints (optional)