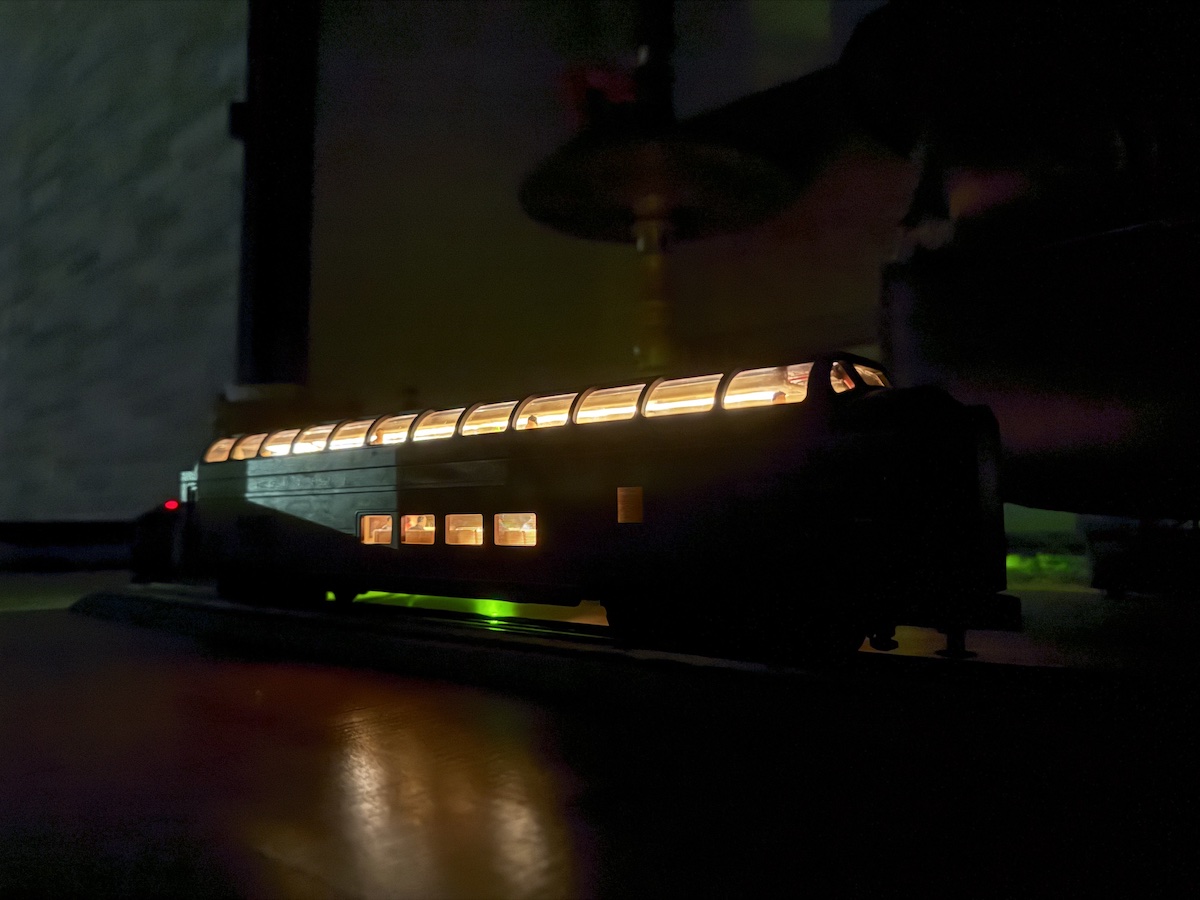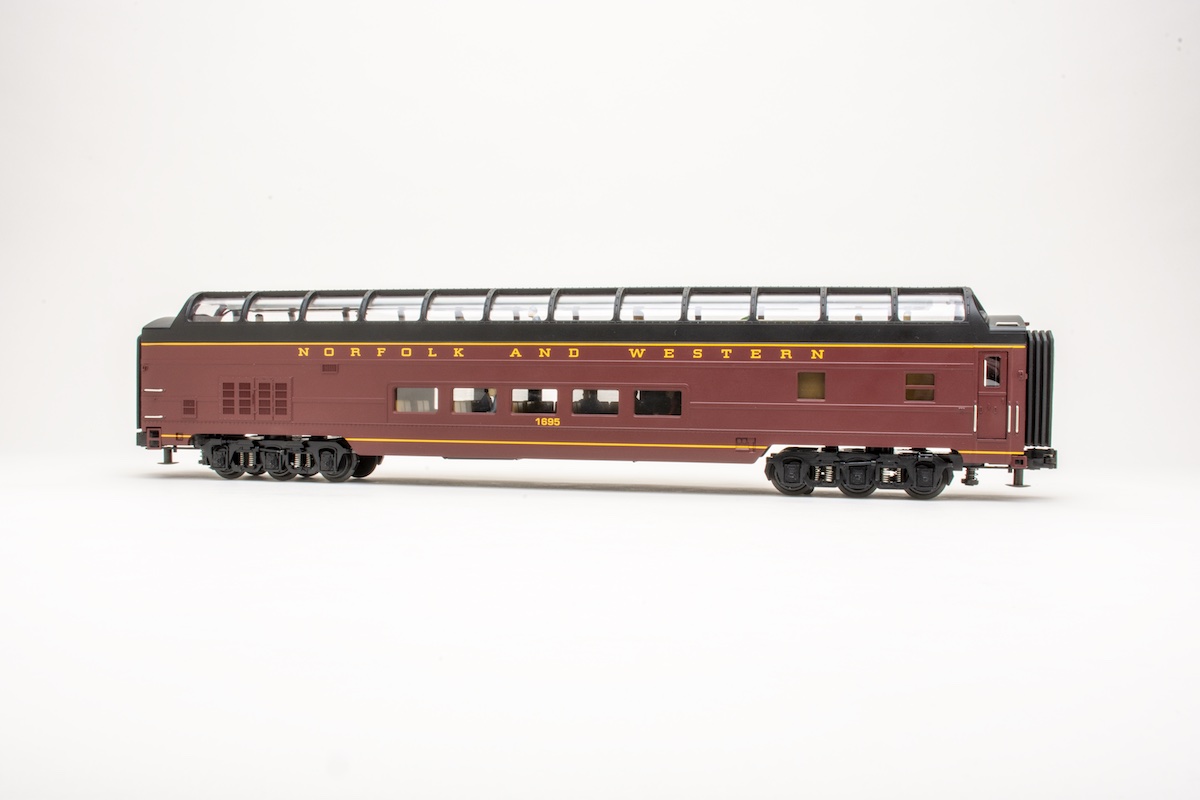
“When life gives you lemons, make lemonade.” At least, that was my thought process when I received this MTH Premier Norfolk & Western 18-inch, full-length dome car. Though a beautiful model from 2004, it came with older, 18V lamp bulbs. Initial track power testing immediately revealed several issues: Lights only turning on in the lower level; sensitive flickering, even when the car was lightly tapped; and a brief shorting out of the power pack. Additional work was clearly needed to get the lighting system functional again. But why stop there? The decision was then made to convert the entire car to LEDs, making some “lemonade” out of this situation.
Key decisions
Dealing with MTH-type models using alternating current (AC) power was new territory for me when it came to LED upgrades. A visit to one of my go-to hobby shops provided crucial tips and components. The store’s technical consultant advised that the project would be straightforward after I made two decisions:
- Should I use a bridge rectifier, a voltage regulator board, and a capacitor? The rectifier converts AC from track power into direct current (DC). The regulator allows you to adjust the voltage rate, controlling the LEDs’ intensity for a more realistic look. The capacitor retains power to prevent flickering when pickup rollers pass over dead frogs or dirty track sections. I’ve seen it where none of these components are used and can still work, though it can come with risks.
- Should I retain the original MTH spring contact blocks? MTH uses these blocks and a contact board to transfer current, minimizing excessive wires for a clean body-to-frame separation. There is a catch with the springs wearing, thus losing their contact.
I opted for all three components for obvious reasons: AC-to-DC conversion, intensity control, and flicker prevention. I also decided to replace the spring contact blocks and hard-wire the rollers, resistor, regulator, capacitor, and LED strips (more on that reason coming up). Of course, you can always go in the opposite direction I’ve chosen.
Some disassembling required
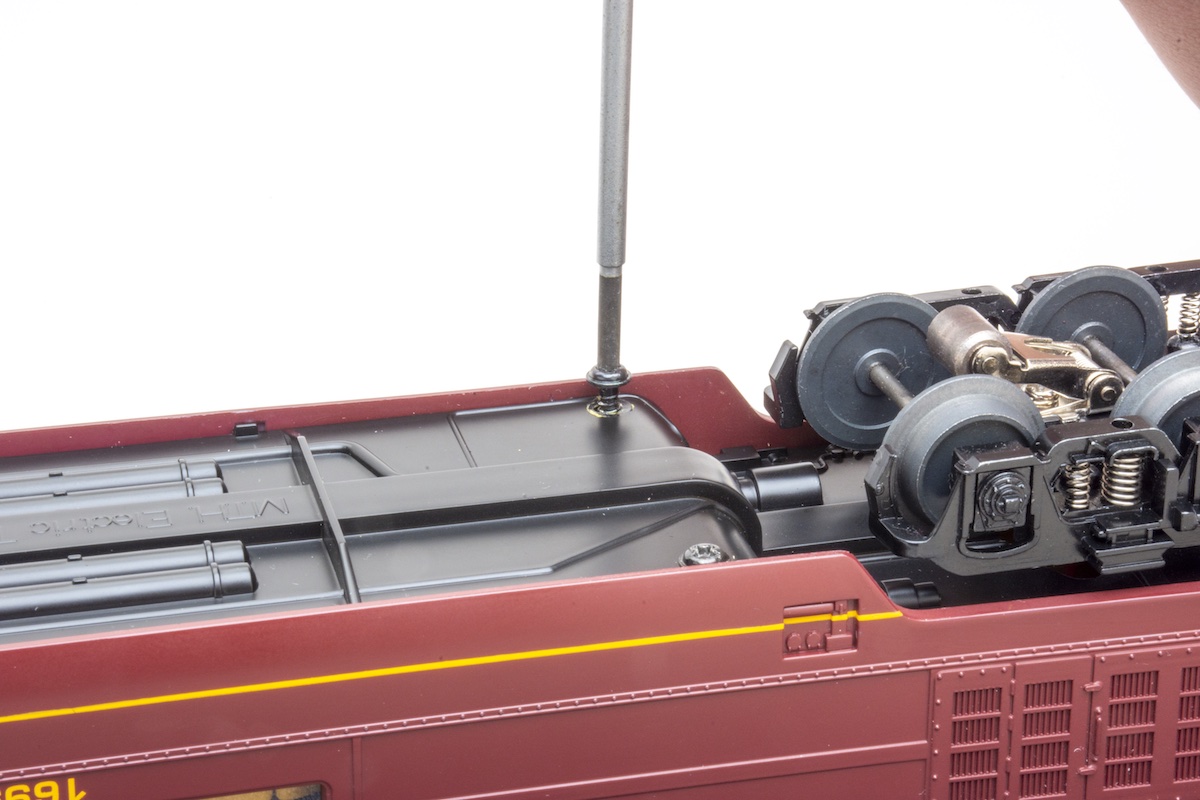
To begin the project, the car body must be lifted off the frame, which usually calls for removing the body-mounted screws. This particular model requires removing eight round-head screws along the underside, plus two smaller flat-heads at the vestibule end (which secure the step details).
All 10 were unscrewed as I was not only removing the body and frame, but also taking out the top and bottom interior details. Dissembling all four will require gentle prying and wiggling to lift the body and interior details free. Take your time to prevent cracking or breaking the plastic.

Lighting up the work
Rewiring for the new LED system started at the rear die-cast truck at the vestibule end of the car. The 22 AWG wires from the truck’s pickup rollers now run through a trench inside the frame toward the forward end of the car. Here, they meet the forward truck’s own wiring. All wires are soldered to the resistor’s input.
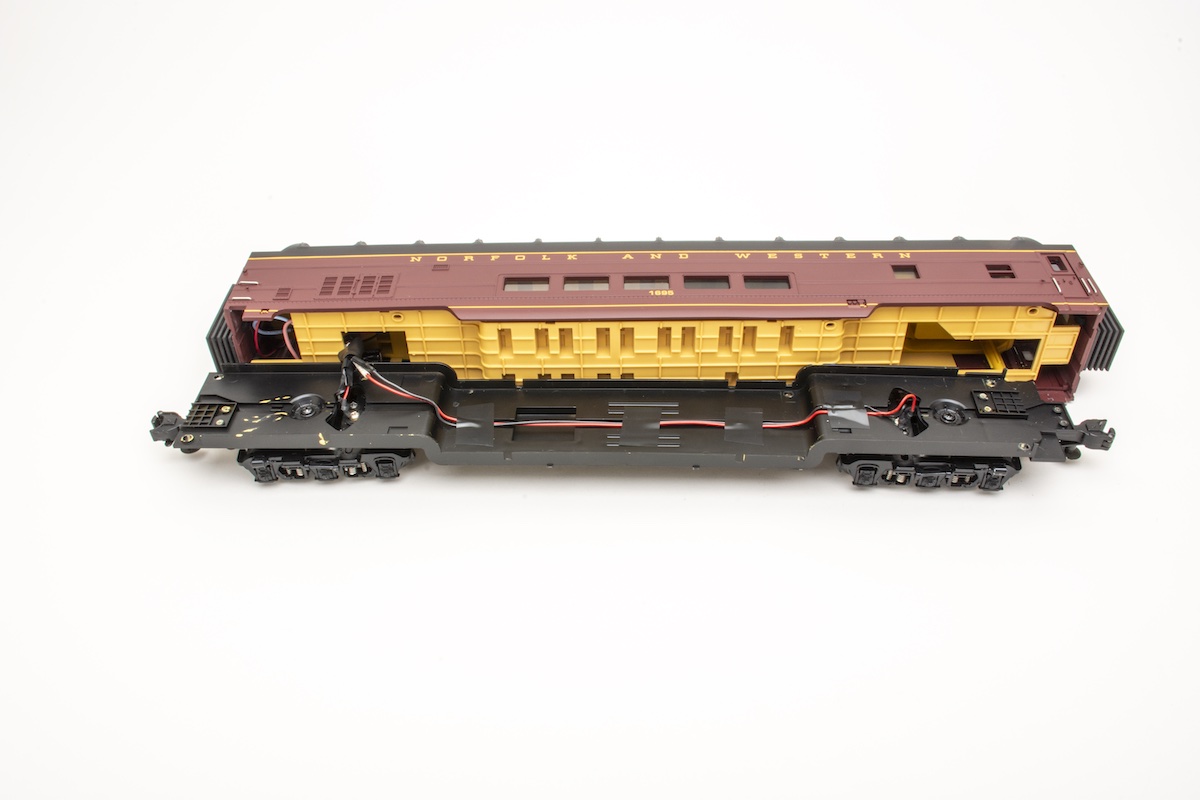
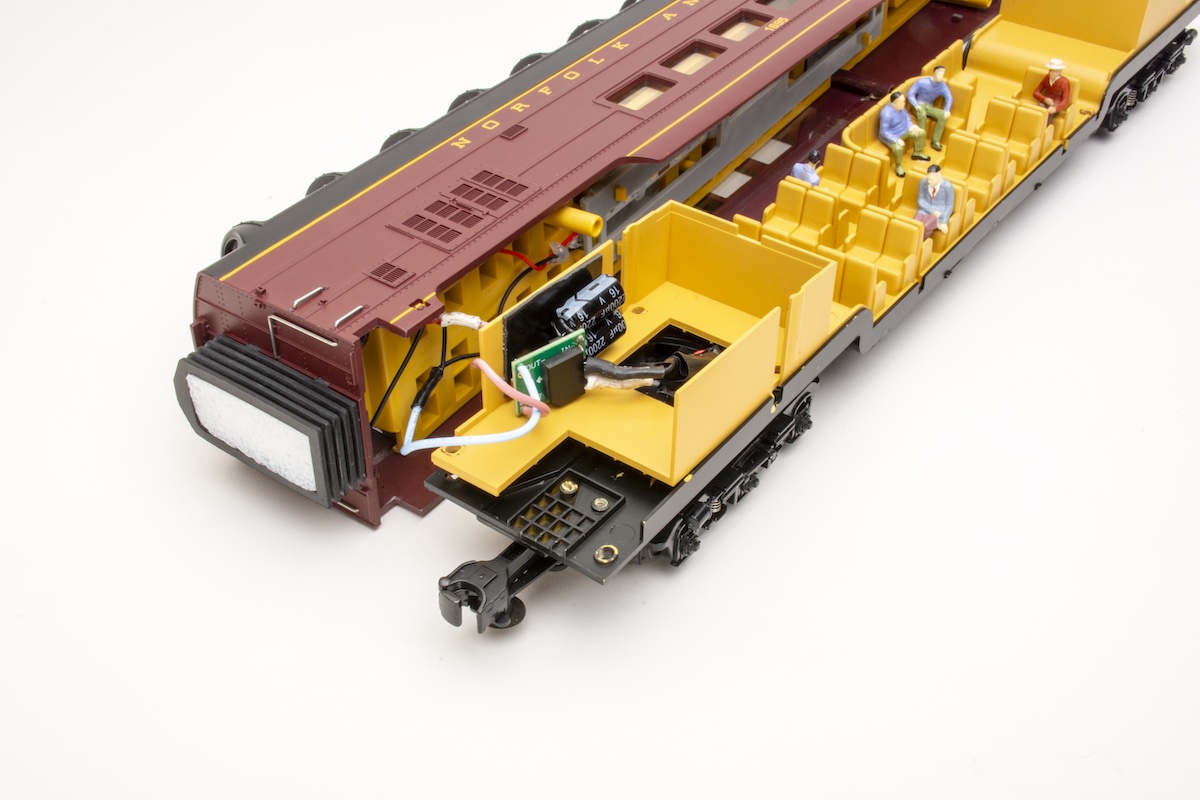
The section directed above the forward truck is an empty space, hence an ideal spot to store the resistor, regulator and capacitor, as well as any excessive wire from the LED strips, prompting my decision to ditch the spring contacts and go hard-wire. Added bonus: This end section has windows on one side but covered with a shade-style detailing, so you won’t see all the components inside. Please note that the same might not apply to other passenger car types, such as a coach.
I soldered two sets of hot and ground wires to the resistor’s output and ran them to their respective LED strips. Be mindful of wire lengths when going hard-wire over the contact blocks. They should be long enough to allow the body and interior detail to be lifted off the frame for future maintenance, but not so long that they can affect the forward truck’s turning capabilities.
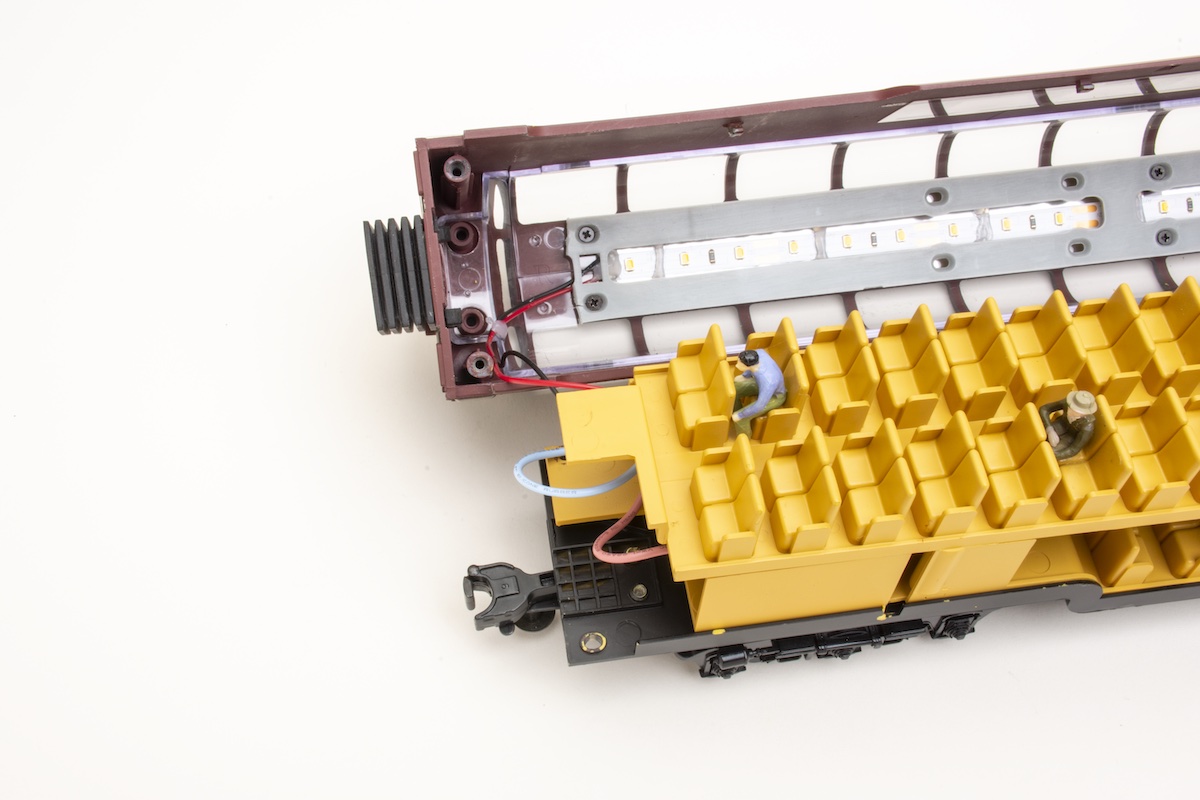
I selected Warm White, 2700K LED strips to recreate a realistic appearance in the car’s interior. I cut them at the copper section, roughly based on the length of the plastic guides that held the original lamp bulbs and metal pickups — 14 ½ inches on the dome, and 8 ½ inches on the underside of the top interior detail to light the lower level. Obviously, I removed the lamp bulbs and pickups, though I decided to retain the guides over the installed LED strips for that extra detail.
After I soldered the wires to the copper at the forward ends, I attached each strip with an M3 adhesive backing. I also applied dabs of hot glue for a reinforced, long-lasting bond, which I highly recommend doing. Avoid gluing over the LED bulbs for your own project.
Let there be light!
I can’t stress enough the importance of testing before full operation. Upon the initial power-up, the LEDs were flickering badly when the car was rolled back and forth or even wiggled side to side. This sensitive flicker pointed to a poor connection to the track power.
I initially checked the rollers and wheels to make sure they were properly secured and lubricated, but with no luck. So off came the body and interior details for an inside look. The screw connecting the brass end of the ground wire to one of the trucks was slightly loose, which prevented proper contact. A simple tightening of the screw resulted in a big difference. The LED lights were now flicker-free, top to bottom, with no short circuits. After adjusting the intensity on the regulator, they looked fantastic!
In the future, I would like to go back to the car for minor adjustments, such as better covering the exposed wires at the front of the dome section and adding more seated figures. Overall, this LED upgrade to the MTH Premier full-length dome is complete and, as the consultant said, “pretty straightforward,” making it a project anyone can perform and learn from.