I enjoy animating scenes on my O gauge layout, and have come across a great way to get slower, more-precise realistic action: using servos.
A servomotor, or servo, is a small, inexpensive device that provides control over the position, speed, and acceleration of a mechanical system. The device is readily available, easy to program, and easy to either disguise or hide on your layout. Servos are available in several sizes depending on the workload required. For the most part, smaller ones are fine for layout use.
There are two basic types of servo. Before purchasing, be sure to buy the right type as one servo cannot perform both functions.
The first type moves an arm, known as a horn, from one position to another. The arm extends and returns to the original spot. This can be set as one back-and-forth action or divided into separate movements. Start, stop, and speed are programmed through a controller.
The second type of servo has a circular motion similar to a wheel. This will spin continually in either direction until programmed or switched to stop or reverse direction. Speed and direction are programmed with the same controller.
The controller itself is used to set the start, stop, and speed. It can typically control two servos independently or with coordinated action. A wiring diagram will come with the controller, which requires just a few wire connections and a 6-volt DC power supply. The only other thing needed is a switch to start the action. This can be a push button, throw switch, or infrared detector.
Servos are available from most electronic suppliers, but I like Polulu Electronics and Robotics. They have a great video tutorial and helpful written information. If you want more complicated movements or to integrate several servos, you’ll need a more advanced controller that is programmed with a computer. These have a much steeper learning curve. Polulu has several sizes available.
Here are some examples of how I’ve used servos on my layout. I’m sure you will find many uses as they’re easy to install and operate. Perhaps you’ll be inspired to try a similar project.
Cemetery scenes
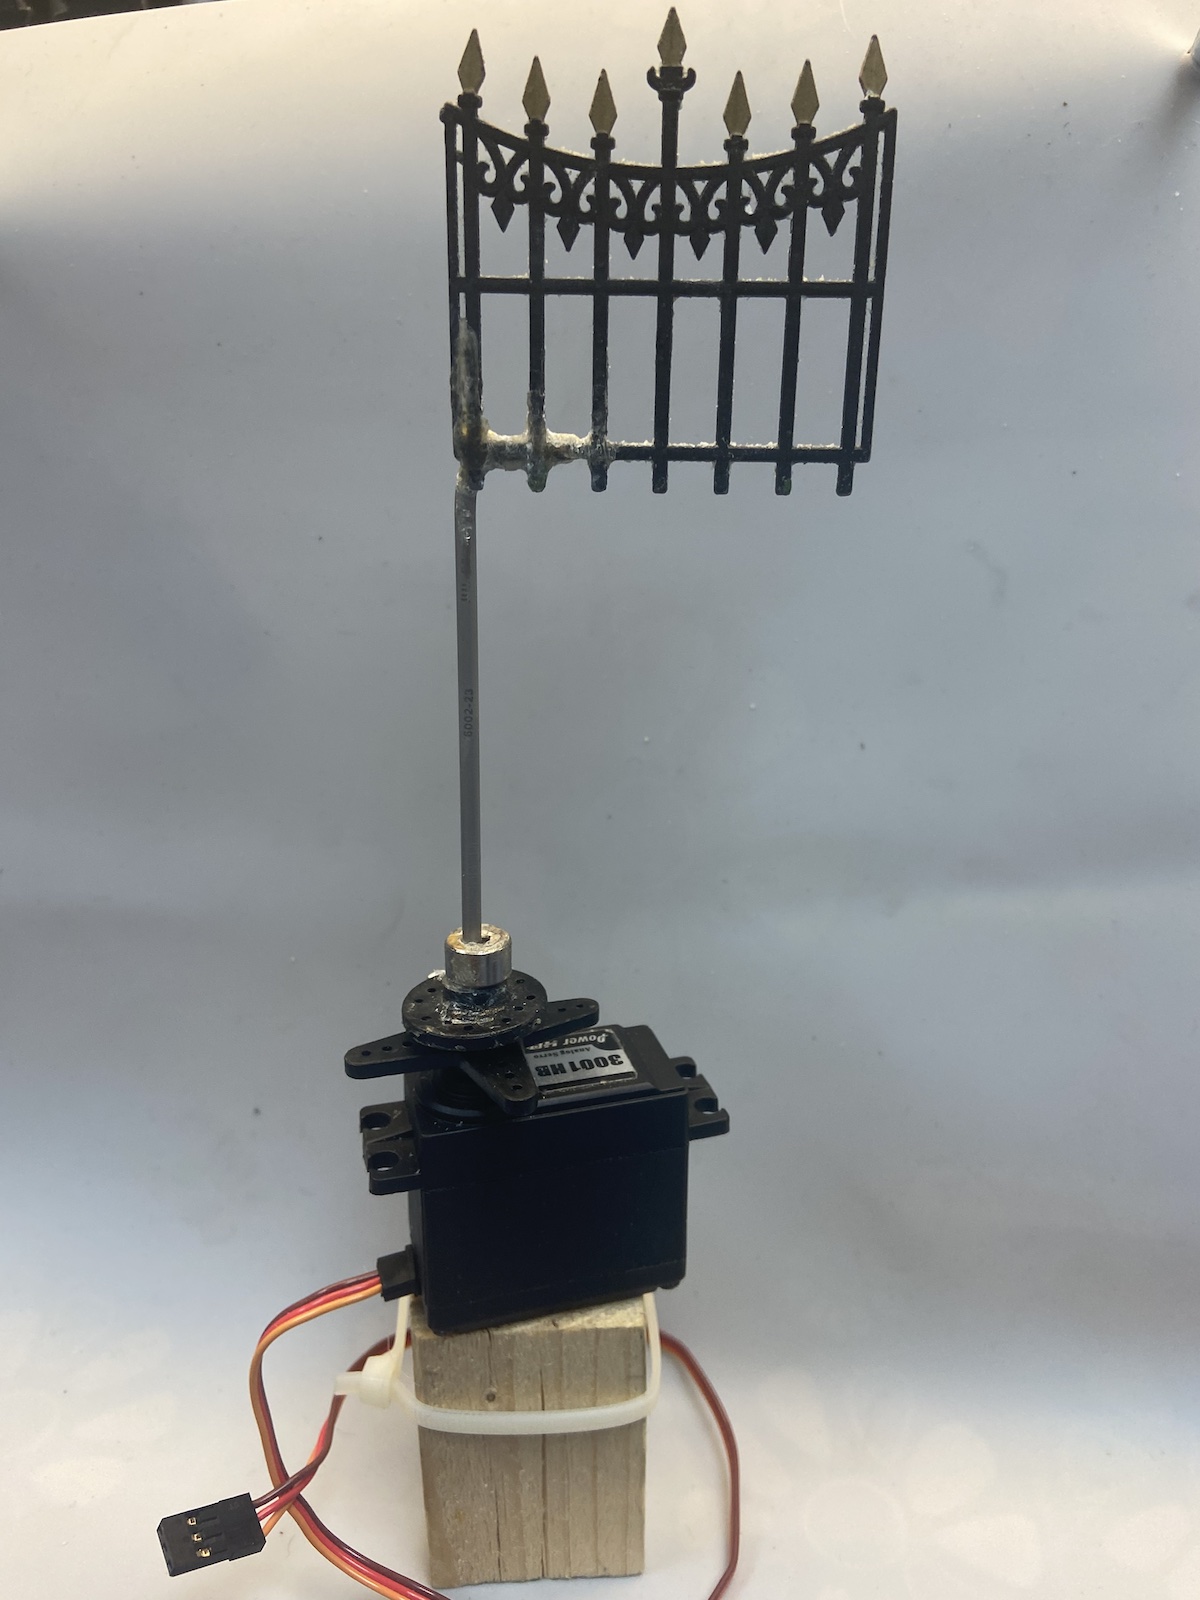
On my layout, I use servos to slowly open and close a rusty cemetery gate. Photo 1 shows the entire unit with the gate. As the servo moves back and forth, the gate (attached to the horn) follows the action. The servo is underneath the scene so the viewer only sees the opening and closing effects.


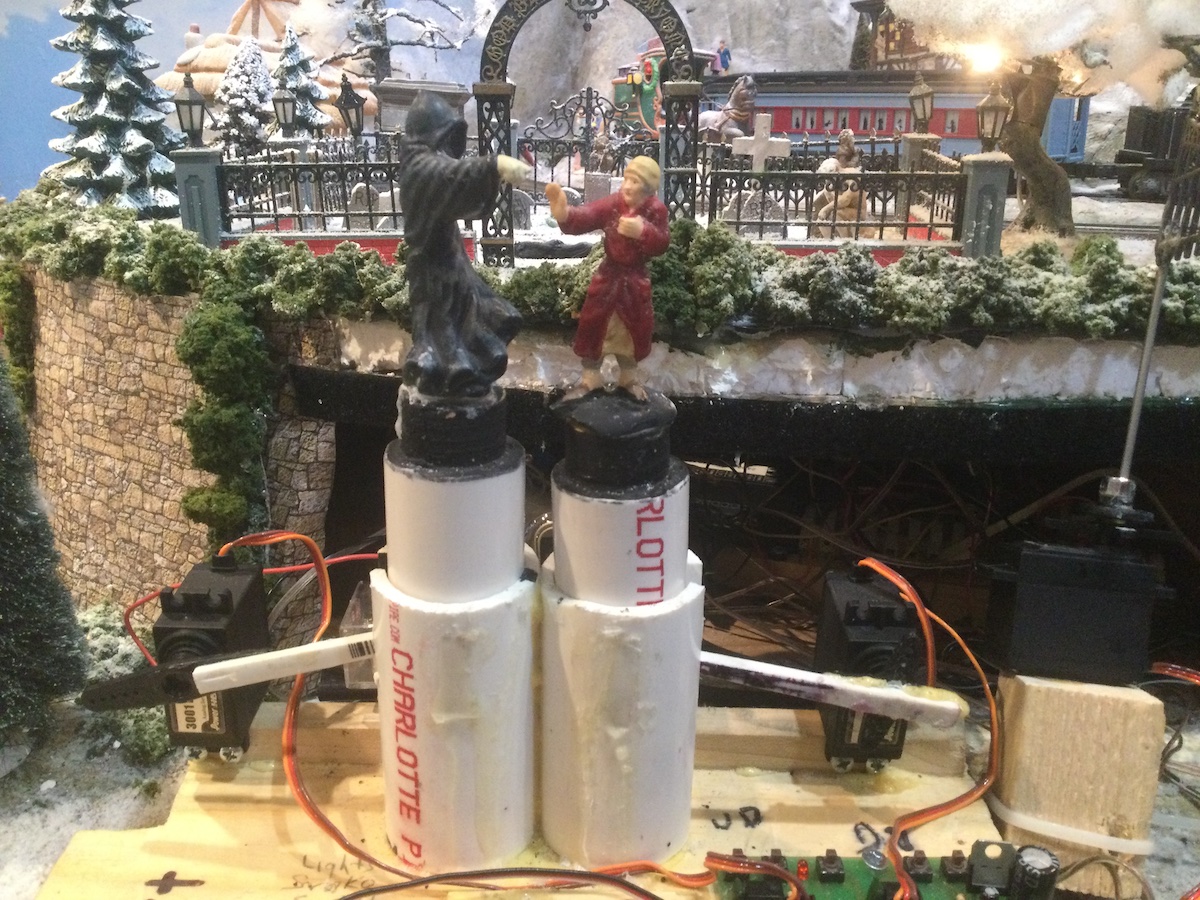
I can raise and lower a coffin in a grave robber scene, or raise and lower Ebeneezer Scrooge and the Ghost of Christmas Future from a smoking grave (photo 3). In photo 4, you can see what is under the figures, out of sight. The servos are mounted on their sides and a plastic rod is attached to the horn. The rod extends through a slot cut in the larger piece of PVC and is positioned under the smaller (inside) PVC. The figures are glued to the top of this PVC, so as the servo goes back and forth, the figures move up and down. I’ve found the tube-withinin-a-tube action is smoother and less wobbly. The figures are available online; the PVC is easily available from any building supply store. The larger tube is 1.25” inside diameter, the smaller is 1.25” outside diameter.
Construction scene
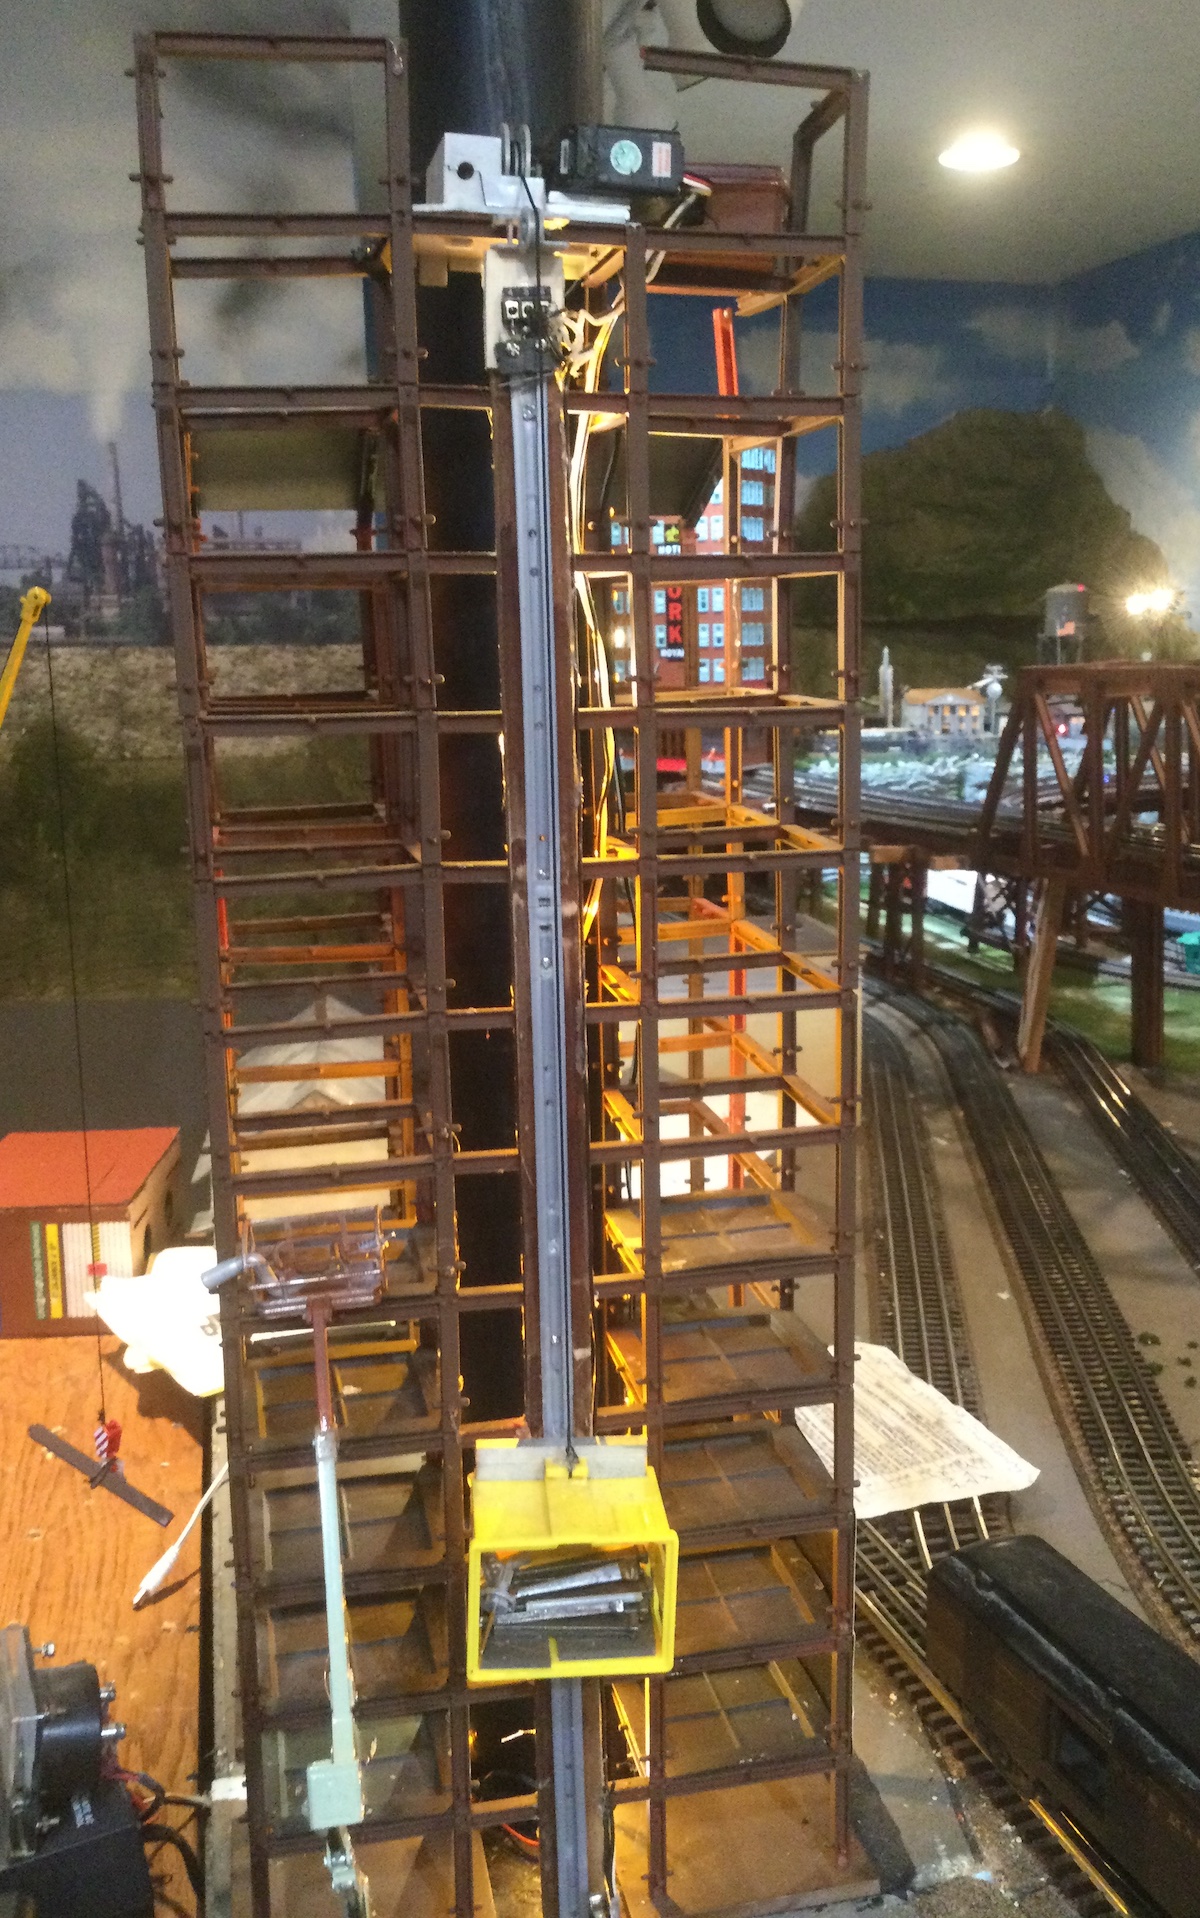
At a construction site of an unfinished high-rise, I move a service elevator up and down, accomplished with a continuous action servo (photo 5). The yellow elevator slides in a track pulled by a cable wound by a servo mounted atop the roof. Upon arriving at the top, the elevator trips a single pole double throw (SPDT) armature switch (available from Jameco Electronics, jameco.com) that reverses the action, taking the elevator back down (photo 6). At the bottom, another switch is tripped, thus reversing the action and sending the elevator back up.

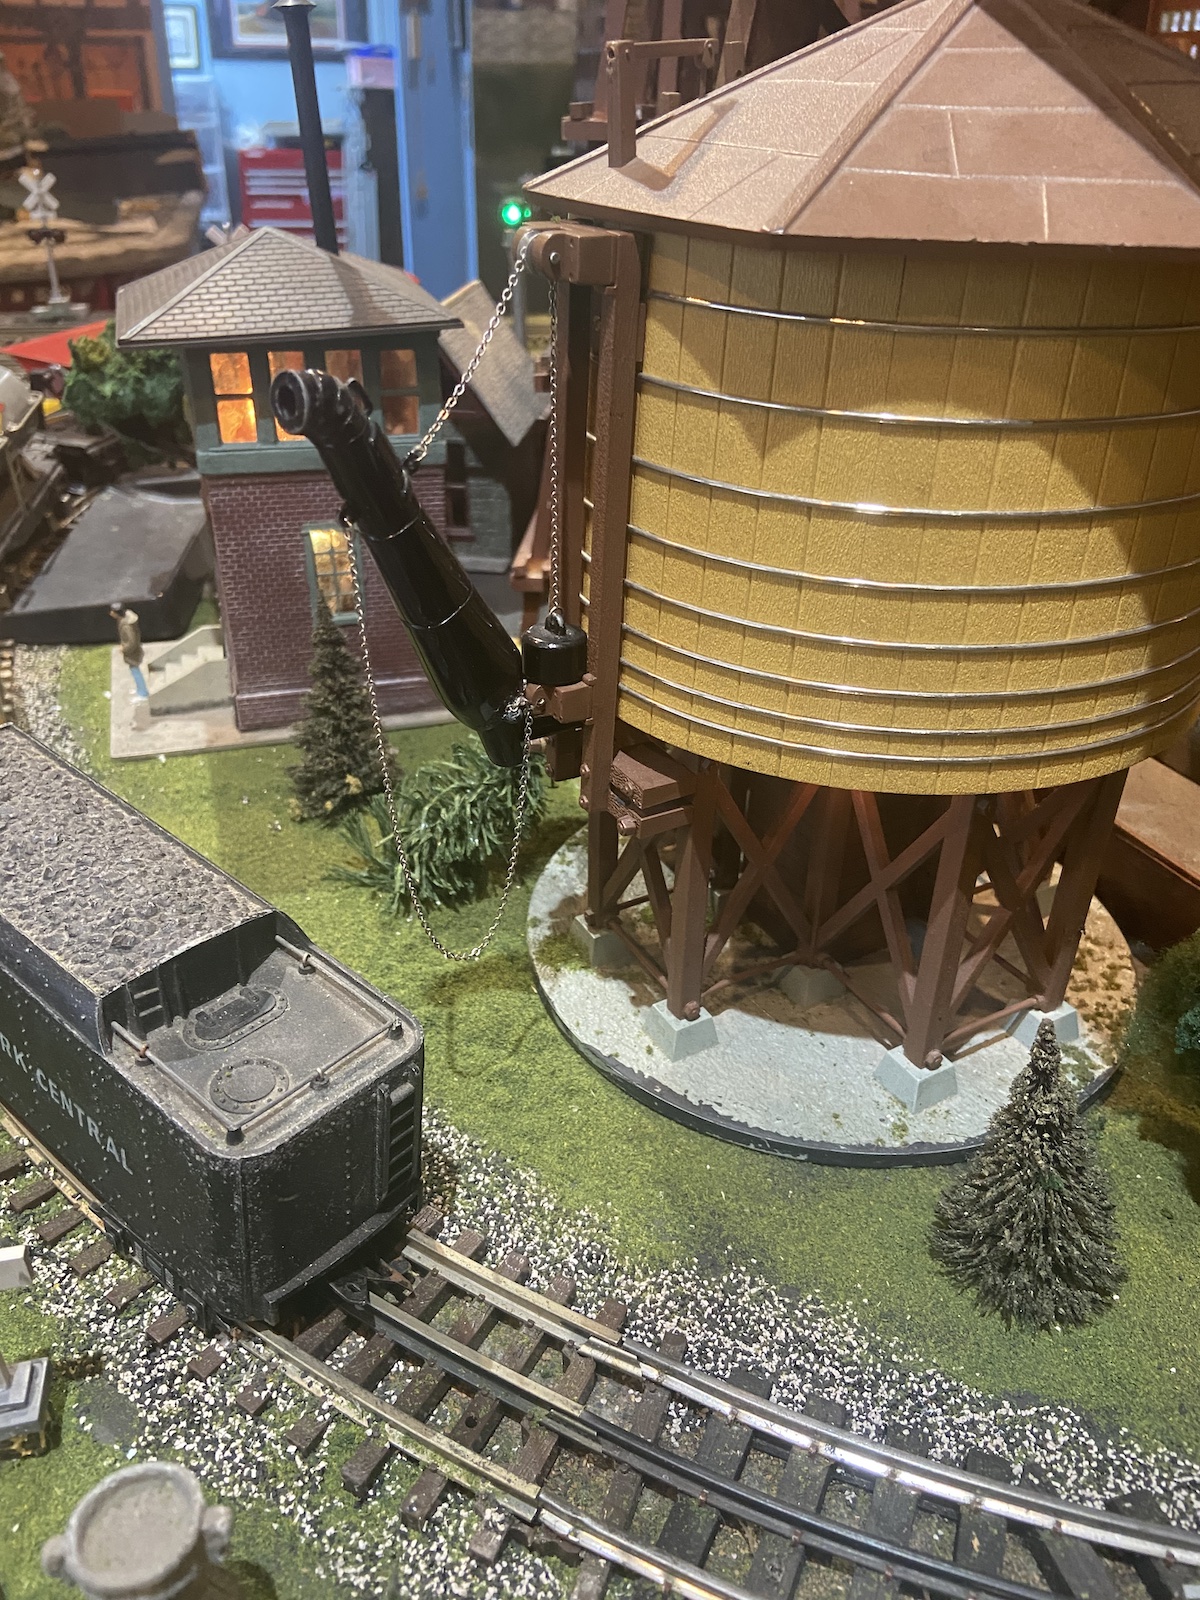
Water tower animation
I’ve upgraded my Lionel No. 24224 water tower by adding a servo. Out of the box, the downspout rests vertically next to the big tank, waiting for action. Park the tender below, push a button, and the spout comes crashing down, hitting the top of the tender with a crunch. Push the button again, and it snaps up to its original position.
With a servo replacing the original motor, a button push will slowly lower the spout. It stops just above the tender, allowing for minor adjustments to the tender’s position before delivering the water. (Photo 7) When complete, another button push slowly raises it to its original position. Sound effects would be fun to add, but that’s for another story.