Grade crossing for a garden railway: I founded the Motorcycle and Model Railroad Museum of Wisconsin, a non-profit corporation that allows others to enjoy model trains and growing vintage motorcycles, in 2002. These, along with a 3,000 square foot HO scale model railroad layout, will be the centerpiece of this Green Bay area attraction.

Having met garden railroaders through clinics at EngineHouse Services, our local train shop, I thought a large-scale railroad running outside of the museum would be a fun attraction. I could run a track out of our garages, bury it to the level of the track in the cement apron around the garage, and then use the track as a midcourt line as it ran across the blacktop of the basketball court immediately next to the garage. The staff at EngineHouse Services were enthused with the project, and helped me bring the plan to reality.
One of the EHS staff, Dick Foreen, came to the job site the day we laid the first section of track out of the garage and through the cement apron. We embedded the rail, ties and all, into the cement so it was level with the apron, and then the concrete installers made a flangeway for the inside of each rail. To avoid interference from the cement between the track, we took a grinder and a test engine and adjusted any humps once the concrete hardened.
Two nights later, it rained. I went downstairs into the train room and everything had flooded! The concrete installers had not put any slope in the concrete, and had failed to seal the edges of the Spancrete floor in the garage, nor between the garage floor and the apron outside. The concrete apron and installed track all had to be removed.
Rebuilding a grade crossing for a garden railway
Of course, rebuilding the parking lot/basketball court gave us new options for installing track. Our first thought was to simply lay the track on top of the blacktop and have the rollers and press it in, but this would have crushed and bent the rail and ties. We considered digging out a section of the blacktop as the workers poured it, but quickly abandoned that idea due to the extreme heat.
We even thought of having the blacktop poured in two sections, leaving a gap between each section, but we were concerned with shifting during the winter (frost heaving the ground) and high temperatures during the summer. It seemed that a regulation grade crossing for gauge-1 track might not come to fruition.
Finally, the EHS staff and Mike Bringe, owner of Quality Asphalt, came up with an idea. First, install the blacktop. Then cut two shallow gaps in the blacktop with a concrete saw, (approximately 3/8’ deep and 3/8” wide), and place the rail directly in these gaps. This would eliminate having to worry about the blacktop shifting, the center between the rail cracking out, or the tracks coming out of the gap. We agreed to try it.
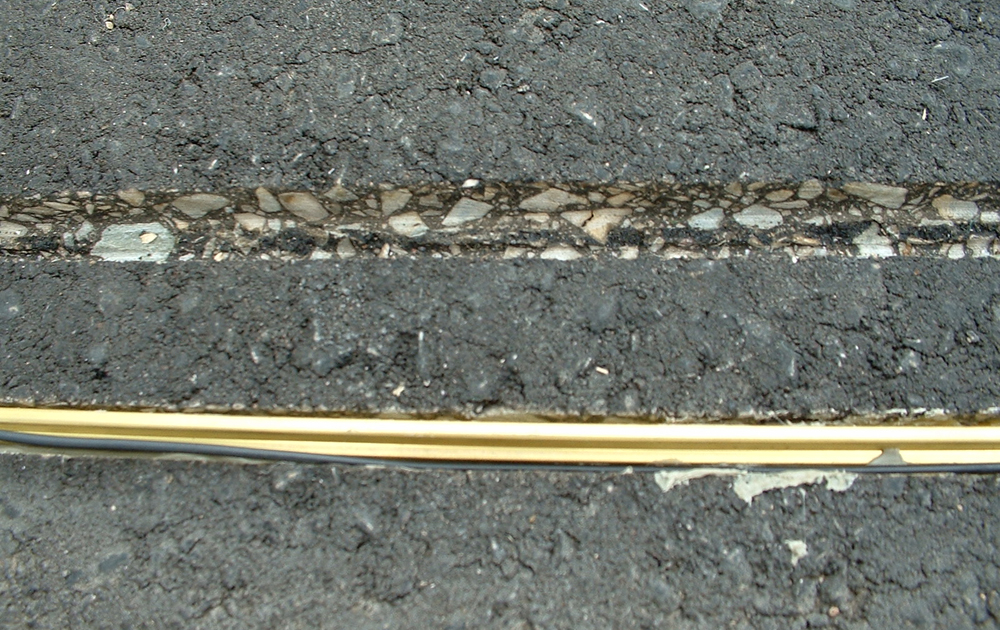
I bought 14 sections of 8’ rail from EHS. After making the first long cut across the blacktop, we chipped out any leftover shards and set the first rail in. The level was almost perfect, and there was plenty of room for a flangeway. We did the same thing for the second rail, although we cut the gap slightly wider on the inside to allow for a little wiggle room as we gauged the track.
This required a second pass with the concrete saw. Additionally, as we laid the second rail, we made sure the outside rail-to-rail measurement was 2 ¼”, to allow for the proper gauging later as the rails were secured.
The next step was to join and electrify the rails. Securing the 55’ length with rail joiners and screws was easy. I have made it a policy to always attach feeder wires to every section of rail I lay to avoid shorts and dropouts. I soldered a buss wire to the outside of each rail, connecting it at two different points on each 8 foot section. We wired the feeders to the outside of each rail, as all would later be buried in blacktop crack filler.

We applied a base of Liquid Nails in the gap. We set the rail on top of the adhesive. Because the Liquid Nails has about 15 minutes before it starts to set, we had time to adjust for straightness, gauging, and levelness. In about one hour, the rail was secure enough that we had no worries about it moving. [Note: The product has a minimum 24 hour cure time, depending on weather conditions. –Ed.] It would be difficult to spike the rails down, although one might consider using some spikes after using the Liquid Nails. I found this to be unnecessary, though.
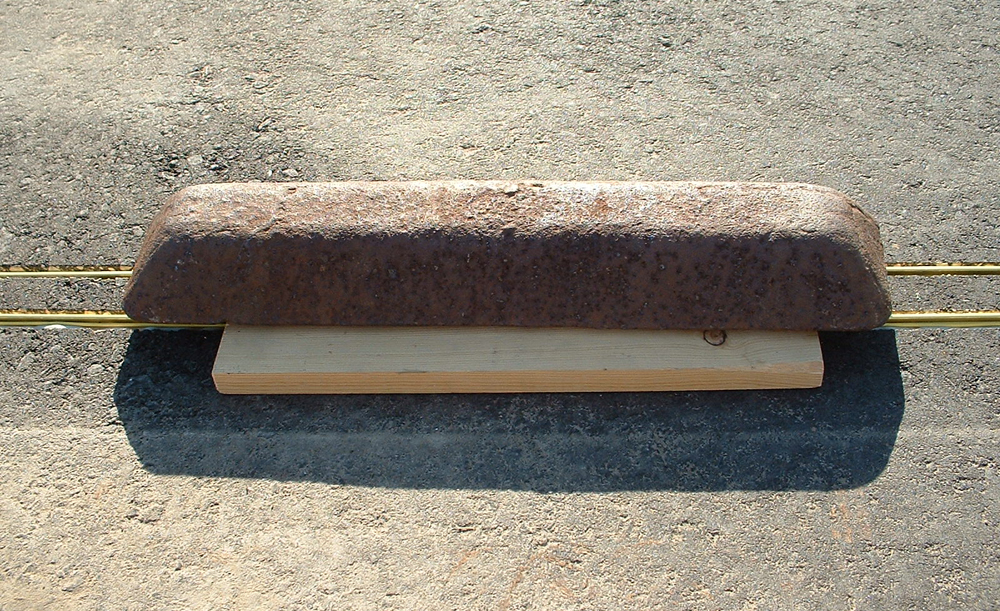
We mounted one 55’ length of rail and let it harden overnight before installing the second rail. This allowed us to gauge and adjust the second rail using the first as the guide while the Liquid Nails firmed up.
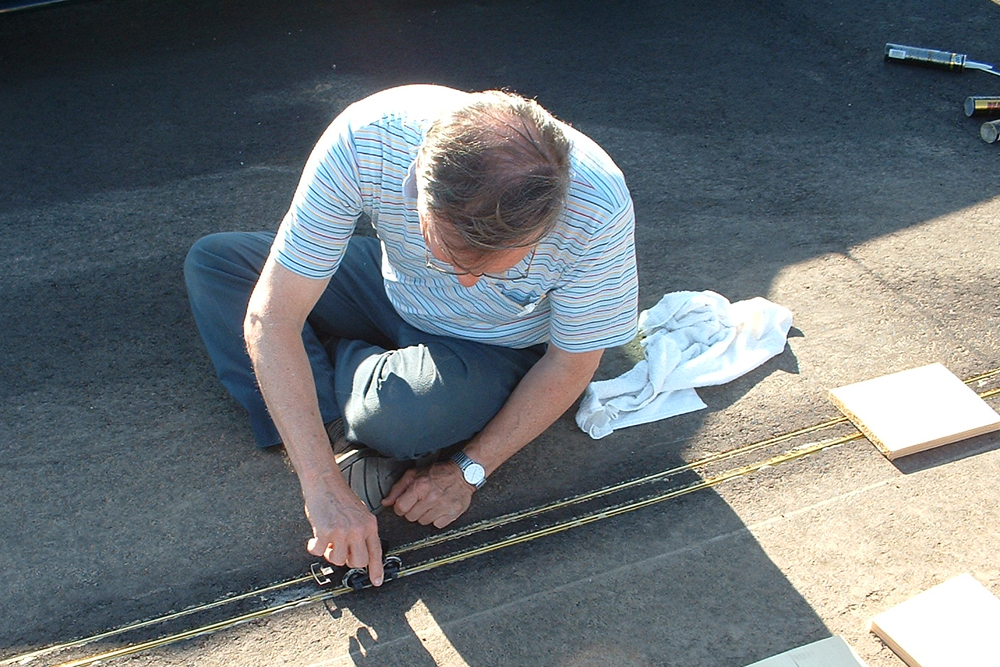
While doing this, we had a rail gauge, coupler guide, a set of trucks, and a large-scale diesel engine nearby.
We rechecked each section as we proceeded to a new section, making sure that the length didn’t cause any shifting with each adjustment. The engine came in handy, as we were able to determine if there were any spots in the center of the two rails that were too high, allowing us to take a small grinder and level the blacktop a bit if needed.
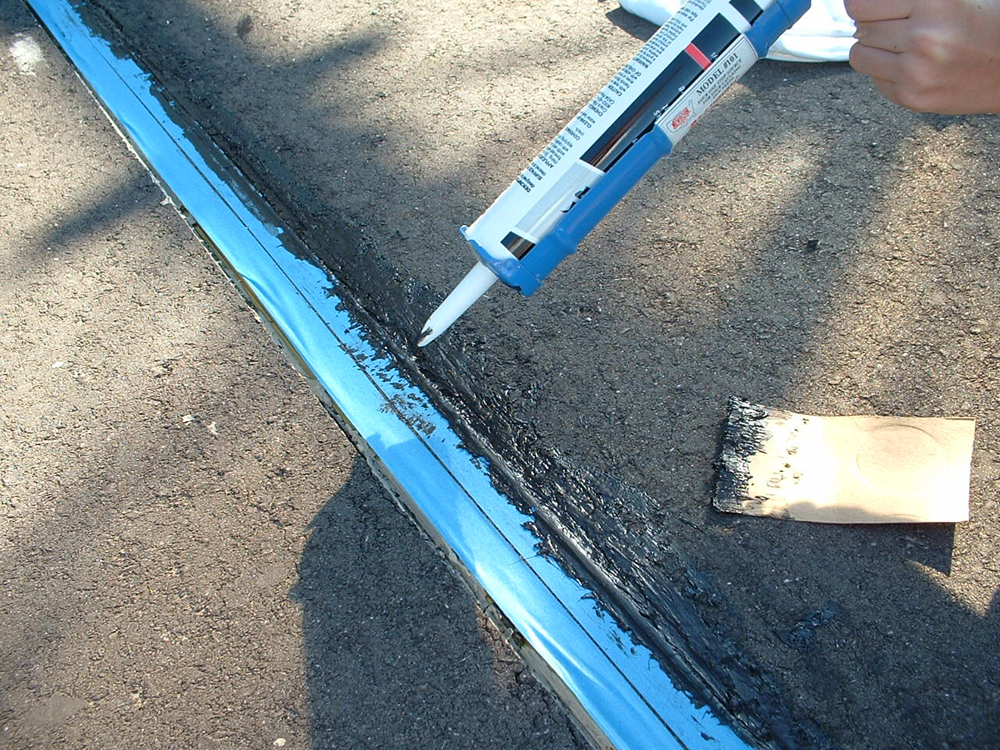
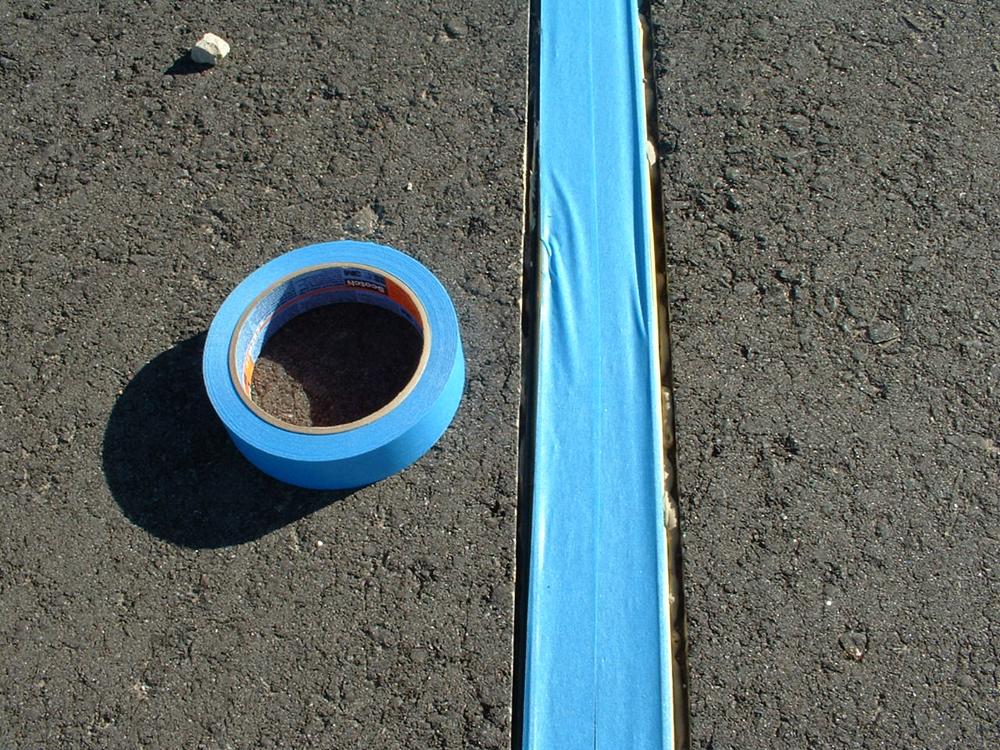
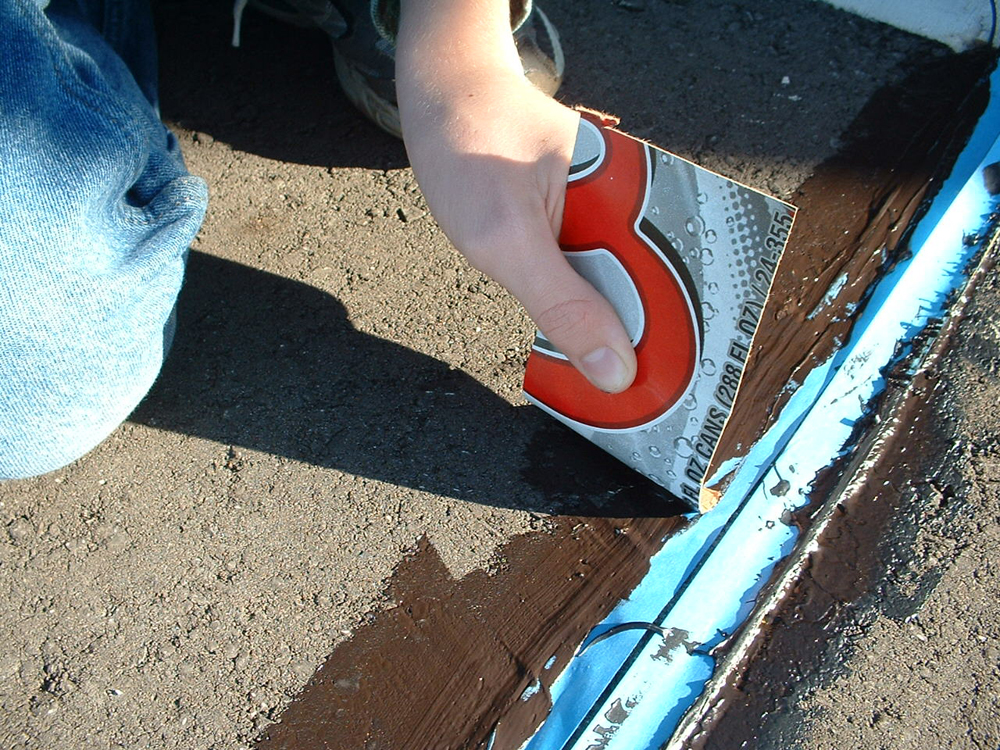
The final step was to take the blacktop crack filler and fill in the gap between the outside of the rails and the blacktop. To avoid having to clean a mess off the top of the rails, I took a roll of blue carpenter’s masking tape and covered both rails before filling the gaps. The sealer is quite easy to use, but can be messy, and will take a full 24 hours to cure to the proper hardness. Drying seemed to take longer on hot days.
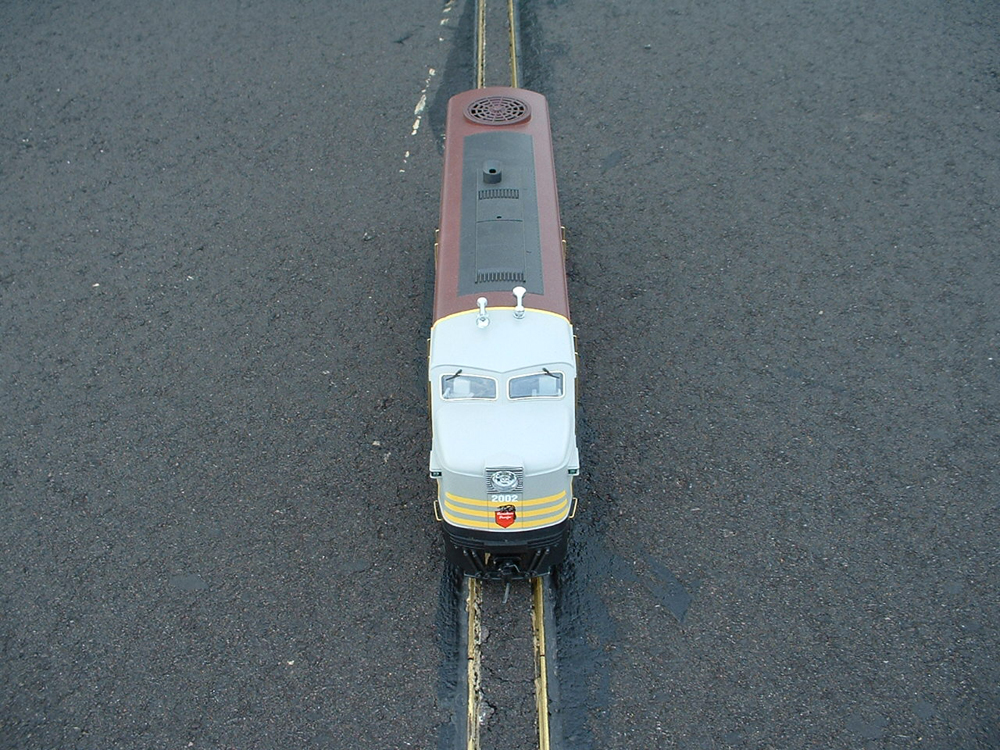
I made sure that the wires were fully buried in the filler so they would not stick out and be run over by vehicles crossing the tracks. Weight is not an issue when driving over the crossing, as the tracks and gaps are narrow, and the weight dispersal of a large vehicle over this will make minimal, if any impact. We ran a test engine over the length of track without any problems.
As we finish painting the lines on the basketball court, I will paint the center of the rail white for the basketball midcourt line, and finish the job by cleaning the top of the rails. If you need to cross a driveway or sidewalk, I hope you give this method a try. It’s worked well for me.