


In the October 2005 issue, I explained how to build a large terminal building for your O gauge layout. But the actual building is only part of a terminal complex. Whether it’s a terminal (with stub tracks ending next to it), or a station (with through tracks beside it), there’s almost always a train shed connected to the terminal building to shelter passengers.
As with terminal buildings, there are few commercial train sheds on the market. However, the materials and construction techniques described in this article will help you to construct a train shed for your particular layout space and configuration.
The shed size will depend on available space and the number of tracks you cover. My model features five stub tracks, making the finished shed about 27 inches wide and 240 scale feet long. Real train sheds are often much longer and wider, so my model strikes a balance between sufficient size and the physical limitations of an O gauge model railroad.
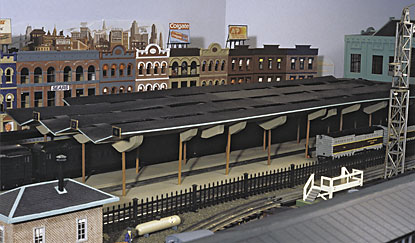
My terminal building models the Delaware, Lackawanna, and Western terminal in Hoboken, N.J., so I wanted to copy the unique Bush-style train sheds used by the railroad. Designed by Lincoln Bush, the chief construction engineer for the DL&W in the early 20th century, the shed was a series of low turtle-backed canopies that spanned platforms serving two tracks. A narrow smoke duct is directly over each track and runs the entire length of the shed, allowing locomotive exhaust to escape. The low-level structure shelters passengers well, while being easier to maintain than high umbrella-type glass sheds. More information and photos can be found in Theodore W. Scull’s “Hoboken’s Lackawanna Terminal,” published in 1987 by Quadrant Press.
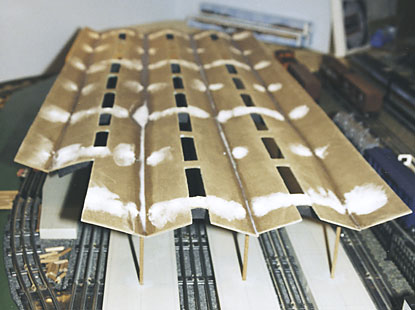
To begin my project, I installed stub tracks and determined the length of the platforms. Then, I cut 1- by 5- by 8-foot pine boards and trimmed them where needed (photo 1) to fit between the tracks. The ¾-inch thickness of this wood is just right for use with most tinplate track types. I removed the boards and painted them a concrete color, although an asphalt color could also be used. After drying, I marked the boards with a fine-tip black pen to make expansion joints and random cracks. I then screwed the completed platforms into the layout base. I filled the countersunk holes for the screw heads with vinyl caulking compound and touched up the spots with the platform colored paint.
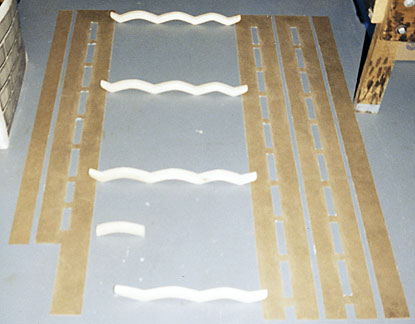
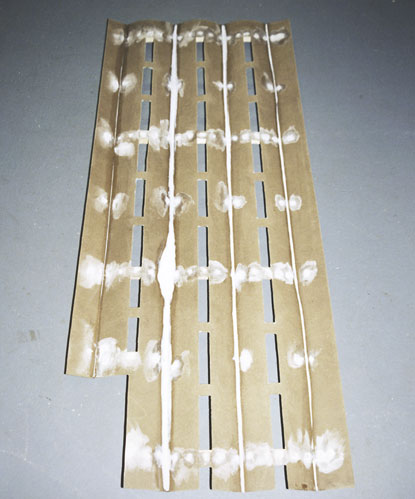
I made the shed roof from 1/8-inch hardboard that I cut to size on a power table saw. These are a series of 5-foot-long hardboard strips that I measured and marked out for the smoke-duct openings. I used a jigsaw to cut out slots 5 inches long and 1 inch wide (photo 2), leaving a 1-inch wide space between each smoke-duct slot. I fashioned four identical roof support beams from 24-inch sections of 1-by-2 pine board with my jigsaw, as shown in diagram A (see the “Train shed diagrams” downloadable PDF). I spaced the completed roof support beams 18 inches apart, starting 3 inches from each end of the shed roof. Next, I screwed the roof sections into the roof support beams using countersunk No. 6, ¾-inch-long flat head wood screws. I cut and attached the additional, smaller wood supports to the roof sections halfway between the main support beams. I painted the underside of the shed roof a light color to help reflect the lighting I’ll install later. Then, I turned the roof unit over to apply vinyl caulking (photo 3) to fill all the countersunk screw holes and gaps between the hardboard roof strips.
I made the columns to support the shed from ¼-inch wood dowels, but Plastruct I-beams, K & S metal tubing, or other materials would work too. The dowels for the load-bearing roof support columns used under the main roof support beams were made from 5¼-inch length dowels. I cut all of the other columns that don’t actually support the shed to 6-inch lengths. I then measured and drilled holes for all of the columns through the platforms at 6-inch intervals. Spaced 19 inches apart, I fixed the true support columns in place using wood glue. I glued the longer, non-supporting columns into all other platform holes as shown in diagram B (see the “Train shed diagrams” downloadable PDF).
Next, I attached the shed roof to the support columns. On the underside of the roof, I measured and drilled 3/8-inch holes into the roof support beams. I then lowered the entire shed roof onto the support columns (photo 4) until the four rows of support columns nestled into the corresponding holes in the support beams. All the other false columns simply touch up against the underside of the shed roof, giving the impression that all of the columns are actually supporting the shed. By not using glue to attach the roof, I can easily remove the entire unit for cleaning and maintenance.
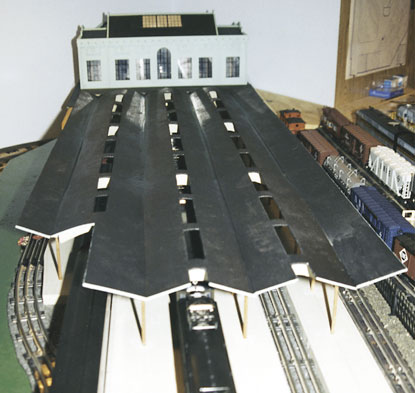
Once I was satisfied with the fit, I removed the roof unit to paint the top flat black. Adding 1/16- by ½-inch basswood flashing along the entire length of the roof gave the shed a heftier appearance and helps hide the support beams and lighting system. I painted all flashing and edges of the roof copper green to simulate the aged copper flashing used on the actual Hoboken Terminal and train shed. After drying, I placed the roof section back on the platform and positioned the structure against the concourse roof (photo 5).
The shed’s lighting comes from a 50-bulb string of mini white Christmas lights. I stapled the wires to the wooden roof support beams. The plug and wire lead trail off the rear corner of the shed and hook into the layout lighting system. The resulting illumination is just bright enough for both daylight and night operation.
Track number plates provide a finishing touch. I cut out ½- by ¾-inch shapes from poster board and painted them metallic blue. I applied gold dry transfer numbers and glued a plate directly above each track at the yard end of the shed.
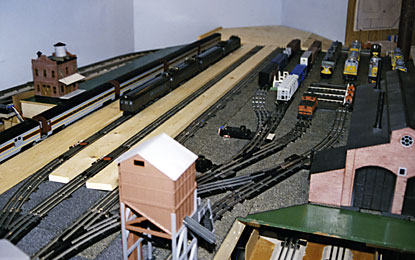
With freight tracks and an engine service facility surrounding it, the terminal looks like an important rail terminus. Build one yourself and see how your terminal complex becomes the heart of operations, as well as the visual centerpiece of your layout.

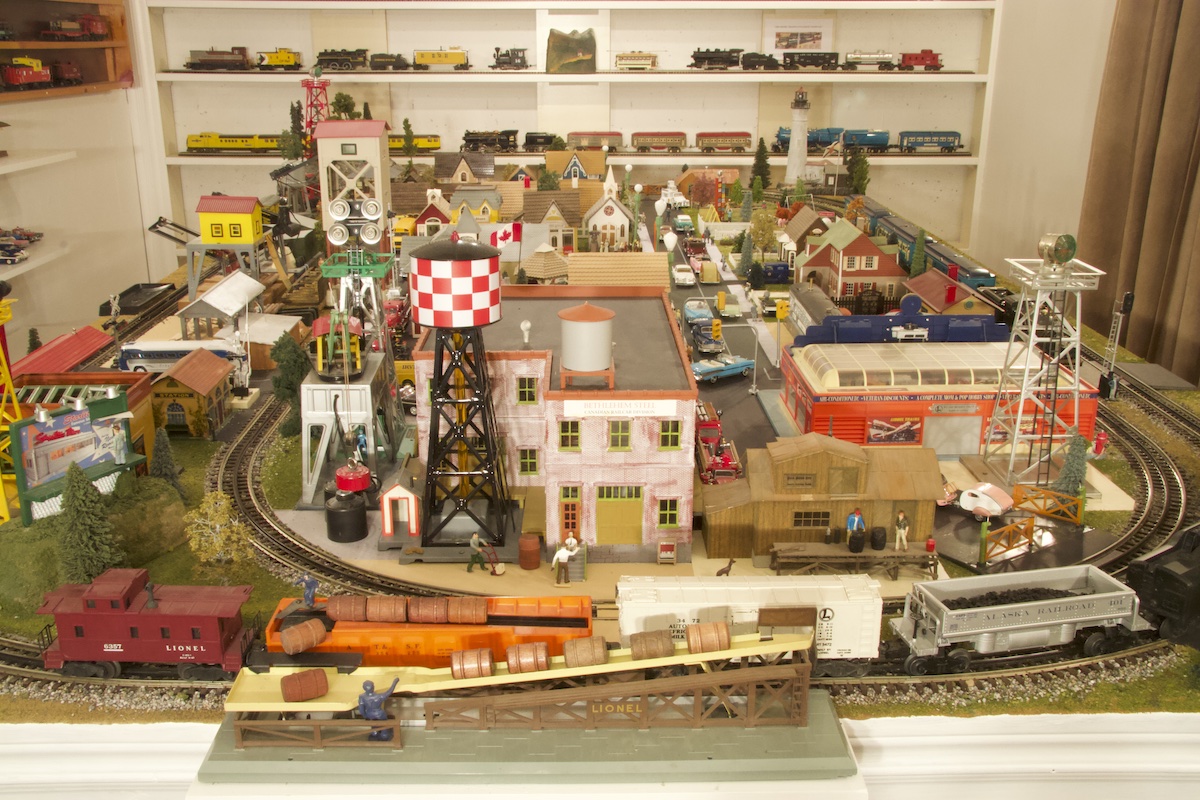


Photo 3 is missing from the article and I was unable to find a way to access the “Train shed diagrams”, in particular diagram A. Your assistance would be greatly appreciated.