


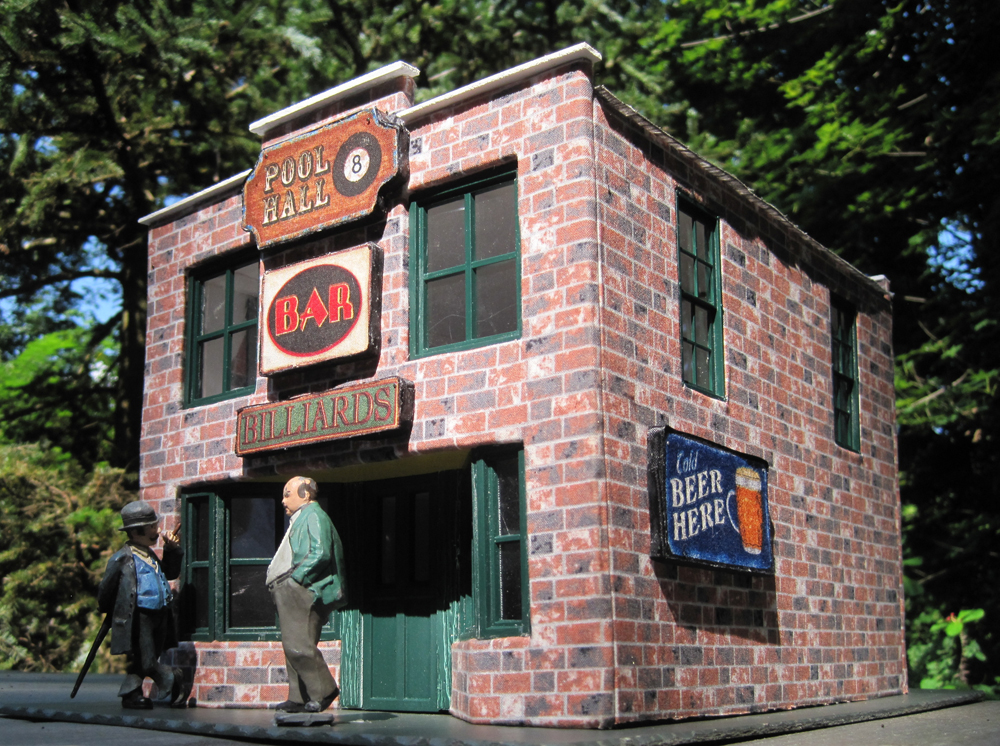
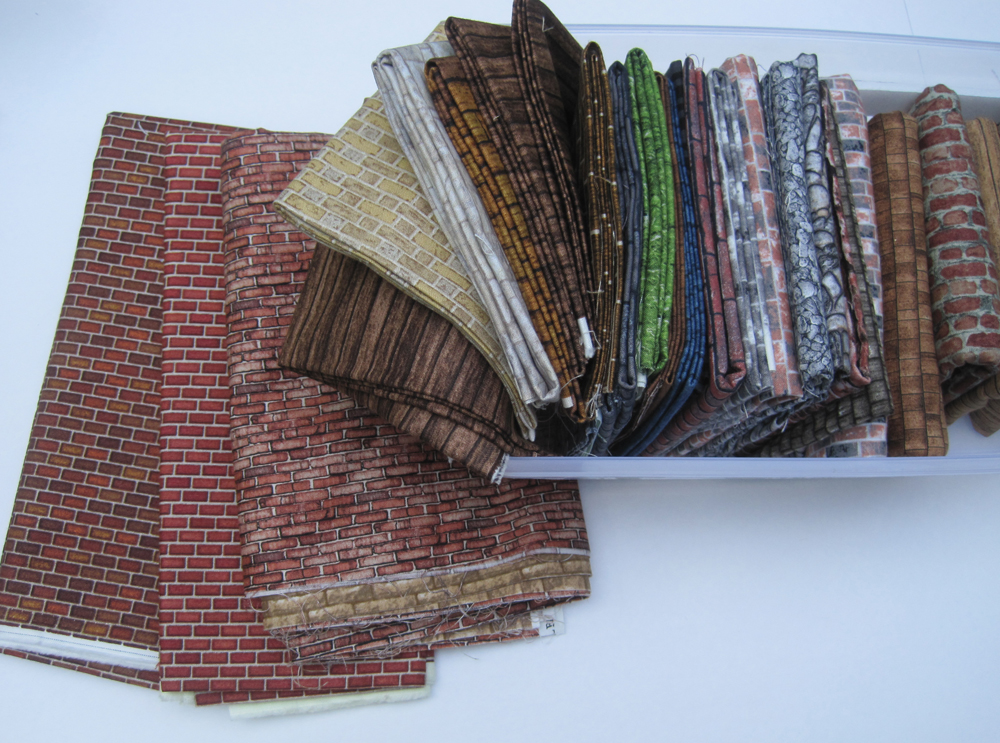
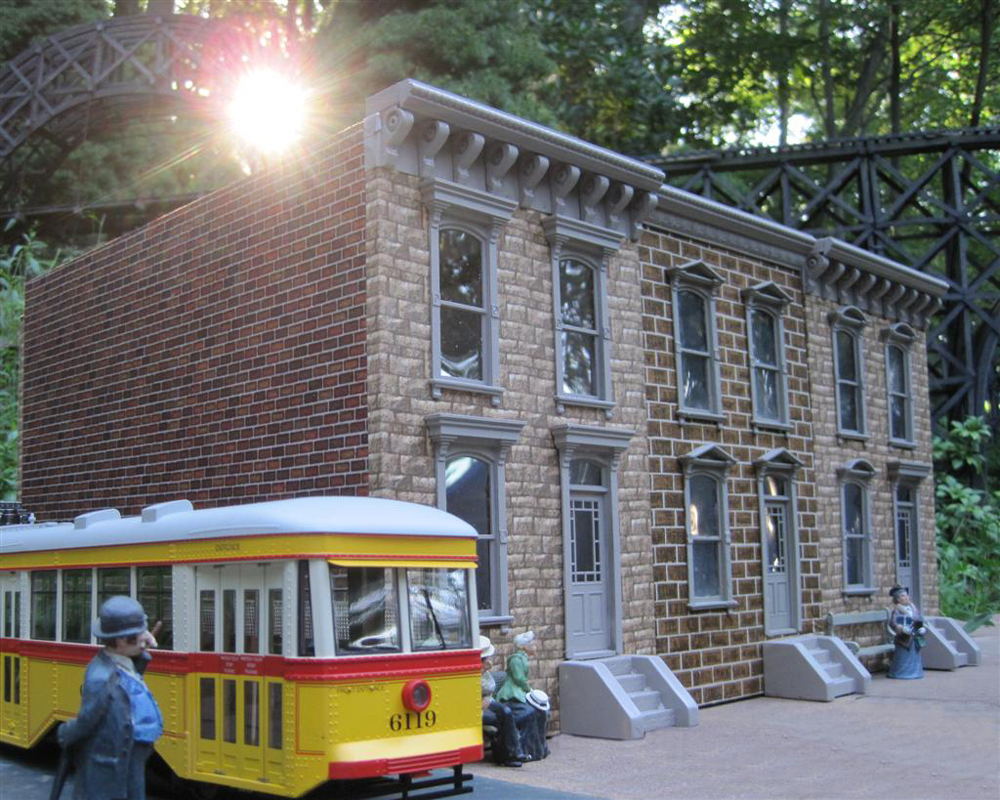
I’ve discovered a way to build inexpensive and custom designed buildings for indoor use or temporary displays at train shows or open houses. The primary material for this project is fabric. These fabrics are called “landscape designs,” and include patterns such as brick, wood, and stone, as well as signs. Several manufacturers make these designs, but it is a small market. Sometimes it is not easy to find a brand name, as the retail fabric outlets often cut the material into “fat quarters,” (basically 1/4 of a yard of fabric).
Fabric varies in width, but averages 45 inches. When cut into quarters, pieces range from 18 inches by 22 inches. You may have to keep these dimensions in mind and design the building based upon the available fabric size. I have found some bolts of fabric and purchased several yards. The material costs approximately $10- $12 per yard or $3 per fat quarter.
Materials list:
Fabric
Windows and window glazing
Door(s)
Foam core sheet (or 1/4 or 3/8” plastic sheet)
Spray adhesive
Plastic glue
White glue
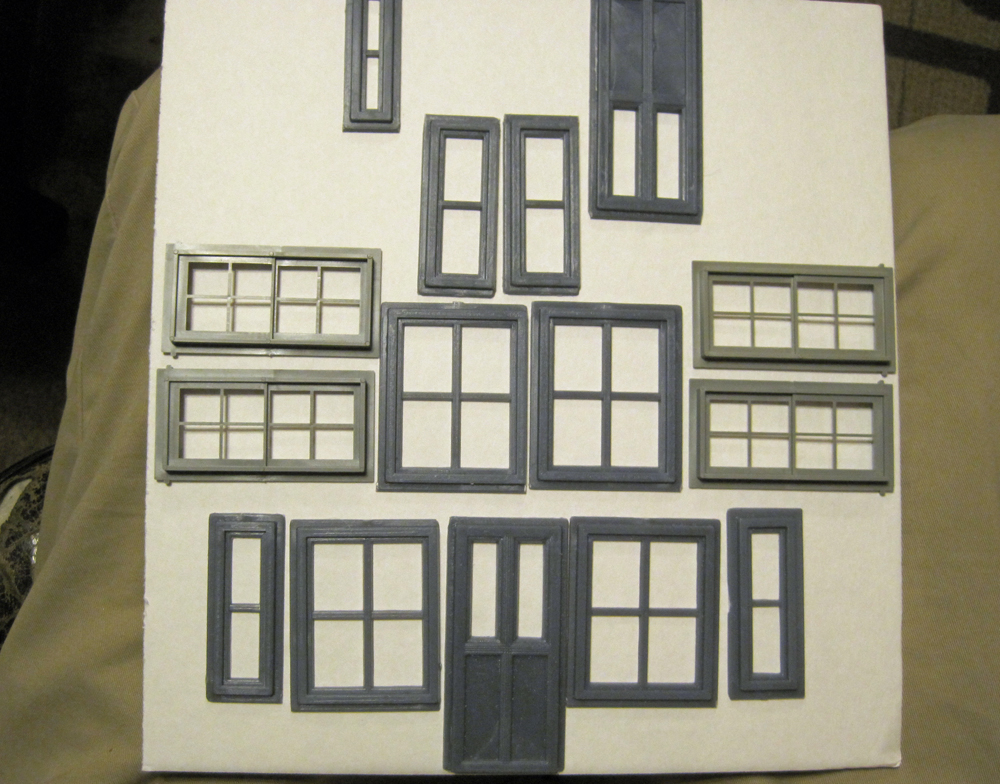
For the wall and roof panels, I bought a 20-by-30-inch foam core panel from a dollar store. You could also use a 1/4-or 3/8-inch plastic sheet material. For windows, I used Colorado Model Structures window and door set plus a couple of Grandt Line windows. You’ll need some spray adhesive (such as 3M Scotch Super 77), plastic glue, and white glue. If you need glass for windows, I cut mine out of a disposable plastic container from the grocery store. The total cost of my building is approximately $20 or $25.
Planning your project
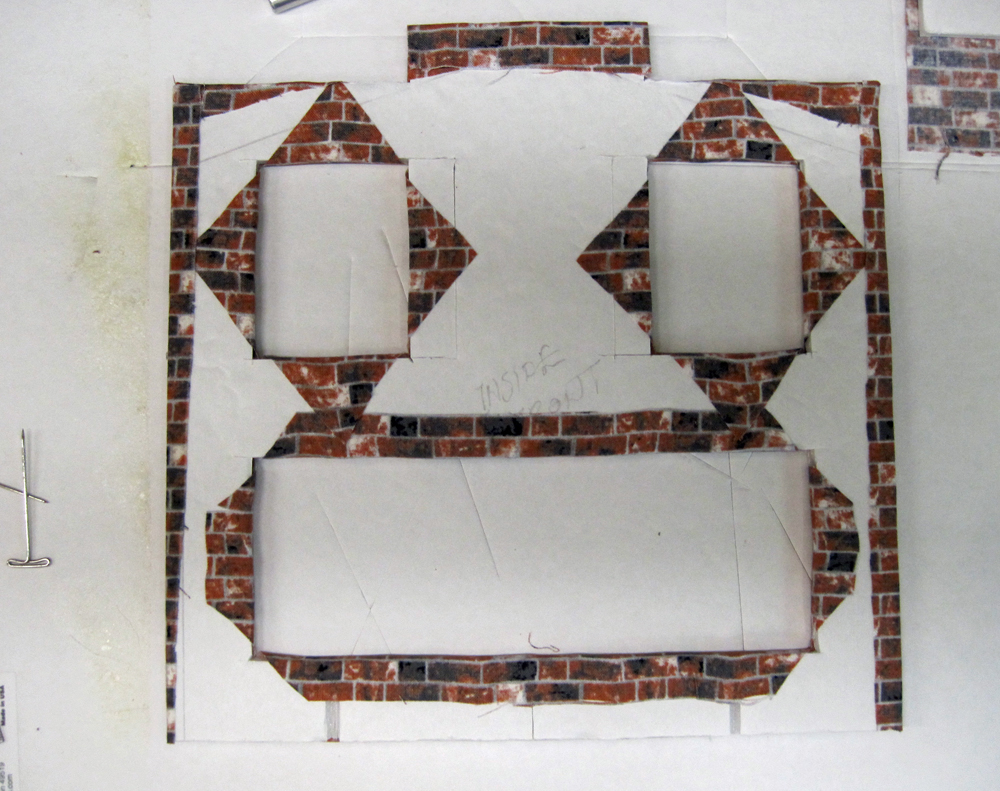
Planning your building is the most important aspect. The building needs to be sized to allow for the pattern orientation and to wrap the fabric edges around the sides of the foam core panel. This is particularly important for a brick or stone pattern. Masonry openings always have a finished edge near windows and doors.
The backing panels should be laid out and cut to size. Window and door openings should be accurately cut to ensure a smooth surface for the fabric wrap into the openings. All edges should be wrapped to prevent fabric from unraveling at the edges. If the backing board is 1/4 inch thick, provide a minimum of 1/2 inch beyond the perimeter of the board. Note that the fabrics are not precise and may have variations or misprints.
For this building, the windows will be installed from the back. In the case of Grandt Line windows, when installing from the back, they also need to be turned upside-down to ensure the sash laps correctly at the meeting rail. I am sure other folks may have techniques for mounting materials on a substrate, but I am trying to avoid wrinkles in the fabric.
Prepping the fabric and covering the panels
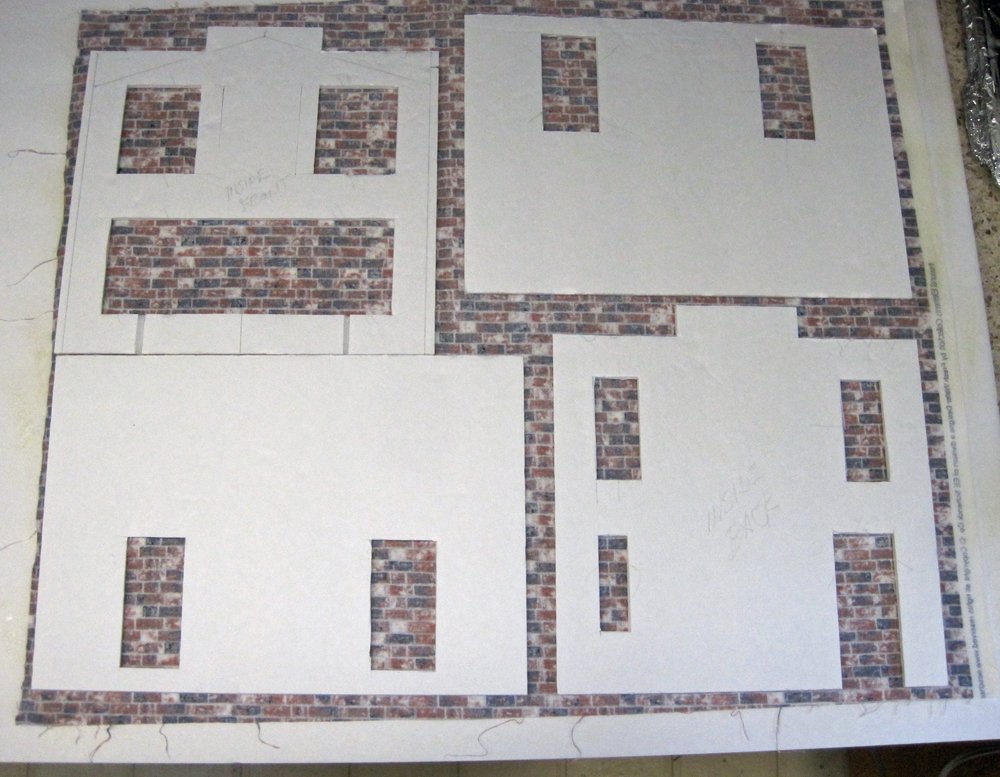
First, iron the fabric to remove fold marks or wrinkles. Position the fabric face down on a piece of foam panel. Spray the back of the fabric with a uniform coat of adhesive, or coat the panels with an exterior wood glue. Carefully align the panel pieces, with the brick pattern showing through the back of the fabric and dropped in place.
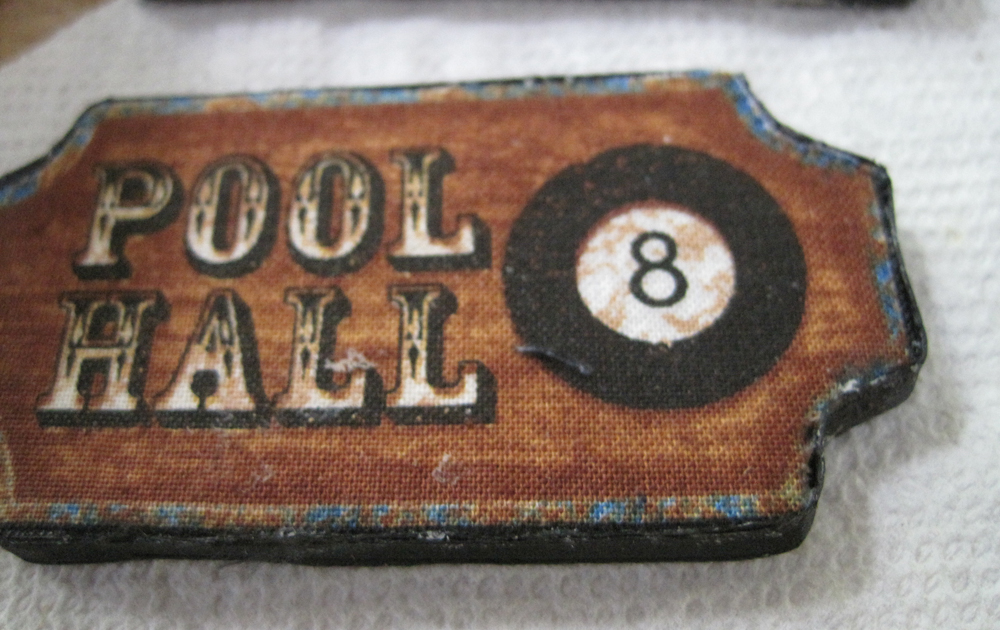
Wrap each panel around the window/door edges while the adhesive is still wet. This involves slicing the openings diagonally and pulling the fabric around the edges of the openings. I also mounted the roofing material and some sign fabric (signs were cut out after mounting.)
To ensure a complete bond, I ironed each fabric covered panel (face up) using a low heat setting. Note: Before ironing, cover the fabric with
parchment paper to make certain no adhesive gets on your iron.
Repeat this process for all four walls and the roof.
I glued the windows and door into the openings from the back, then I added the glazing material. After I cut out the signs, I covered the edges with a black ribbon to hide the edges. My signs were pin nailed through the wall panels, but they could also be glued in place.
Final assembly of the structure
I finished the assembly by adding wood blocks to the inside corners, recessed at each end, to allow gluing of the side walls. I added two separate blocks to form a second floor panel to ensure building squareness. Once the floor was installed (with a trap door to access lighting or interior details), I installed the roof. Interior blocking helps support the roof at the desired location. Finally, I added a base plate by screwing it to the interior blocking.
Fabric notes: I can’t verify their properties in reference to fading, staining, or resistance to water or chemicals. These structures might be better suited for indoor use, or for temporary use outdoors. There are spray-on products designed to protect fabrics from sun exposure, such as Scotchgard Sun and Water Shield or Forcefield UV, but I haven’t tried them. I would love to hear if you have used these!


Any specific sources on this fabric? An online search usually shows the fabric designed for weed control. Addinq “quilt” still produces nothing similar to the suggested fabric. I like the idea and would like to give it a try!
What a great idea!!