Ozark Miniatures
3461 S 5225 W
Cedar City UT 84720
Price: $130.80
Website: www.ozarkminiatures.com
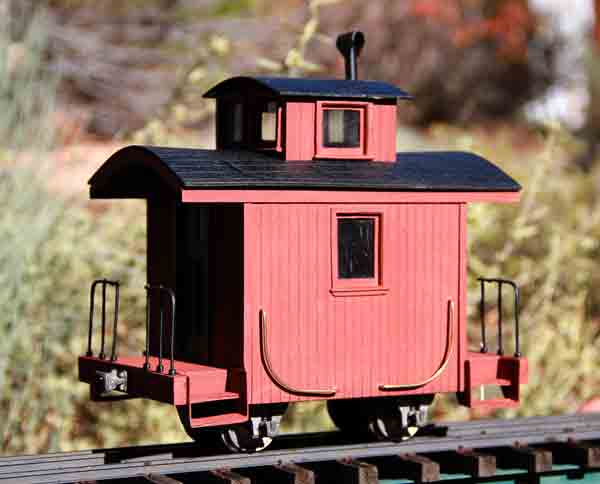
Wood-and-metal kit for constructing a freelance bobber caboose; laser-cut wooden parts; white-metal castings; plastic window panes; Sierra Valley wheels; link-and-pin couplers. Dimensions: length, 8½” over couplers; width, 4½”; height, 8½” to top of smokejack. In 1:20.3 scale, this works out to around 14′ x 7’6″ x 14′, respectively
Pros: Good-looking model of a freelance, two-axle bobber caboose; suitable for the rear of a train of short ore cars or logging flats
Cons: Minimal instructions; accompanying photographs are small and, in some cases, details are difficult to see; no underbody detail; some trimming of parts required to make things fit—not mentioned in instructions
The kit contains laser-cut wood parts, scale stripwood, white-metal castings, plastic window glass, metal wheels, and colored jewels for marker lights. The instructions call for two bar clamps, four spring clamps, hobby knife, pin vise, a couple of small drill bits, rubber bands, super glue, and wood glue. In practice, I used more than four spring clamps to hold some items, like the main roof, while waiting for the glue to dry. I also used a small razor saw to trim some of the scale lumber to length, and a foam sanding block or a small flat file to sand some components to size.
The instructions come in the form of a single sheet folded in half, with 21 steps, a page and a half of small (2″ x 112″) color pictures, and a diagram for the identification of the wood parts. A separate, small sheet of instructions covers the assembly of the pedestal/journal castings.
Instructions suggest cleaning the flashing from the metal castings, then rinsing them to remove any residue from the molding process. I have found better success by scrubbing the castings with a spare toothbrush and mild dish detergent. I used a blackening agent on many of the castings, and the extra scrubbing ensures that the blackener is able to react with the metal. The instructions suggest sanding the edges of the laser-cut wood components to enable a better glue bond.
Instructions are terse but offer a logical order for construction. The accompanying color photos help the builder to understand some of the construction steps. However, in other cases, the photographs are reproduced at too low a resolution for you to see exactly what is intended. For example, the side and end walls of the caboose are joined at the corner by a square piece of stripwood. The text just says to glue part “B” to part “L.” In the related photo, it is difficult to see how part “L” is supposed to fit in relationship to part “B.” As a rule of thumb, it is useful to dry fit as many of the parts as possible before gluing anything. In this case, assembly became obvious after I used a rubber band to hold all of the wall components around the base.
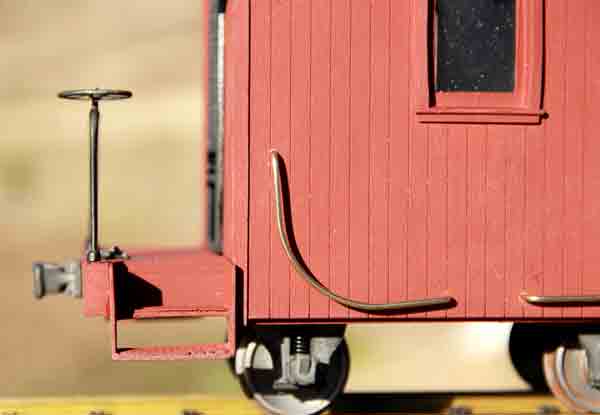
The other area of issue was in fitting the caboose steps. I found it necessary to sand the same corner post (mentioned above) in order to make space for the step casting to fit between the end beam and the wall. The step castings also have a notch at the top, where it appears that they could be inset slightly under the floor of the end platform. This is not mentioned in the instructions and, if you intend to accommodate this feature, you would need to make the adjustment in the second step of the instructions, where the beams are glued to the floor.
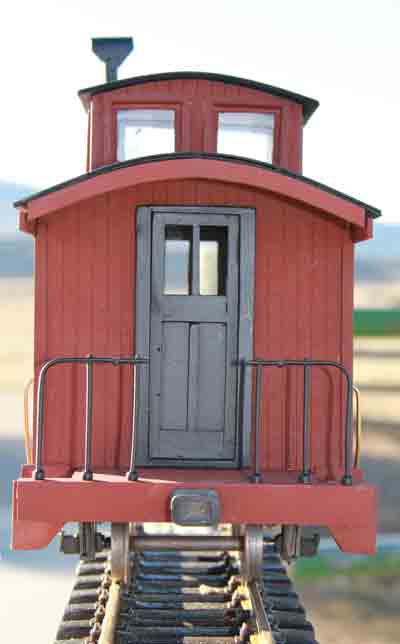
Standard cautions apply to assembling the pedestal/journal-box castings. Care must be taken to keep all super glue out of the area in which the journal box slides. Keep the glue to a minimum. I used two spring clamps to hold each pedestal/journal box until the glue had set to full strength. Likewise, when putting the plastic “glass” into the window openings, be careful to avoid touching the plastic if you have even a hint of glue on your finger tips. (I have a smudge in one of the cupola windows because I was not careful enough.) Using tweezers instead of “fat” fingers might also help in fitting the “glass” into the window castings.
The kit comes with marker lights, including red and green plastic jewels for the lenses. I chose not to use them. After looking at various pictures of bobber cabooses, I felt that the markers were not necessary for the look I wanted. I also chose to leave off the handrails that mount to the walls because I could not easily drill the mounting holes after the end railings were glued in place.
I found this to be an enjoyable kit to assemble. I spread the assembly over several evenings to ensure plenty of time for the glue to dry. I painted the components with my favorite hardware-store spray paint.
The final caboose blends well with some of my smaller live-steam engines and the short wheelbase allows it to look at home on tight curves.