


I wanted to scratchbuild a rural large scale depot to replace one that was past its prime on my garden railroad. While I was working as an art director for a commercial printing company, one of my sales reps came across a 1916 combination freight/passenger-depot blueprint.
He asked his client, a buyer for the Union Pacific Railroad, to bring the blueprint over to my department so I could see it. To my delight, He allowed me to borrow the delicate piece to make a copy.
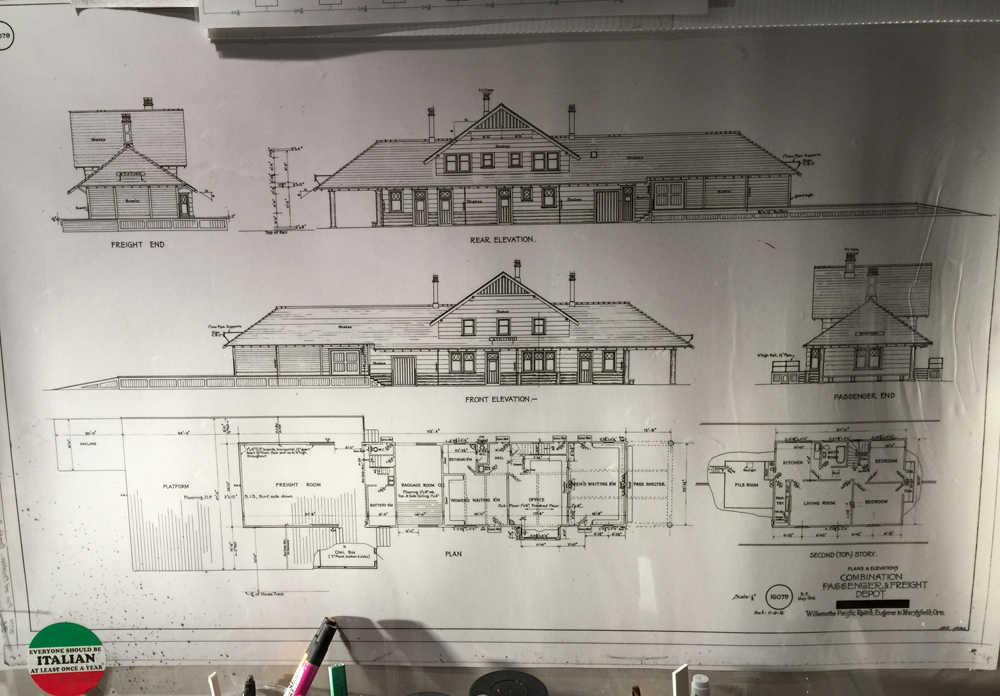
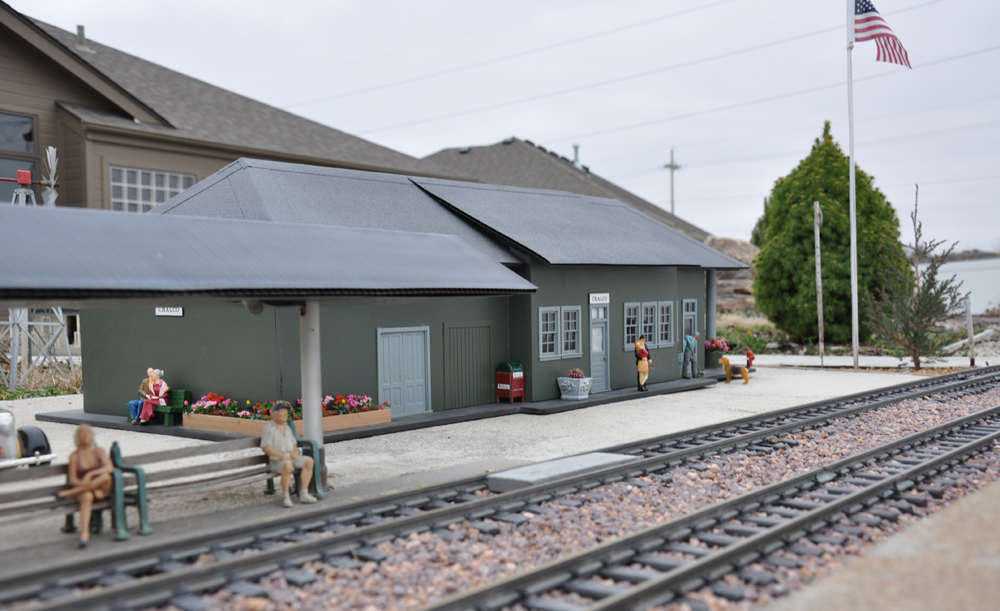
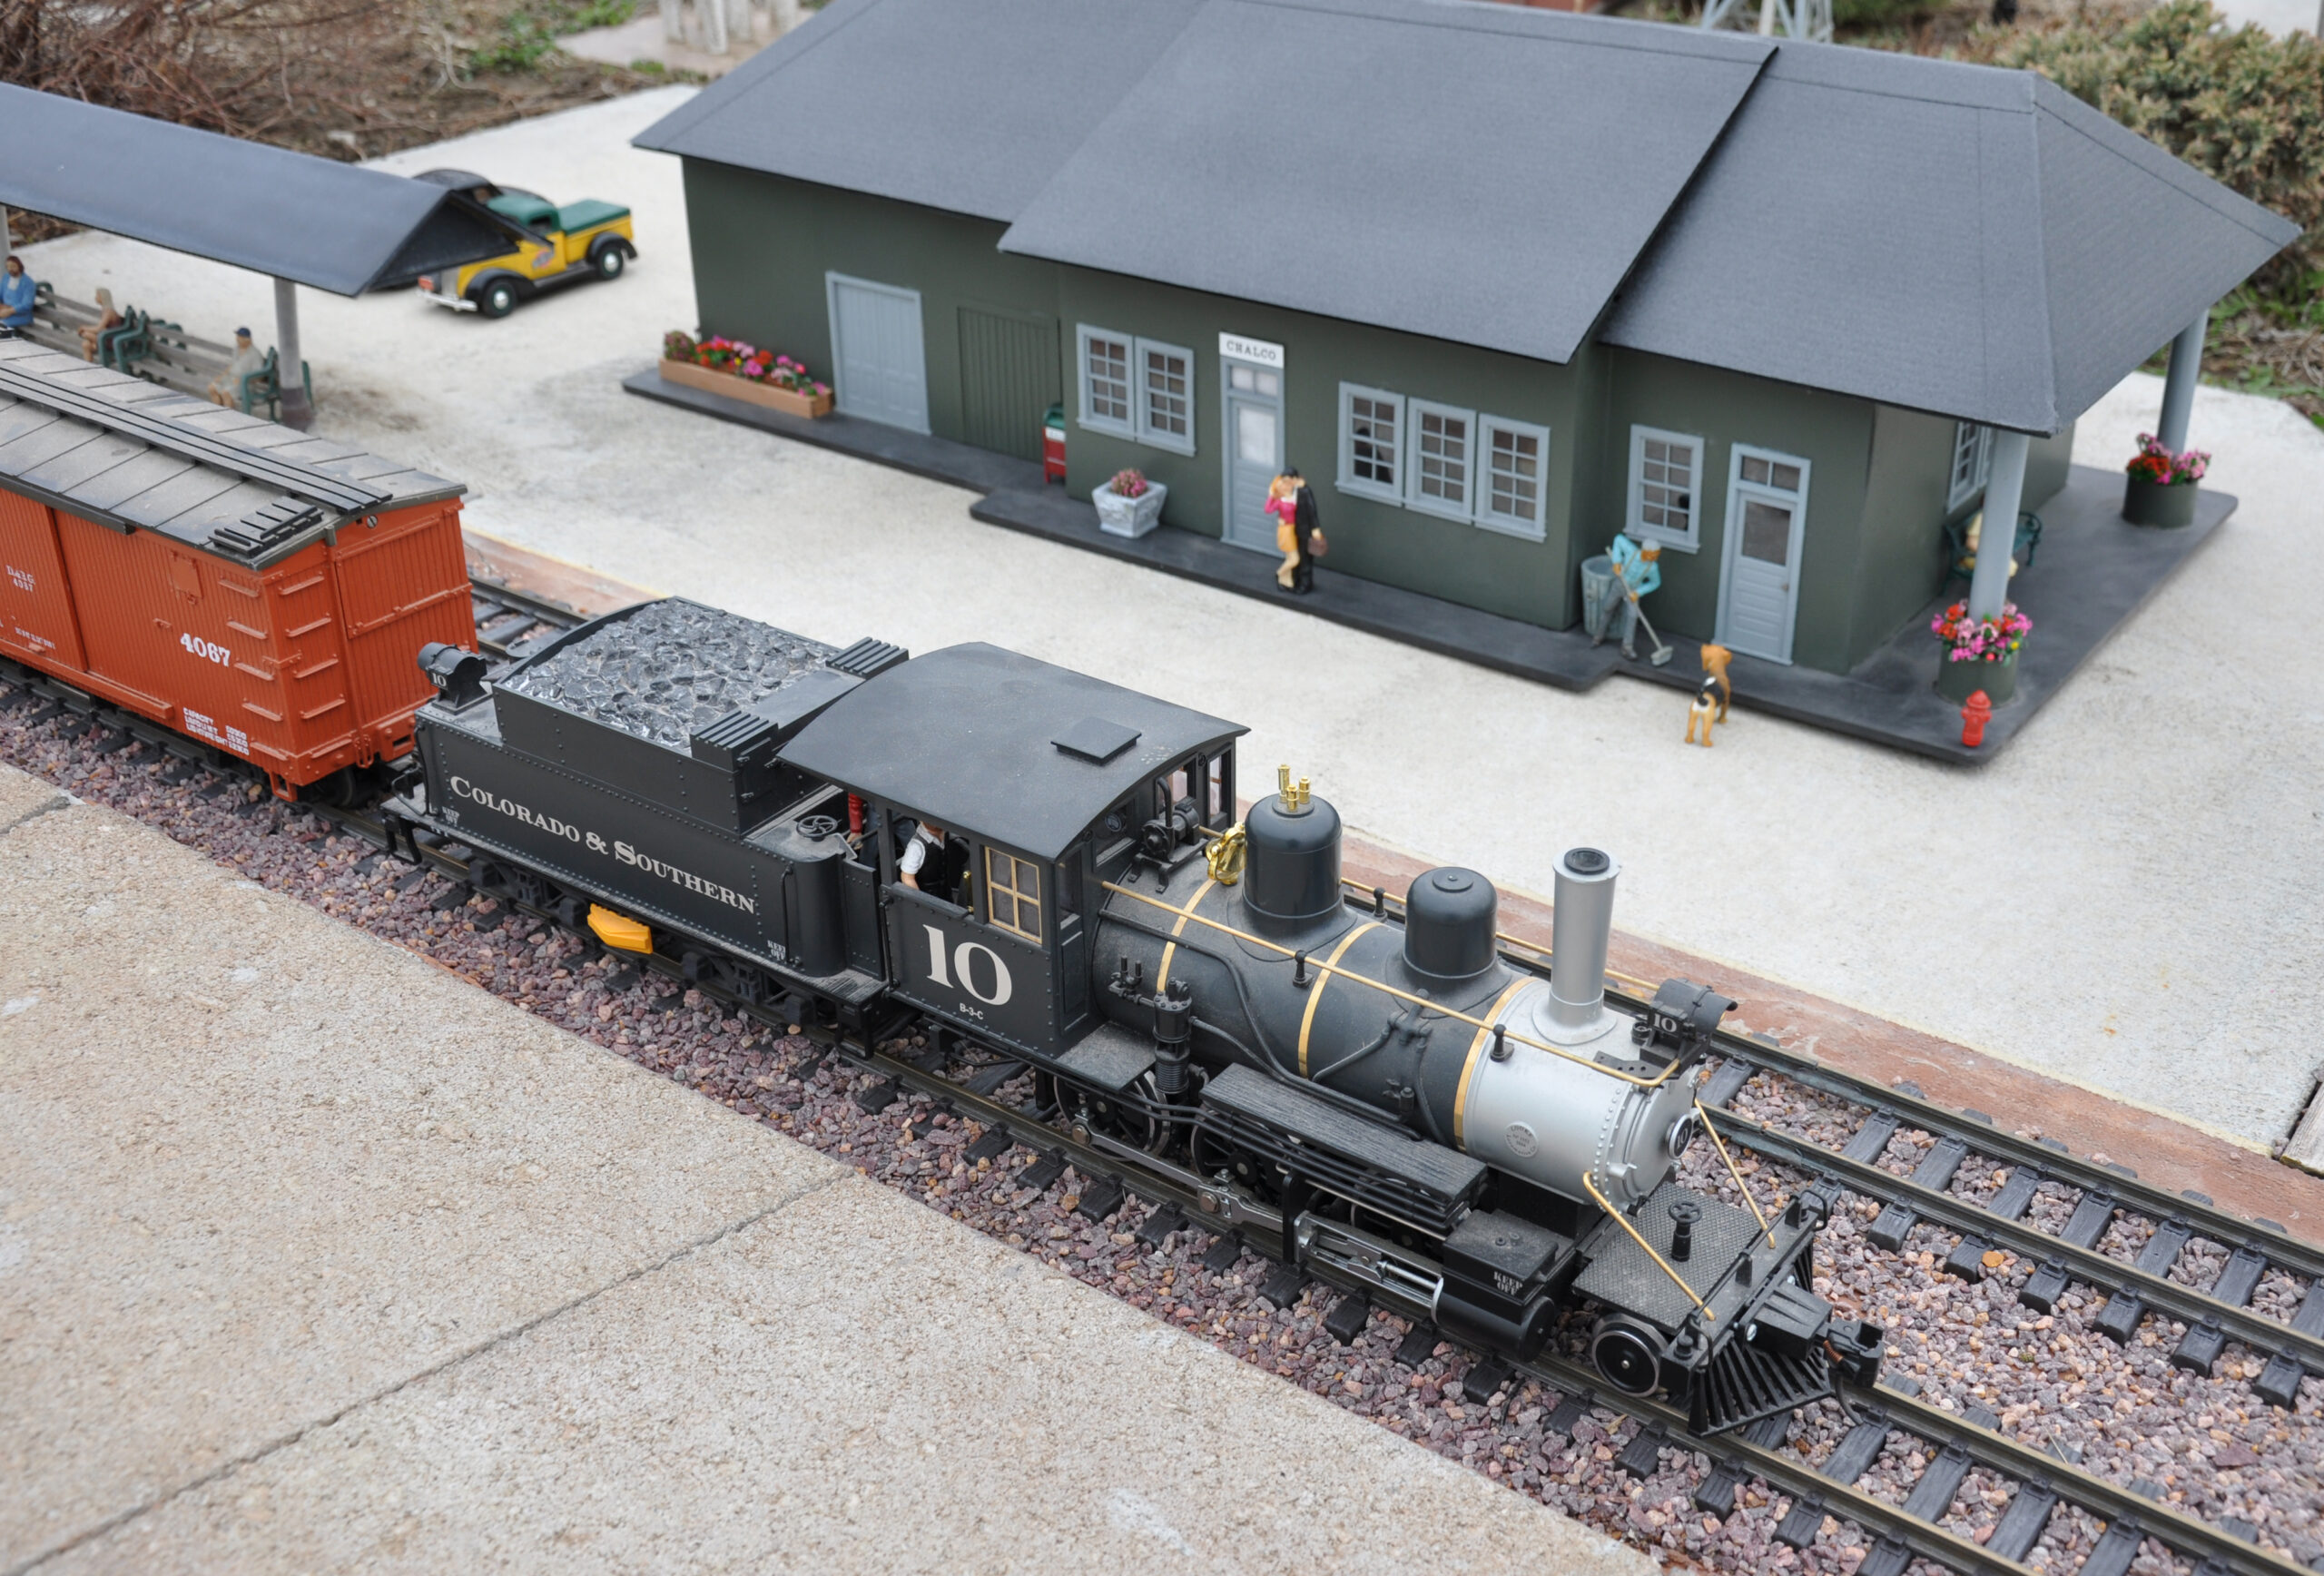
I based my new depot on this blueprint. I toyed with the idea of building an exact 1:29-scale replica, but decided to simplify it, as my small rural farm town didn’t need such an elaborate building.
An existing covered passenger shelter currently on my railroad, anchored in concrete, where the new depot would be placed, forced a design change. The is concrete slab, 4″ thick with rebar and landscape wiring running through it. I eliminated a raised platform around the structure’s freight/baggage area to accommodate the passenger shelter. I eliminated the upper floor of the building as well.
Starting the rural depot build

I used 1/4″ thick, commercial-grade styrene, purchased from a sign-material warehouse, for the exterior and interior walls. This is tough material and should be able to handle the temperature swings my Nebraska weather dishes out.
I used a 3M Plastic Emblem and Trim adhesive (available at any auto-parts store) to assemble the building’s walls and roof panels. This wonderful adhesive is the best I’ve ever used over the years. It’s not cheap, at $15 per tube, but it works great for outdoor buildings! I used two tubes for this project. Wherever possible, I used clamps for a better bond.
I cut 1″ strips of styrene to form roof supports, gluing them in place. For the roof underlayment, I laid down a base of the 1/4″-thick styrene (same material I used for the walls), then covered the sub-roof with black, corrugated plastic, which is the same material used for outdoor signs.
Why the double layer roof? My old depot formed dips, or valleys, between each roof-beam support. Severe temperatures during the summer months softened the material, which made it sag. I’ve found, over time, that the corrugated plastic forms a protective outer layer that has survived hail storms.
I also used Gorilla-brand black duct tape to cover the open seams in the roof. I cut the tape a bit longer to wrap under the overhang areas, as the tape will shrink a tad in the summer months.
To eliminate the glossy surface from the corrugated-plastic roof material, I spray-painted it with a black texture paint. It has a matte black finish with specks of gray. I used a matte clear as a final paint coat on the roof.
Making the cuts
As with a few of my past building projects, I didn’t use power tools to cut the walls or roof material. Instead, I use a razor knife and scoring knife. You could use a table saw to cut the material, but I’ve found that the razor knife provides a smoother and more accurate cut. I use both short and long T-squares to ensure that my cuts are as accurate as possible.
The trick to making precision cuts with a razor knife is to use light pressure on the first few cuts (to create a groove), then gradually apply more pressure. For critical wall panels, I cut through the entire piece using my razor knife. On other non-critical parts, I cut halfway through using my scoring knife, then snapped the material. Use extreme caution when using a razor knife. Go slowly and take your time when using razor-sharp cutting tools.
I purchased the majority of my windows and doors from Grandt Line Products [Grandt Line is owned by San Juan Details. —Ed.]. Cutting window-and-door openings with my knifes takes a lot of time but the extra effort allows for precise openings. I used my T-square to draw the position of the doors and windows directly onto the styrene. The old saying, “measure twice, cut once” applies to most people. However, I measure three times.
I also bought three of the large rear windows at a National Garden Railway Convention. I used 3M spray adhesive to lightly mist the interior side of each window. Once the glue becomes tacky, I dropped in a clear-plastic window section. I avoided overspraying, as glue would ruin the nice clean window lines. I also used a small dab of the 3M Plastic Emblem and Trim adhesive in each corner of the window to make sure the glass window panels would not fall out over time.
Finishing and details
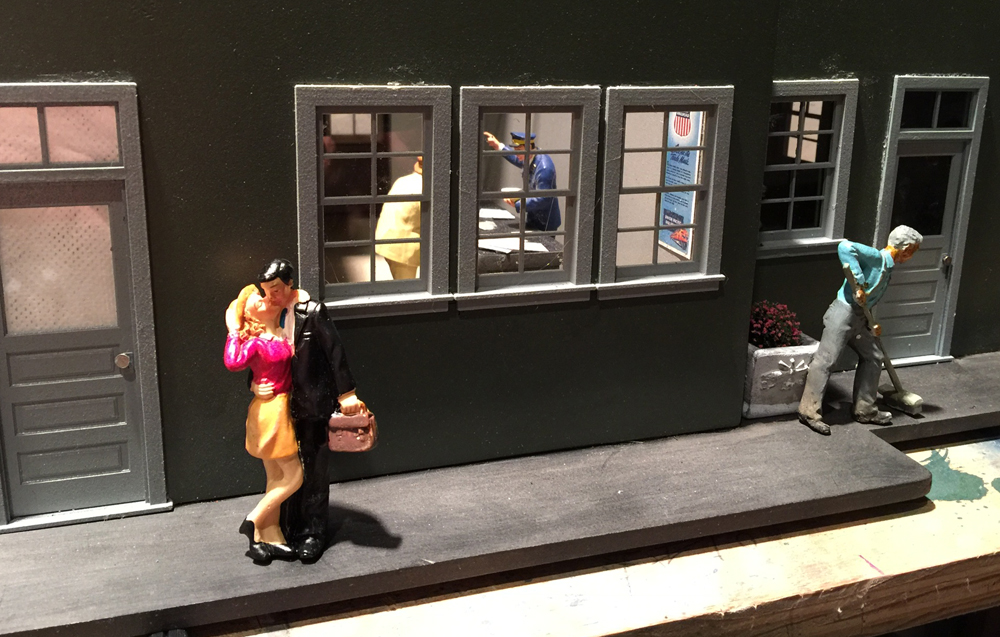
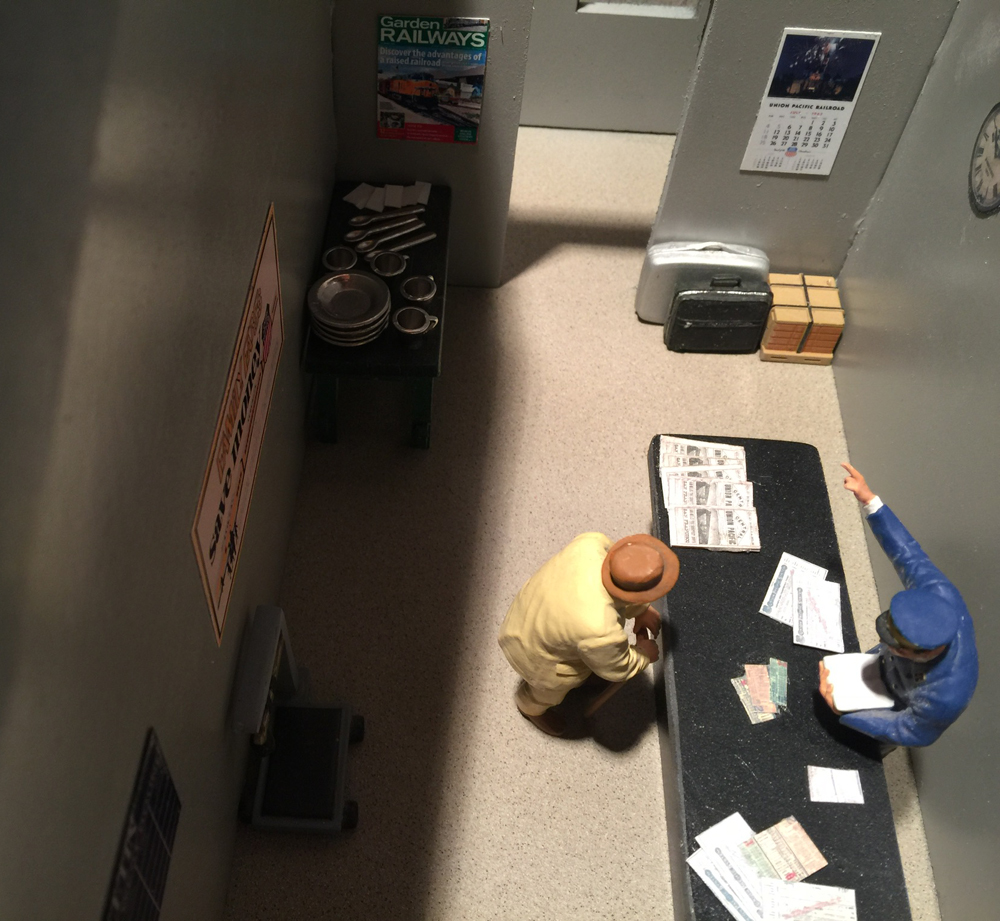
On this building project I added a finished, detailed interior—a first for one of my outdoor structures. The interior benches and tables I scratchbuilt from extra pieces of the styrene material. Always save your scraps for such occasions.
Low-wattage light bulbs illuminate the interior of the depot. Several buildings and areas on my railway light up at night, powered by a Malibu landscape-lighting system. A photocell triggers the lights to come on at dusk and turns them off four hours later.
I covered the front and rear entrance door with white pieces of Bounce dryer-sheet material to conceal the electrical landscape wiring that comes up through the floor from being seen when the depot is li. I’ve used actual cloth in the past and it yellows over time. I thought I’d try the dryer sheet to see if it will remain white.
The depot, from left to right when viewing it from the front, has the following rooms, just like the original 1916 combination depot: freight room, baggage room, women’s waiting room, office, and men’s waiting room.
Finishing
Before painting, I lightly sanded all surfaces with a palm sander for better paint adhesion. I used plastic-compatible spray paint. I also cut a plastic base for the building to sit on. I sanded it but left it unpainted. It provides a 1/4″ lift to the building in the hope of keeping it a bit drier. I lightly glued the structure to the base but I’m sure a bit of moisture will creep into the building. I hope that, since the entire structure was made from the 1/4″ styrene, it will stand up to whatever Mother Nature throws at it.
I dedicated a lot of time and effort into this new depot to protect it from our harsh Nebraska weather. The structure will only be on my railway during the summer months. I store selected buildings in my garage from November through March. I do leave several structures out on the railway year round, as I enjoy taking wintertime photos of the town and other parts of the line.
All in all, I’d say this was roughly a 100-hour project completed over a three-month period. It was a perfect project to keep me busy during our cold Nebraska winter. The sleepy town of Chalco, Nebraska, now has a new railroad depot to serve its Palmore Pacific Railroad customers.


Where can I get a copy of the prints? I’m new to Garden Railroading and thought this might be a great place to start.
Thanks