


When developing the landscape for a garden railroad, one needs to consider the role of water in shaping the topography. Even in the flattest areas, streams and rivers carve their way across the land. Where there are hills and mountains, these waterways often gouge out ravines and rocky streambeds. It is these topographical features, giving variety and interest to our miniature landscapes, that I want to describe in this article.
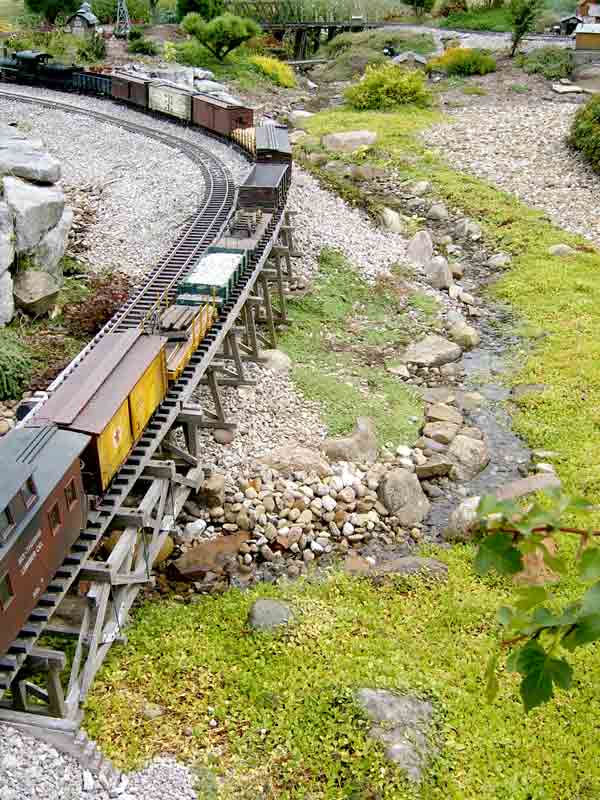
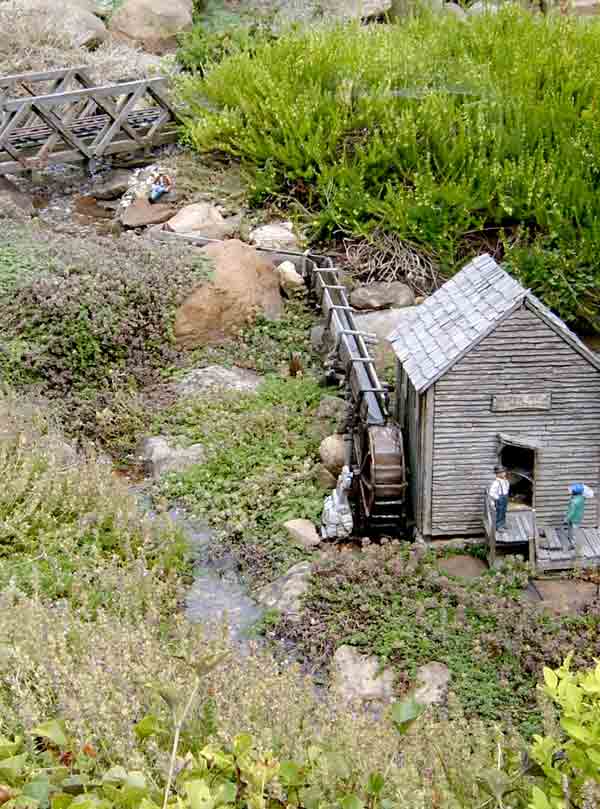
Besides providing beauty and interest in their own right, streams can serve other purposes in our railroad gardens. They can separate one distinct area of the landscape from another, making a boundary, so to speak. A larger river can introduce waterside industries or boat transportation to our miniature worlds. A smaller stream may provide an occasion for a water-powered mill. Figures of people fishing or animals drinking bring life to the scene. The intersection of a stream and the railroad would necessitate a bridge. And, in my estimation, bridges add considerably to the interest of railroads.
Building a stream
It goes without saying that streams run downhill. When planning your landscape, visualize where you might want a stream, flowing from an elevated point to a lower area. Since streams in nature seldom run in a straight line, plan some curves and jogs in its path. Make a reason for the stream’s deviation: a large rock, a ridge, or a hill in its way. A shorter stream will be small and narrow. A larger waterway should look like it has come a greater distance.
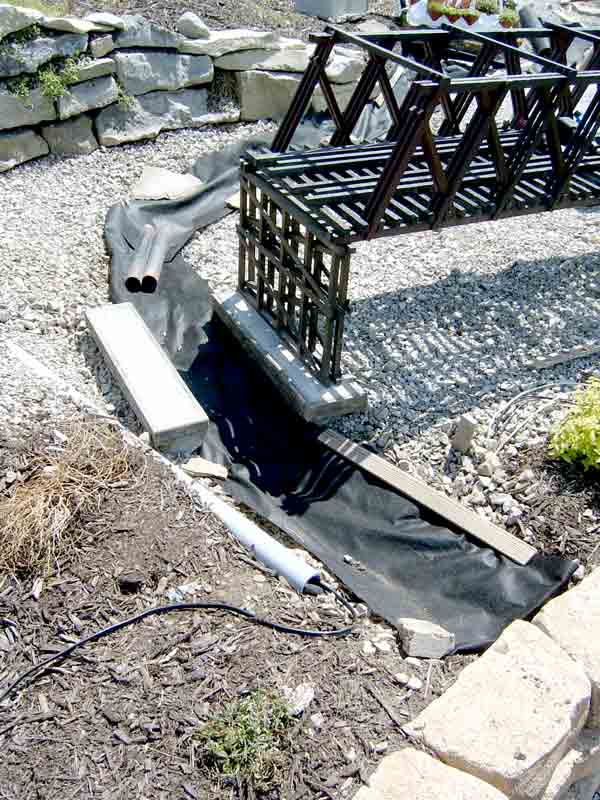
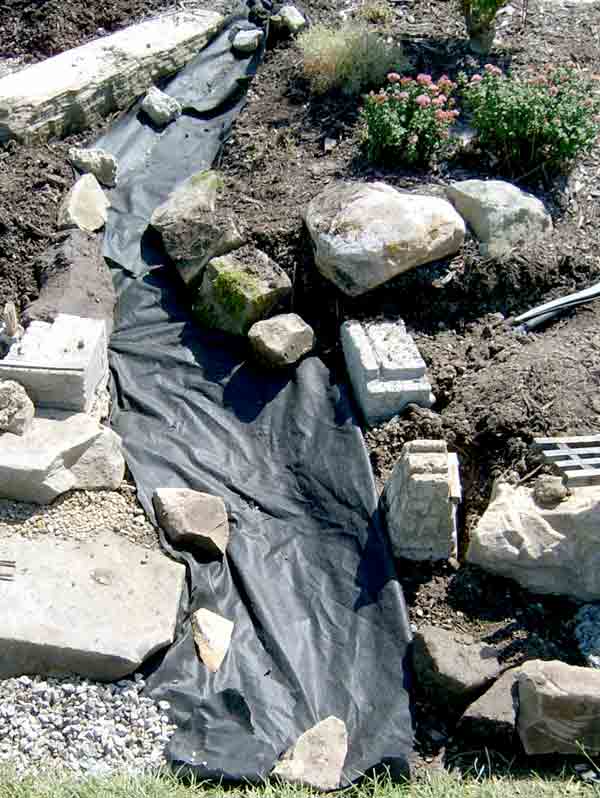
For a practical, functioning, recirculating stream you will need a lining that is durable and will conduct water from start to end without loss. In my last column (December 2009 GR) I covered the various lining materials that are available. For the steep mountain stream I will describe here, I used EPDM rubber liner. Since I planned to use smaller, rounded stones to edge and fill the streambed, I chose a good grade of landscape fabric, a.k.a. weed barrier, as the underlayment (rather than carpet, as I described in my last column). This serves to protect the rubber liner from puncture where heavier rocks press the liner against hard earth or sharp stones underneath.
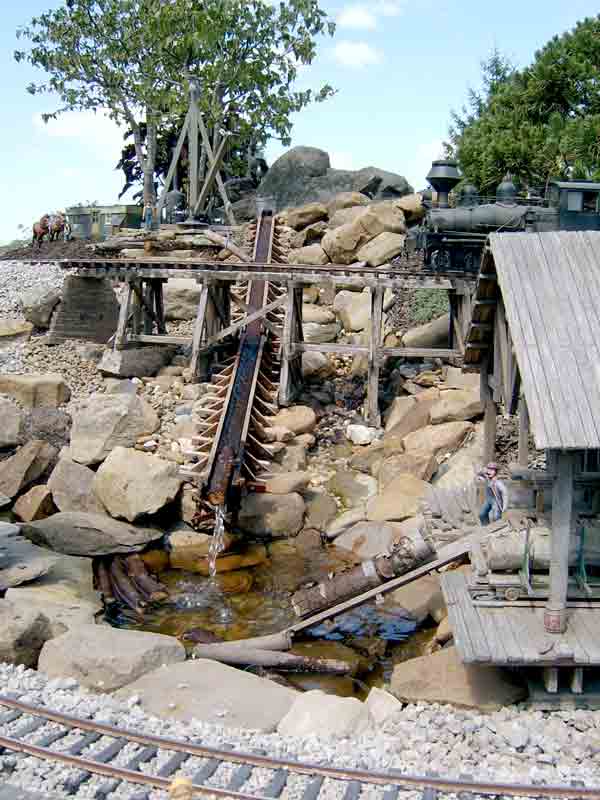
In my case, I wanted the stream to flow into a mill pond. I wanted a wooden flume parallel to the stream, conveying logs from a logging camp up the hill to the sawmill below.
The mill pond need be only a few inches deep to float logs and, therefore, would contain a relatively small amount of water. I needed to provide a separate reservoir that would contain the pump and hold enough water to fill the stream and pond. A four-gallon plastic bucket with the center of its lid cut out served this purpose well. Inside the four-gallon bucket I placed a lidded, two-gallon bucket to support the rocks that would cover and disguise the reservoir. The water from the pond flows into this rocky grotto and disappears, falling into the reservoir. The two-gallon bucket has multiple holes drilled into its sides and top so that it displaces very little water. Fiberglass or plastic window screening covers the top of the reservoir and filters out any debris that collects in the mill pond.
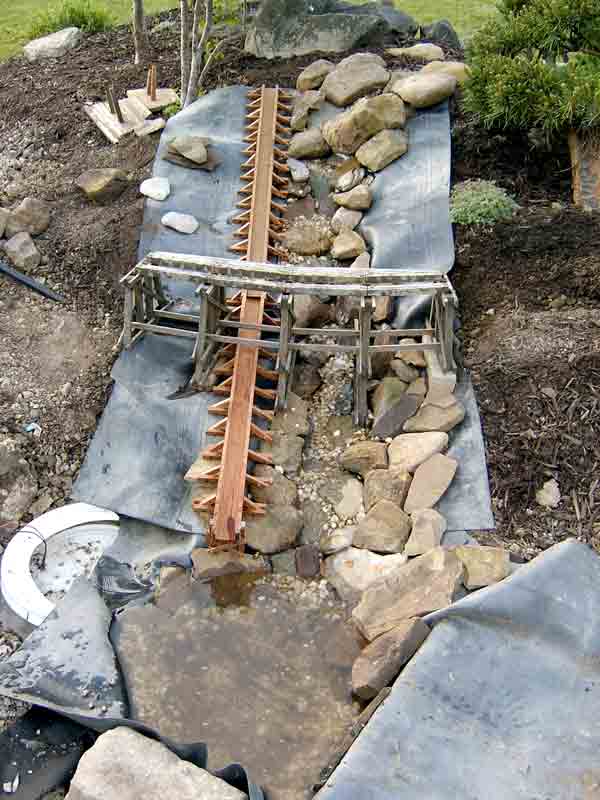
Construction may be easier if separate pieces of liner are used for the stream and the pond, although it can just as well be done with a single piece. If two pieces of liner are used, one for the pond and another for the stream, make sure the pond section extends higher than the water level in the pond and the stream section overlaps the the pond piece by at least 6-8″.
The submersible pump I used runs on 12 volts DC (as described in my last column) and requires a 3/4″ outlet hose. I used a 3/4″ garden hose, attaching a Y-fitting with valves on each leg to individually adjust the water flow in the stream and flume. The steepness of the flume, its smoothness, and the weight and buoyancy of the logs traversing it determine how much water needs to be diverted to the flume.
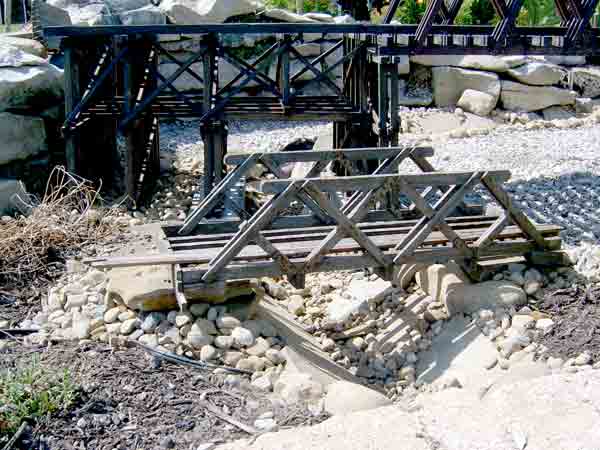
The edges of the streambed are lined with larger, smooth rocks, while smaller, rounded stones and river gravel fill the bottom of the watercourse. Black, expanding, foam sealant is not needed in this setting (as it would be in building a waterfall). The water runs rapidly downhill, splashing over and around the rocks quite realistically.
Dry “streams”
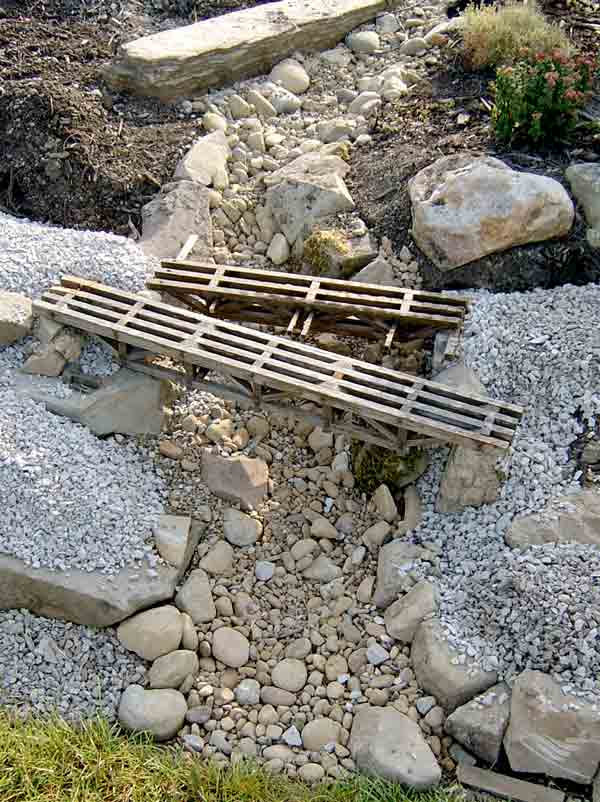
Running water is fascinating, but not necessary to convey the image of a stream. A realistically constructed dry streambed will give a convincing impression of a waterway in the dry season. This way, you can have the visual benefits of one or several streams, with much less work and expense.
In addition to the visual appeal, dry streams have other uses. They afford opportunities for more bridges and trestles (you can’t have too many bridges, in my opinion); they are natural drainage channels for heavy rain runoff; and they can serve as walkways into difficult-to-reach spots in your railroad. If you plan to use a dry streambed as a walkway, make sure the bottom is flat and wide enough to accommodate your foot. In time, stones may get moved around a bit, but they can easily be put back in place.
Building dry streambeds
Impervious liners are not necessary for dry streams. A sturdy grade of landscape fabric will prevent rocks from sinking into the earth, and soil from working up between the rocks. It will also greatly reduce the number of weeds that sprout up. Dig out the stream outline using the same principles mentioned above for wet streams. Use rounded rocks that look water-worn for a realistic appearance. Line the edges of the streambed with larger rocks and fill in between with smaller stones and river gravel. Groundcover plants and mosses growing in the areas around the streambed will enhance its realism.
Plants that spread into the rocks of the waterway will be easy to pull out if their roots haven’t had a chance to grow through the landscape fabric. However, if you prefer a wild and overgrown effect, low groundcovers can add a lush look spreading into the stream.
For visual interest and realism in our miniature landscapes, it’s hard to beat a running stream or even a dry streambed. And there are many other reasons for including these in your garden railway. (Did I mention having more bridges?)


WOW! I love your realistic streams!