
I wanted more deciduous trees for my railroad—plants that not only looked like trees but behaved like trees. Their bark should thicken and get rougher as they age. Their leaves should show color other than green in the fall. Their branches should be bare in the winter, revealing a tree-like skeletal structure. Their new growth in the spring should bud out vivid green or some other fresh color. And, of course, they should be scale-appropriate for my garden railroad.
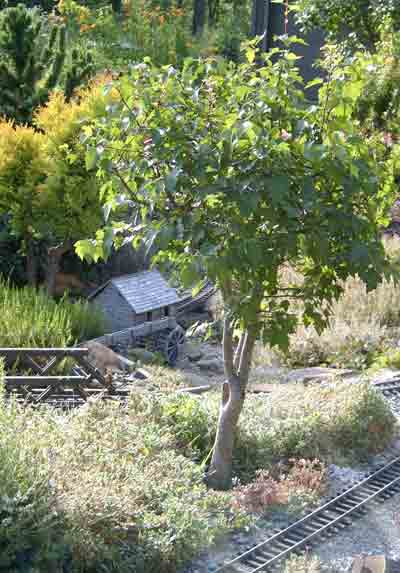
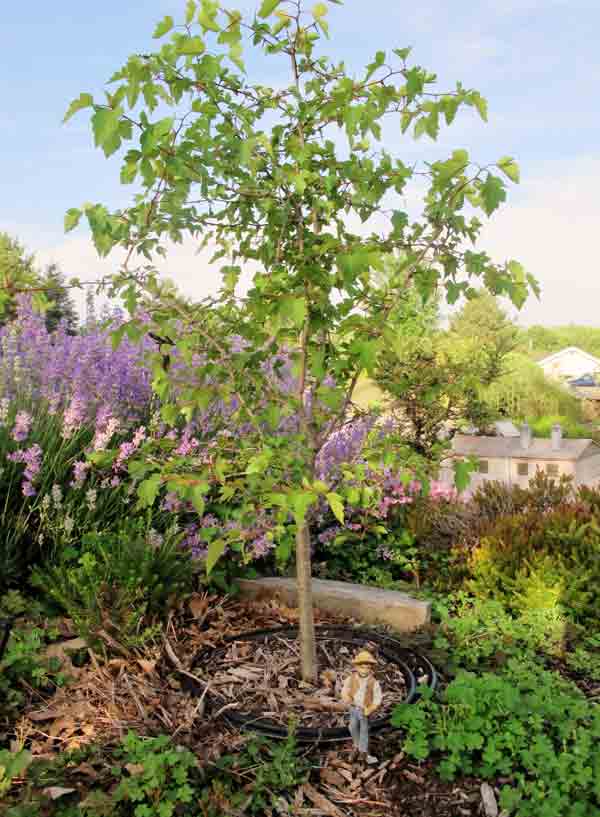
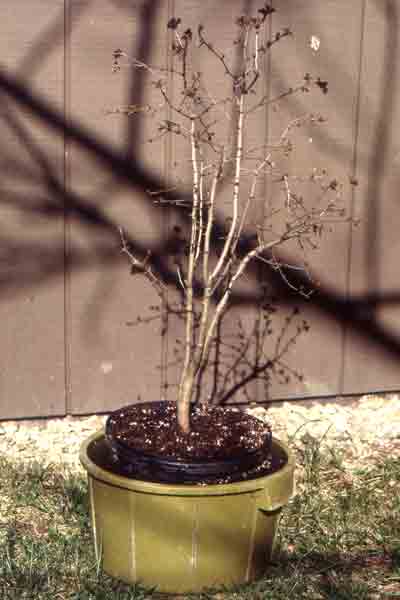
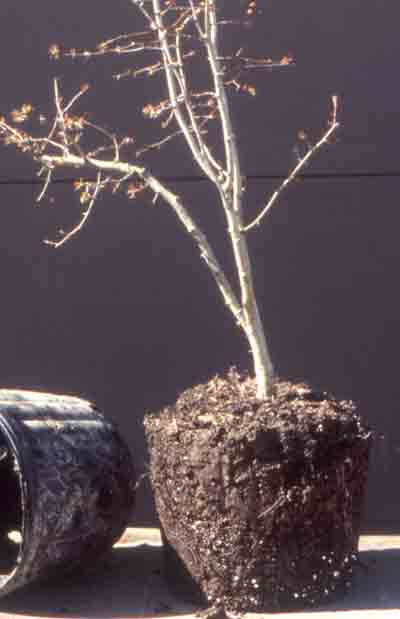
There are some naturally occurring miniature deciduous trees (small Japanese maples, Chinese elms, small birch trees, and dwarf mulberry, among others) that I described in the October 2011 GR. Some of these can be pricey, some are very slow growing, and others are hard to find. I wanted something cheap and easy that would still look good. So about 17 years ago I started experimenting with a modified bonsai technique to miniaturize Washington hawthorn trees (Crataegus phaenopyrum, Zones 4-8). This has worked remarkably well, producing decent looking trees in three to five years (photos 1 and 2). They mature nicely while being kept small, their roots confined in pots sunk in the ground. I have several trees up to 15 years old and have lost only one.
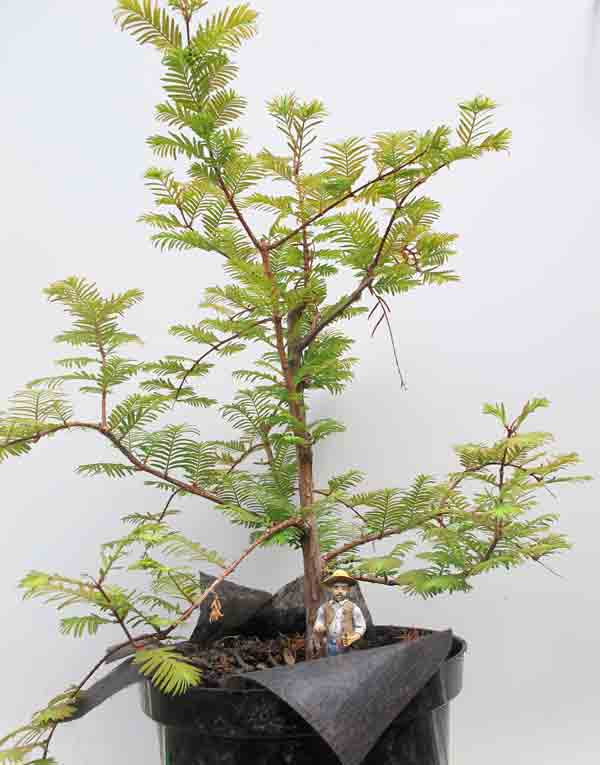
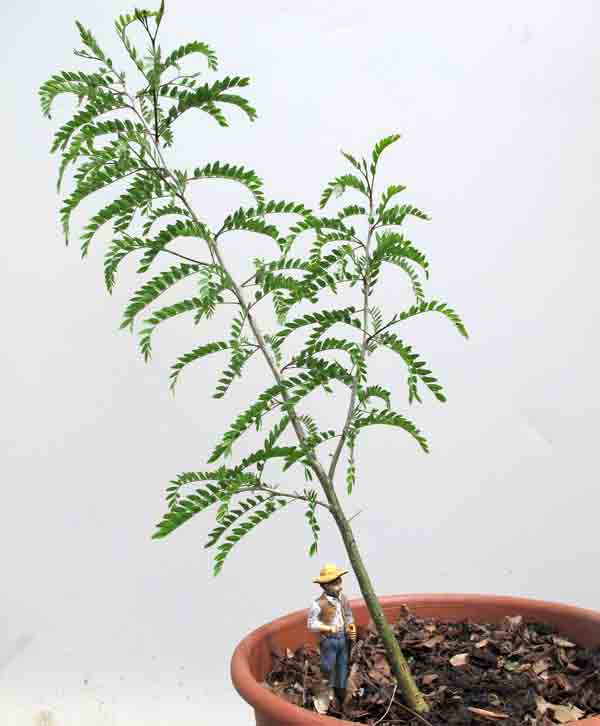
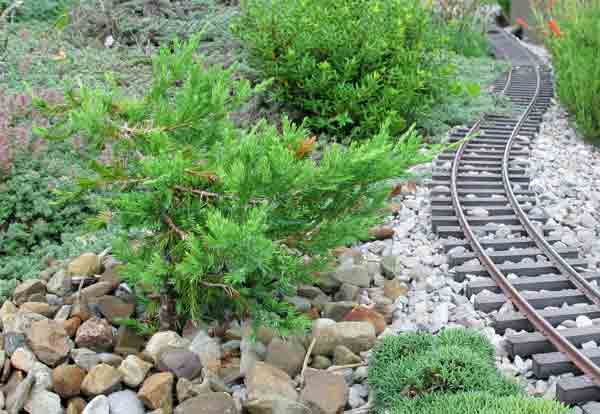
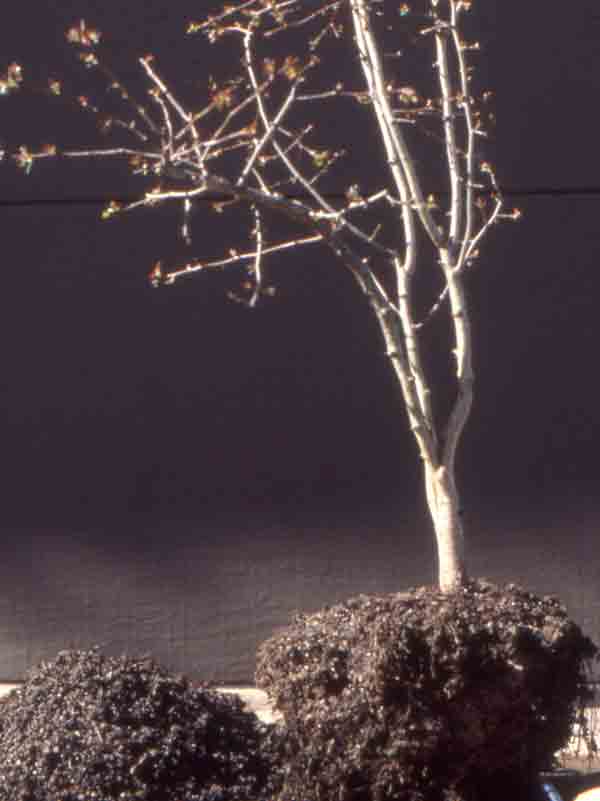
Why did I choose Washington hawthorns (which, by the way, can grow to 25-30 feet tall at maturity)? To begin with, their leaves are small, they are moderately slow growing, they have nice bark, a pleasing overall structure, and they are tough as nails. Unfortunately, they also have thorns that do not miniaturize. I figured by using gloves and being careful, that was an acceptable price to pay. The technique involves root pruning and top shaping every two years, with a light pruning of branches once or twice in the intervening year. Currently, I am trying to produce other trees in this manner, such as dawn redwood (photo 3), locust (photo 4), and common juniper (photo 5).
Potting a new tree
Trees should be very small when you select them to grow in pots. First, they survive better when small and, second, by shaping them early in life, you can better determine their eventual structure. Trees that come bare root, such as from National Arbor Day or little starts that you move from the wild, should be grown in a garden spot for a year or two before being potted. I use one-gallon plastic containers for most trees, graduating to two-gallon containers for some of the bigger trees. I use a soil mix of one-half good garden soil, one-quarter finely ground hardwood mulch, and one-quarter course sand, fine gravel, or Perlite.
Trees that have been growing in the ground for one to two years should have their roots spade-pruned at least six months before being dug up and potted. The purpose of this is twofold: to reduce the size of the eventual root ball that I would dig and to stimulate the tree to grow new roots within this restricted area. I use a small garden spade and plunge it about 6″ deep, straight down, in a circle around the tree no bigger than the diameter of a one-gallon container. I do this root pruning only after leaves have fallen from deciduous plants in the fall or before bud break in the spring. I keep the tree watered well during the summer, and six to twelve months later it will be ready to pot up, with better chances of thriving in its new confined space.
Before potting, the tree may be shaped with some judicious pruning of branches. The aim is to reduce the main branches to two or three if they are upward reaching (photo 6), and three to five if they are outward reaching from a main trunk. Some of the smaller branches should be removed to open up the tree so that its characteristic structure can be more easily seen.
Plastic plant containers have holes in the bottom for drainage (which keeps the tree from drowning). These must be covered so that roots won’t grow into the surrounding soil and defeat the effort to keep the tree small. I’ve found that two layers of landscape fabric (weed block) will allow adequate drainage and prevent roots from escaping. I place the newly dug root ball in the pot, with enough potting mix to bring the top of the root ball level with the edge of the pot. I pack the soil firmly and put the whole container in a tub of water, letting it soak for 20-30 minutes to drive out any air pockets remaining in the soil (photo 7).
Potted-tree maintenance
The potted tree can now be placed in its assigned spot on the railroad. The pot is buried up to its rim and is disguised with mulch (photo 8) or gravel (photo 5). Often, groundcover will grow into the pot and help to blend the tree into its surroundings (photos 1 and 8). It is important to remember that potted trees have limited means of obtaining water and nutrients. Pots should be watered regularly, especially during periods of drought. Drip irrigation is an ideal way to make sure all potted trees are provided adequate water (photo 8). A cup or two of diluted water-based fertilizer (such as Miracle-Gro) should be poured into the pots every month during the early growing season, stopping application after August 1 so that the trees have time to acclimate in the fall for the coming winter.
Root pruning
Every other year, in March or early April, I watch the trees for signs of emerging leaves. That’s the best time to pull the pots out of the ground for root pruning. It can be done later but it’s easier on the trees before the leaves are out full and it’s easier to see the branch structure when the leaves are small. I turn the pot upside down and pull the tree out (photo 9). I usually lay the tree and root ball on its side and cut (whack) through the lower third of the soil and roots (photo 10). If the landscape fabric is torn or rootlets have penetrated it, I replace it. The pot is then filled one third with the potting mix, the tree is put back in the pot, and mix is added around the root ball and packed in. The whole pot is placed in a tub of water and soaked to drive out any air pockets. While the tree is soaking is a good time to trim the top, thinning out enough small branches to emphasize its natural shape.
Trees take time to develop and this project tends to be a long-term one. However, unless you are willing to pay top dollar for ready-made scale trees, this method has a lot going for it