


Why build a garden railroad tunnel portal
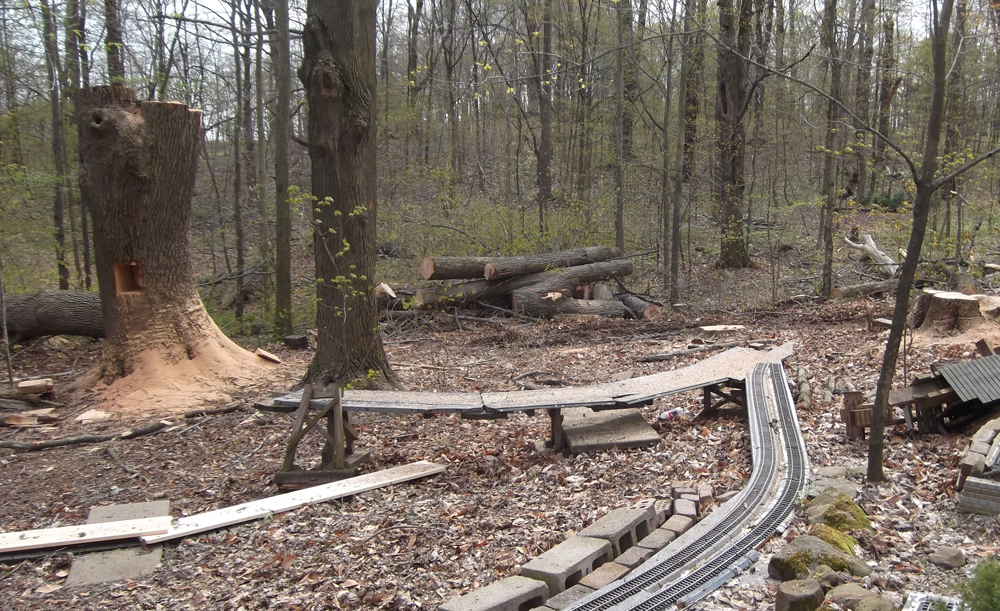
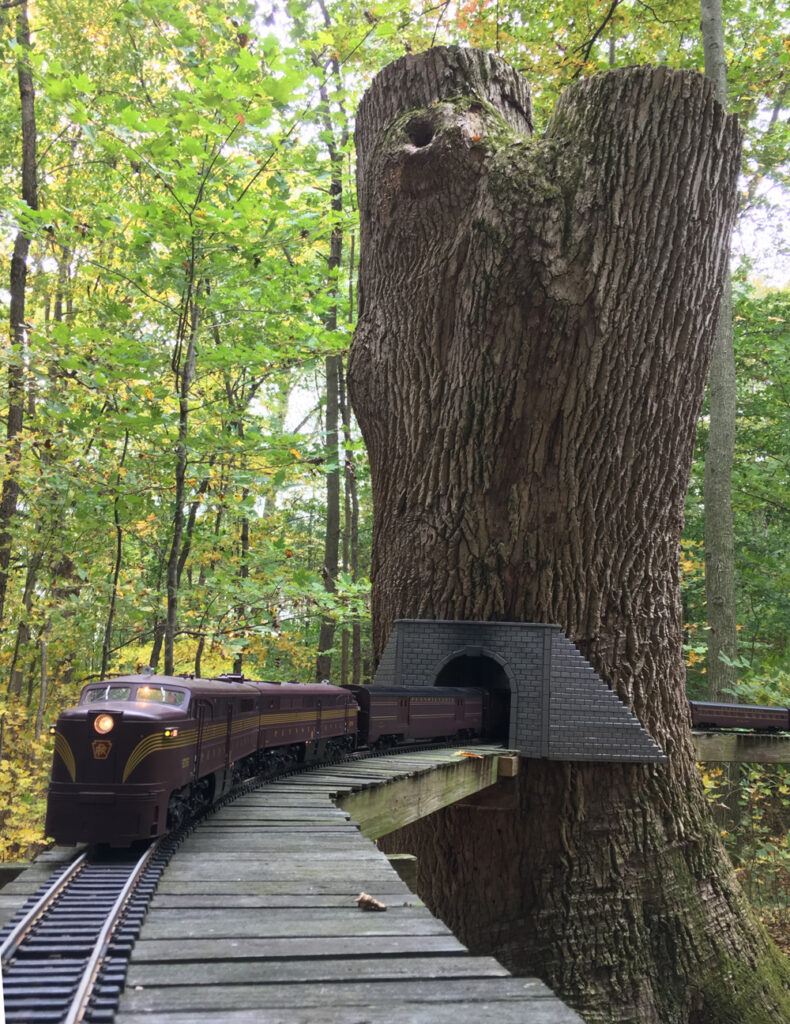
Thanks to the invasion of the Emerald Ash Borer, several large ash trees had died and their falling limbs caused problems for the Blackstone RR Maintenance Dept., so I called in a professional. When the worker saw my trains, he offered to leave a 10-foot high, 40” diameter stump from one of the trees and plunge cut a tunnel through the tree. The tunnel was an interesting focal point for my trains for a year or two, but to improve the scene, it needed a tunnel portal.
Garden railroad tunnel portal design
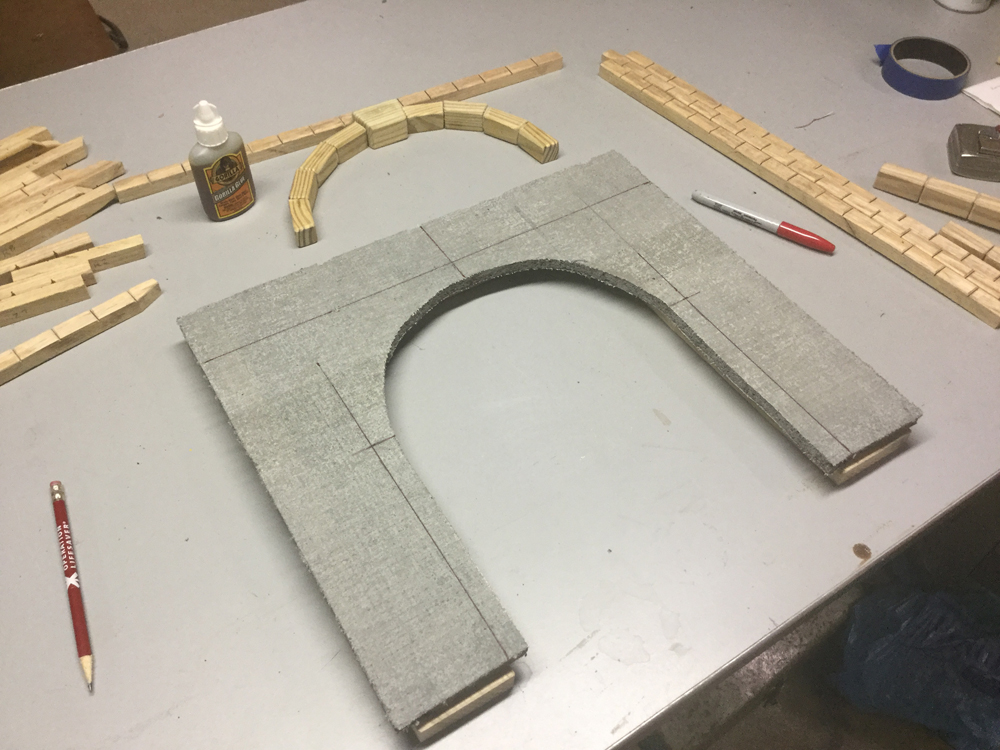
I sketched a basic design that looked reasonable and more or less met clearance standards. Since this structure will be outside all year, I used 1/2” thick cement board as the framework where I would attach wooden “blocks.” I cut the cement board 1/4” smaller all around than the portal, to allow a little fudging here and there and to hide the cement board’s edges.
Garden railroad tunnel portal construction
I used the wood from the cut trees for all the blocks and boards for the portal. Ash is excellent for weather resistance, and in this case, an appropriate choice. I started by first cutting blocks for the arch keystone, 1 1/8” thick x 1 3/8” high x 2” long at the top. I tapered the ends to make the bottom 1 5/8” long. The arch blocks and the column blocks were made from 3/4” square boards. Each of the 8 arch blocks are about 1 3/4” long, with a 10 degree taper on each end, providing 20 degrees of arc for each of the 9 blocks (=180 degrees).

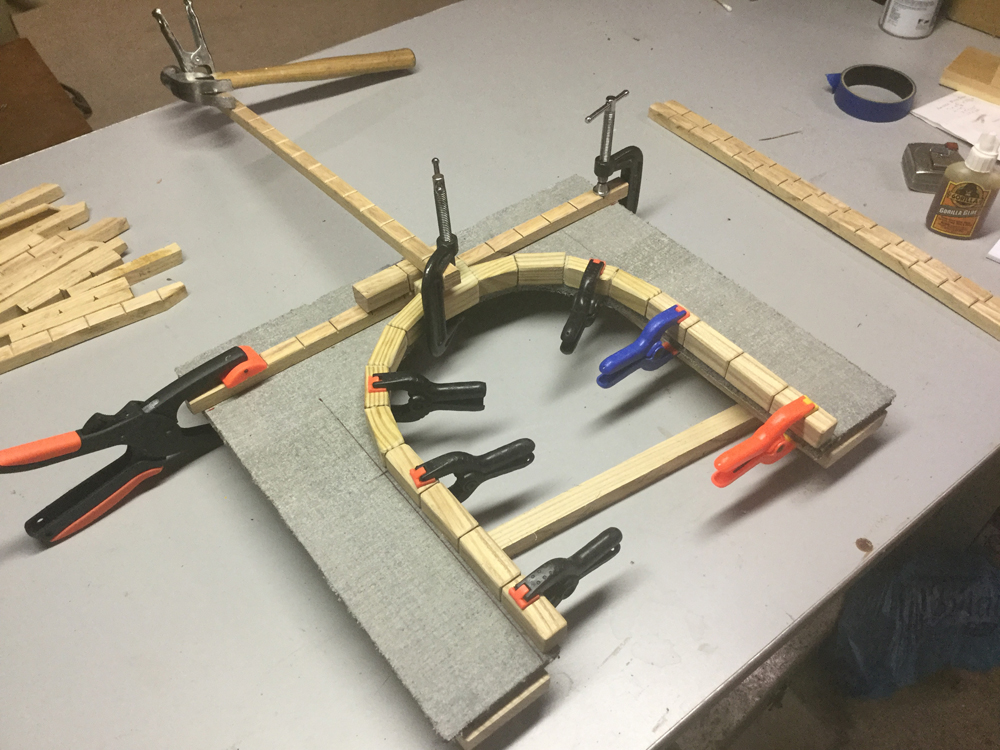
I sanded blocks to round the edges and glued them together to make a semi-circle. I used a sketch of the arch as a template to maintain the proper shape. After the glue cured, I attached the assembled arch to the cement board.
I used Gorilla Glue for assembly. This product is activated with water and requires clamping or weights during its two-hour cure. It helps to score the surface of the cement board, where the glue will be applied, to provide a better grip. When gluing the block strips together, apply the glue sparingly, as it expands. The exception is when you’re attaching wood stiffener boards to the back of the cement board; use lots of glue here, since the “overflow” won’t be seen.
Make the vertical columns from two pieces of wood, 3/4” sq. x 7” long. I cut faux “mortar” joints on a table saw, with the blade set to about 1/8” above the table. I crosscut the two column boards at 1 3/4” spacings to simulate 4 blocks high. I filed all “mortar joints” and edges to make them (vertical and horizontal) chamfered (tapered) to open up the joint. Sand and attach the columns to the cement board and to the arch blocks.
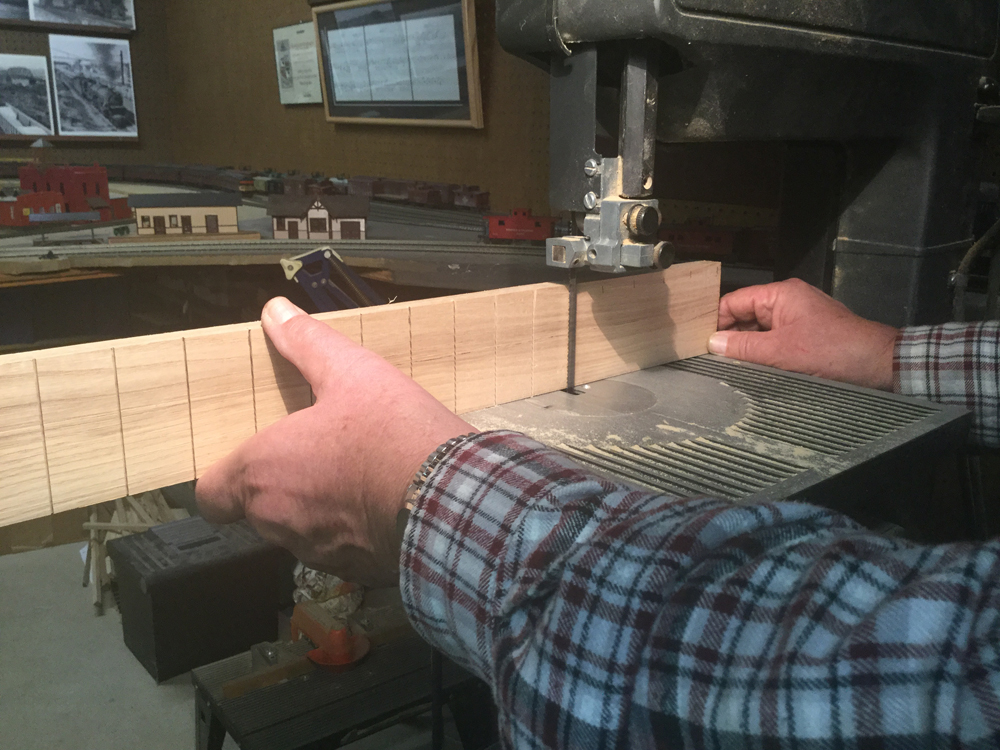
I made the portal’s wall blocks from 5/8” thick boards. I had to limit the board length to 24”, since my band saw has a 12” throat. I cut vertical grooves in the board, spaced at every 1 1/4”. Rip these boards (cut lengthwise) to make 5/8” square strips of blocks, each 24” long.
Safety note for the band saw: In order to see the band saw cut that produces the “mortar joints” and to judge the depth of the cut, I pulled the board toward me to make the cut (not pushing on the board, as is typical). It’s a little awkward at first, and I suggest practicing your motion for a few cuts without the saw blade running. Be sure to wear eye and ear protection as you work.
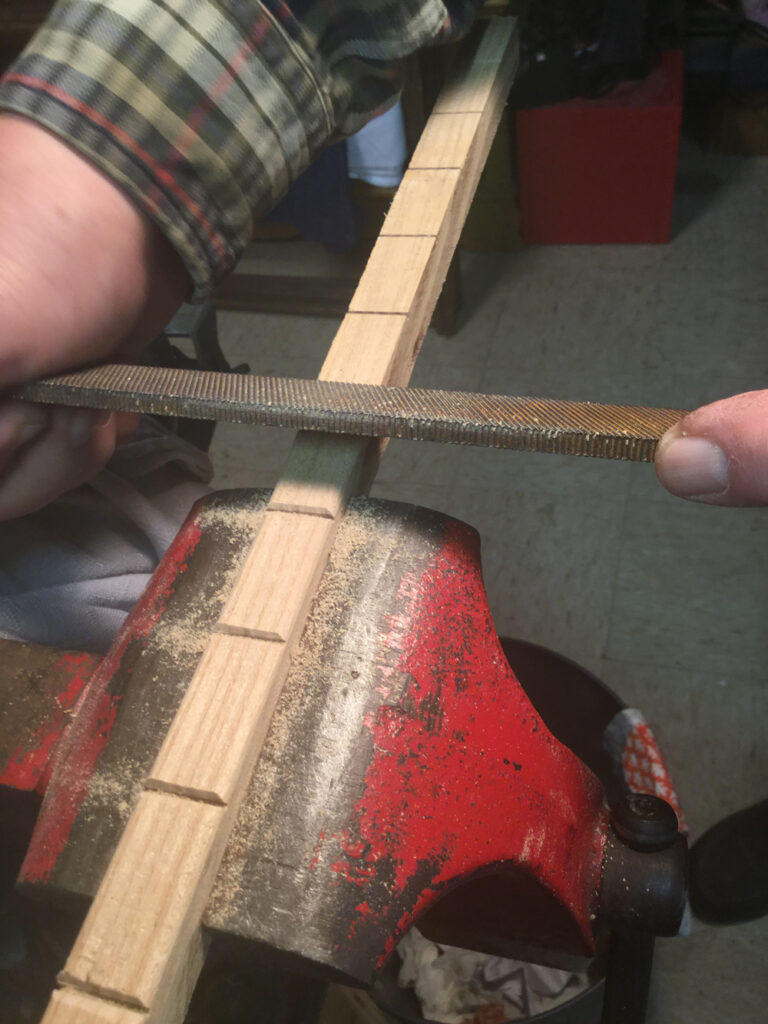
To shape the blocks, I used a coarse metal file, with cutting surfaces on the sides of the file, to chamfer the groove between two “blocks” and to chamfer the long edges of the block strips that will be exposed. It sounds like a daunting task, but it goes quickly once you get a rhythm going.
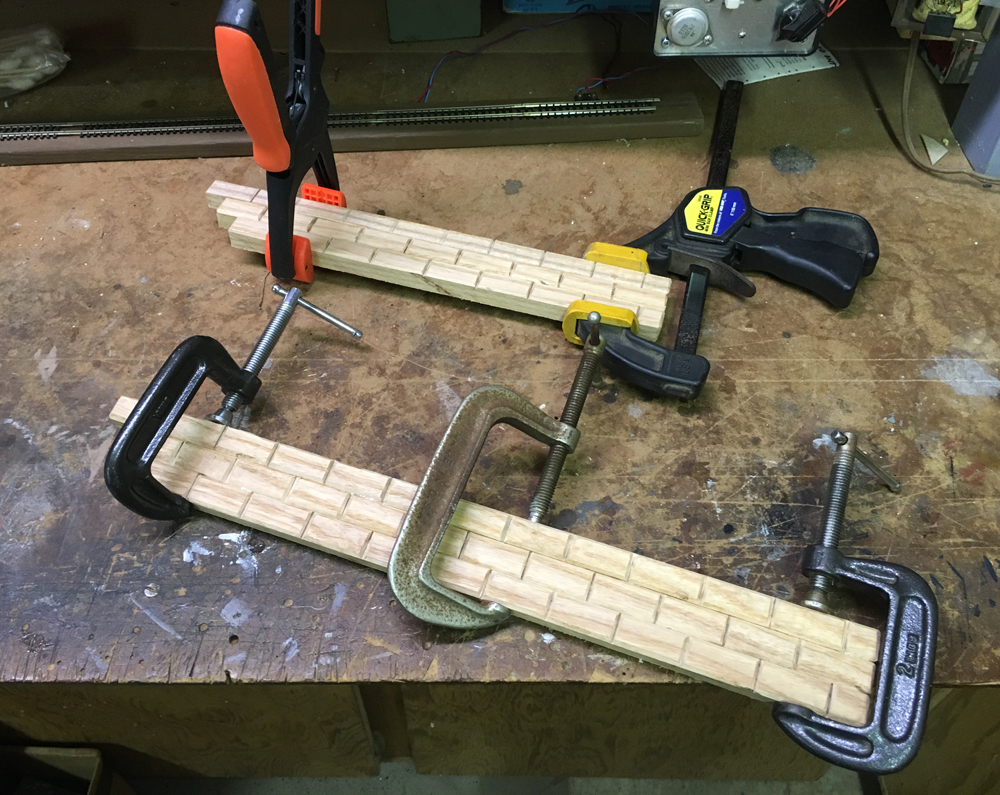
I glued the strips on to the cement board, starting with a full strip laid tightly across the top of the keystone block, ensuring a straight, parallel starting line. I continued with full strips to the top, keeping the mortar joints aligned vertically on every other row. When working down from the starter strip, keep rows on each side of the tunnel opening straight across from each other.

The strips butting into the arch and the columns should be cut so that the mortar joints maintain their alignment from the top of the portal to the bottom. Do as I say, not as I do, as this detail eluded me to some extent. (Don’t look too closely at the photos!) I also glued three boards to the back of the cement board to provide additional strength.
The construction of the wings is similar to the portal wall. The wings have the same number of rows as the portal, and each row will be shorter by a half block as the wall is built up from the bottom. Keep the horizontal mortar joints of the wing in line with the portal mortar joints. I glued three of the wing strips together prior to gluing them on the cement board, making several assemblies of three strips for each wing.
This continued up to the full height, where I glued a single block on top of each wing. I added a cap block to the top of the portal. This is a 1/4” thick board x 21” long x 2 1/4” wide that had “mortar joints” added at every 2 1/2”. It was positioned with attention to the joints in the top strip of wall blocks.
Garden railroad tunnel portal installation
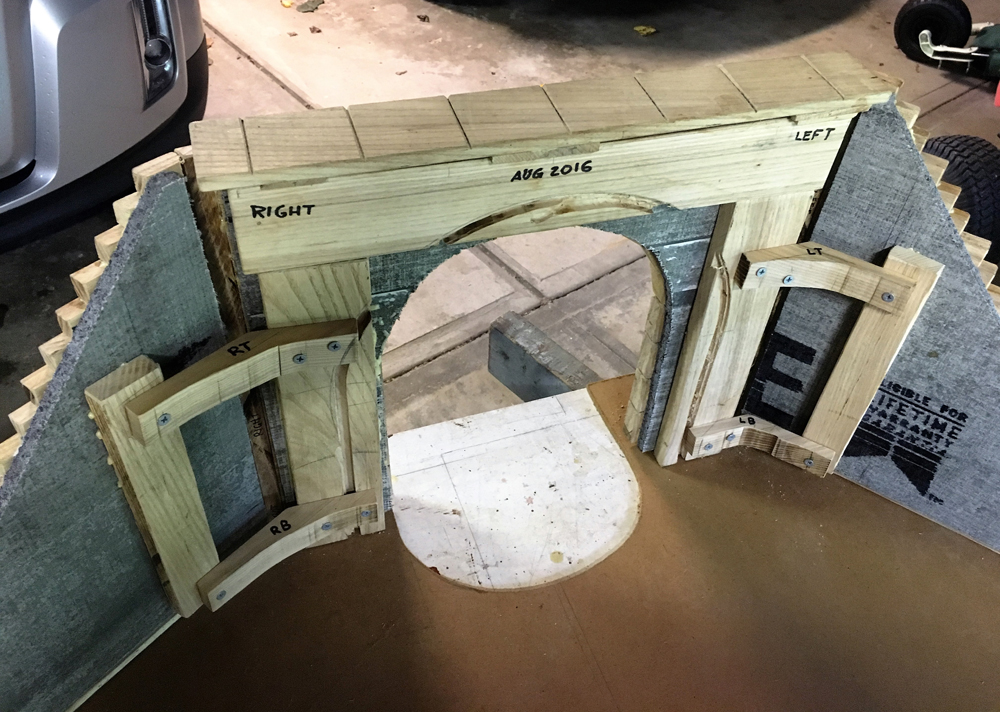
I wanted the wings as close to the stump bark as possible. I made several cardboard templates before I found the proper angle, then used the template to make a bracket with the correct angle for each wing. I glued a board to the back of the wings so I could screw one end of the bracket to the board behind wings and screw the other end of the bracket to the board behind the portal. I made a block strip with a wedge shape to fit into the vertical gap between the portal and the wings, which was glued in place after the wings were attached. Some flat gray paint, a light touch of black spray paint for the locomotive exhaust at the top, and it’s complete!
For the record, I have never seen tunnel wings angled back from the face of the portal, but then again, I have never seen a tunnel portal on a tree! A conventional tunnel has the wings angled out in front of the face of the portal, which could be done by using differently shaped brackets.
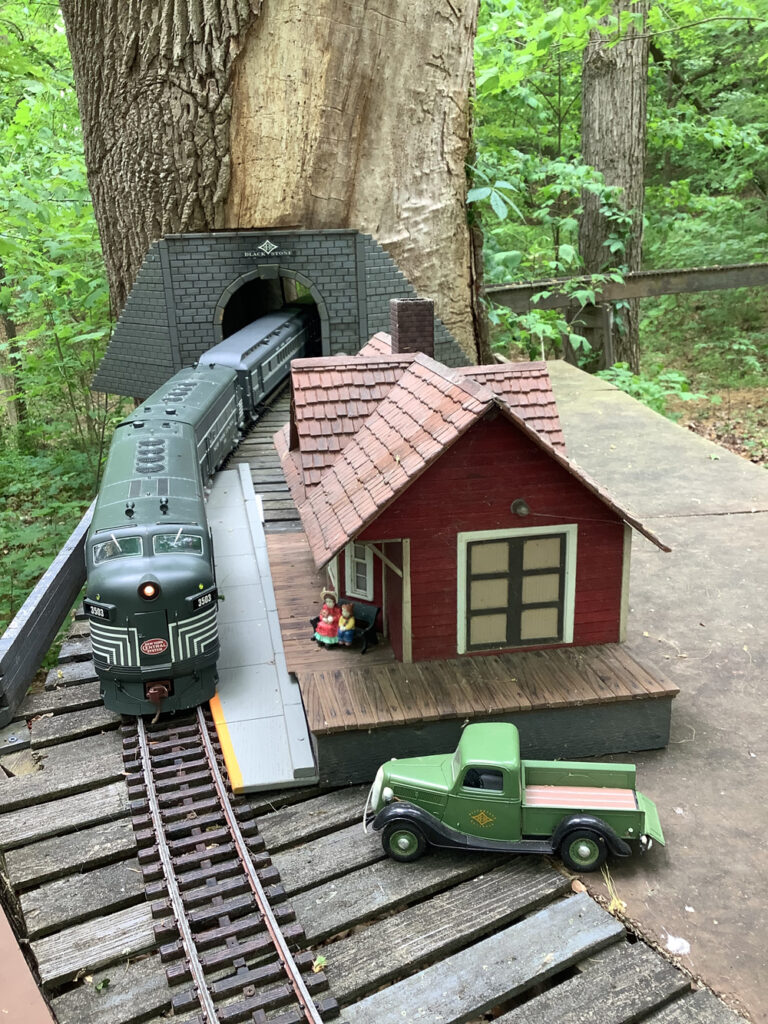
Update: It’s been five years since I built this portal. As seen in this photo, it has held up fairly well. Last year a large chunk of tree bark fell on the portal, knocking it off its support and breaking the glued bond between the cement board and the portal bracing. I re-glued and clamped it back together, and it is still standing. The ash wood blocks seem to be in excellent condition, and if anything, they look even better, due largely to the mold and weathering that accentuates the mortar lines of the block.


