


Durable roadbed for garden railroads, as a topic, developed for me after retirement. For many years, I was an “armchair” garden railroad enthusiast. With plenty of time on my hands I began focusing on building the railroad. Having more time did not make things easier because, being a rookie, I agonized over which method should I use to properly lay the track.
I also found lots of tips, help, and information in articles and online research, which suggested that laying track focused on three major areas: foundation, connectivity, and ballast.
Selecting track
For the past few years I’ve purchased LGB track in preparation to building the railroad, and felt confident on its reliability. Because broken electrical connections seemed to be a common problem outdoors, I bought Split-Jaw Rail Clamps to minimize connectivity problems.
I used standard straight and curved sections, and did not custom bend any track.
Most track laying methods are influenced by two factors: the degree of realism desired by the railroad owner, and weather conditions prevalent in the region where the railroad is located.
Local conditions affect durable roadbeds
Since in garden railways we are dealing with 1:1 conditions, we seem to be on the losing side when we go up against Mother Nature. I noticed, from a practical point of view, many modelers go with the flow of their local environmental conditions. This sometimes means realism suffers a bit but the result is fewer problems when running trains. Ultimately these results in developing more durable roadbed for garden railroads.
I live in an area surrounded by tall trees: oaks, maples, birches, pines, and others. Throughout the year, these trees drop pollen, sap, leaves, needles, seeds, acorns, and twigs, which wreaks havoc on operations. For me, a nice looking, carefully groomed, no. 3 grit ballasted track, continuously maintained to look like the real thing, was not practical. I’d prefer to give the railroad a quick pass with my leaf blower and be done.
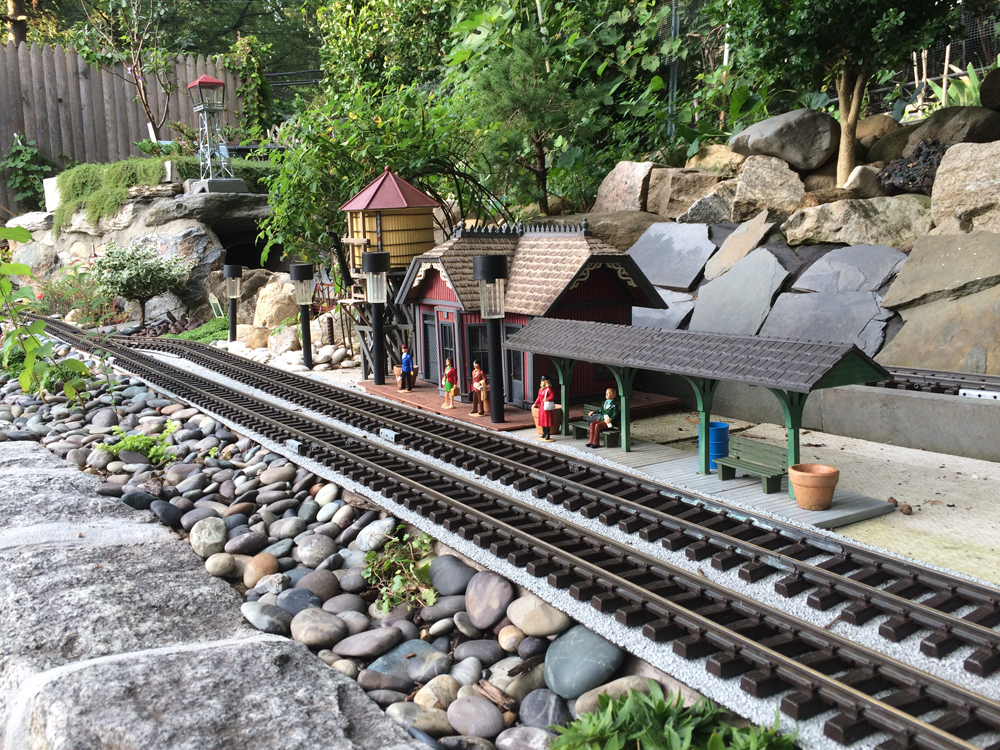
My view on realism and local conditions is tinted by relaxation and practicality. I wanted nice-looking track, but with high reliability and low maintenance. Hence my decision to use landscaping timbers for the foundation and mineral-surfaced roll roofing as ballast.
List of materials
- Landscaping timbers (for track foundation)
- Mineral surfaced roll roofing (as ballast stand-in)
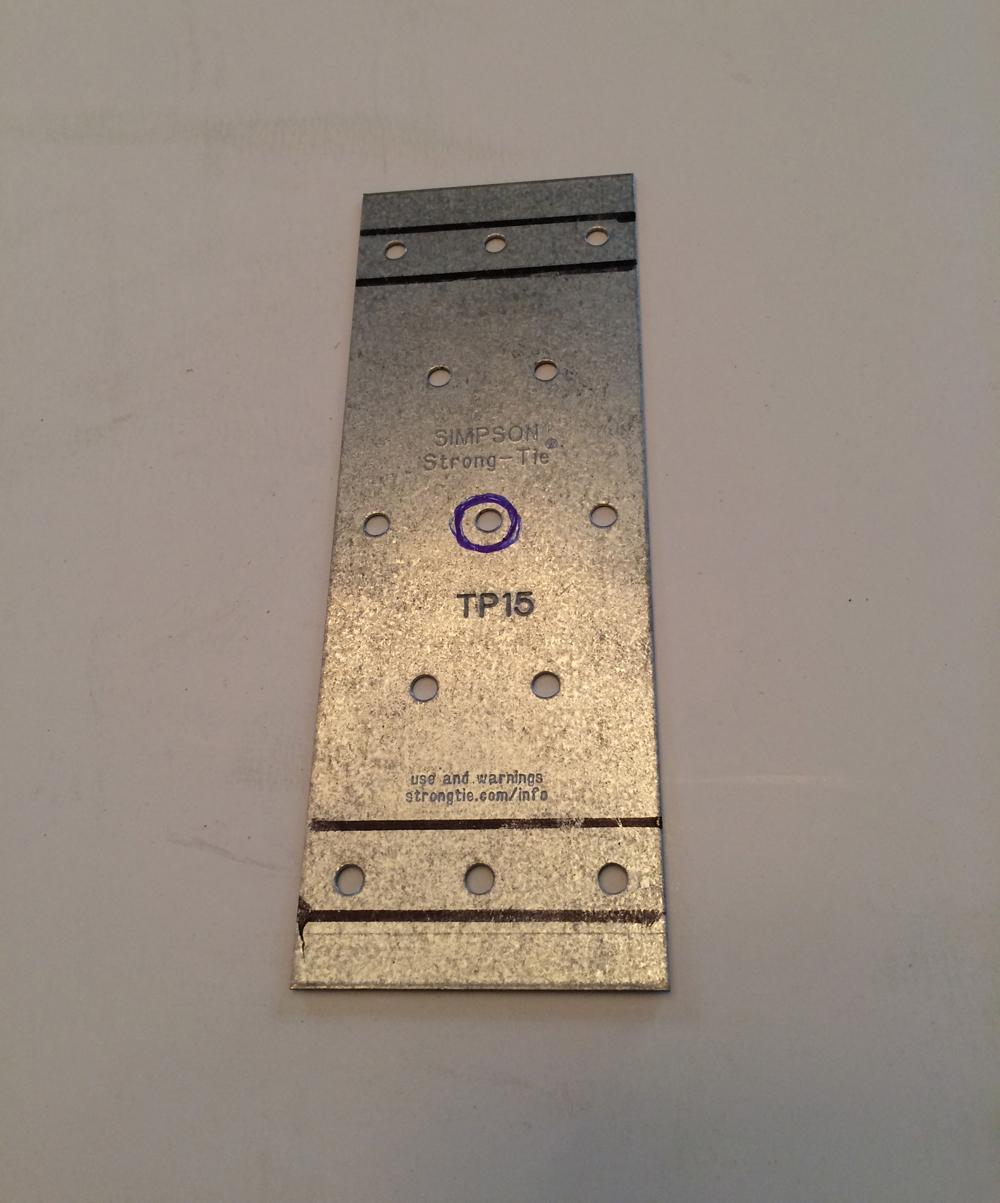
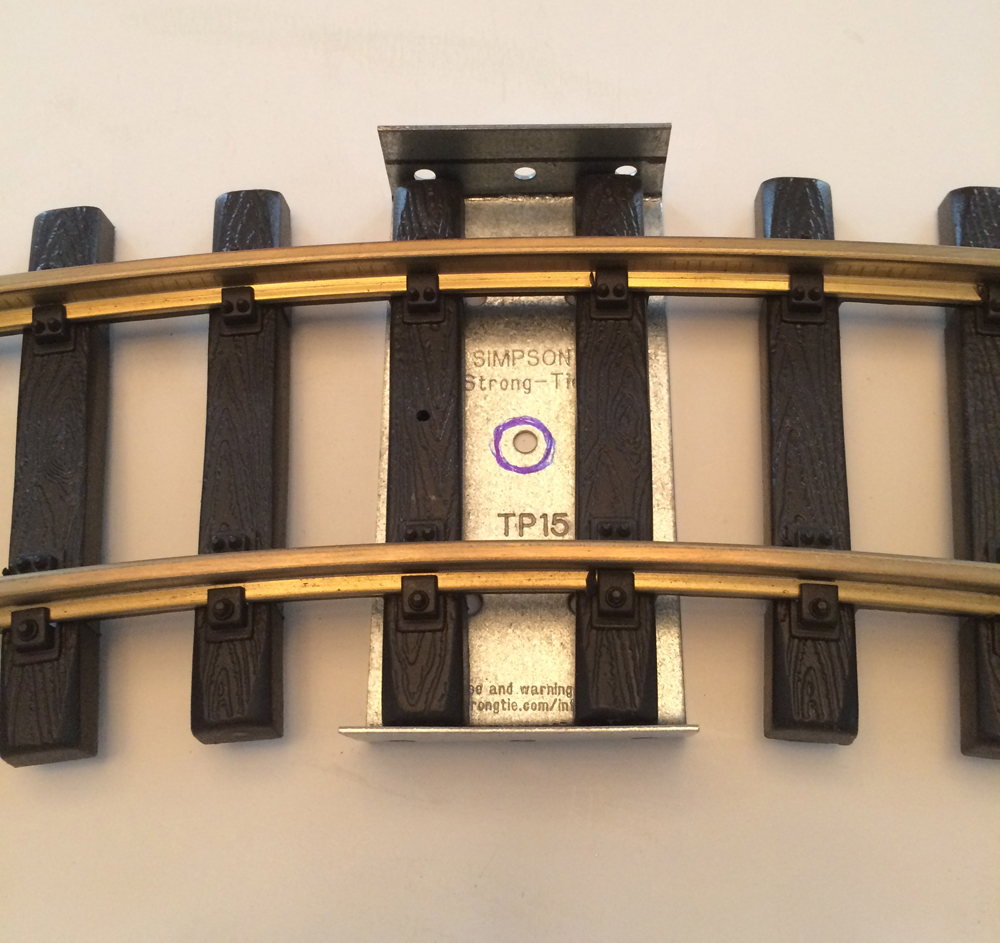
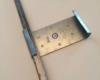
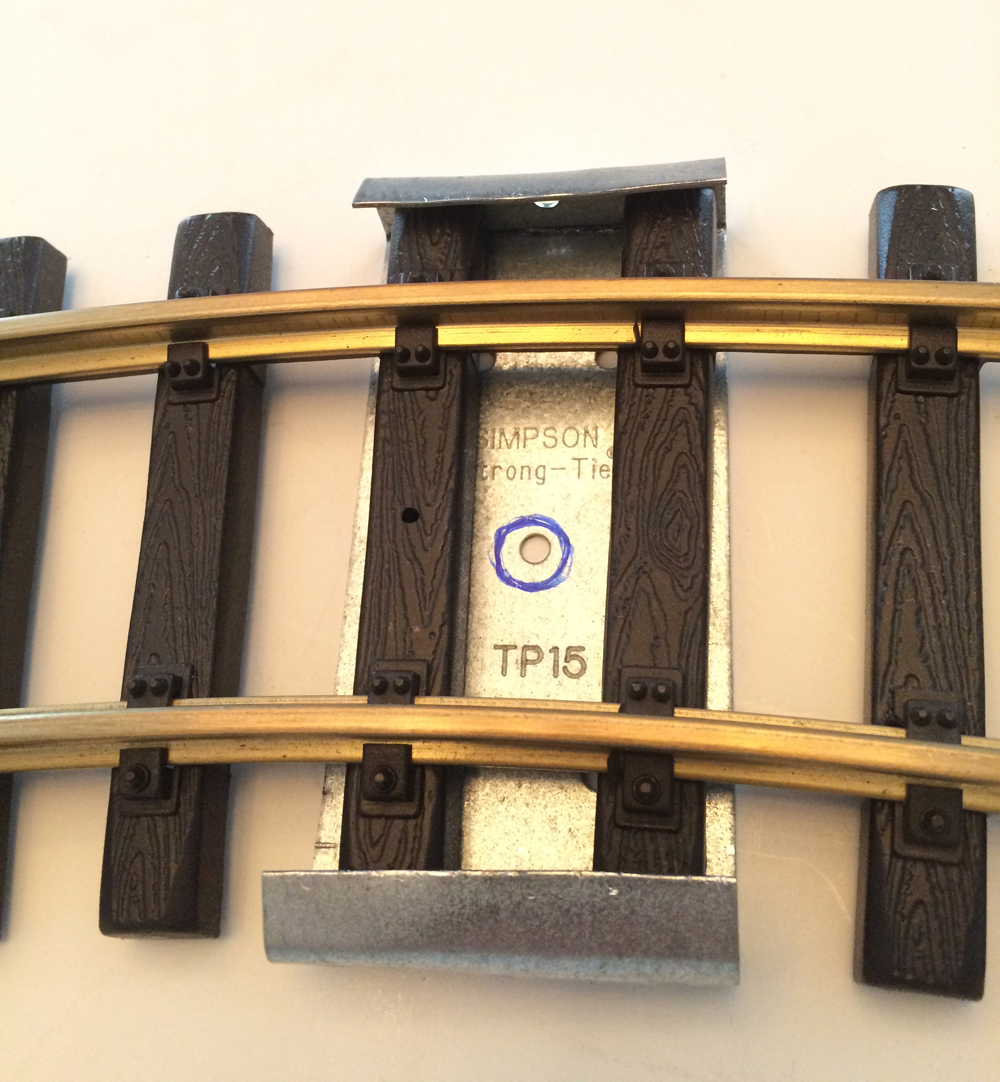
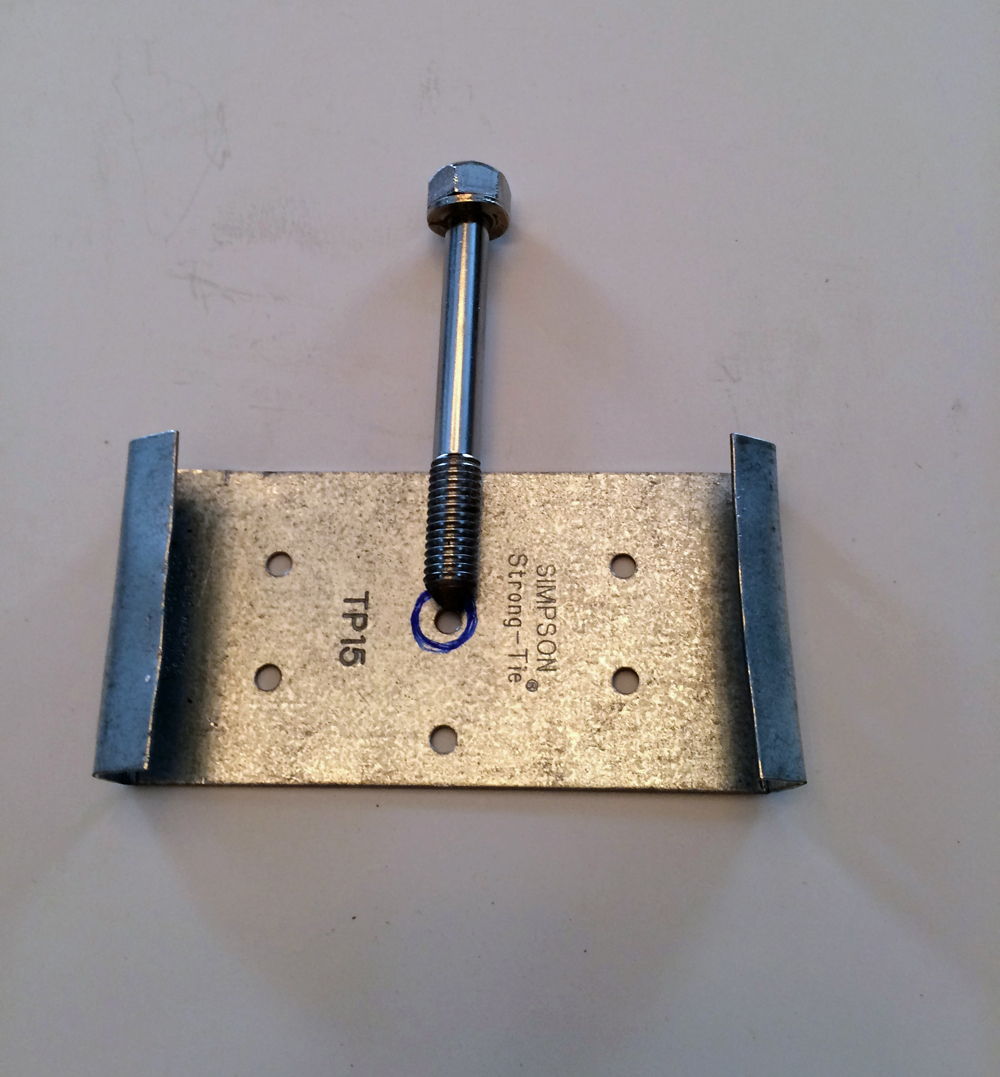
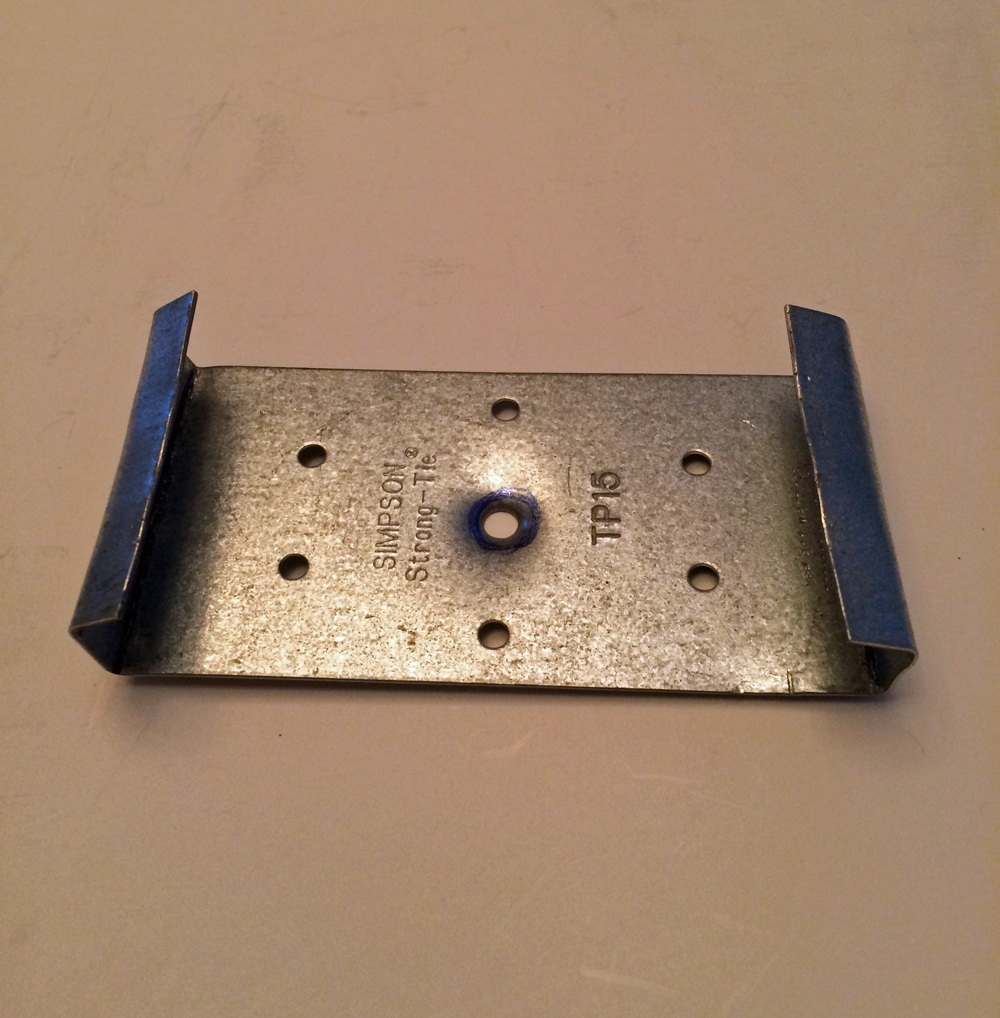
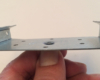
- TP15 Simpson strong-tie plates
- To link/attach timber pieces together
- To make clamps which hold/attach the track to foundation
- 1¼” deck screws (to install the tie plates/clamps)
Using landscape timbers for the roadbed
Anticipating the drastic temperature changes in the Northeast, I wanted a flexible and stable “floating” foundation. I also wanted to take advantage of the sandy soil in my garden, which would allow water to drain quickly from under the landscaping timbers.
The shape and heft of the timbers provide the stability I was looking for. They are 8-foot poles about 4 inches thick with two opposite flattened sides, so their profile ends up looking kind of oval. One flat side goes on the ground and I attach the track to the other. Once on the ground, these pieces are flat and stable.
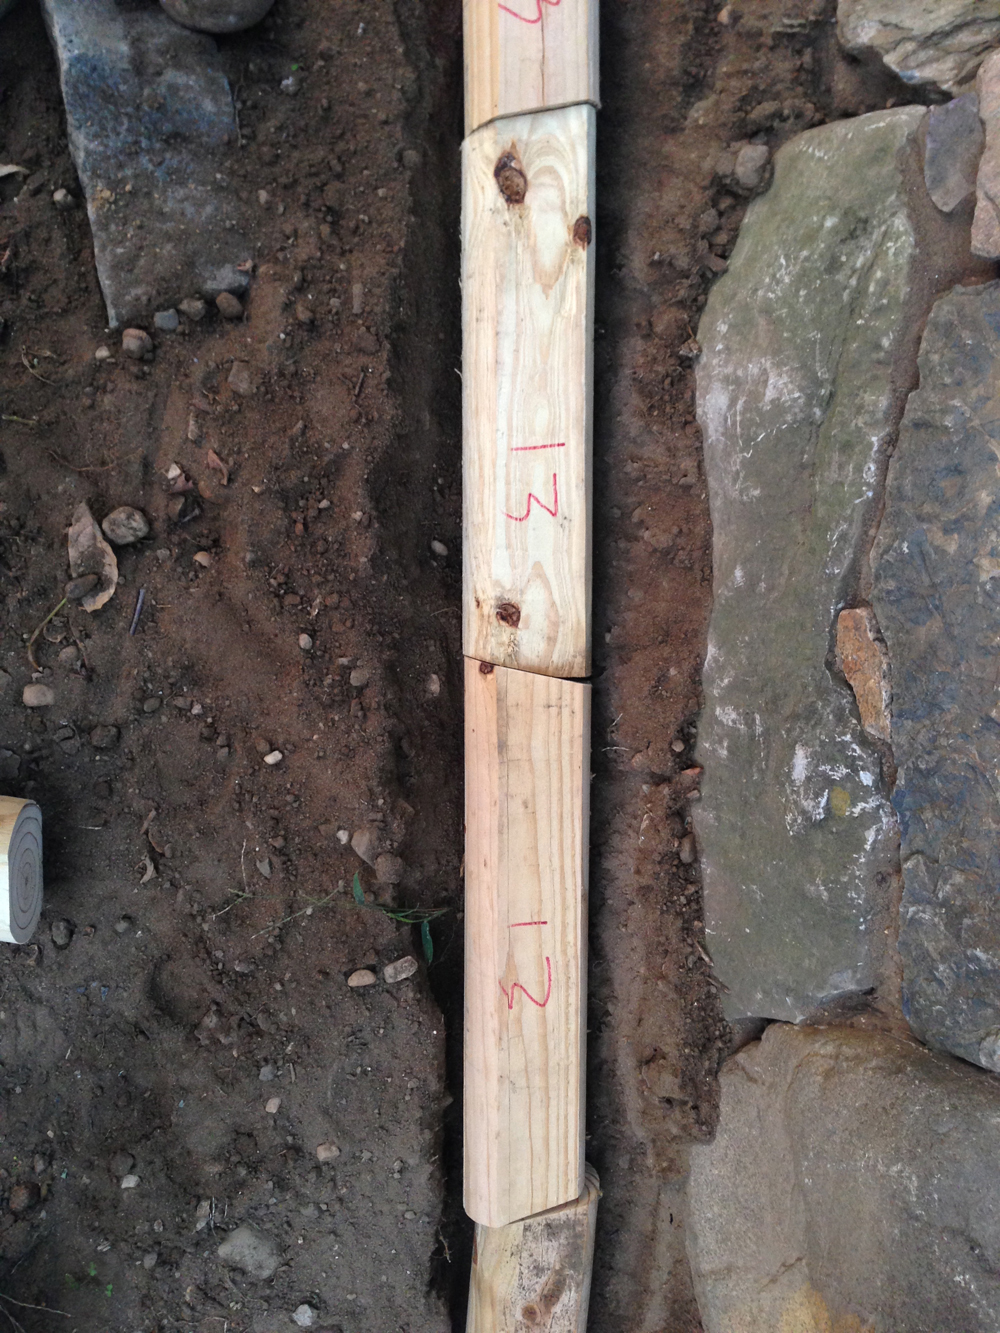
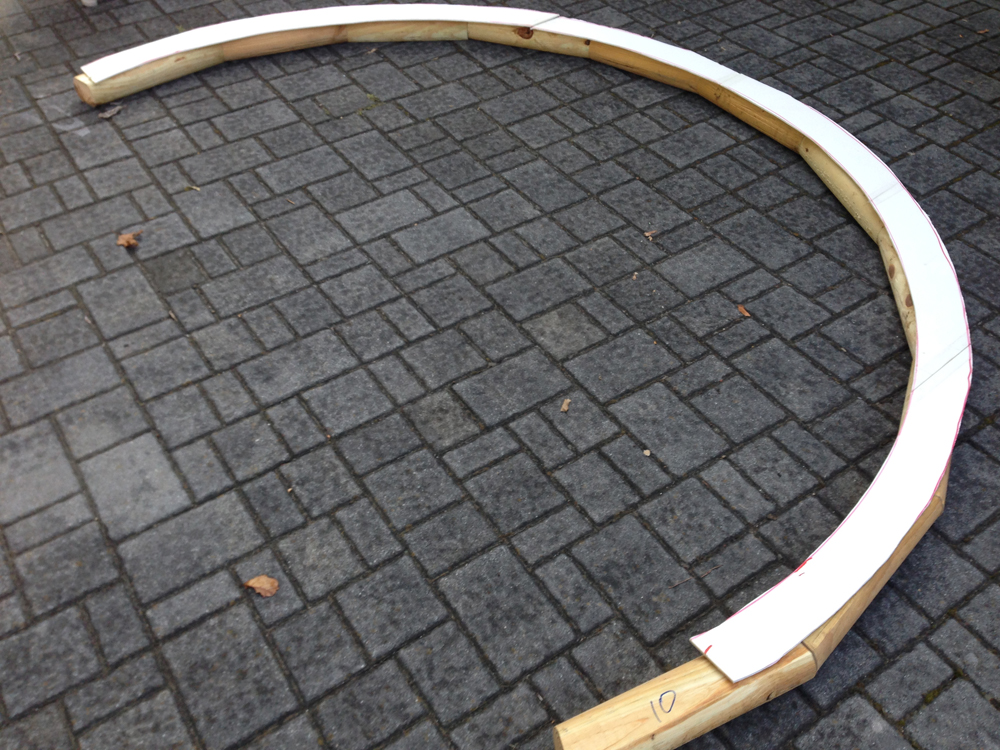
A critical step in this system is to cut the timbers in roughly 2-foot sections. The ends should be angled to correspond to the curvature of the track you are using.
Cutting the timbers
I used the largest curves that would fit in my railroad: 15000 (30°) and 16000 (22.5°) LGB series.
To fit the curvature of these I cut the 2-foot timbers as follows:
- For the 15000 series, cut the ends at a 13° angle
- For the 16000 series, cut the ends at a 10° angle
The photo below shows the timber pieces for the inner (15000 – 13°) and outer (16000 – 10°) curves being installed.
For straight sections of track, I recommend also cutting the timbers in two-foot sections. If you place an entire uncut 8-foot section on the ground, moisture will cause the wood to warp.
The lumber pieces couple nicely with the tie-screw attachment system. It allows a degree of flexibility and you can obtain long, gentle curves if necessary.
For the foundation under turnouts, I cut the timbers following the pattern in the switch itself. The straight section of the switch corresponds to a straight section of timber. For the diverging line I cut one end of a 2-foot timber at around 70°. This angle does not need to be precise. A lot will depend on the field conditions of your railroad, but it’s not critical since the “ballast” will cover any imperfections.
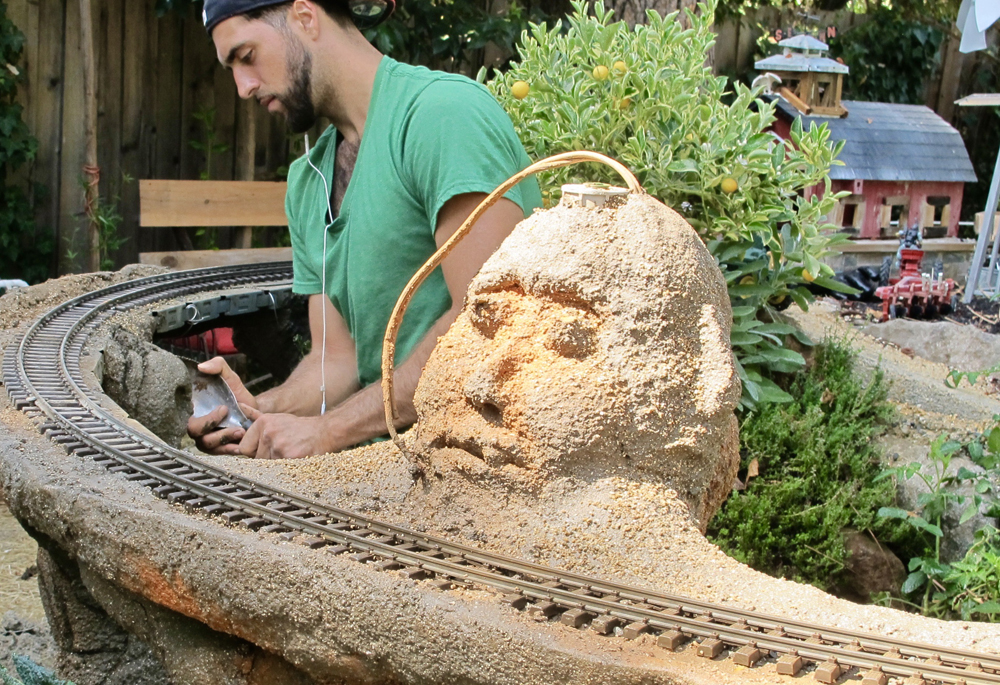
Installing the timber pieces
I used the actual track pieces to fashion foam board patterns that guided me to ensure the timbers follow the curves and when digging the trenches. I used foam board came in handy for the patterns, but heavy cardboard would also work.
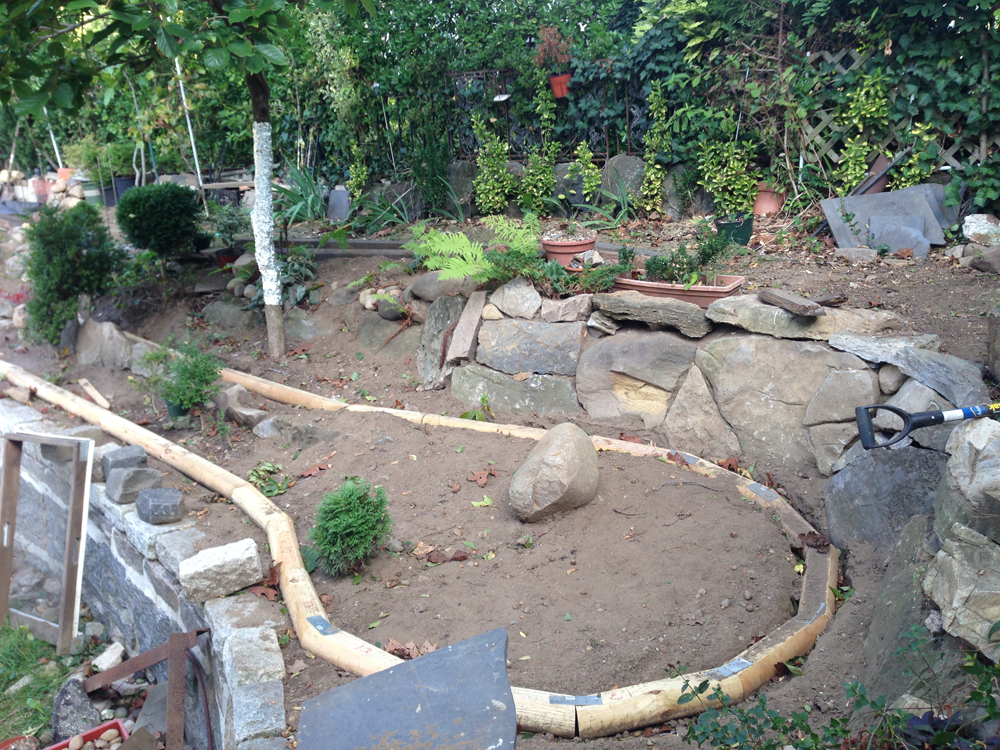
Digging trenches and installing the timbers went quickly. I wanted half of the timber foundation to be buried in the sandy soil and the other half to be above ground. This not only allows for better maintenance, but gives a level of realism as it looks like the raised bed of gravel real tracks normally rest in. Once groundcover is planted and spreads, all will appear to be at the same level.
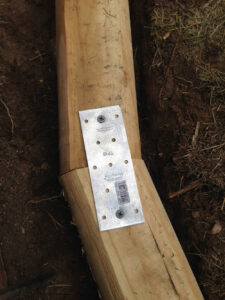
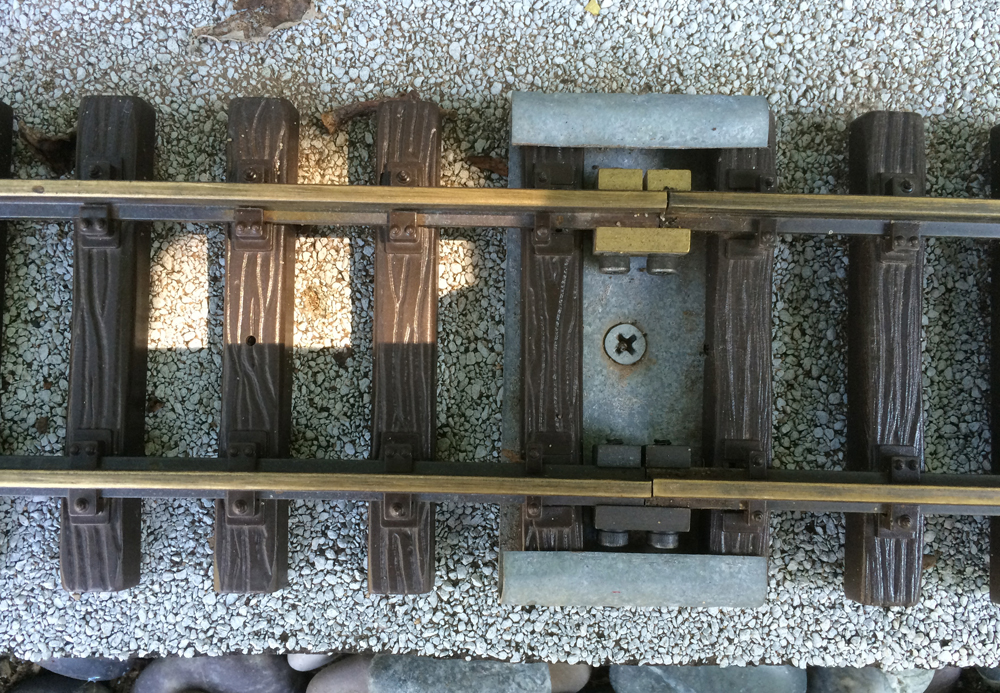
I used one metal tie plate to hold two pieces of timber together (pic 9). Just two screws, one at each end of the plate, is enough to hold them. This keeps the pieces attached but also allows the whole thing to “float” when dealing with frost heave and other forces due to seasonal and temperature changes.
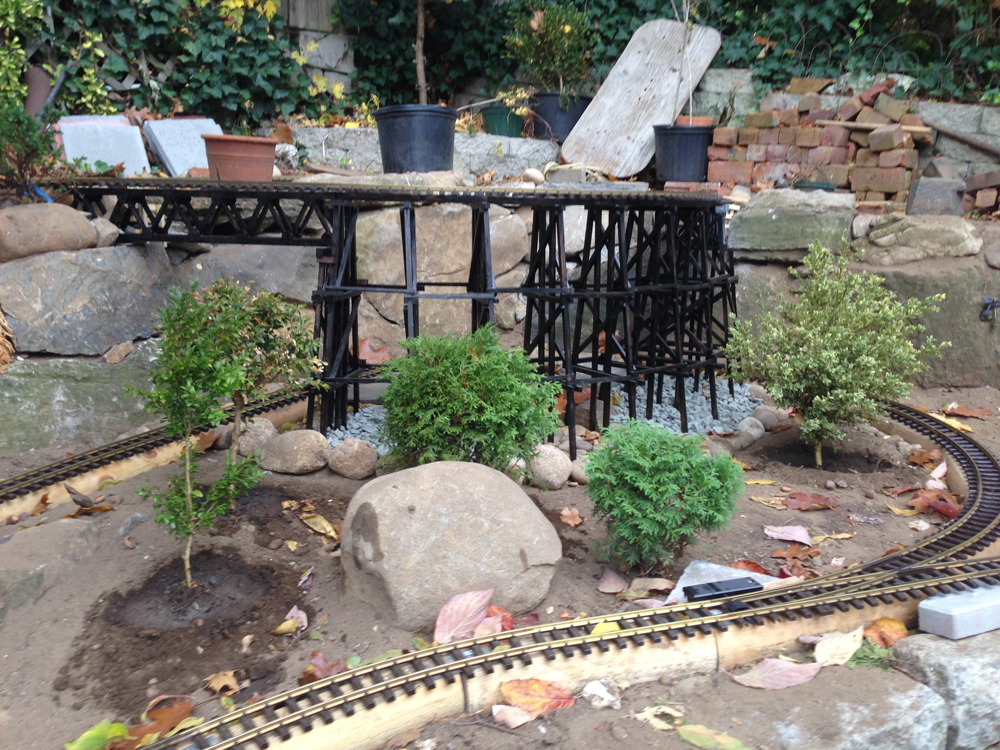
It took me just a couple of days to install all the timbers. Then I began placing the track on the foundation temporarily to test and ensure proper fit. I spent a few days fine tuning the final track placement, making sure the track and foundation aligned, and smoothing out dips and hills along the foundation.
Installing the ballast
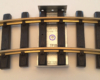
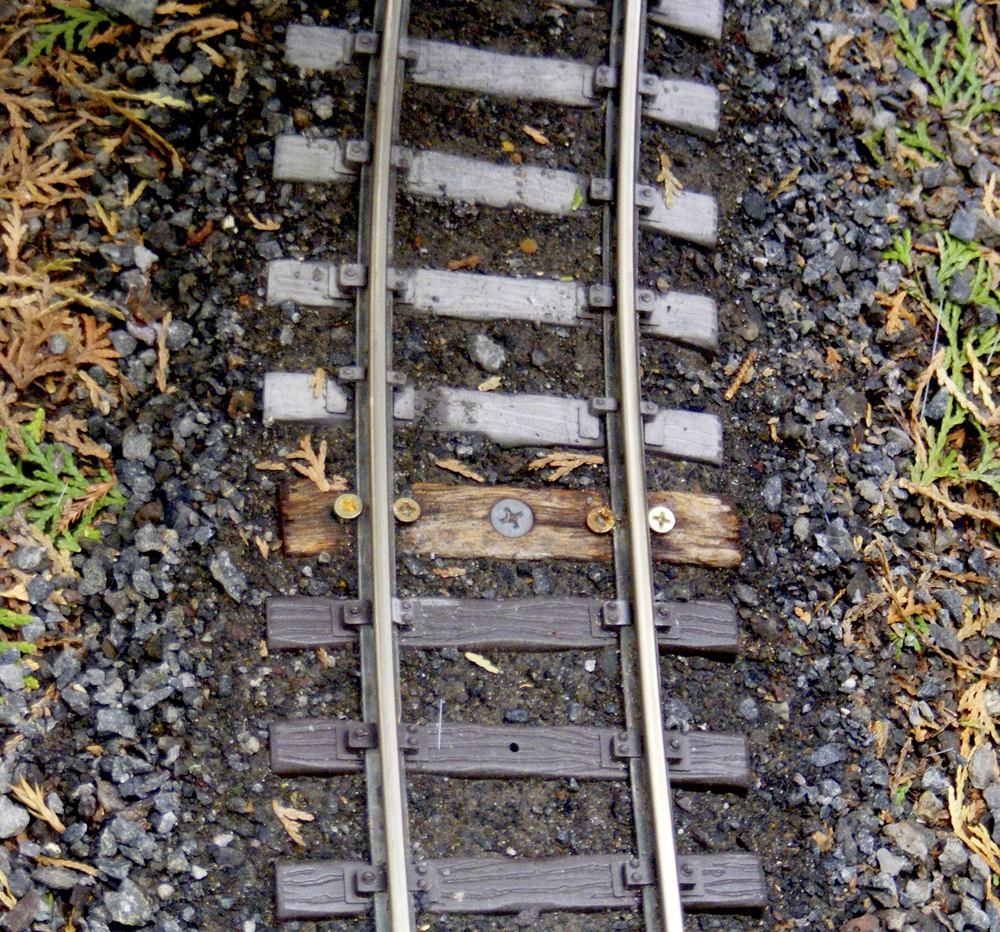
Mineral surfaced roll roofing (my “ballast”) looks a lot like regular asphalt roofing shingles. It comes in a continuous roll, 36 inches wide by about 33 feet long. The mineral particles that coat one side are grayish and, when a 4-inch-wide strip is placed underneath G scale train tracks, it gives the illusion of evenly spread ballast.
To install it, I cut 4-inch-wide by 36-inch-long strips from the roll roofing material. For the double track in my siding, I used 10-inch-wide strips of the material.
I used foam-board patterns and the actual switches themselves to mark where to cut their 4-inch-wide rights-of-way.
The roofing material not only acts as ballast, but also as “roofing” to protect the timbers underneath.
Attaching the track-ballast to the timbers
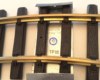
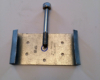
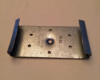
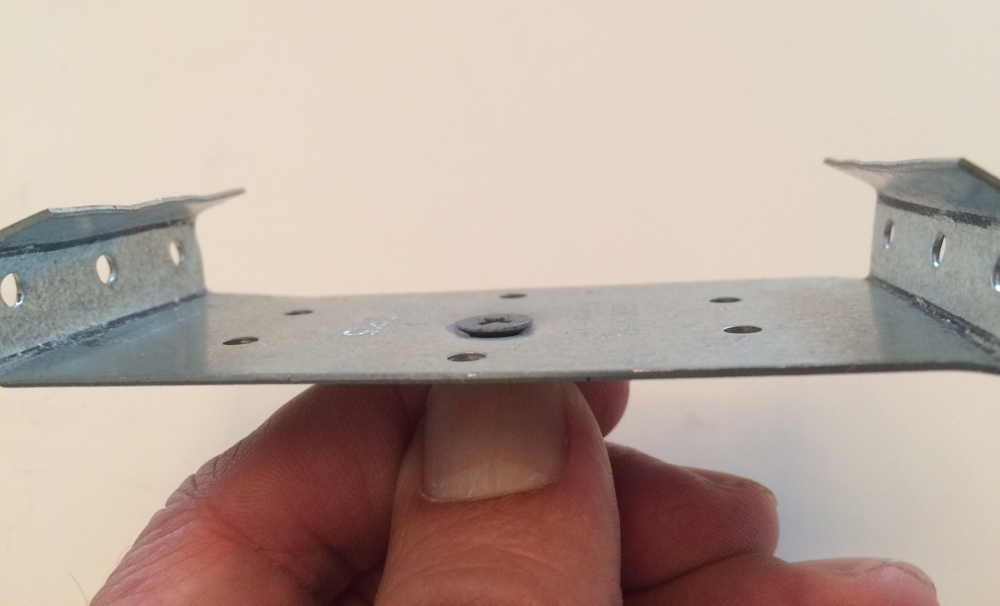
To attach the track to the timbers, I used tie plates as “clamps.” This approach allows for the track to move back and forth in response to temperature fluctuations, while remaining attached to the timber foundation.
I first bend both ends of the tie plates, then curl them over a bit (see steps in the photo gallery below). Then I make an indentation to the center hole in the clamp. This creates a sort of “countersink” in the clamp, allowing the head of the attaching screws to sit flush with the surface of the clamp. This helps to avoid an obstruction where the track ties could snag and break as the track moves with the temperature fluctuations.
To make this indentation I used a 3-inch-long, ¼-inch-thick bolt as a punch, with its tip ground to form a cone. One sharp blow of a hammer creates the dimple in the center hole, while also forming a dent on the timber. A 1¼”-inch deck screw completes the assembly.
Steps to fabricate the track clamps

The piece of 1x4 wood (actual size is ¾” x 3½”), the author used to form the first two bends. Hold the tie and the wood sandwiched in a vise to make the folds.
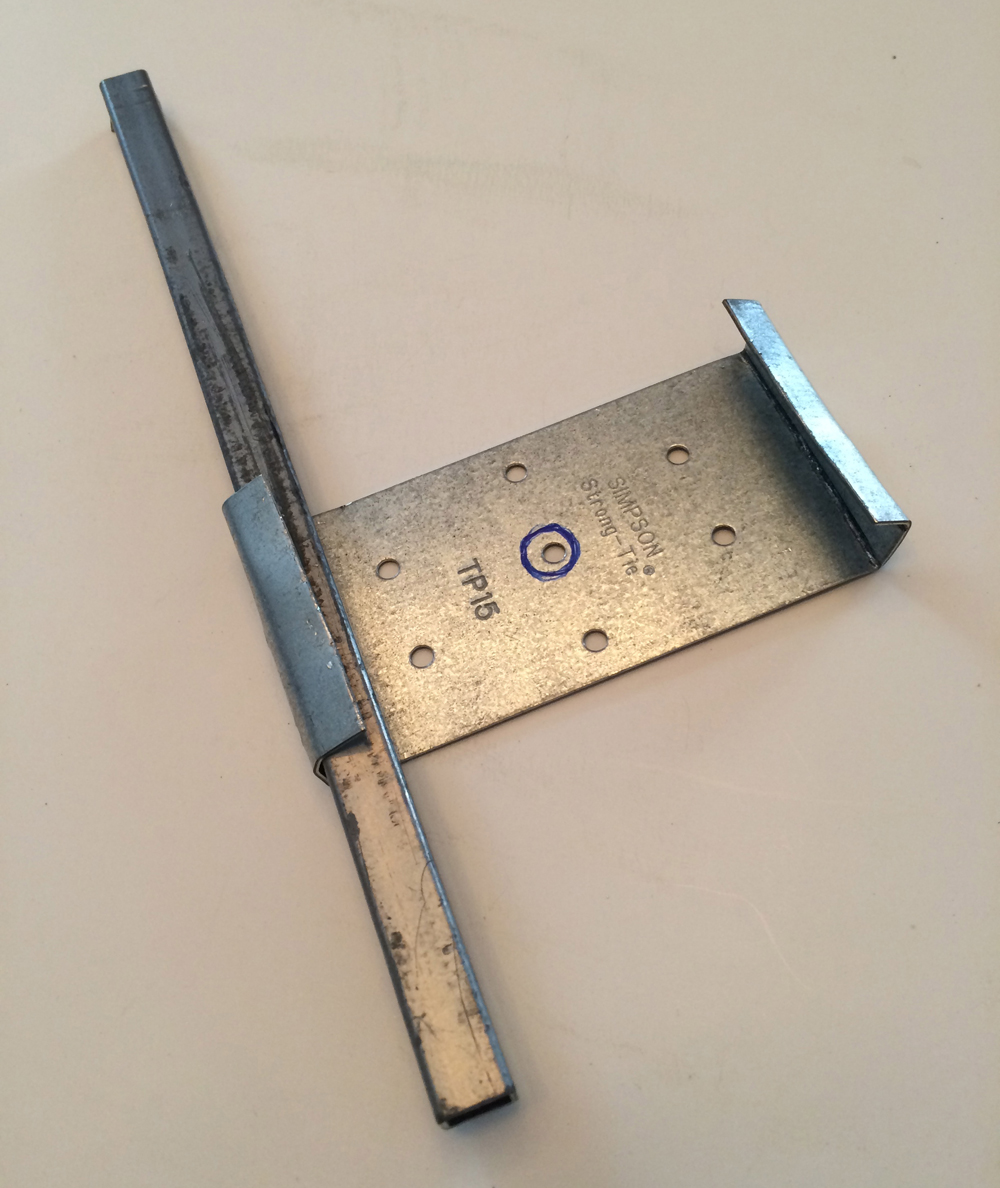
Use a piece of 3/8” square tubing to bend the top piece of metal over to form a curve.
The final two bends are complete (these bends don’t need to be sharp, lest they bind the plastic ties).
The author uses this bolt, which he ground the tip into a cone shape, to create a “dimple” in the center of the tie plate.
With the whack of a hammer using the modified bolt, the author created a dimple in the center of the tie plate.
With the center dimple, the screw sits level with the tie plate base.
The clamp is installed on the author’s railroad.
It’s critical to make sure the track fits or slides snugly inside the clamp. Minor adjustments can be made with pliers to tighten or loosen the grip. The last two folds don’t need to be fully bent, else they will bind on the plastic ties. Also, do not overtighten the screw when attaching the clamp to the foundation, as it may distort the clamp and cause binding of the track.
NOTE: These clamps are used mostly on straight track. On curves I only use them at the beginning of the curve, but not in the middle. In my folded dogbone railroad, the straight portions of track are about 30 feet long. As the change in temperature moves the track, it pushes and pulls the curves laterally, so tie clamps in the middle would inhibit this necessary movement and could damage the track. Because I’m using Split-Jaw Rail Clamps, the curves hold together pretty well on their own as they shift laterally.
Some advantages of this system
Besides the ease of cleaning and maintaining the track, I also discovered how easy it was to make modifications to the track. A year after the initial loop was installed, I decided to add a parallel siding for my station. Since everything is modular and held together with screws, removing portions of track, “ballast,” and foundation to add the siding was a piece of cake. The only thing differently I did was cut new straight pieces of ballast to cover the double track created by the siding in front of the station.
In terms of reliability, the track has gone through two of the harshest winters we’ve had in years. The timbers have remained firmly in place, the ballast is looking and holding well, the Split-Jaw Rail Clamps are doing their job, and none of the plastic track ties are broken.
I can now just sit back in my patio chair and enjoy running my trains without too many problems. This is especially true when family and friends come to visit. I’m happy with the uniform look of my track, and I’m even happier with the relatively high level of reliability and low level of maintenance that I’ve accomplished. I sincerely can say that I’m having a great time!


Those “timbers” will soon warp and bend as they dry out in summer sun and be completely junk in a couple of years! I use redwood fence boards supported by cheap concrete bricks at the joints. I reinforce the edges of the boards with 1″ redwood lath. Join the sections using composite short splices thick enough to hold screws. Before laying track, paint with a quality deck paint to get a uniform color base and protect the wood further. DO NOT ballast as it prevents routine cleaning and washes away. Attach flex track sections with a screw through a fender washer BETWEEN the ties, allowing the rail sections to float somewhat during hot and cold spells.
Excellent article using the garden timber sections! Did you ever evaluate the use of the ladder system using PVC pipe sunk in the ground and then attaching wood/ PVC type material with spacers versus the use of garden timber as you have utilized? If so, any pros or cons you could provide? Thank you!