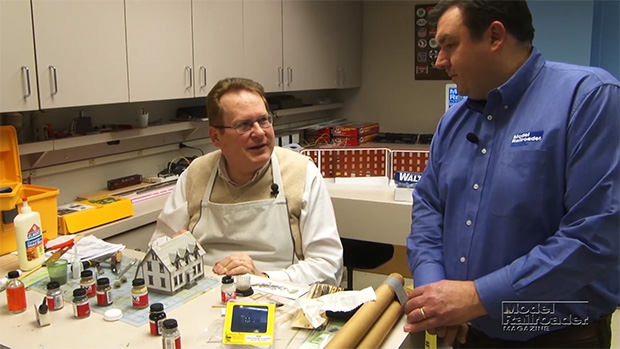
Having trouble viewing this video? Please visit our Video FAQ page Structures and trackwork dominate this episode of the Model Railroader staff’s Rice Harbor video journal. Associate editor Steve Otte describes the lighthouse for Rice Harbor. Steve built the structure from a Branchline Trains kit, and the model also features a working beacon. Editor […]
Read More…
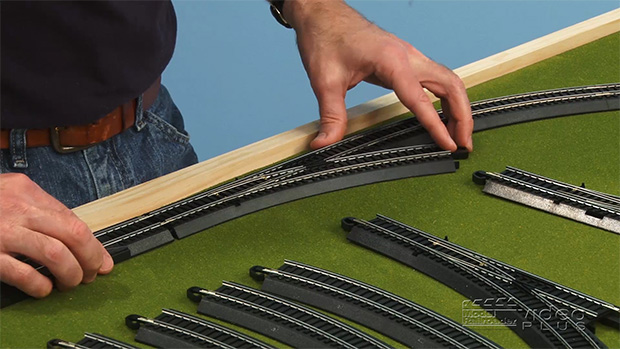
Having trouble viewing this video? Please visit our Video FAQ page Layout designer David Popp describes his strategy for using various turnouts on the Rice Harbor project layout. The turnouts are controlled by New Rail Models Blue Point controllers. You’ll also get a look at the benchwork for the folding staging track and see […]
Read More…
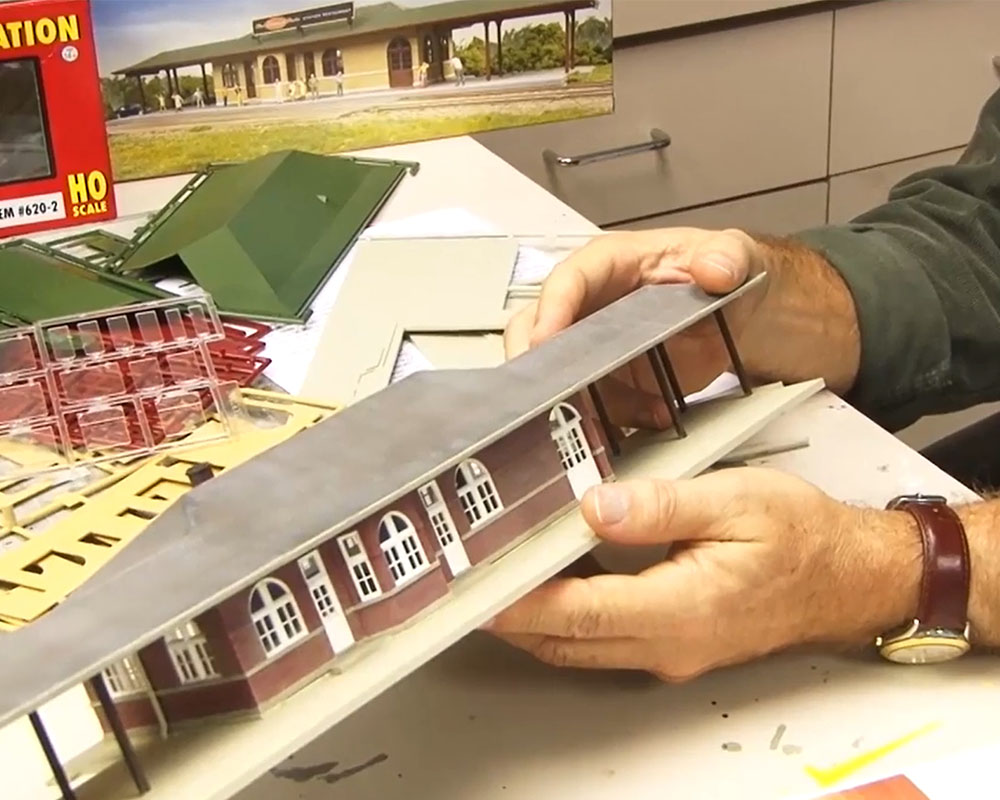
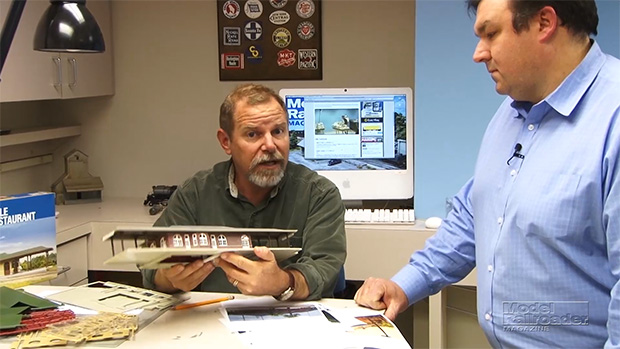
Work continues on the Model Railroader staff’s HO scale Rice Harbor project layout. David Popp begins track work on the railroad. Editor Neil Besougloff discusses his options for modeling a passenger station that will fit the model railroad’s setting and era. […]
Read More…
Having trouble viewing this video? Please visit our Video FAQ page Now that the foam base for the Family Train Layout is in place, David shows how to expand the basic train set oval of track and connect the wires required to power the trains. Would you like to learn more about how to […]
Read More…
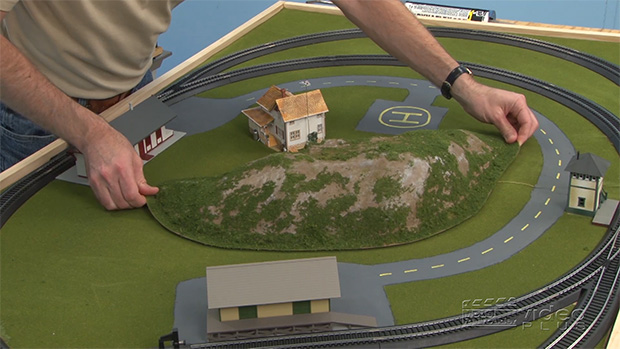
Having trouble viewing this video? Please visit our Video FAQ page In this fifth and final installment of the Family Train Layout project, David shows viewers how to spruce up the railroad by adding a vacuum-formed hill, trees, and other small details. Would you like to learn more about how to get started in the […]
Read More…
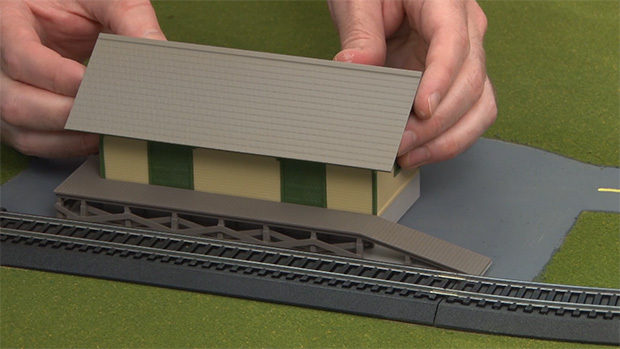
Having trouble viewing this video? Please visit our Video FAQ page David shows viewers how to add roads and other paved areas to the surface of the Family Train Layout. He then shares tips for placing and permanently securing various structures. Would you like to learn more about how to get started in the great […]
Read More…
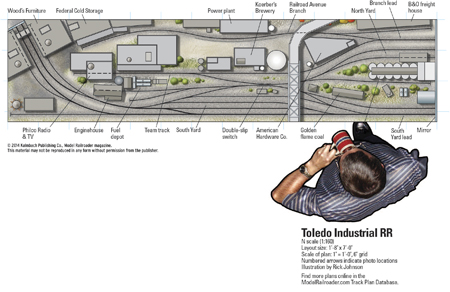
Name: Toledo Industrial RR Scale: N (1:160) Size: 1′-8″ x 7′-0″ Prototype: freelanced Locale: Toledo, Ohio Era: 1970s to early 1980s Style: shelf Mainline run: 10 feet Minimum radius: 10″ Minimum turnout: Peco small radius Maximum grade: none Originally appeared in the February 2014 Model Railroader. Click on the link to download the PDF of […]
Read More…

The Blackstone Models HOn3 (HO scale 3-foot gauge) 2-8-0 Consolidation features a SoundTraxx Tsunami Digital Command Control (DCC) decoder. We ran the superdetailed steam locomotive on Blackstone’s new ProTraxx HOn3 click track. […]
Read More…

Having trouble viewing this video? Please visit our Video FAQ page In this month’s installment Model Railroader associate editor Cody Grivno gives you an introduction to weathering rolling stock with the PanPastel weathering system. Cody will also show you new locomotives and rolling stock in HO, N, and O scales. Viewer mail this month […]
Read More…
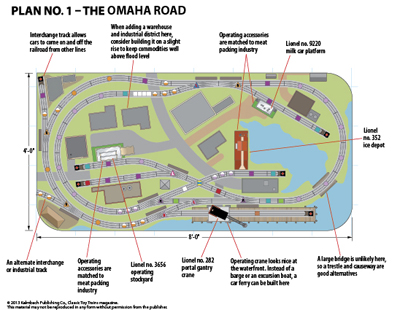
Layout designer: Michael Tylick Scale: O Layout size: 4 x 8 feet Track type: Lionel FasTrack Minimum curve: O-36 Originally appeared in the February 2014 issue of Classic Toy Trains. Four fun-filled 4 x 8 track plans: Boston & Albany RR Four fun-filled 4 x 8 track plans: Boston & Albany RR components […]
Read More…

Layout designer: Michael Tylick Scale: O Layout size: 4 x 8 feet Track type: MTH RealTrax Minimum curve: O-31 Originally appeared in the February 2014 issue of Classic Toy Trains. Four fun-filled 4 x 8 track plans: Frisco Railroad Four fun-filled 4 x 8 track plans: Frisco Railroad components […]
Read More…
