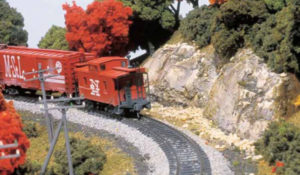
Use this quick tip to make custom rock molds for realistic model railroad scenery
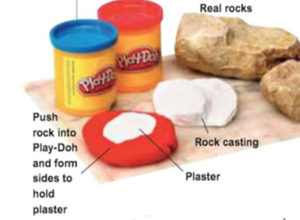
Want to make unique rock castings? Here’s an interesting method that was featured in the March 2002 Classic Toy Trains. Play-Doh, a children’s modeling toy, is a great one-time-use mold-making material. It’s water-soluble, easy to work with, and reproduces crisp details when used with plaster.
After choosing a rock to copy, knead a ball of Play-Doh until the material is soft and pliable. Press the dough onto a flat surface, making a disk about 3/4″ thick. Next, press the rock you wish to copy into the surface of the dough and carefully remove it. Play-Doh likes to stick to porous materials, so you may need to peel the mold off the rock. If this happens, carefully flatten the dough back onto the work surface.
Next, using some additional Play-Doh, form edges around the mold. Mix the Hydrocal as before and pour it into the mold. After an hour, gently peel as much of the Play-Doh away from the casting as you can, then let the Hydrocal cure for 48 hours.
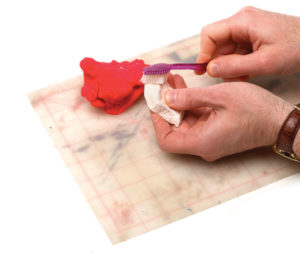
Clean the casting by running it under running water and scrubbing it gently with an old toothbrush. Play-Doh hardens after being out of the can for a day or more, so it crumbles and can be brushed off the casting fairly easily. Once the Hydrocal casting is dry, you can glue it to the layout and paint it like any other rock casting.