I love Lego, and I love trains. When I first saw the SoundTraxx Blunami decoder being demonstrated inside a Lego locomotive at Trainfest, I knew that I had to install my own decoder in a Lego locomotive.
What you’ll need

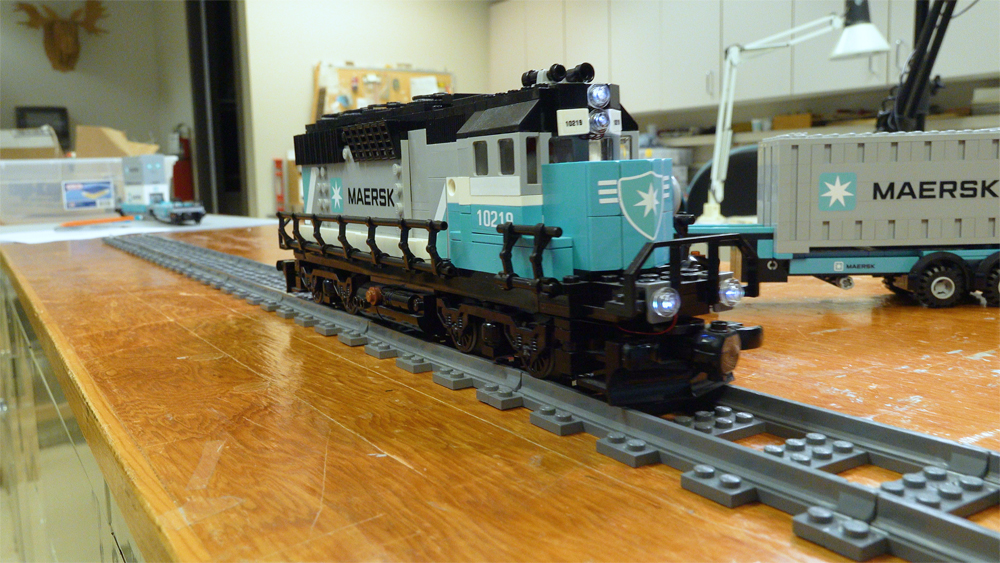
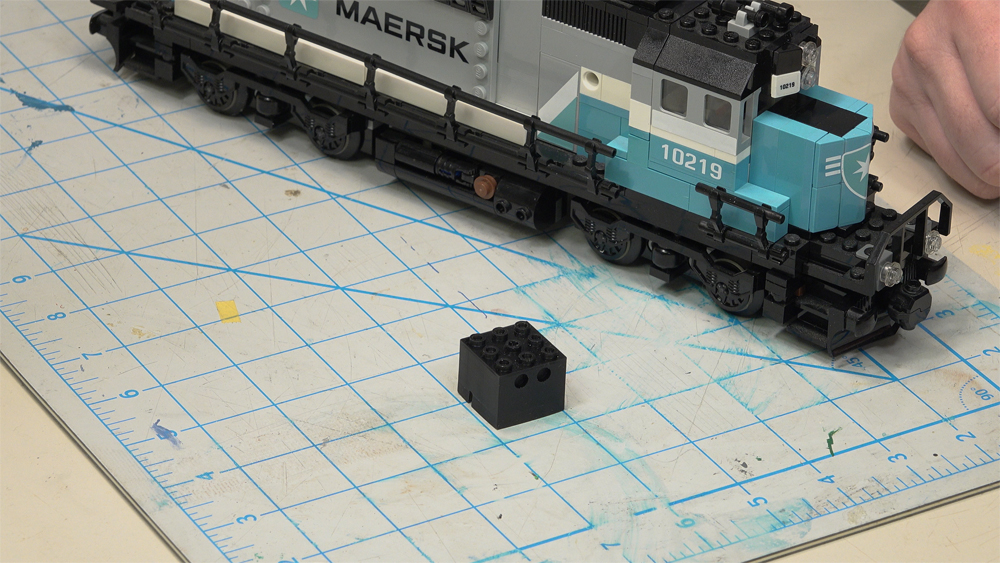
Obviously, you will need a locomotive. Trains.com producer Ben Lake donated his Lego Creator No. 10219 Maersk Train for this project. In theory you can use almost any Lego train that you want, but as we found with this build, the space inside the Maersk locomotive was perfect for all of the wiring that was needed.
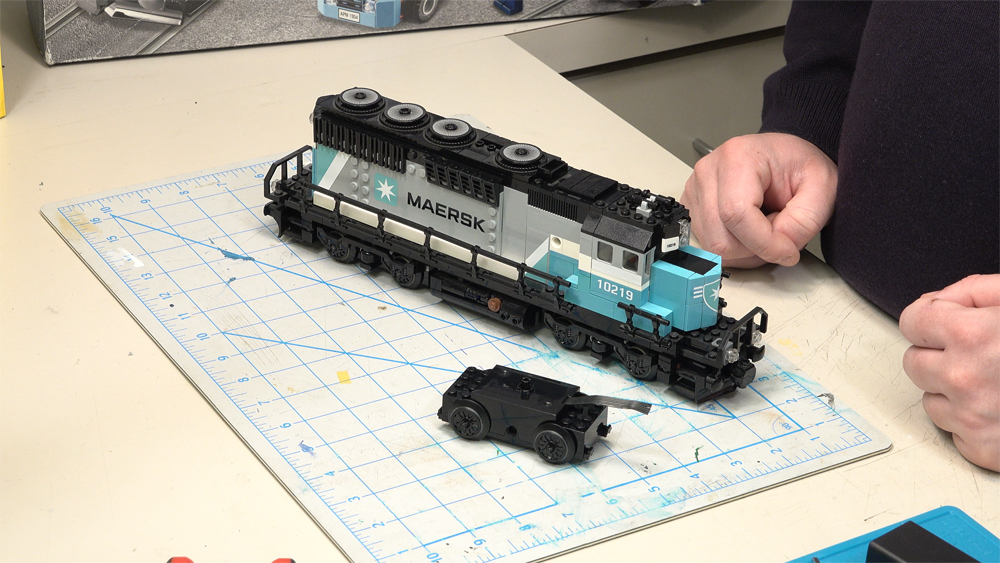
You will also need the Lego Powered Up No. 88011 Train Motor. Many train sets already come with this motor or the previous Power Functions train motor. These can also be used. Be warned, you will no longer be able to use this motor in its normal mode of operation, so if you want to be able to revert back to the original way of controlling your train, buy an extra train motor.
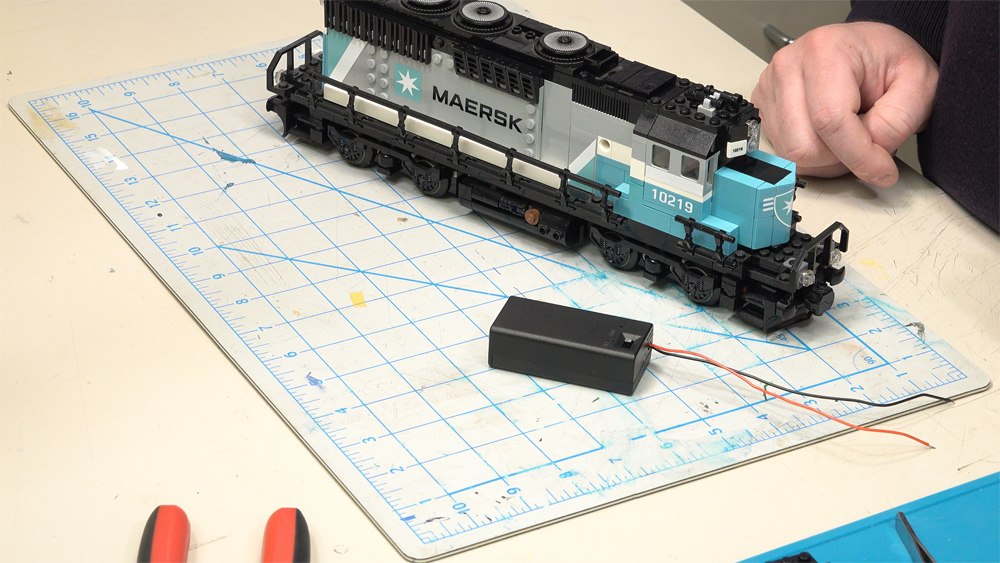
Since the locomotive is not getting its power from the rails, I need a way to give the decoder power. I purchased a 9V battery holder online from LED supply. This battery holder comes with pre-installed positive and negative leads and a convenient on/off switch.
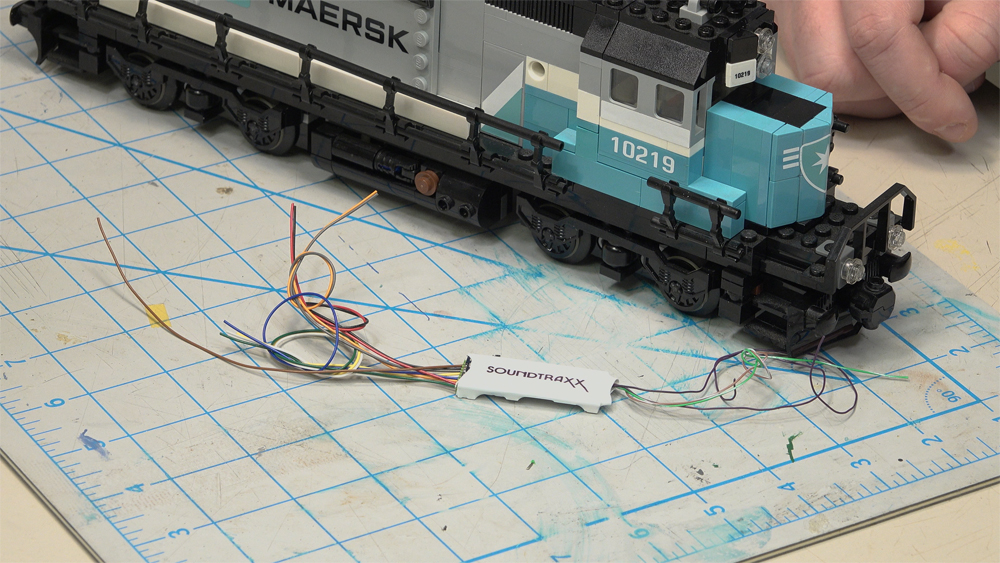
As you can probably already tell, I love using the SoundTraxx Blunami for projects, and this is the perfect project for it. Since I can control the decoder with any Apple device through Bluetooth, there is no need for me to use track power. Instead, I powered the decoder and train motor with a 9V battery. The Blunami has all of the normal functions that a Tsunami2 decoder has, with the added bonus of Bluetooth control.
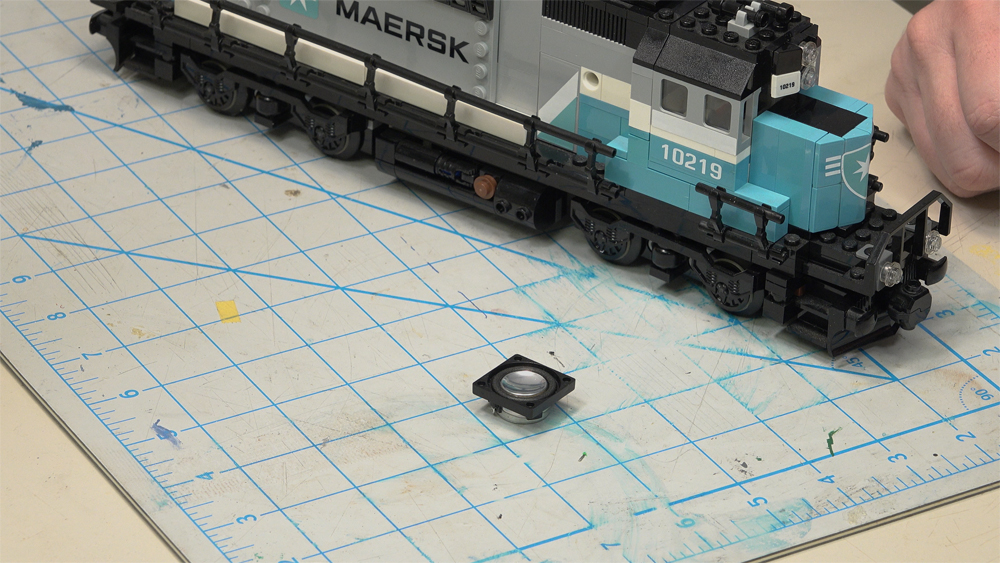
A diesel locomotive isn’t a diesel locomotive without sound! To make full use of our space and the decoder, I used a SoundTraxx 23mm square mega bass speaker. I was also told that a company called LifeLites produces 3D-printed speaker enclosures for SoundTraxx mega bass speakers, with Lego-style studs on top. The enclosure was 3 x 3 x 3 Lego studs, perfect for the inside of our locomotive’s long hood.
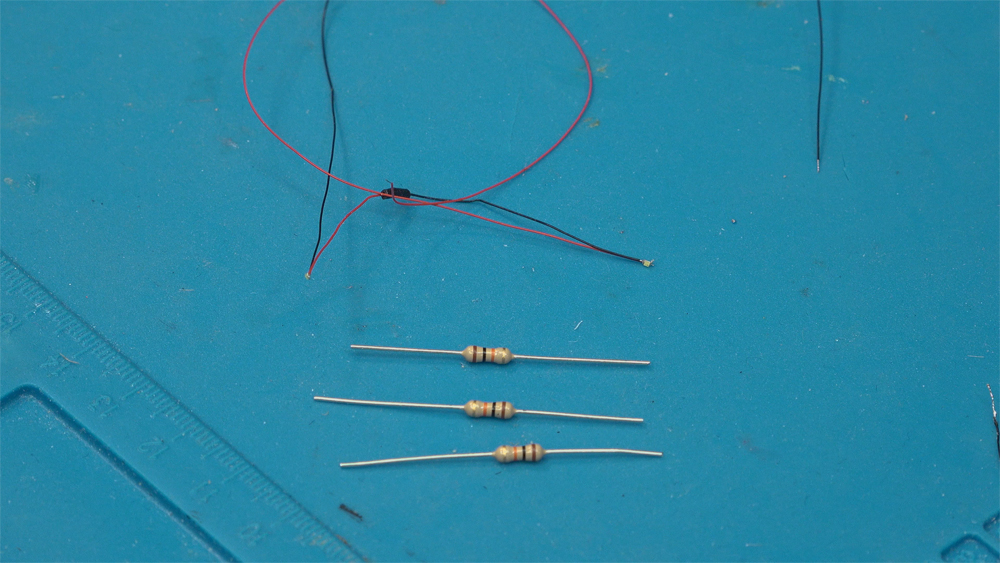
Of course locomotive lighting is needed for safety. For lighting, I used 402 pre-wired surface-mount light-emitting diodes (SMDs). I bought these on eBay. To attach them safely to the decoder, 1K are recommended.
The installation
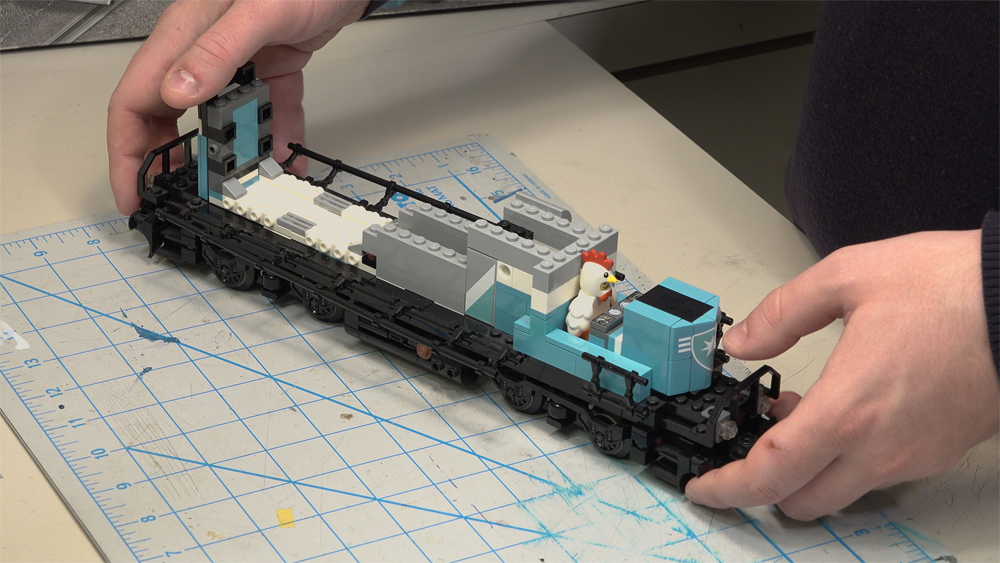
The first thing that I did was remove all of the unnecessary bricks and panels from the locomotive. Lego designed this locomotive to be easily-accessible for the addition of Power Functions equipment. The trucks can also be removed. Next, I test-fit the large components in the locomotive for fitment. The battery box fits in the long hood where the engine was and the Blunami decoder fits underneath the dynamic brake and exhaust section of the hood.
I needed to mount the speaker enclosure with the speaker facing the bottom of the locomotive and studs on top. I used a 3 x 2 plate, double jumper plate, and single jumper plate to go from the 3 x 3 stud housing to a 2 x 3 stud pattern. The assembly was then attached to the underside of the dynamic brake fan assembly and the side panels were re-installed, which bracket the speaker housing.
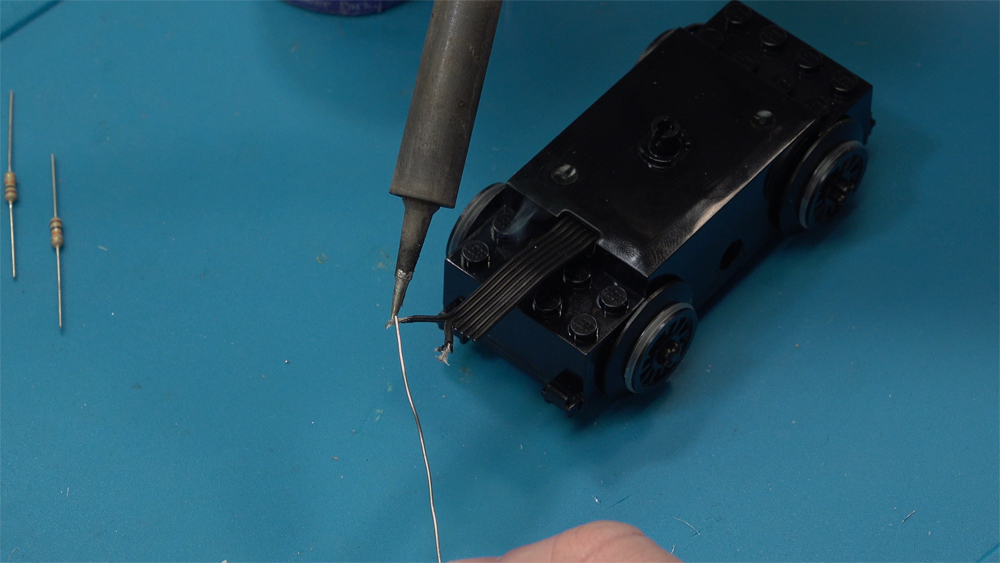
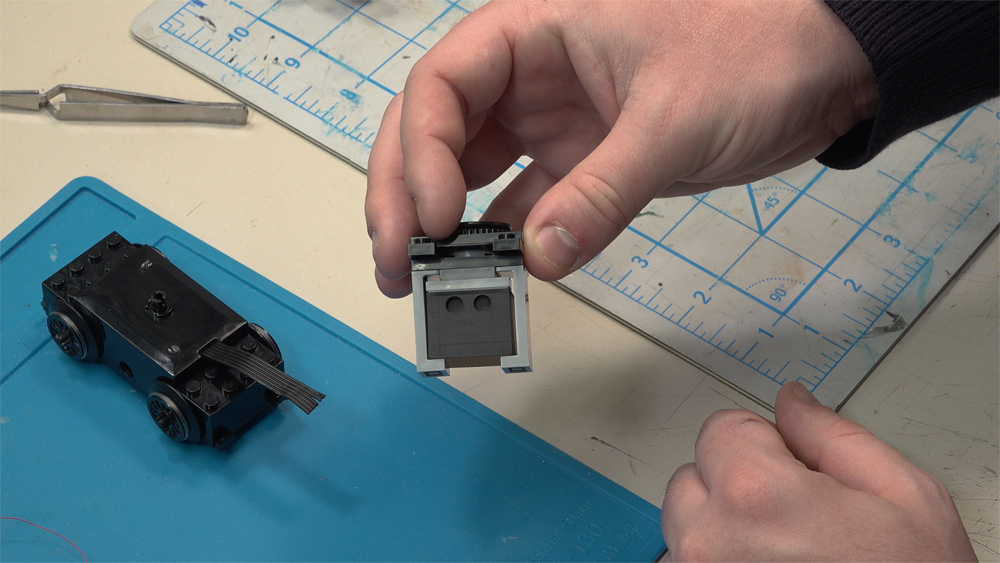
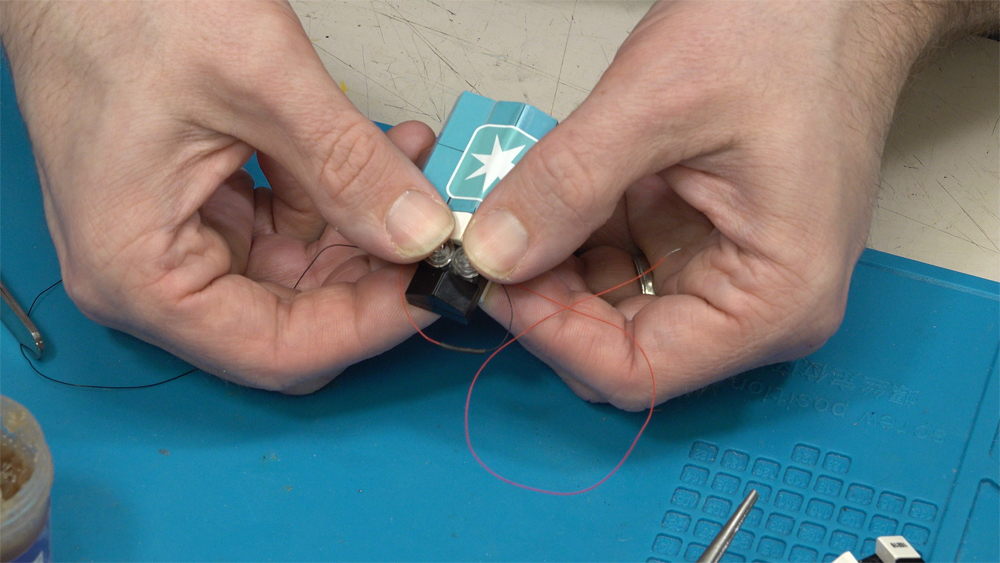
After determining which wire was pin 1 on the motor, I marked it with a silver marker. Since I’m only using wires 1 and 2 on the motor, I separated their insulation from the other four wires, stripped them both, and cut off the excess wires that I don’t need. I then tinned both wires to make my next solders quick and easy.
I next striped and tinned the gray and orange wires from the Blunami. Wire 1 from the motor should be soldered to the gray wire and wire 2 should be soldered to the orange wire. Don’t forget your heat-shrink tubing!
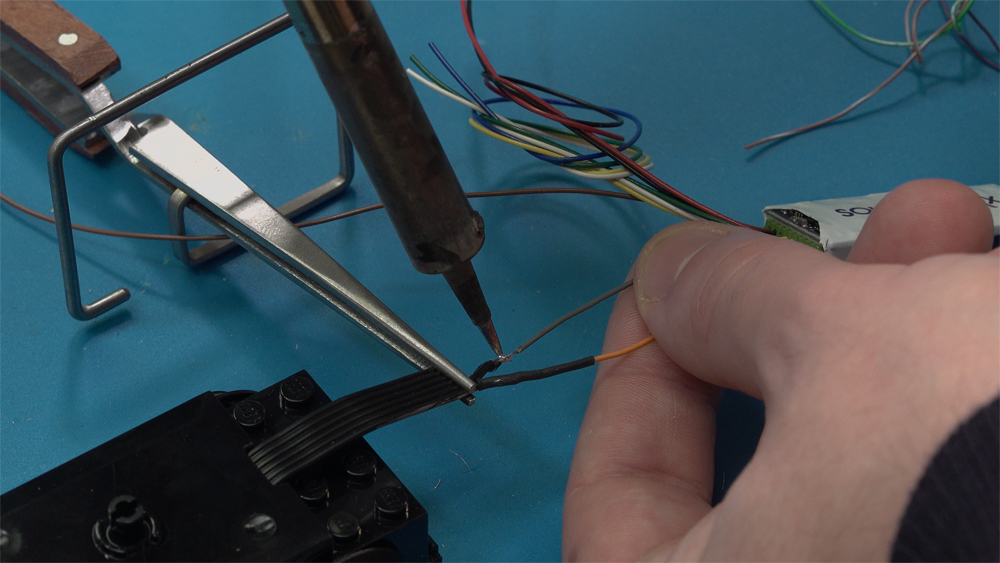
Your motor is now connected to the decoder. The side frames and couplers then need to be removed from one of the old trucks and mounted on the new motor. I then re-attached the motor and lead truck to the underframe of the locomotive.
Because the decoder is able to slide through the hole in the bottom of the locomotive, I was able to solder the truck to the decoder outside of the locomotive. The battery box is too big, and we have to install it inside the locomotive. I trimmed about 2 inches off the battery holder leads and the decoder’s red and black leads. Since I need to take the battery box out of the locomotive to re-install batteries, I left some slack in the wires. The red wires were soldered together, and the black wires were soldered together.
Now that the decoder has power and the motor is connected to the decoder, it’s time to test the motor function. I inserted a battery into the holder after I soldered everything together and flipped the switch on. The blue LED on the decoder lit up which was a positive sign.
I opened the BlueRail app on my iPad and enabled Bluetooth. The decoder appeared and I connected to it. I throttled the locomotive up and it moved on my command, we have motor function!
Sound
Now that I had motor function, it was time to start adding features. First, sound. SoundTraxx decoders use two purple wires to power speakers, a positive and a negative. In this situation, either wire can go to either terminal on the speaker, but if you’re using multiple speakers, you need to ensure they are wired in-series.
Since the wire is so thin, I used the soldering iron itself to strip the wires instead of wire strippers. Press down on the wire with one finger, hold the iron to the wire, and pull the two apart after a second.
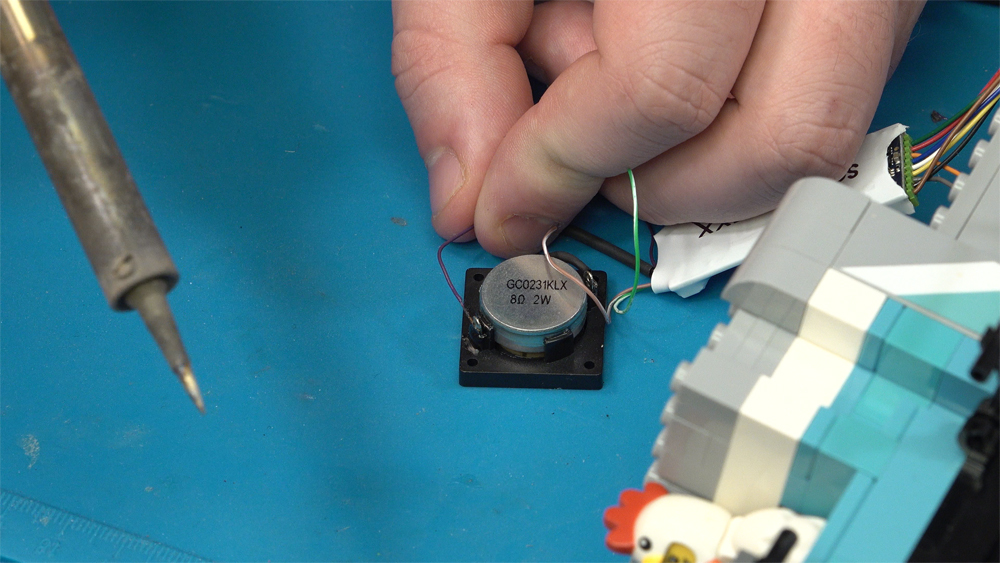
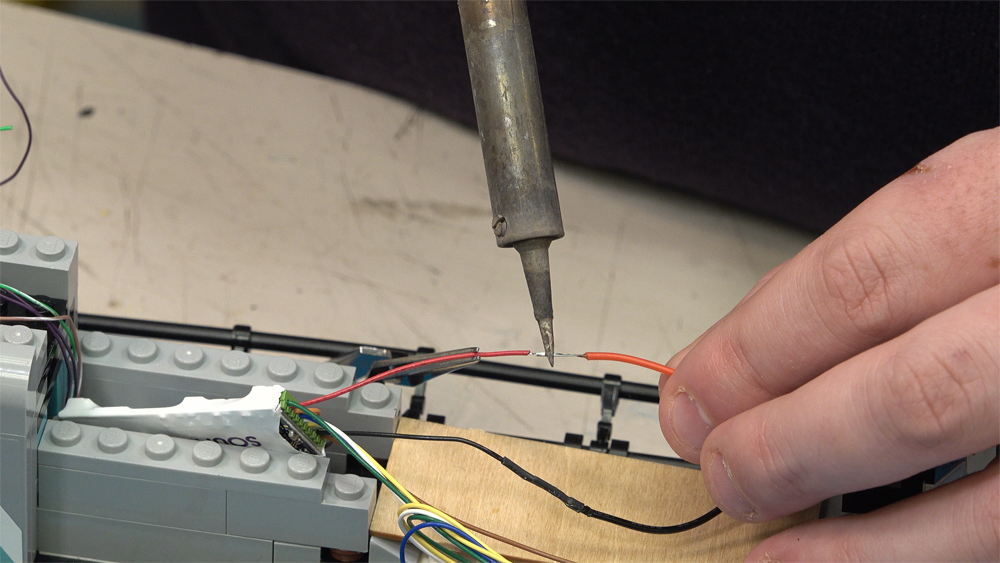
After both wires were stripped and tinned, I tinned the speaker contacts. I soldered one purple wire to each contact and then put heat-shrink tubing over the joint. After the speaker was soldered to the decoder and placed in its enclosure, I once again tested the locomotive with the app. Once the startup bell began to sound, and one blast of the horn was given, we had sound control!
Lighting
The next and last feature that I added was lighting. Ben Lake press-fit the SMDs into position behind the clear Lego studs in the headlight, rear light, and ditch light fixtures of the locomotive.
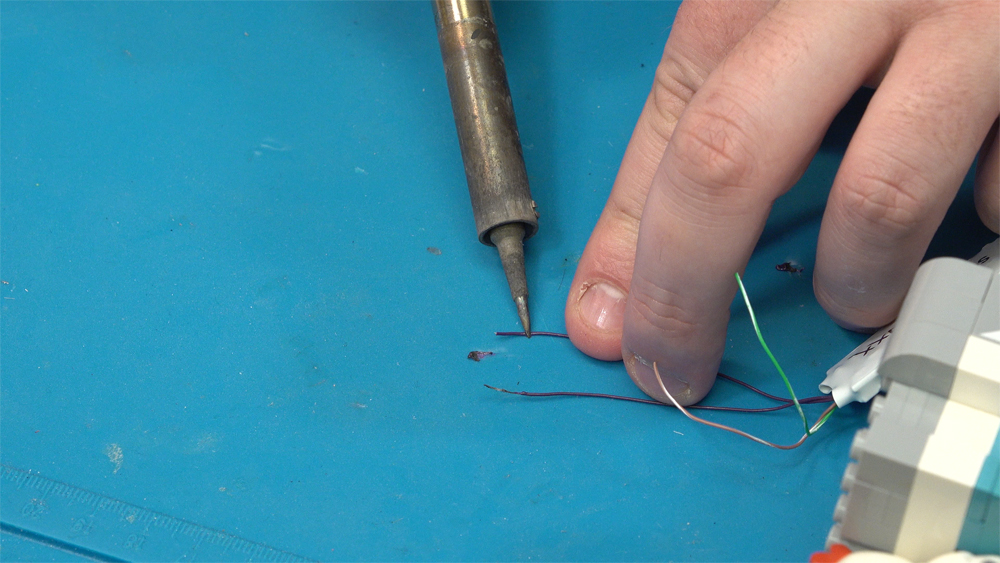
For the lighting on the locomotive, I used four of the decoder wires. Because LEDs have a polarity, I needed to ensure that the positive, or red wires, from every LED goes to the common positive, or blue, wire from the decoder. The negative, or black, leads from each LED was soldered to their respective colored wire on the decoder. The white wire goes to the headlight, the yellow wire goes to the rear light, and the green wire goes to the ditch lights.
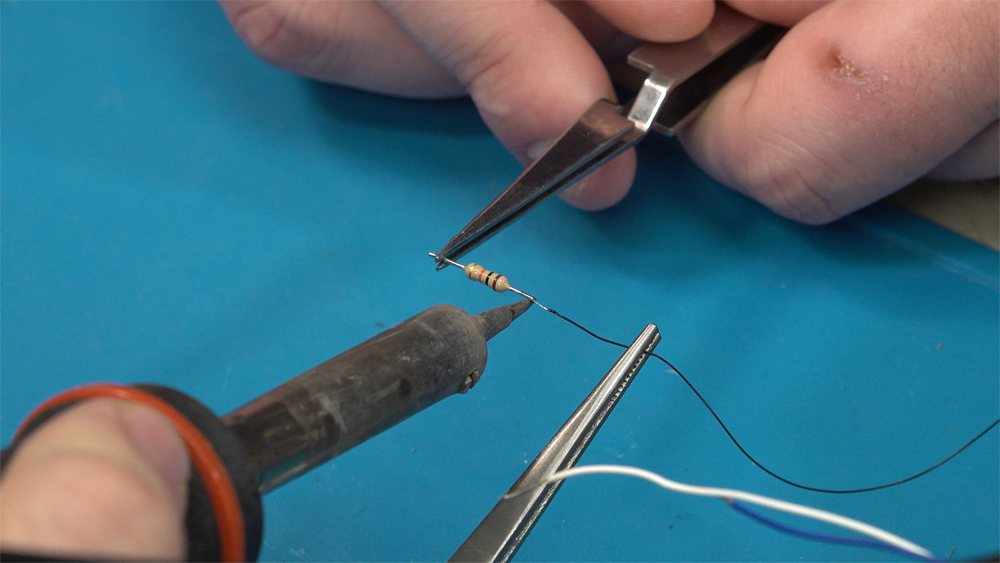
As I have done throughout the whole process, I stripped and tinned the wires that I was working with. I also needed to use 1K resistors on each negative lead. The resistors were also trimmed and tinned as-needed. Heat-shrink tubing was added to every solder joint, but not over the resistors.
With everything installed and the locomotive tested, I placed the panels and bricks back into place. Everything worked just as I thought it would and I had a completed Lego locomotive with a Blunami decoder installed.