Note: These modifications are optional. They do not change the runability or performance of the locomotive.
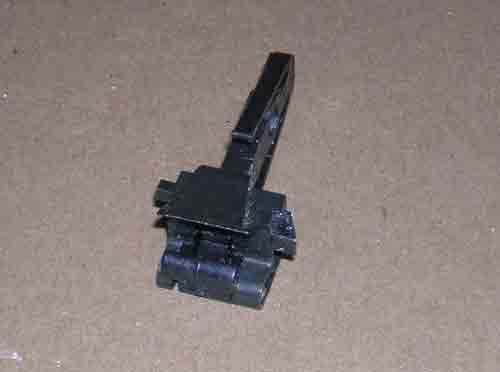
The couplers that come installed with some of these locomotives are short-shank units. The front coupler, if the jaw is open, has about a 1″ throw, side-to-side. With the jaw closed, it is about 3/8″. This is because the pin drops and catches between the center two tubes of the pilot (cowcatcher).
This can be fixed by removing the coupler and grinding the pin off at an angle along the bottom until it just clears. I performed this operation, and it works flawlessly.

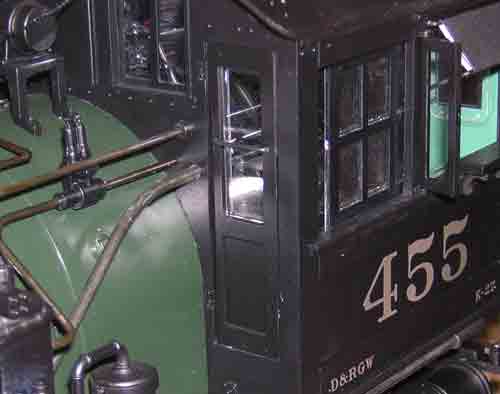
The cab doors do not open a full 90°, rather about 60°. This bothered me a little, as with doors open, I like them fully open.
I investigated the cause, and found the handrail across the outside of the window was impacting the front cab wall. I removed the handrail, drilled the hole through with a #60 drill and pin vise, while holding the back of the door through the open front side window.
A re-check showed the door opened a little more, but still not as much as I would like.
So, I trimmed the space between the handrail holes and window into narrow channels for the handrail to seat into with a sharp X-acto knife, once again while holding the back of the door through the open cab side windows. Opens perfectly to 90° now and stays there.
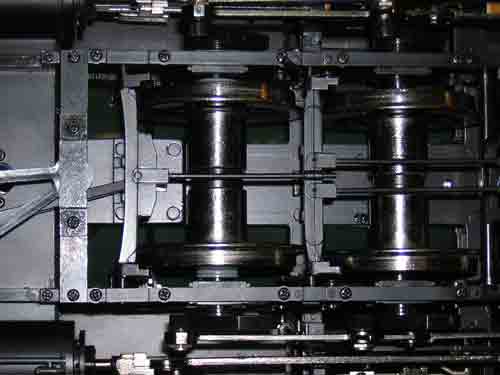
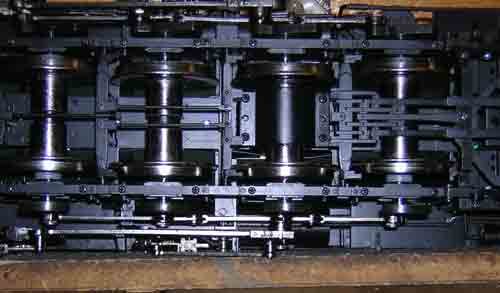
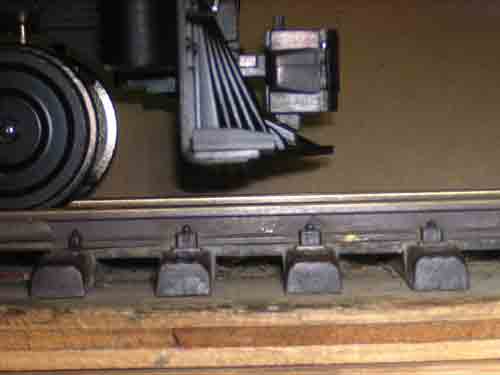
Out of the box, the locomotive I have has about 11/16″ side play at the pilot beam. This is to allow all 4 drivers to move 1/4″ on their inner axles. It was a little too much for my tighter clearances, as a load could cause it to not make the clearance.
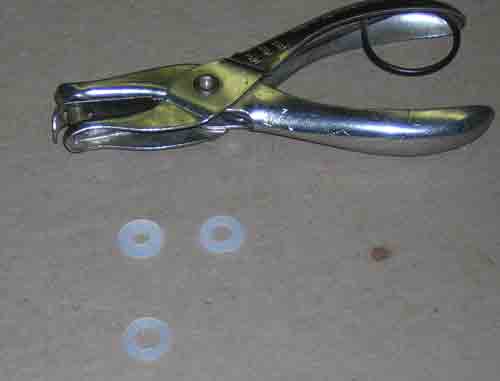
To fix this, I removed the #1 axle, took out the cranks and springs, and made some nylon washers to test. I installed the washers between the wheel and frame. Replace the cranks but not the springs. Now the locomotive has less than 1/4″ play, but it still traverses 1600 curves without problem.
Next, I did #4 axle in the same manner. The K-27 still runs smoothly through LGB 1600 curves and switches (old ones, too), still has about 1/4″ sideplay at the pilot beam, and the locomotive does not “rack” when backing a load.
This is less diameter than the 8′ diameter specified by the manufacturer as minimum.
For anyone with tighter clearances on their railroad, this could be helpful. Since this is a screwdriver modification, it’s easy to remove the washers.


My railroad does not use “amber” or “red” classification lights. I also am fond of the color of actual incandescent bulbs for use in a model of a prototype that actually used incandescent. Since I run strictly radio/battery, and favor 14.4v, I found many years ago that two 12V Grain-of-rice bulbs in series across 14.4V was just about perfect.
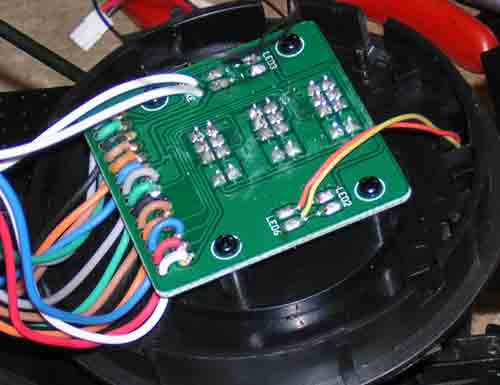
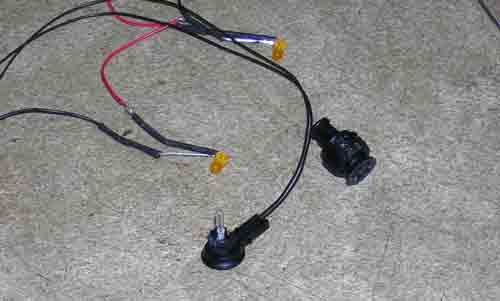
This series of photos shows the original LED in place in the light base. Remove from smokebox front by removing front (pull out), unsoldering wires at board for each light, and pulling the assembly straight out.
The top lens housing lifts off, although it may need to be coaxed with a knife blade at the parting line. I mounted my incandescent bulbs with a dab of hot glue. If you want to use LEDs, just bend a 90° at the base and insert into base.
I connected one leg of my series bulbs to the “+” LED pad on one side, where I removed the original LED. The other end, as shown, connects to the “red” wire along the bottom of the smokebox board.
I left my wires long as I will be removing the on-board electronics and re-wiring this locomotive to a much simpler arrangement.