One of the issues that comes up in almost every 3D print is the finished product. Like most plastic models, there can be plastic strings, places that did not get enough material, holes, sharp edges, and the like.
I am constantly reading about different techniques of finishing 3D parts. Some of them work quite well, while others did not work at all. In this article, I will share how to finish ABS parts, because ABS material is what I use the most. Take note that this is a long process, but much of it will be familiar for those who built plastics models in the past.
Acetone vapor bath
3D printing is done one layer at a time, so sometimes the layers don’t adhere very well to each other and separation of the layers occurs. The best way that I have found to help the layers adhere to each other is to use an acetone vapor bath. It is not expensive to make and works well, as long as you monitor it closely.
WARNING: Acetone vapors are not only a danger to your health, but if a spark occurs nearby you could have a ball of flames. Use only in a well-ventilated area.
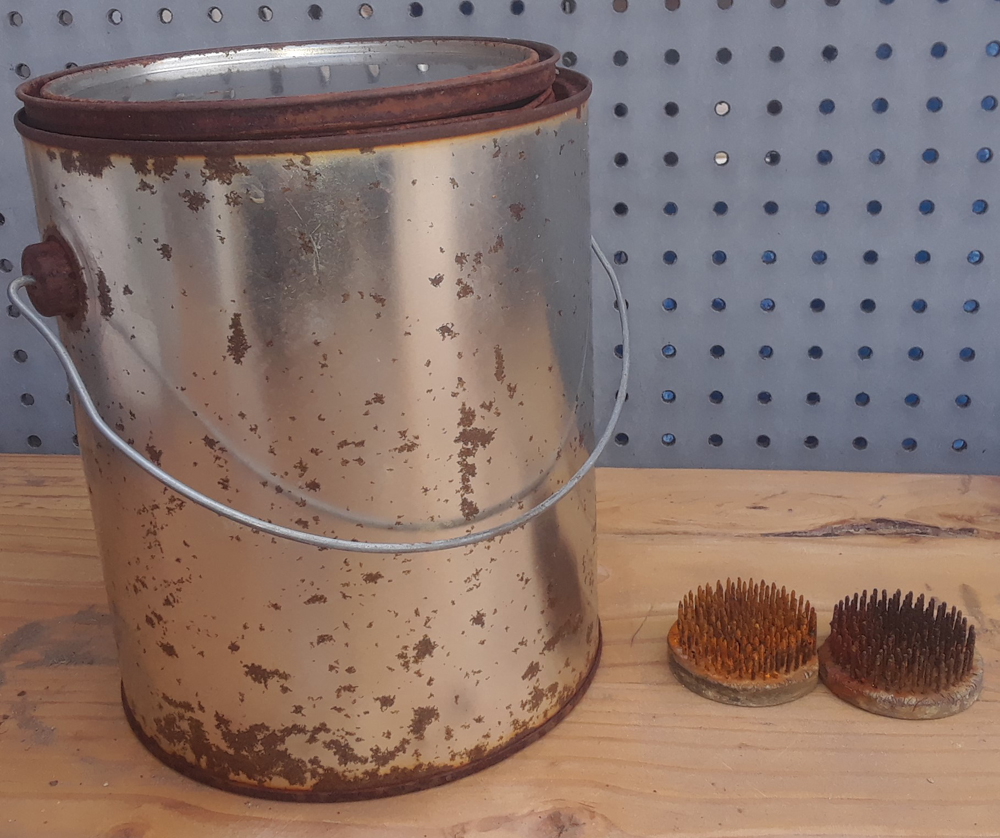
You will need a clean one-gallon paint bucket with lid. You can get a new bucket at most big box stores or at your local hardware store. Next, you will need “flower frogs.” Two are shown in the picture. Make sure that they are made of metal and not plastic. The frogs shown in the picture have a lead base with steel needles coming out of them. These are sometimes hard to find, but they are available on Amazon for about five dollars. You can also check with your local florist or craft stores.
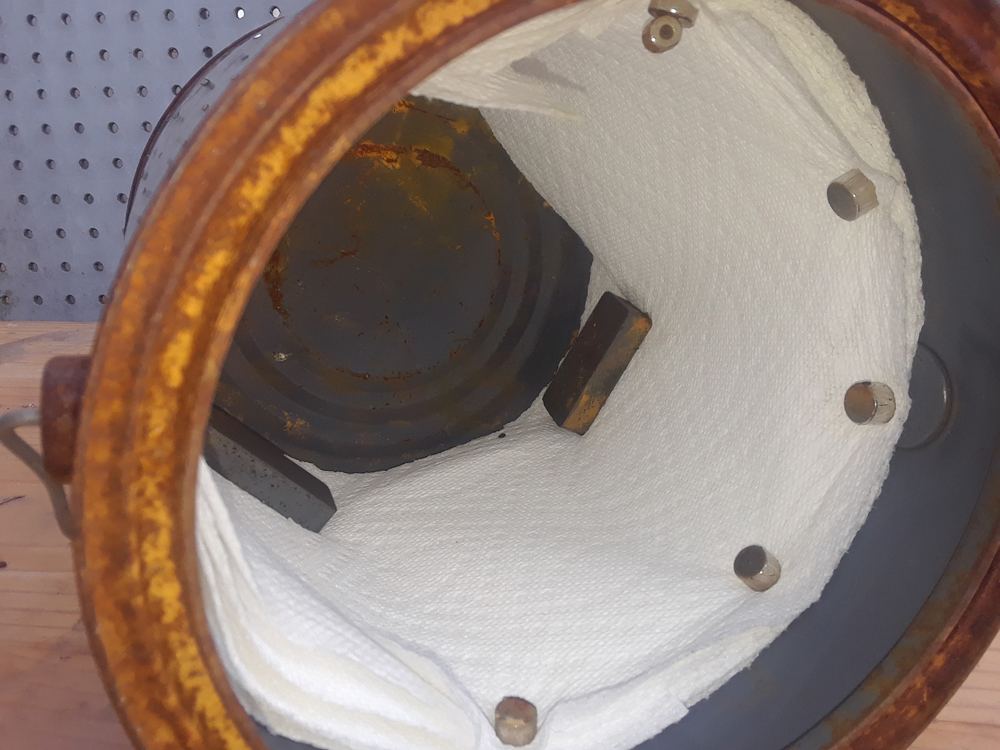
Next, you will need something in the bucket that will hold the liquid acetone and allow it to evaporate, creating vapors. I wrapped a couple of layers of paper towels on the inside of the bucket and used magnets to keep the paper towel up against the side of the bucket. You do not want an acetone-soaked towel falling on your parts! As you can see, I used lots of magnets. The two large ones near the bottom came from Harbor Freight. Any magnets will work as long as they do not have plastic on them.
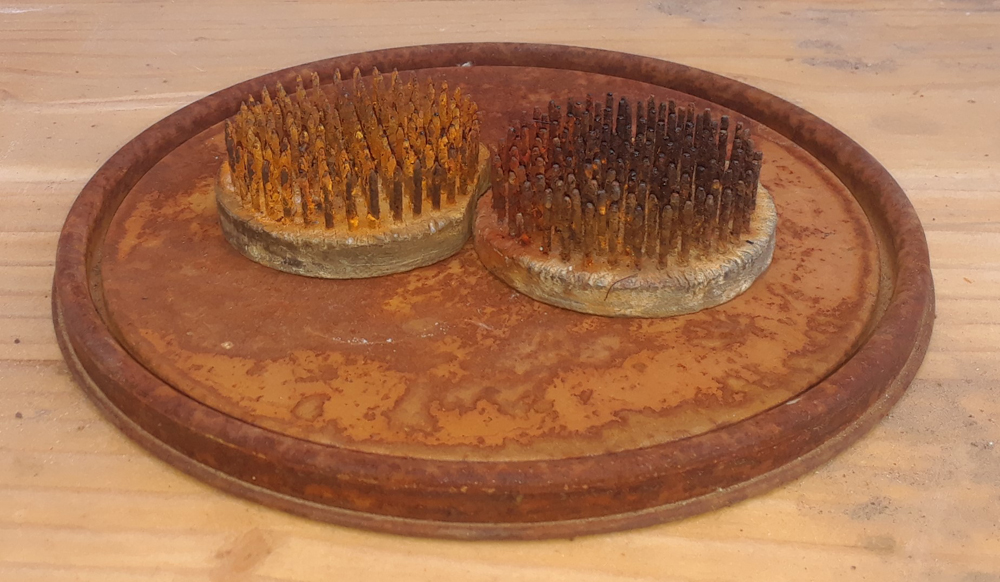
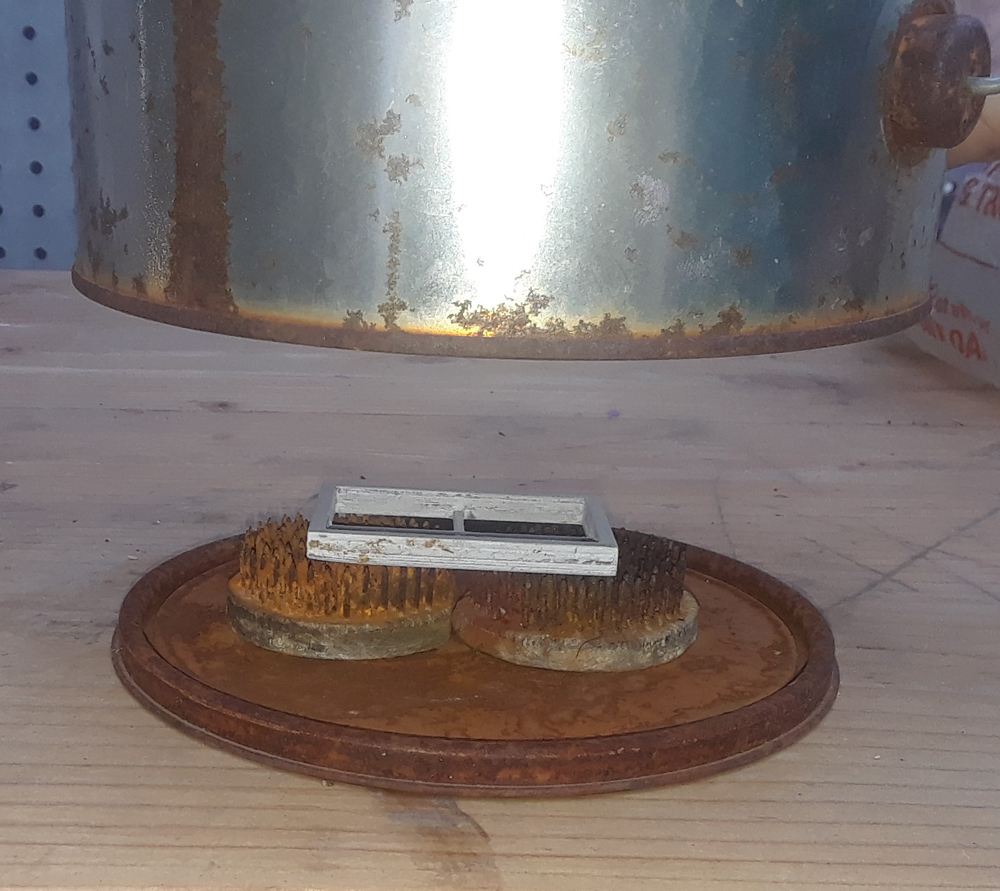
The bucket will be used upside down with the bucket top inside facing up, as shown in the picture, with the two frogs sitting on top of the lid. Center the frogs or place them where the parts are to be set in the vapor bath, making sure the parts will not touch the sides or the lid. The liquid acetone will drip down to the lid on occasion and can ruin a part if it stays in contact with the part for too long.
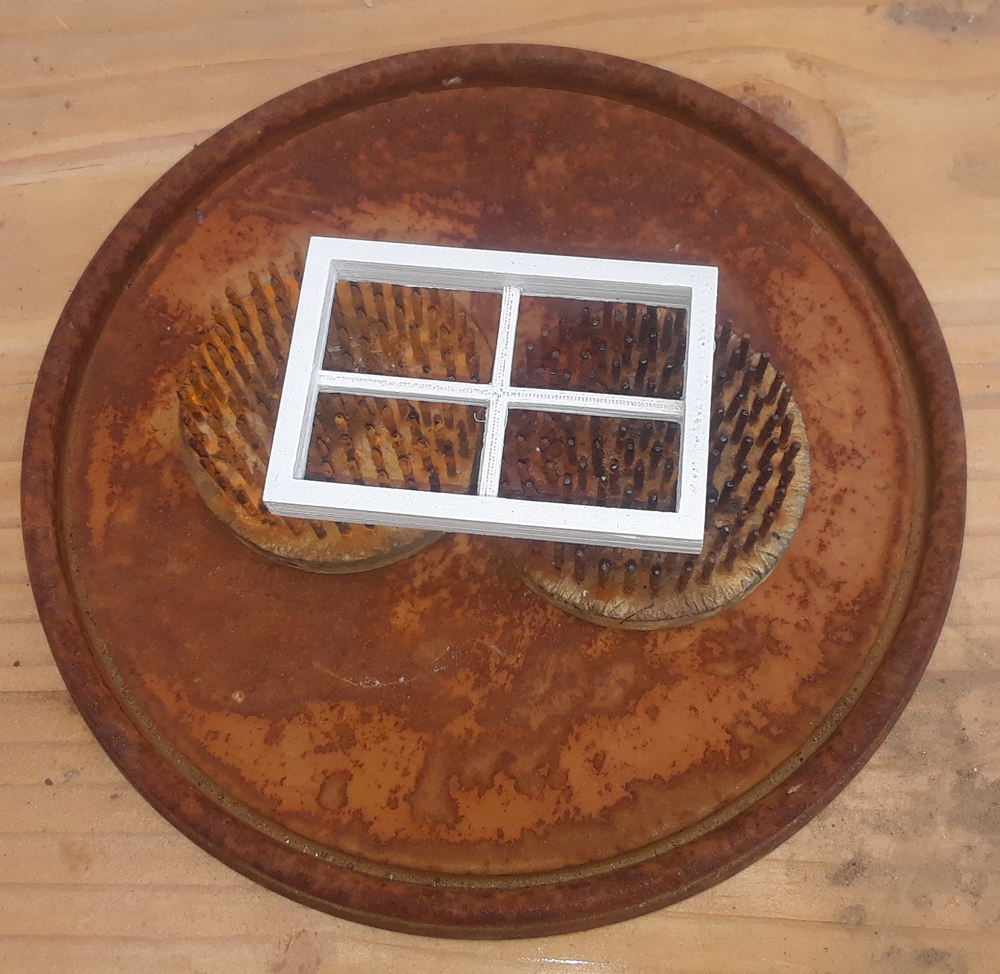
This picture shows how to place the part on the frogs. You want to have most of the overhangs supported by the frogs. Some of the ABS window is not supported but it is supported on the ends. As long as the length of the unsupported feature is not too long, it will not sag during the vapor bath. You will have to experiment with what works for you.

Acetone can be found at most hardware or paint stores. It is typically used as a cleaner, but we will be using the solvent properties of the vapor. Again, acetone, like many of its ketone relatives, are toxic. Use them in a well-ventilated area.
Here is the hardest question of all to answer: how much do I use? It depends on the temperature of the container, how long you want to wait, and, to a slight degree, the humidity. I will typically use between two and four ounces. Note: Use protective goggles and gloves before handling acetone!
Pour the acetone directly on the paper towels and don’t worry if some goes to the bottom of the bucket. Turn the bucket on its side and slowly rotate it, letting the acetone saturate the paper.
Now place the bucket upside down onto the lid with the parts, making sure it fits snugly. Set a timer for about 10 minutes and check the contents. You should see a nice shiny surface on your printed part. Wait another 10 minutes and the part should be dried enough for you to pick up (wear gloves). Inspect the part and especially the layers. They should not be distinct or sharp but a little blurred. You may also want to twist the part slightly and see if any layers separate.
If all looks good then you are done with the vapor bath. If not, put the part back into the vapor bath for another 10 minutes and check again. Timing mostly depends on the temperature. If it is 80-90°F, 10 minutes should do the trick. If it is 40-50°F it has taken my parts as long as 40 minutes because of the cold. Below freezing? I suggest waiting for warmer weather.
Still have layer separation?
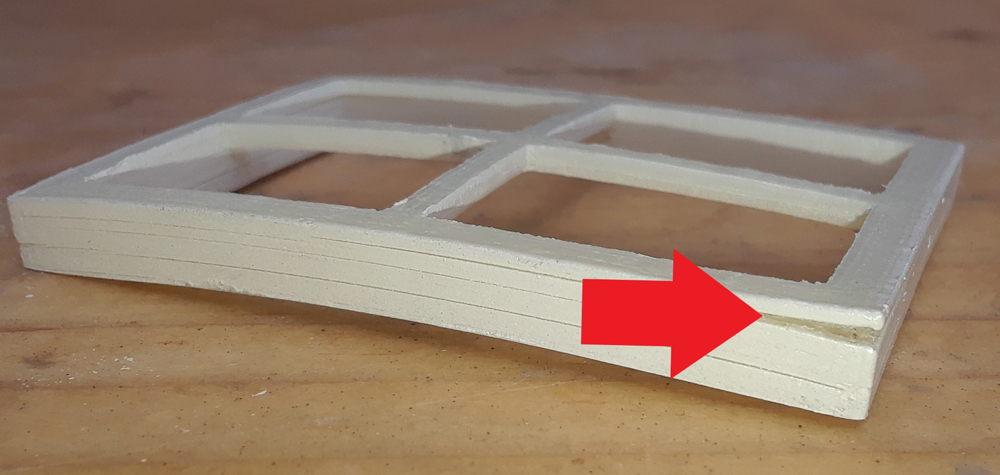
It’s time to get out the glue and small clamps. ABS will tend to warp at times, particularly if the object has thin features like a window. Sometimes that warping is strong enough to cause the layer to separate significantly. You will notice in the photo that not only is the layer separating, but the window frame has warped significantly. I will throw this one out when I am done with the demonstration.
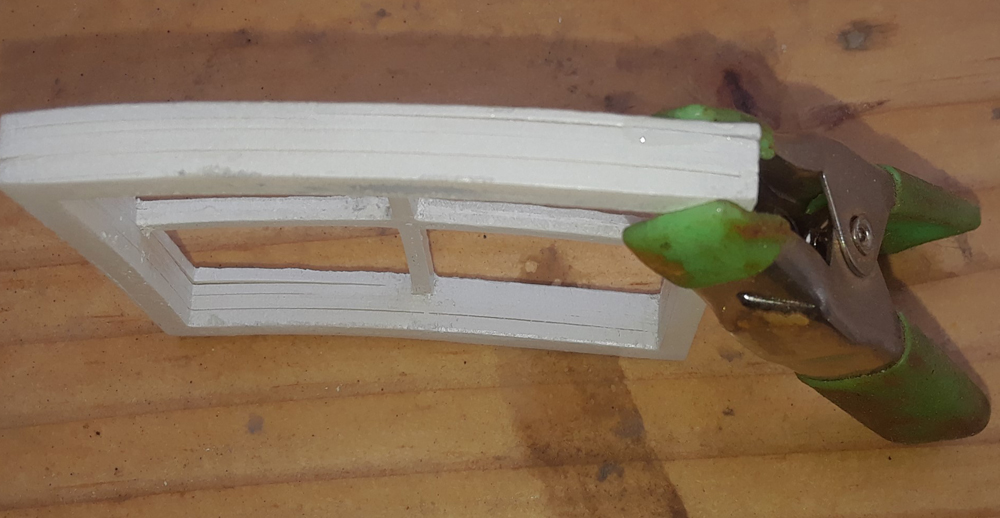
When it comes to gluing ABS parts I use Testors 3521 non-toxic cement (blue tube). It is non-toxic, and seems to hold just as good as the Testors 3501 (red tube) and there are lots of warnings on the tube.
More surface preparation
Sometimes the vapor bath is just not enough to get the surface finish that I want.
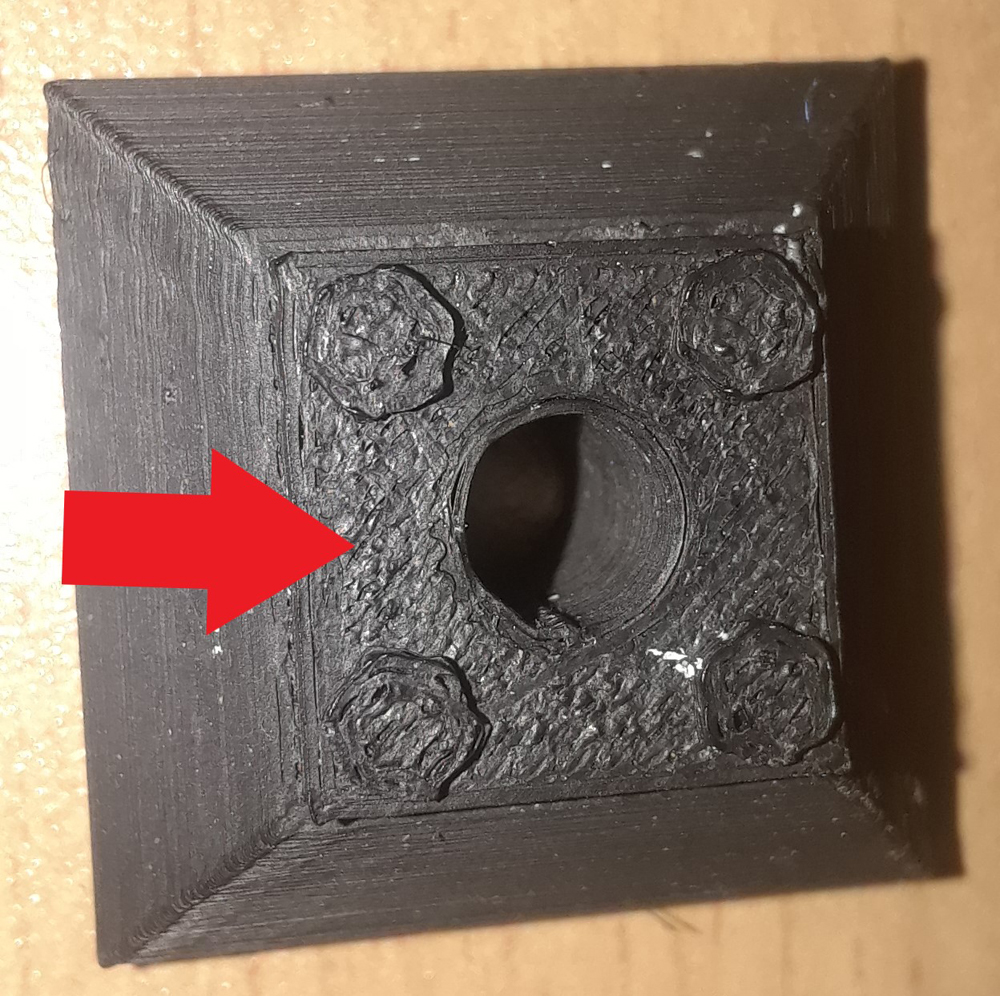
In the adjacent photograph, I show a red line that points to an area that is supposed to be smooth. While it is very small, it is noticeable at a distance when the light is just right. To take care of that, I sand the area with 220 grit sandpaper.
However, the sides are stepped and I don’t want to sand the sides completely off, so I will use Testors 3511 contour putty (grey tube) to fill in the space.
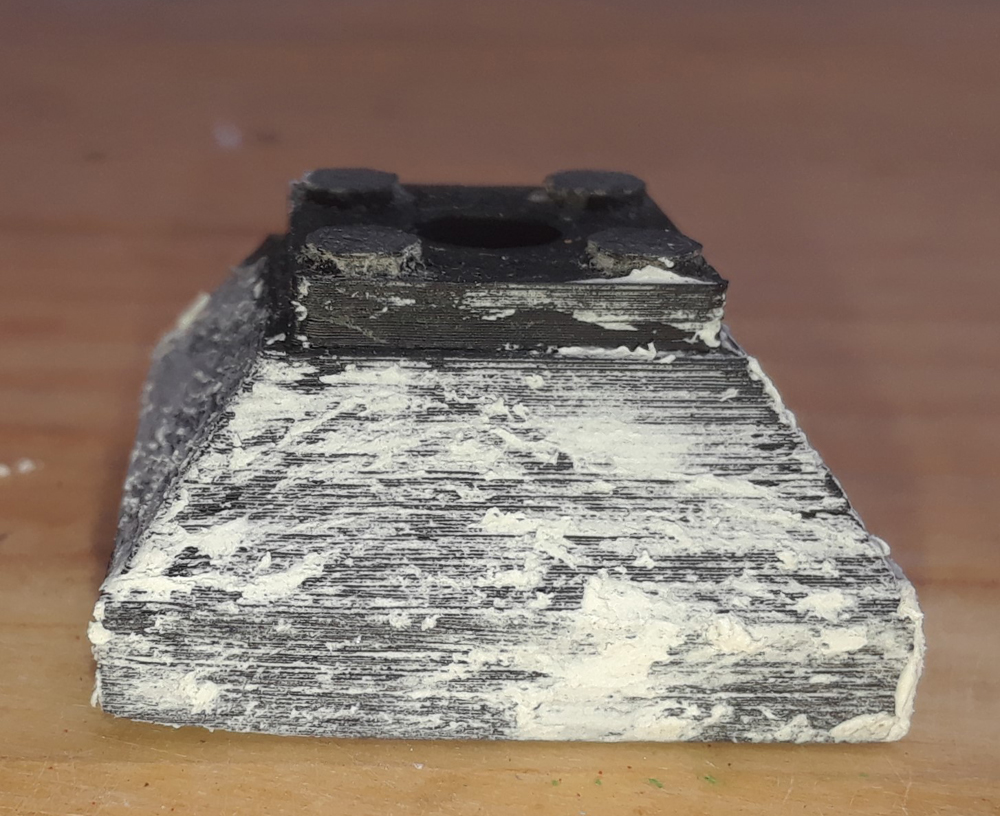
You can see that I have smeared the contour putty in the areas that I want shaped.
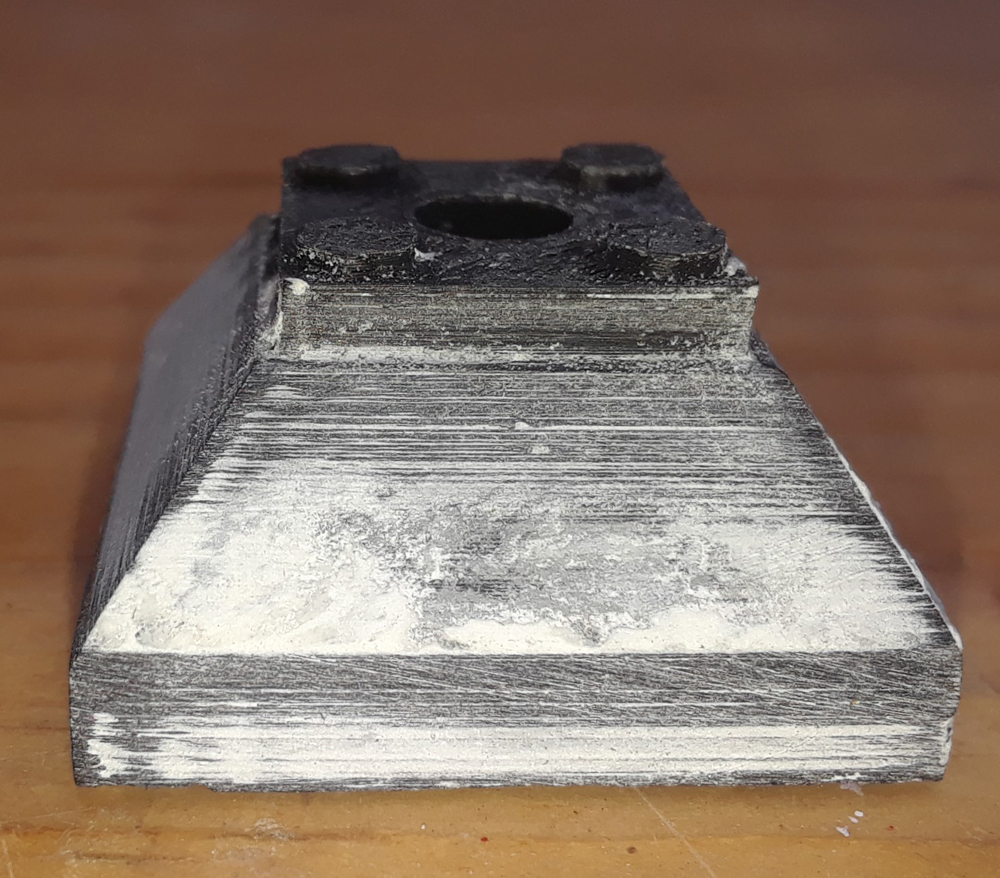
This photo shows the part after it has been sanded.
Painting
I have Rust-Oleum, 2X UltraCover Paint and Primer on ABS parts with great success. It seems to work fine and adheres well through cold and heat. There is quite a variety of colors and while it dries fast, there is still time to smear some additional colors around to give a look of rust or water stains.
I have also used acrylic paints with great success. However, I prefer to use spray type paints to get a good, even covering.