


While the subject of this article is not new to many, it does beg for a reintroduction of sorts. I’m talking about wooden coffee stirrers, which can be cut, sanded, and shaped to fit a variety of projects. On Amazon.com, you can get a box of Royal Wood Coffee Stirrers for about $5 plus shipping. Once you have your box of 1,000 stirrers, let your imagination wander and your creative juices flow.
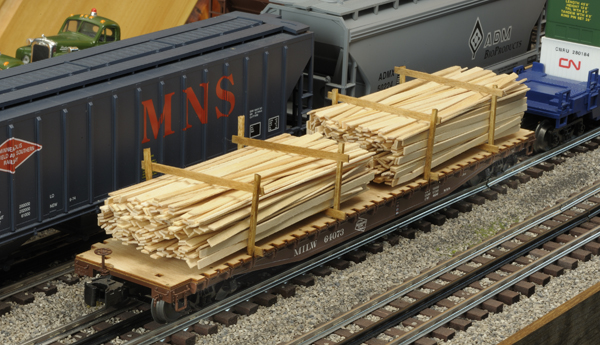
Let’s start with an interesting flatcar load, I made using stirrers, wood matches, and a little stain. My idea was to load both sides of the car with what many call “dimensional lumber” – wood on its way to a mill for finishing and grading. Another way to model this would be to cut each piece around an internal form (foam or a block of wood) to make a neater load as delivered to a mill.
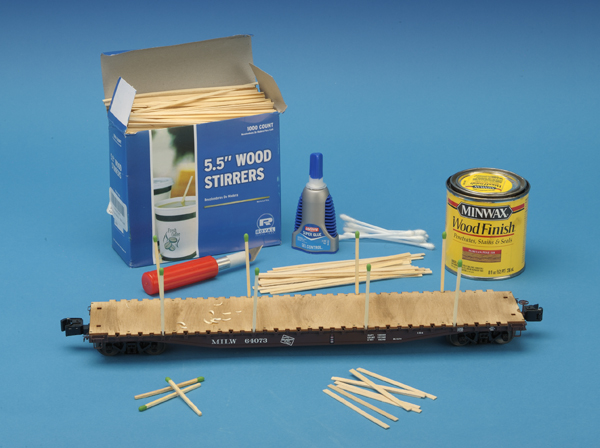
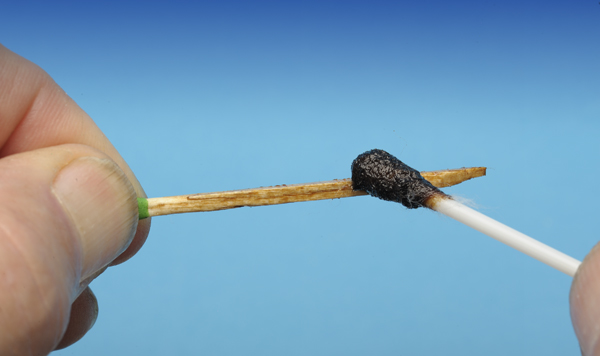
I decided to make the dimensional lumber, first gathering the matches I cut to length and the stain. My load will end up on a Lionel or Weaver O gauge flatcar. I also needed cyanoacrylate adhesive (CA), a sharp hobby knife, and a small brush or a cotton swab to apply the stain (Photo 1). Following my instructions will ensure you don’t damage your freight car, as this will be a load easily removed and replaced.
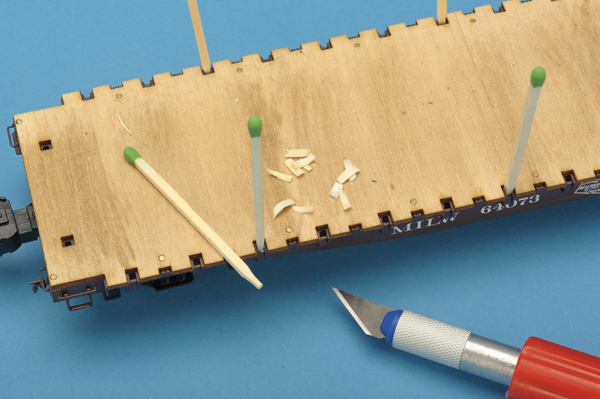
I shaved the bare ends of the matches just enough so they fit snugly into the pockets on the car (Photo 2). Then I pressed them into the pockets so they fit without any wobble. I made sure they stood straight when finally positioned; that way, I knew they were making good contact within the confines of the pocket.
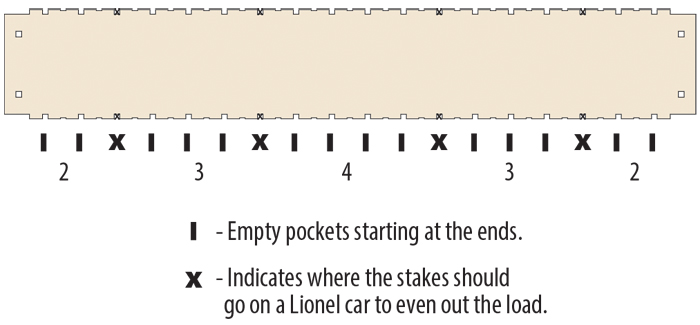
Next, I removed the wood matchsticks from the pockets and, holding each match by its head, applied a light coat of stain. That offered contrast against my finished lumber load (Photo 3). After the stain had dried, I cut the matches roughly 2 inches in length. If you follow the accompanying diagram, you will end up with an orderly appearance of the stakes on your car.
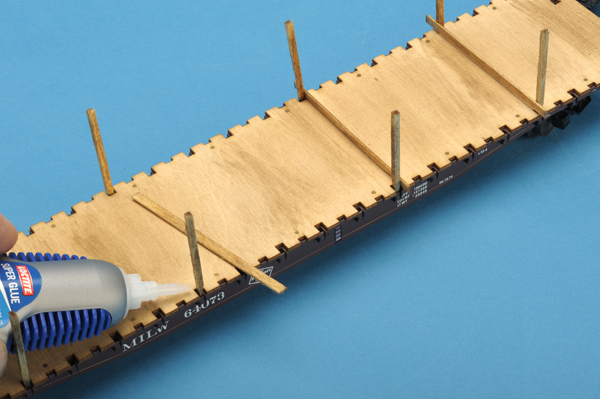
I then went ahead and grabbed a bunch of stirrers, cutting eight pieces, each 3 inches in length. They would become the load supports for the lumber.
Again, I stained all of them including the ends. It was easier to hold one end of the cut lumber while staining about halfway along the wood. After the stain had dried, I reversed the process and stained the other end of the stirrers.
Then I took four of the 3-inch pieces and laid them across the floor of my flatcar. I secured each end with the CA, trying to keep glue off the floor (applying it only to the vertical matchsticks) to easily allow lifting the load off the car (Photo 4). Don’t be concerned if the uprights are a little off one way or the other; on the real deal they are not perfect.
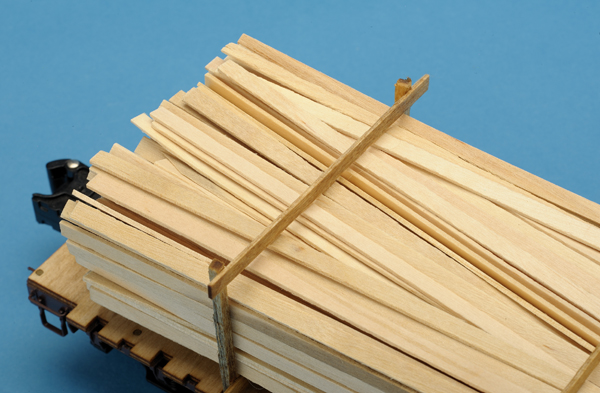
Once the bottom braces had dried, I filled up the side stakes with as much or as little as I wanted for the load. Using CA again, I added the top braces. I pushed them down with a little pressure while the glue was setting, to keep the load in check while it was in transport around my railroad (Photo 5).
When it comes to the actual loads, I find that having one higher and one lower adds interest to a flatcar car. I made sure to leave the load ends uneven, to simulate raw lumber (Photo 6).
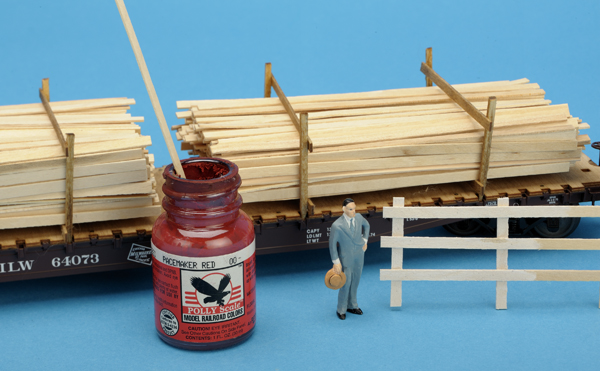
When you have completed this simple project, you will have one handsome car, loaded and ready to be transported to the local mill on your weekly way freight. What about the scraps? That’s easy. For one, you can make a quick board fence around your property, as shown and paint it white. As Photo 6 shows, you can also use extra pieces to mix paint!


yes